Azure Setup
Azure manual provisioning
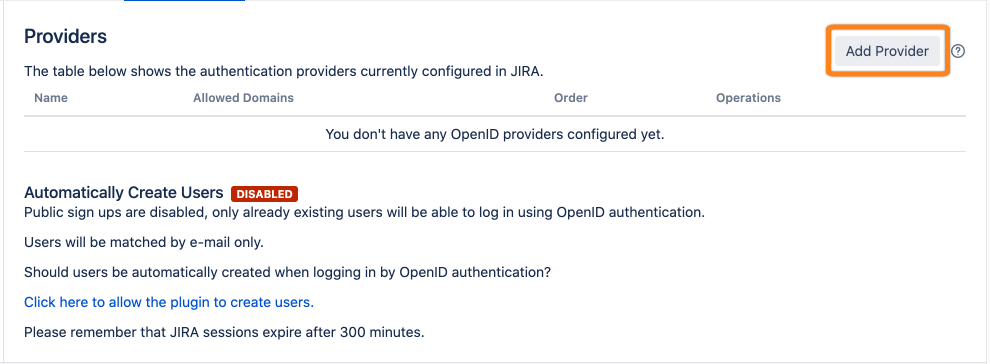
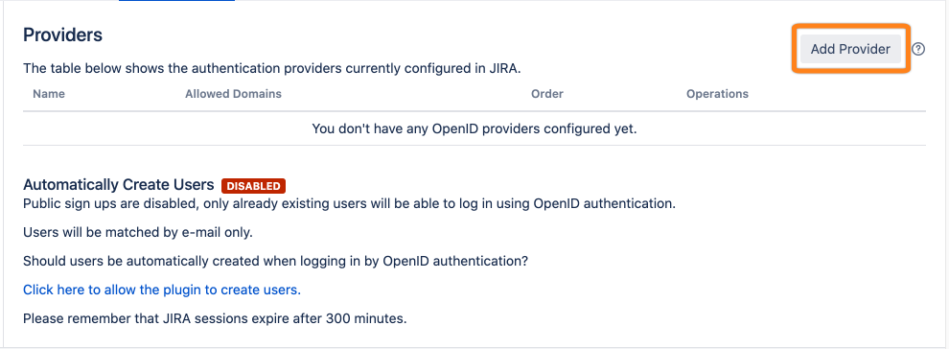
Go to the OpenID Authentication app and click Add Provider.
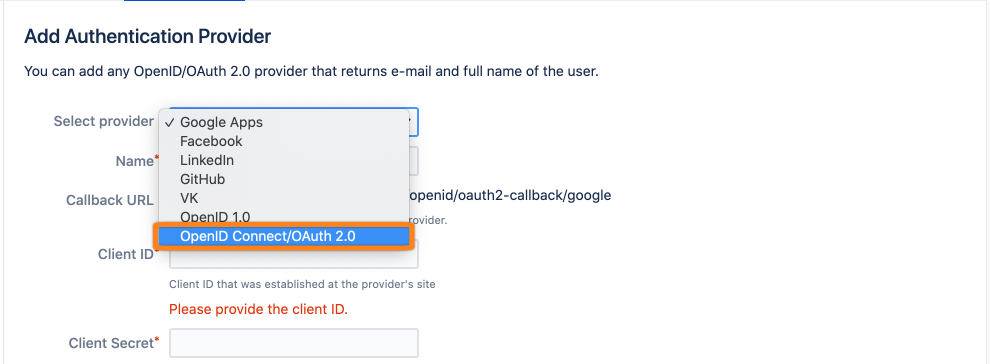
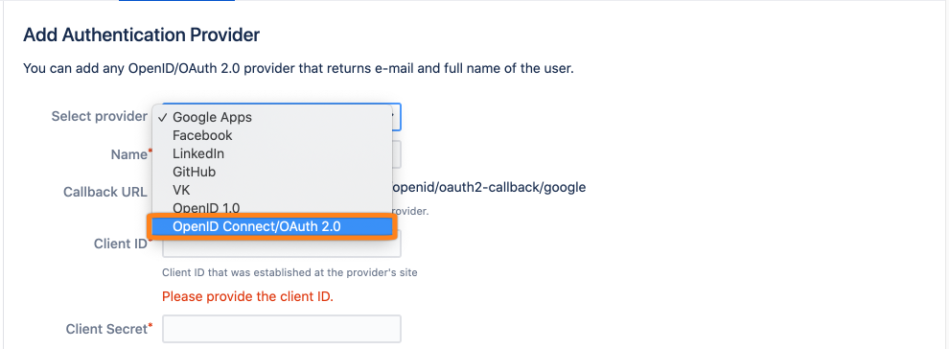
Choose OpenID Connect/OAuth 2.0 for the provider type.
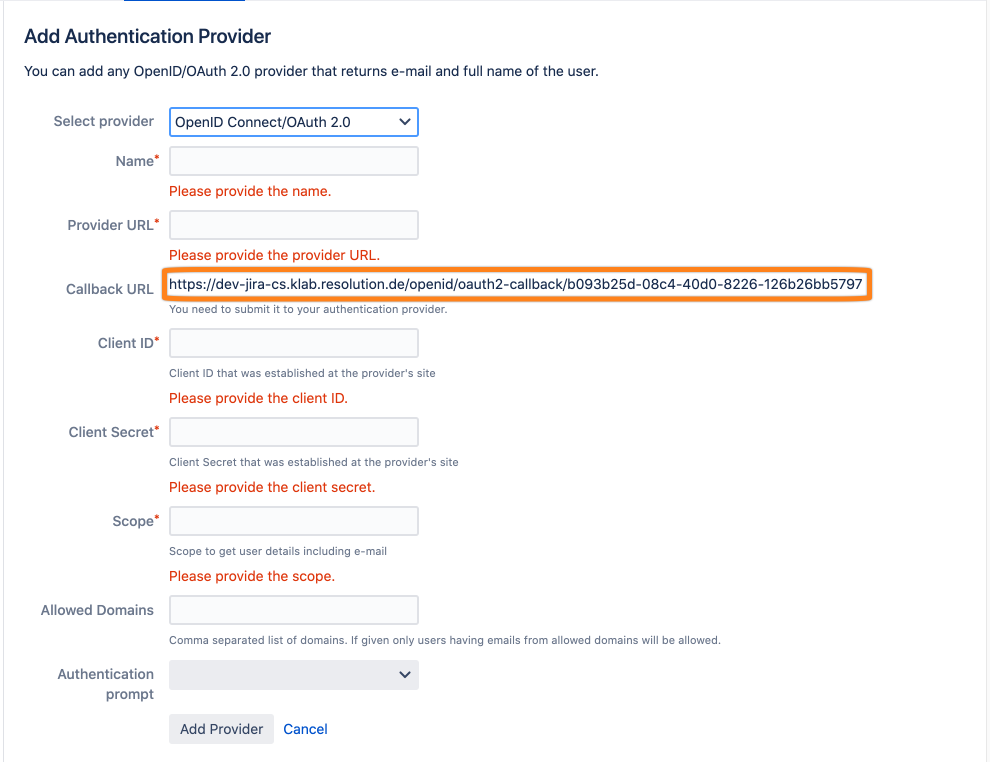
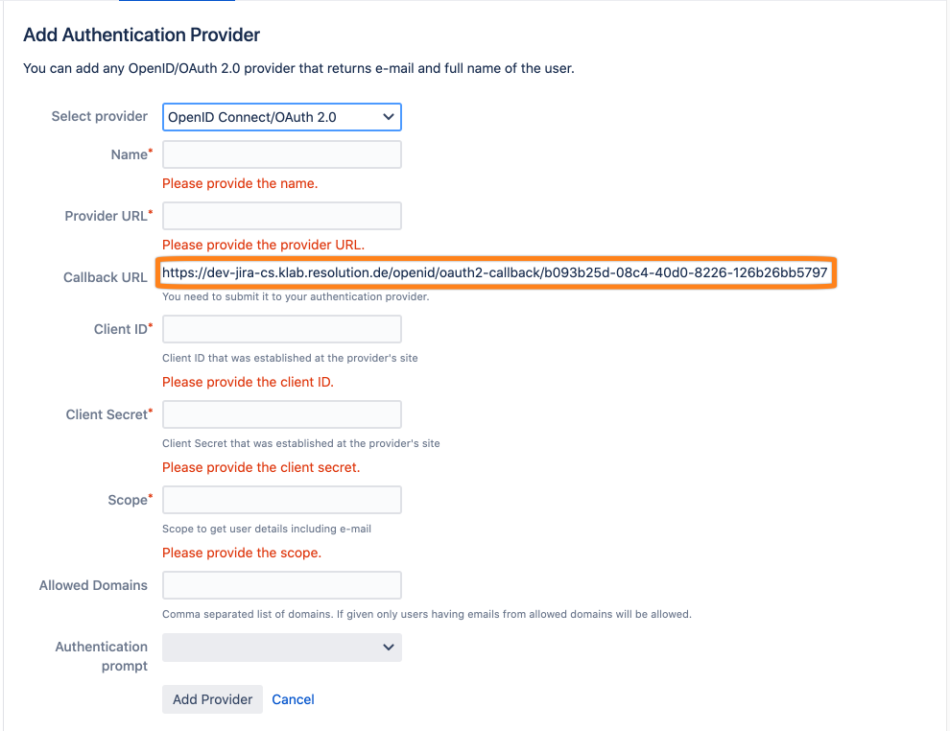
Copy the Callback URL to a text editor of your choice.
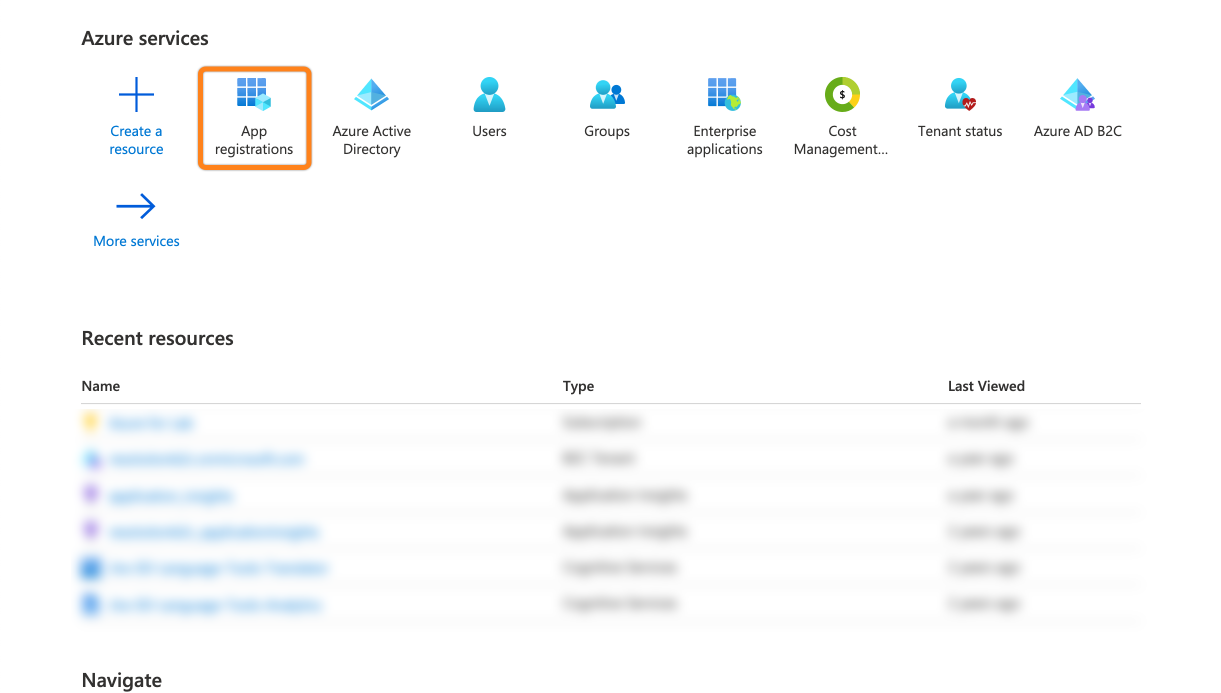
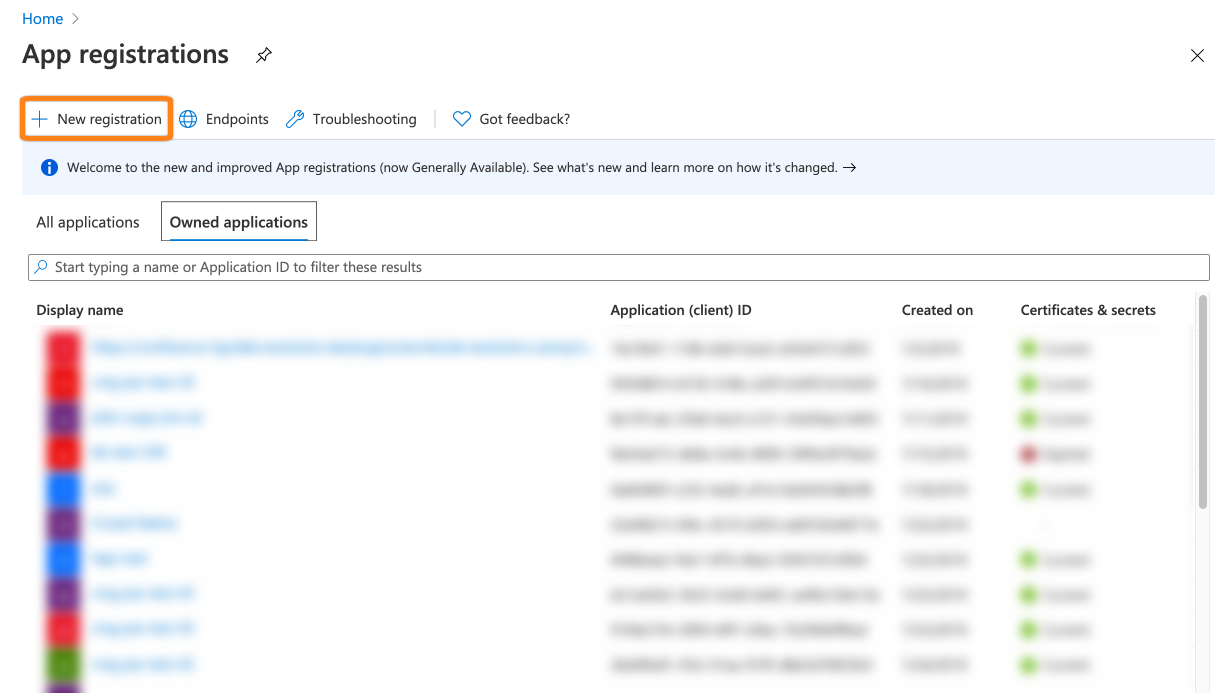
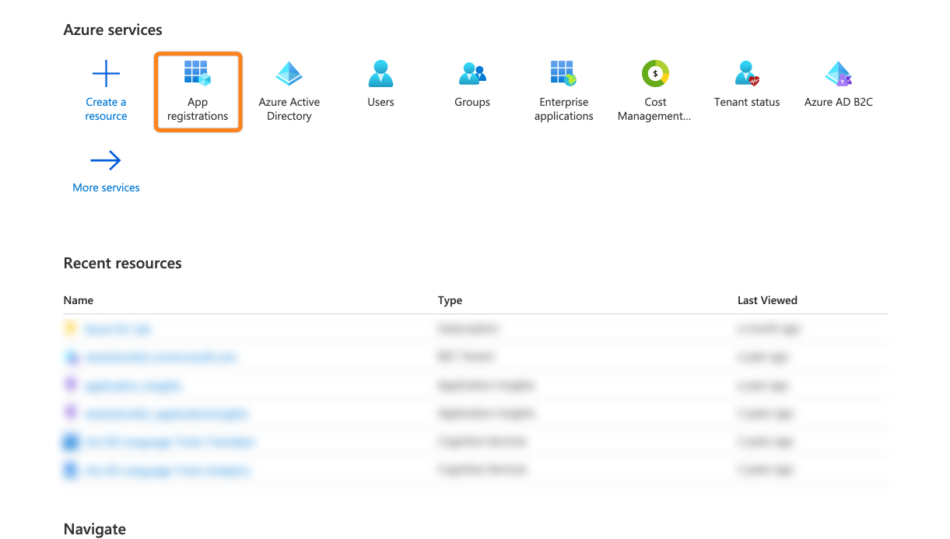
Go to https://portal.azure.com and select App registrations.
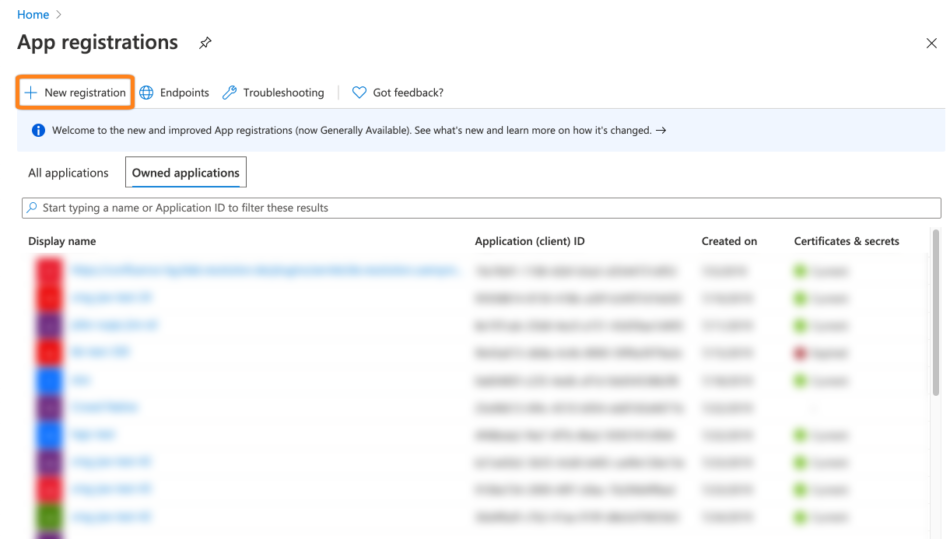
Click + New registrations.
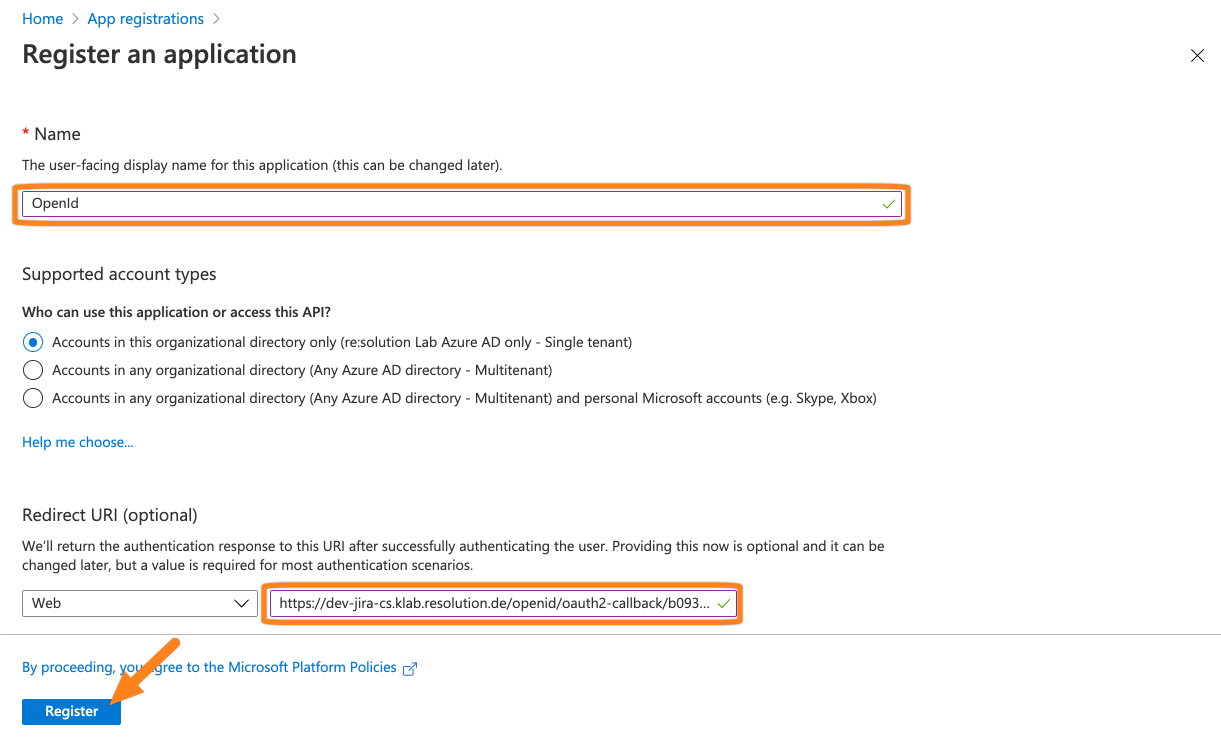
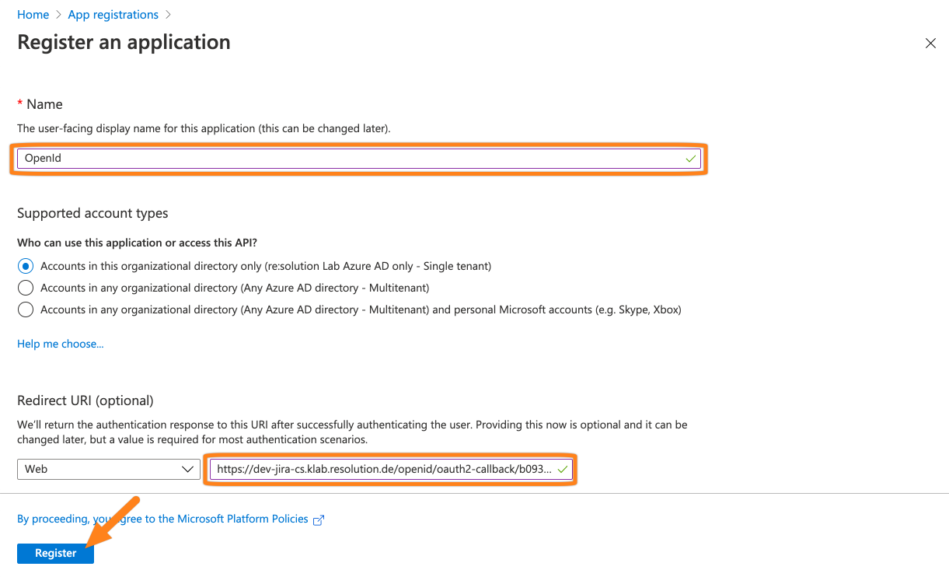
Add a Name for the app and paste the callback url into the Redirect URI. Then, click Register.
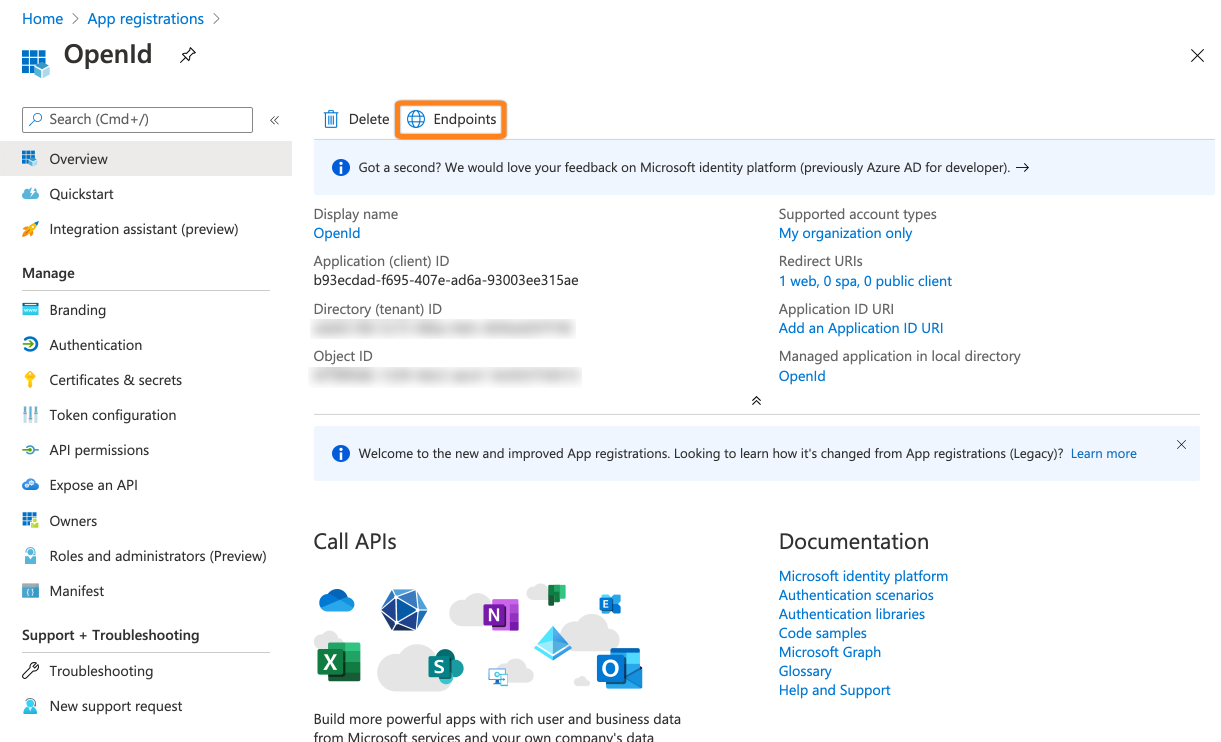
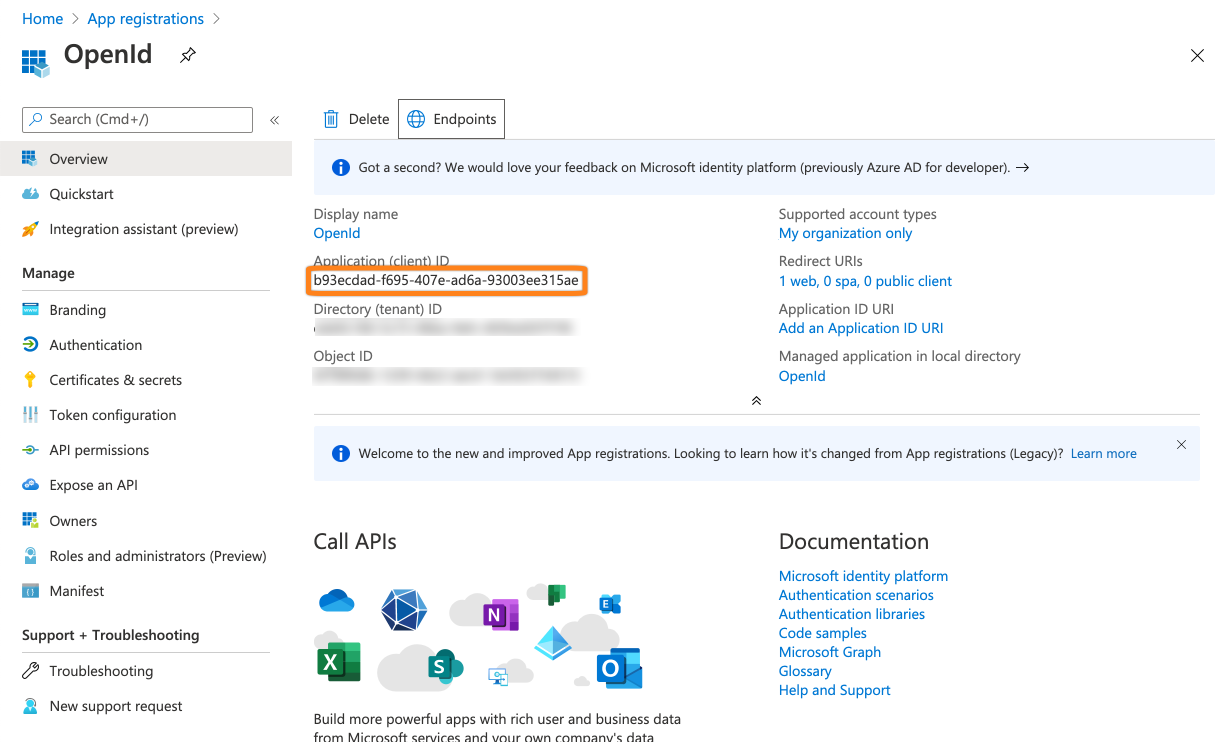
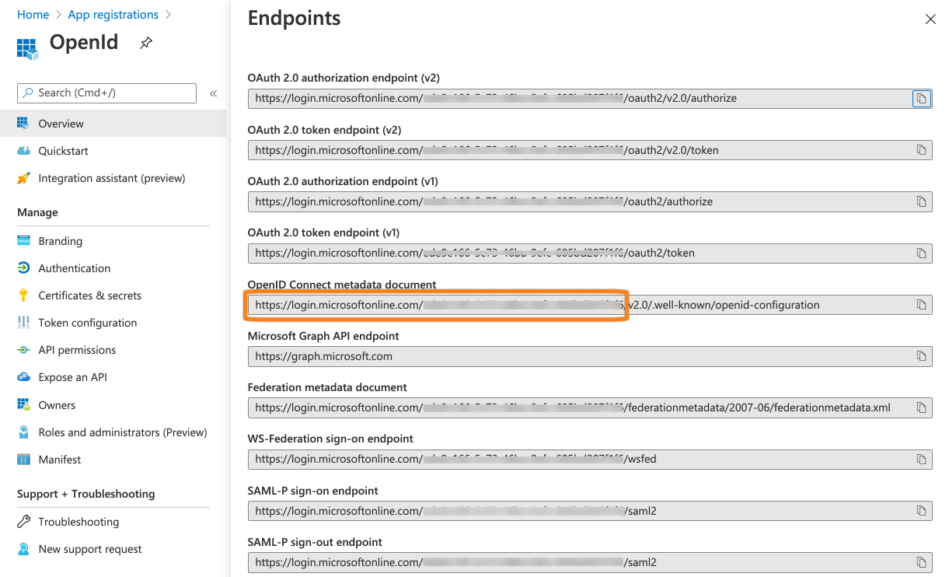
Click Endpoints.
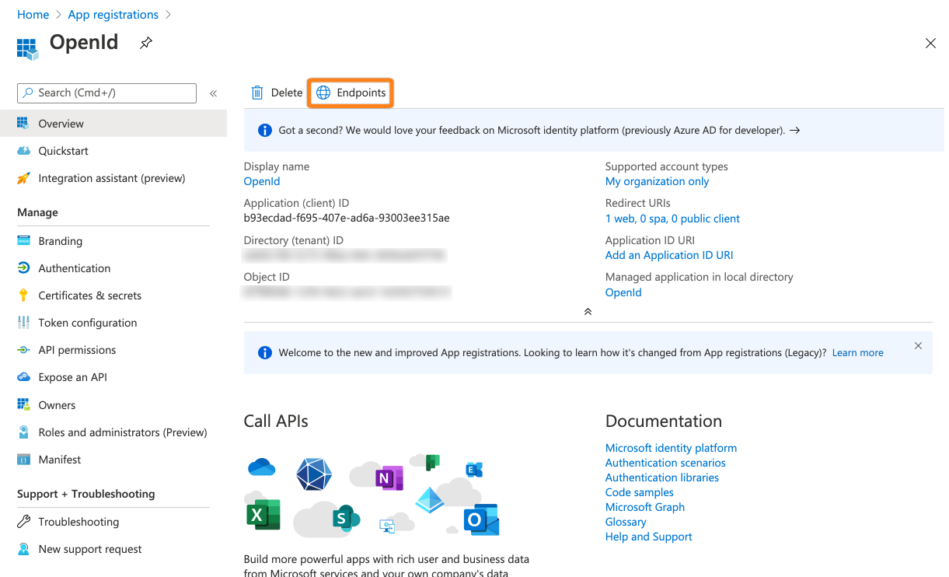
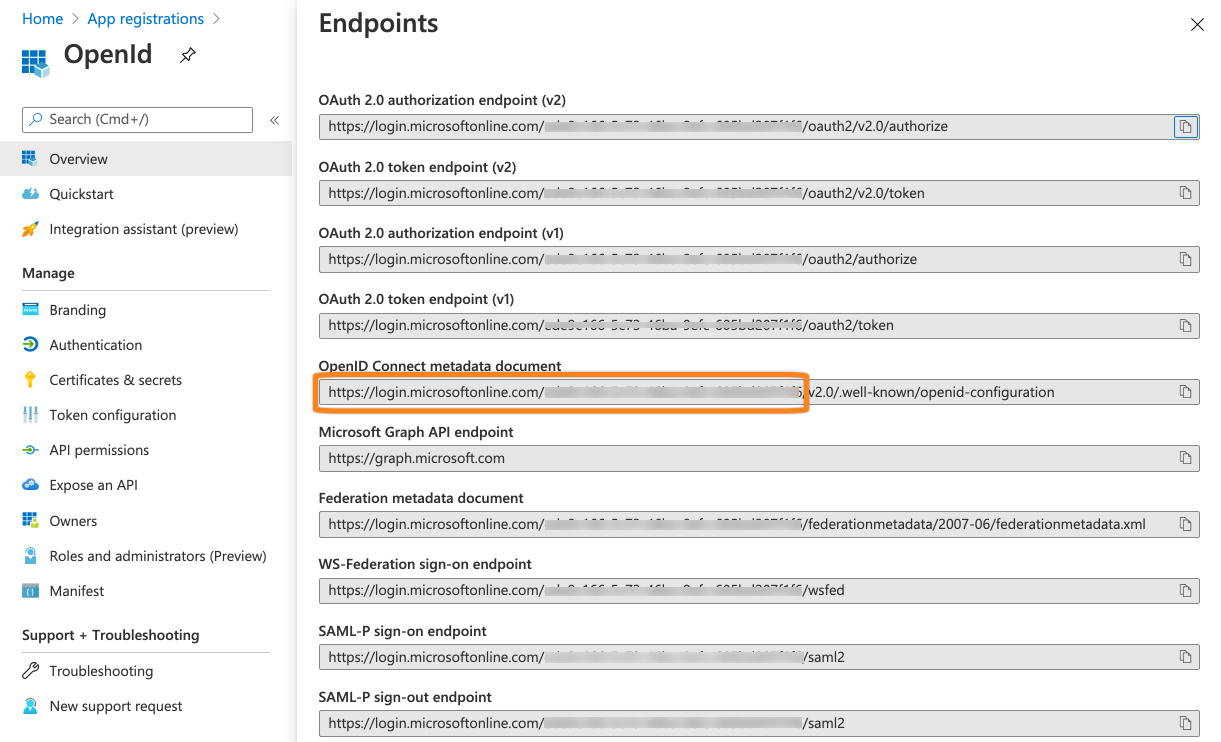
Copy the first part of the OpenID connect metadata document url to a text editor of your choice. Make sure to not copy the /v2.0./... part of the url.
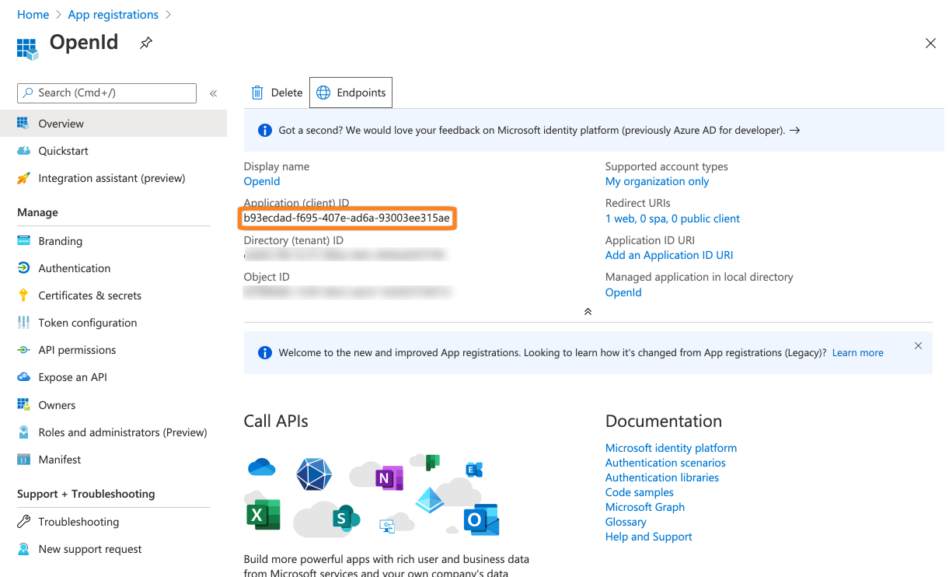
Copy the Application (client) id also to your text editor.
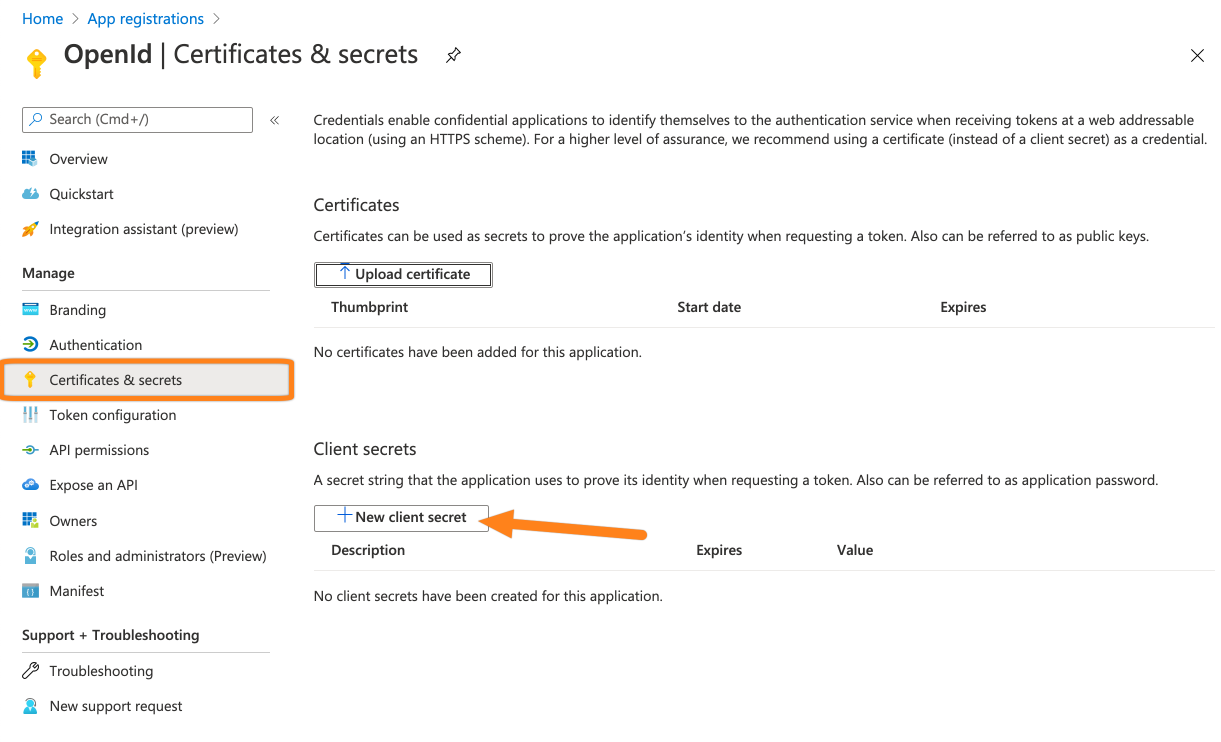
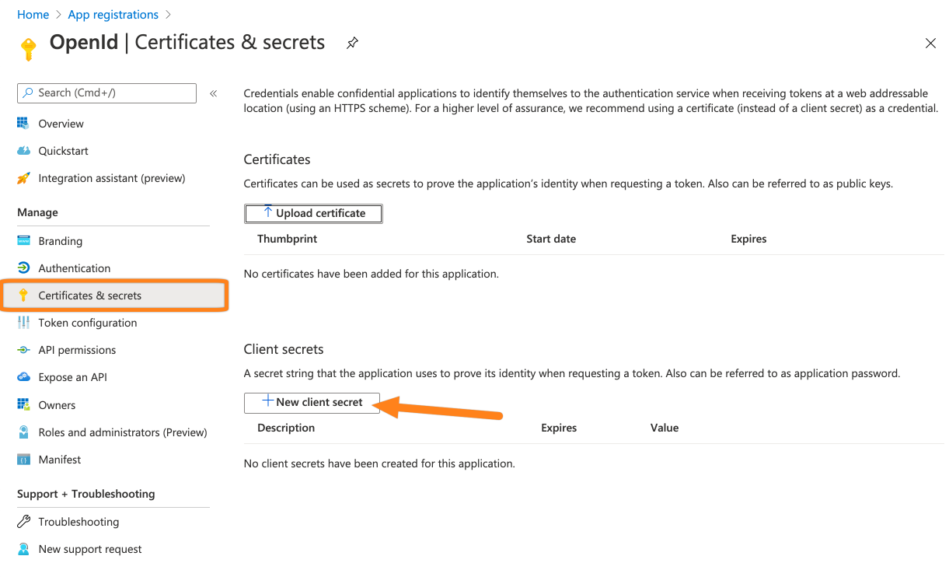
Next, go to Certificates & secrets. Then, click + New secret.
Add a name, select an expiration period and click Add to generate the secret.
Remember to create a new secret in time and replace it later in your OpenId configuration.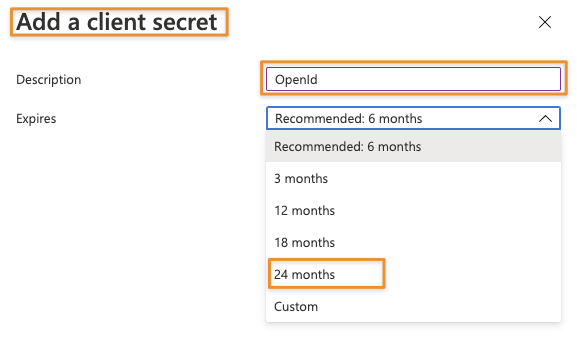
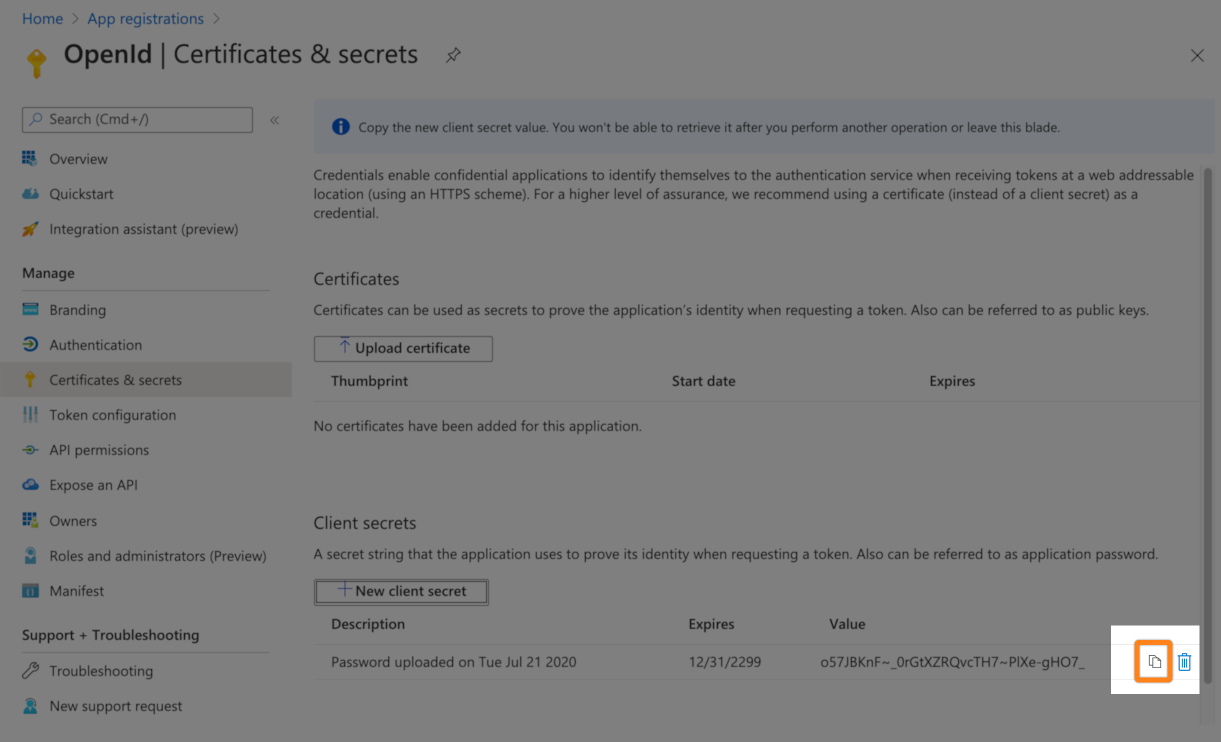
Copy the secret to your text editor. Please not, this is the only time you can see the secret.
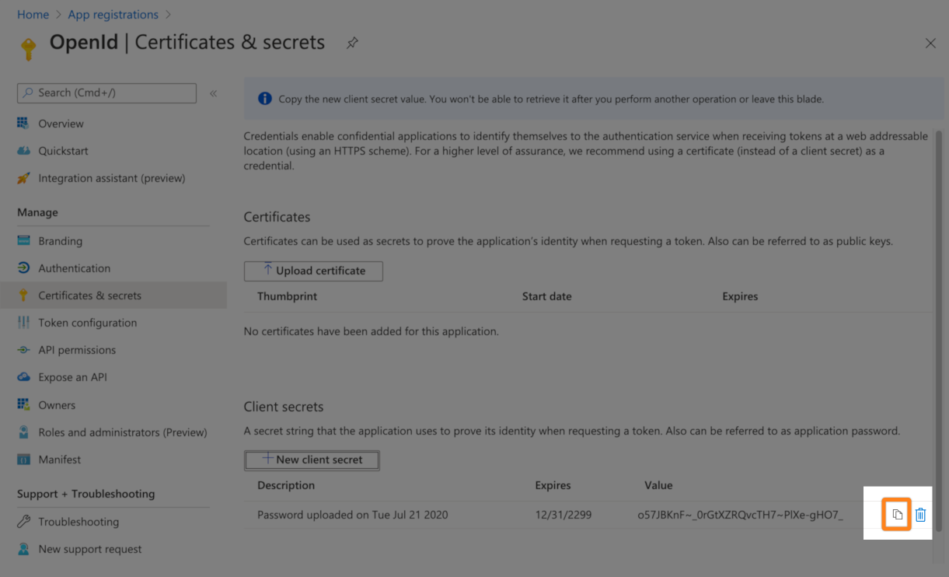
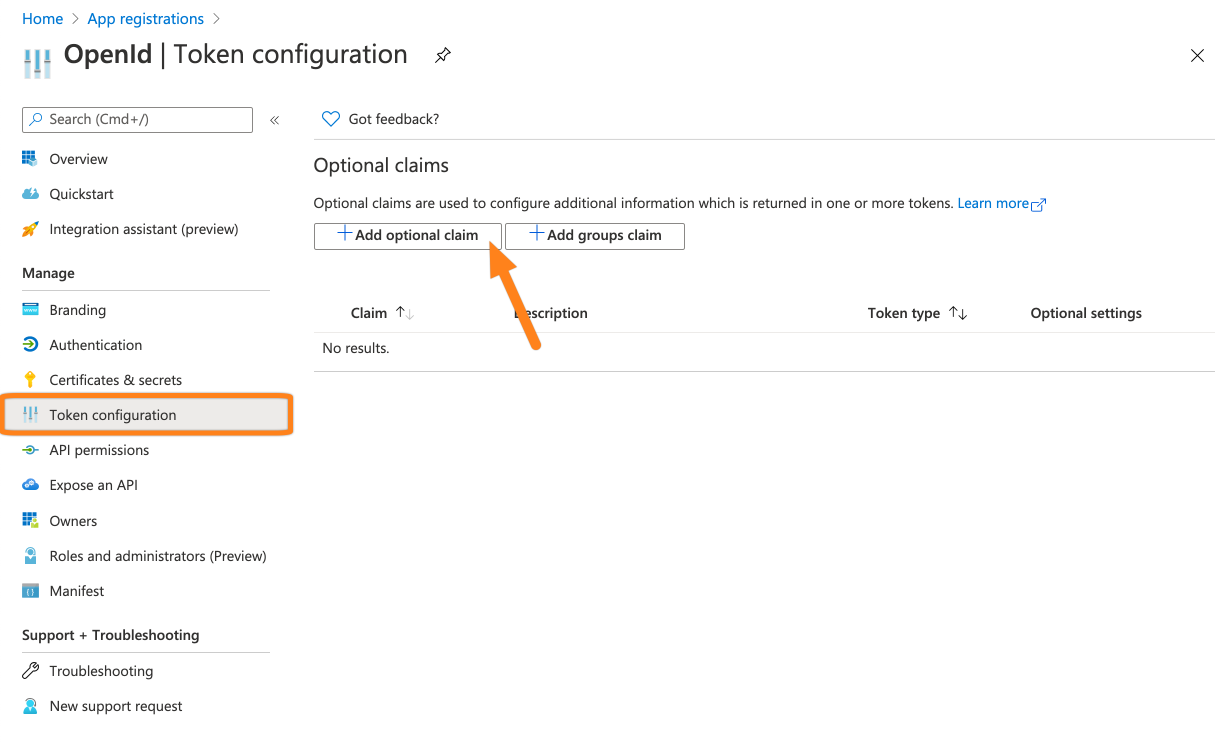
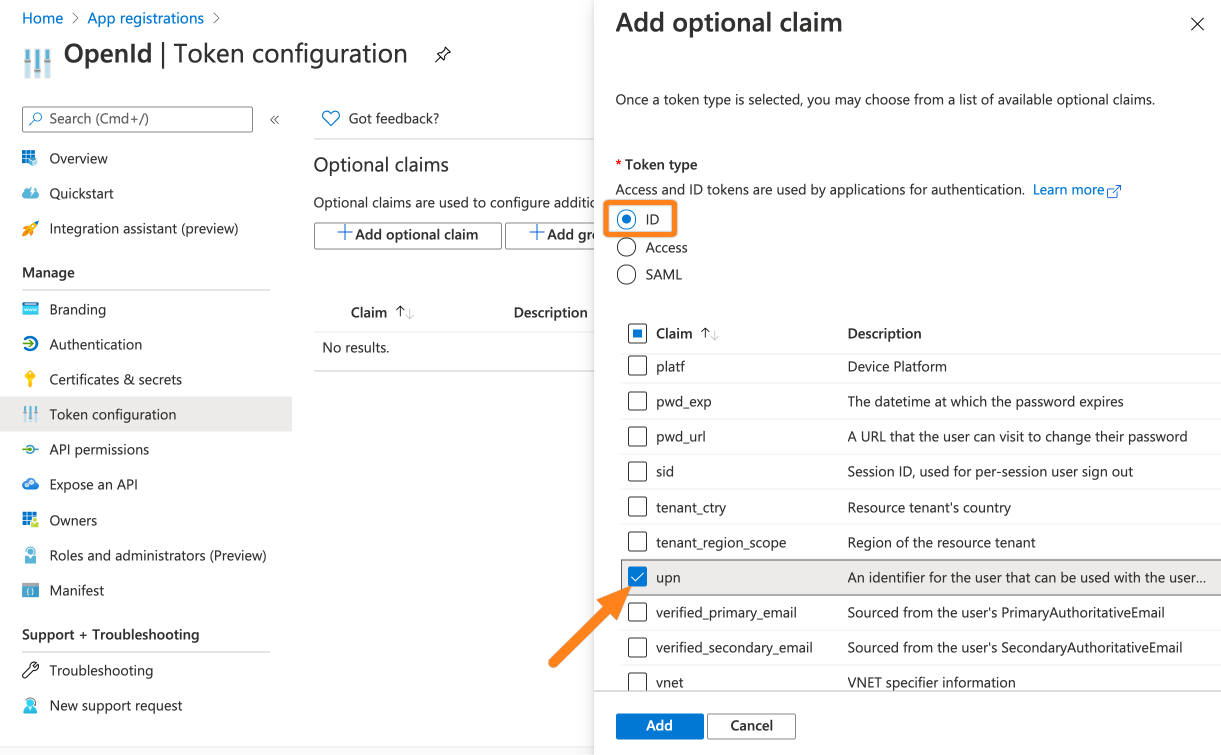
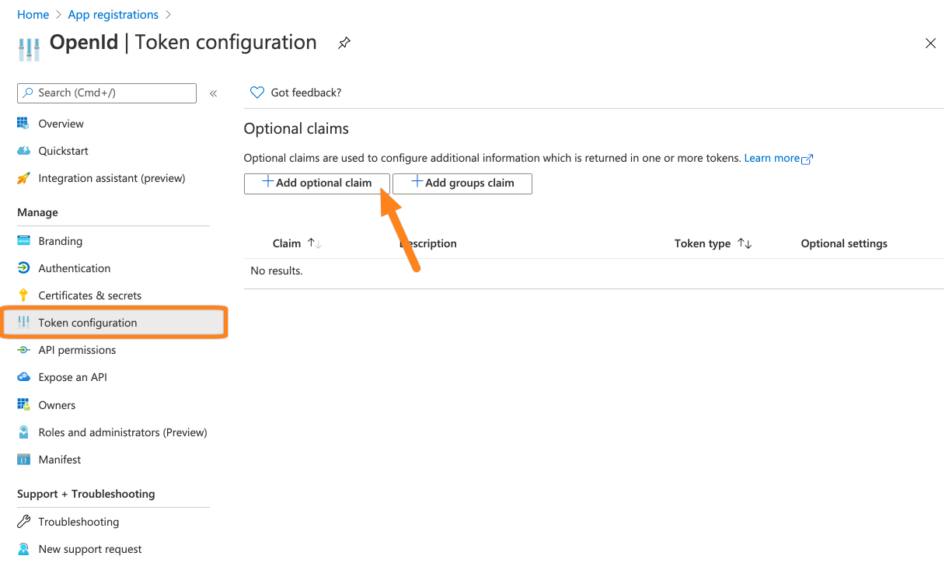
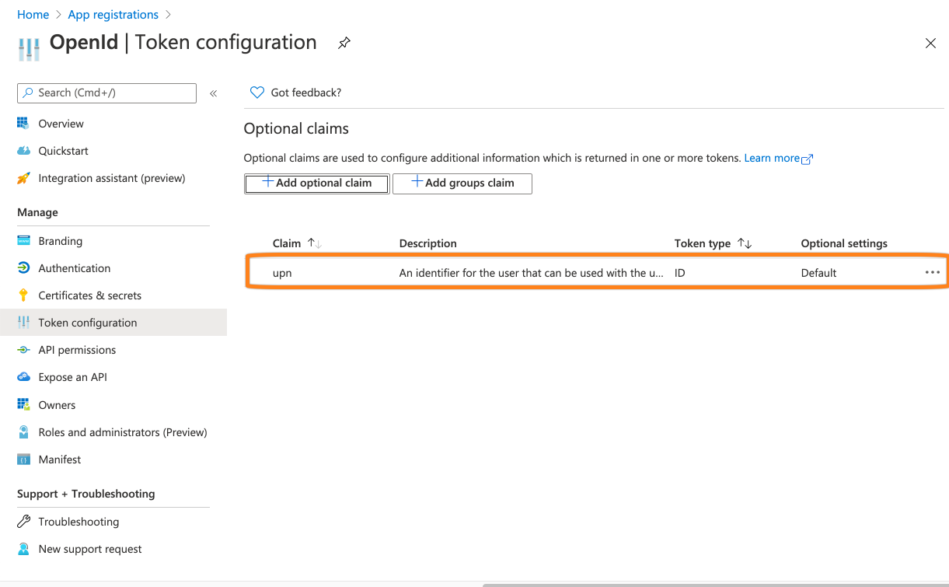
Next, go to Token configuration. Click + Add optional claim.
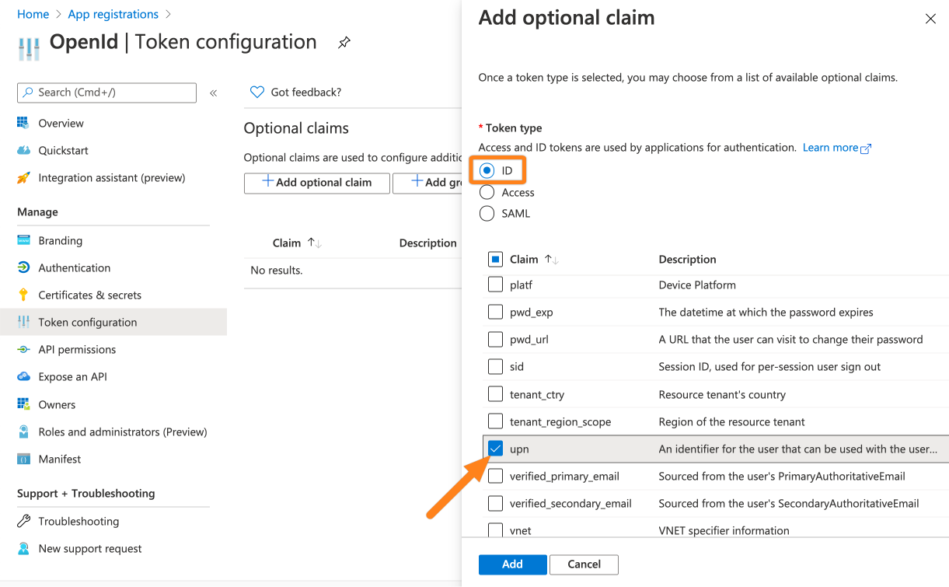
For the Token type choose ID and for the claim the upn attribute. Click Add to complete this step.
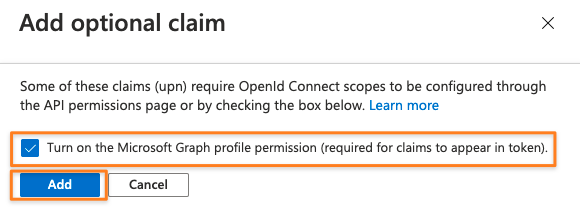
Check the box to automatically add the permission required
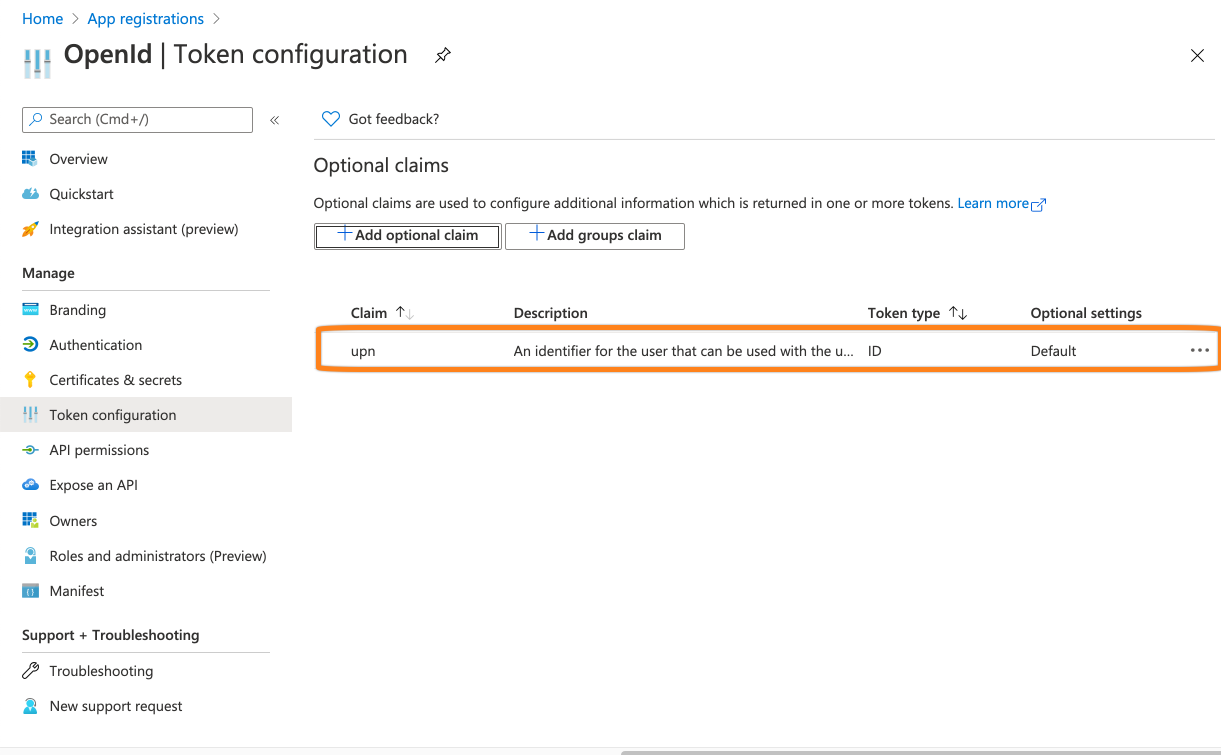
This should be the result.
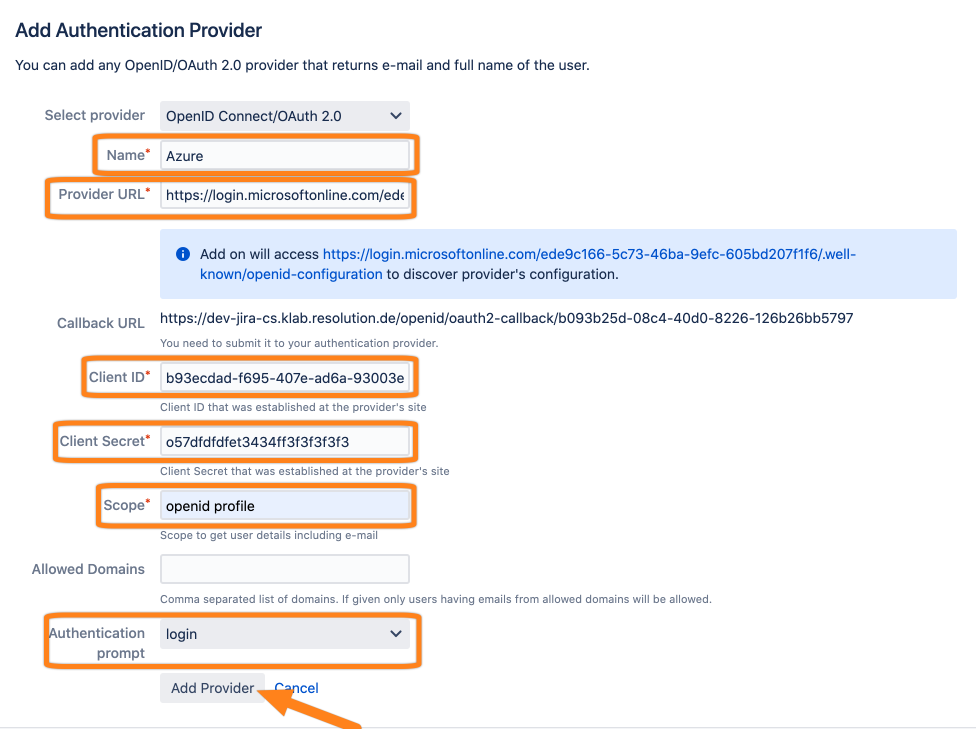
Next, go back to your Atlassian product to finish the configuration. Add the data you have copied in previous steps.
Also make sure to set the scope to openid profile (the space in between openid and profile is important!).
Select login as Authentication prompt value.
Click Add Provider to finish the configuration.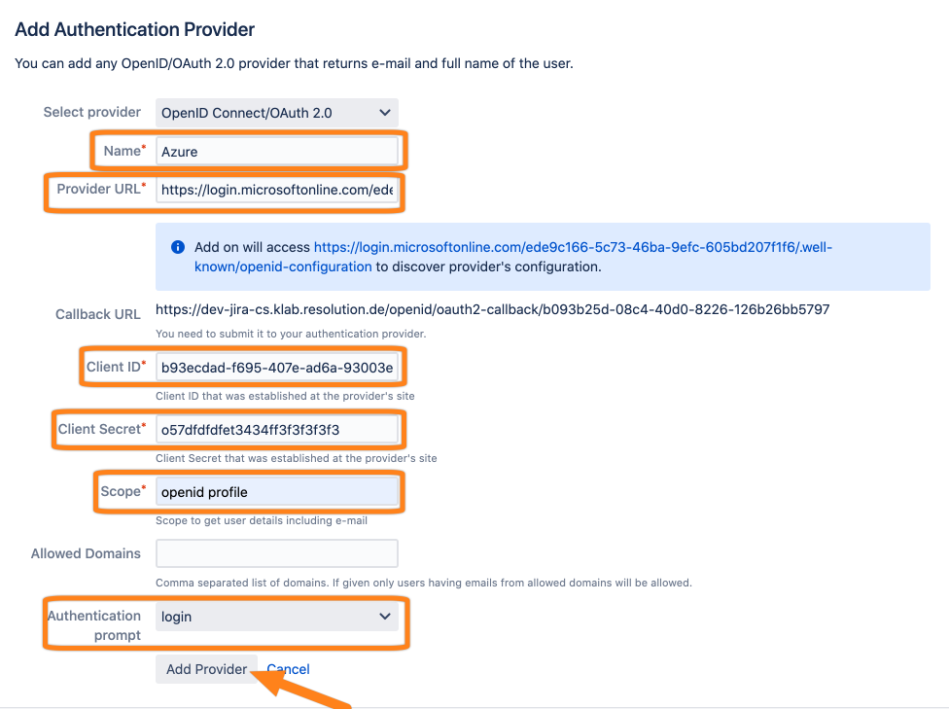
Azure with JIT
Previous steps and
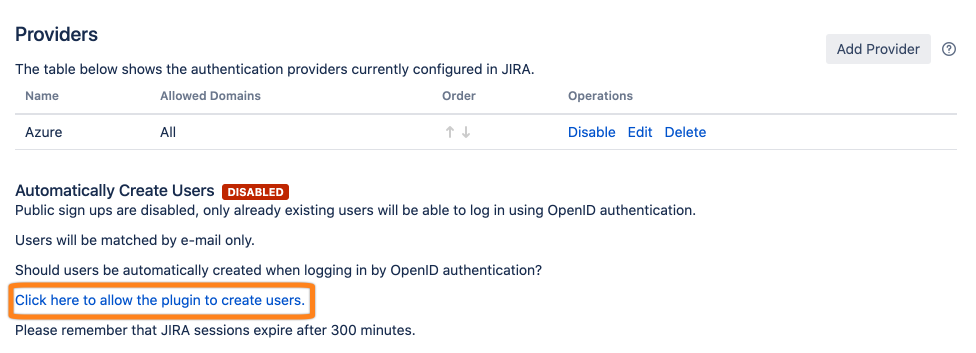
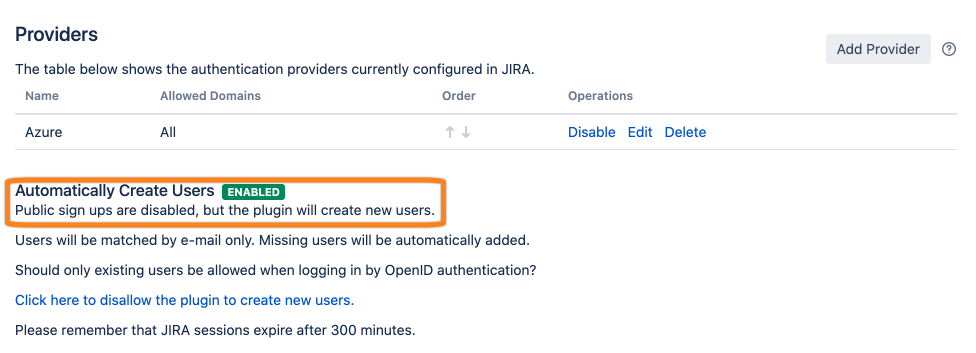
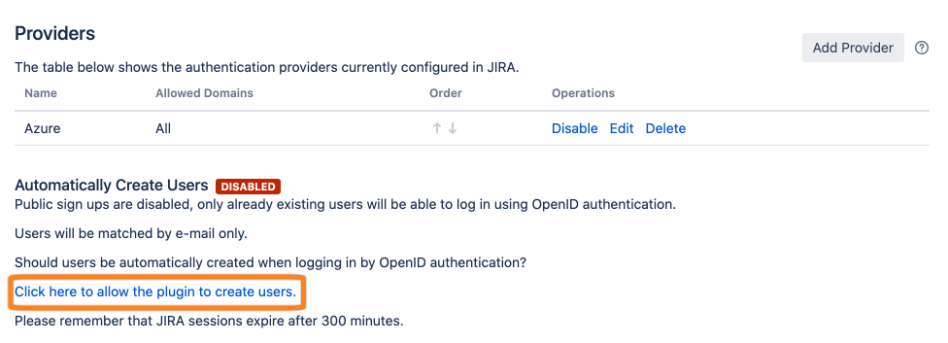
To allow Just In Time Provisioning click the marked option.
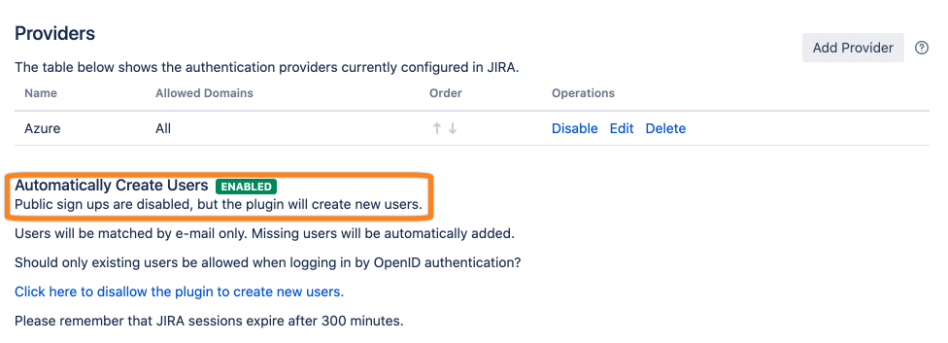
Afterwards, it is active.
Azure with UserSync
Since user provisioning with the Open ID app is pretty limited and there is also no way to provision groups, you could use User Sync and it Azure AD connector to accomplish that:
Users Provisioning Sync & Groups Sync Jira
Users Provisioning Sync & Groups Sync Confluence
Once installed,
you can follow the setup guide for User Sync with Azure: https://wiki.resolution.de/doc/usersync/latest/azure-ad-configuration
and configure the Open ID app for manual provisioning, as explained above
The difference is to not let the OpenID app create users, but User Sync.
Please be aware that you need to setup User Sync in scheduled mode, so that new Azure users are automatically getting created on a frequent basis.
