How to transform Azure AD guest usernames
Goal
Transforming guest user names from Azure AD so that they match Atlassian usernames.
A guest username in Azure looks like the below and a transformation will basically restore the email address part of the guest username.
- c.guest_guestcompany.com#EXT#@company.com
Prerequisites
an Azure AD subscription
A (evaluation) subscription for the SAML SSO app
Admin access to your Atlassian product
For more information about the prerequisites listed above, access the following link:
https://wiki.resolution.de/doc/saml-sso/latest/all/setup-guides-for-saml-sso/azure-ad
Step-by-Step Guide
Go to the SAML SSO configuration page
Select your identity provider (#Image 01)
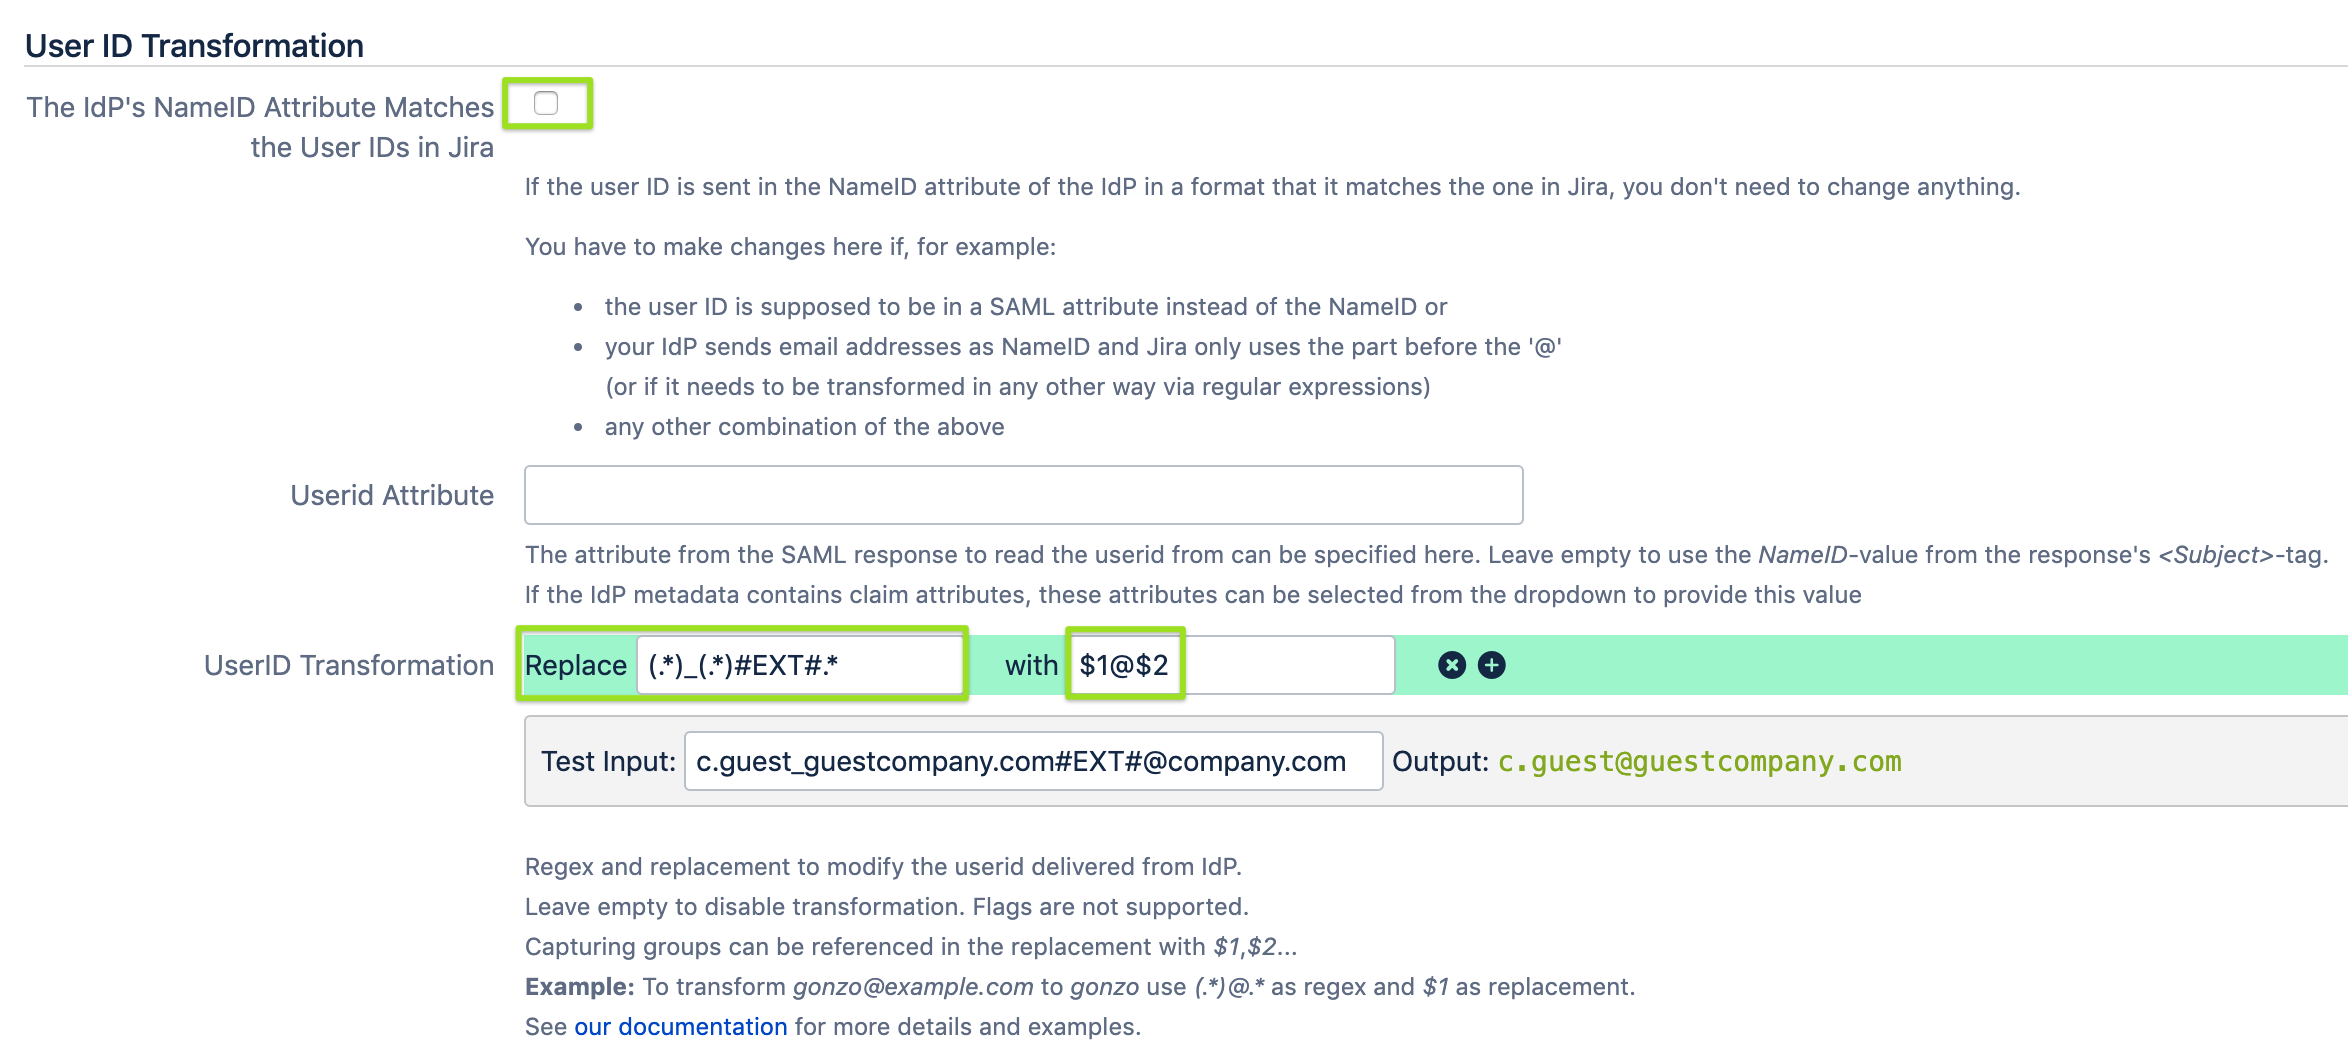
Scroll down to User ID Transformation
Uncheck The IdP's NameID Attribute Matches the User IDs in Jira
Then click Add one+ next to UserID transformation
Add the following transformation (#Image 02):
Regular expression: (.*)_(.*)#EXT#.*Replacement: $1@$2Save your configuration.
Image 01: Select the entry for the Azure AD identity provider

Image 02: Add the following transformation

