OpenAM with Just-In-Time Provisioning
Goal
After completing this setup guide, you will have setup OpenAM with Just-In-Time Provisioning and your Atlassian product for the SAML SSO app. Additionally, you will enable the SSO redirection and test SSO.
OpenAM does not allow to submit groups via the SAML message. In that sense, groups must be managed locally in your Atlassian product.
Prerequisites
To use the SAML SSO app with OpenAM AD, you need the following:
An OpenAM instance
A (trial) subscription for the SAML SSO app
Admin access to your Atlassian product
Video Guide
Here you will find a detailed video guide soon.
Step-by-Step Setup Guide
Configure OpenAM for the SAML SSO App
Create Hosted Identity Provider
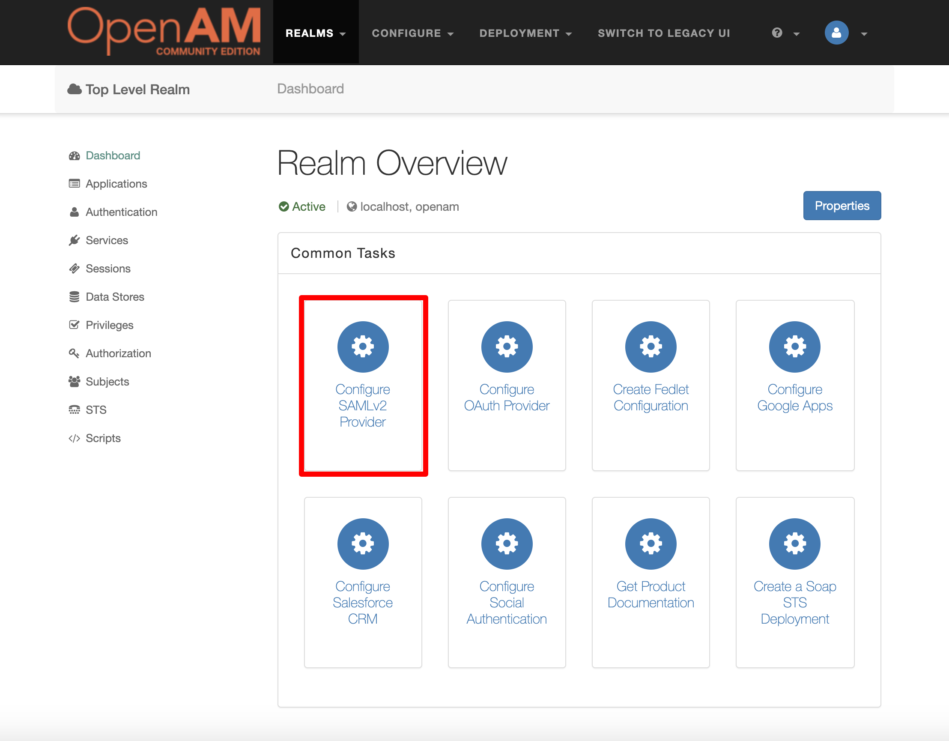
Login into your OpenAM instance and choose the realm you want to use.

Click on "Configure SAMLv2 Provider".
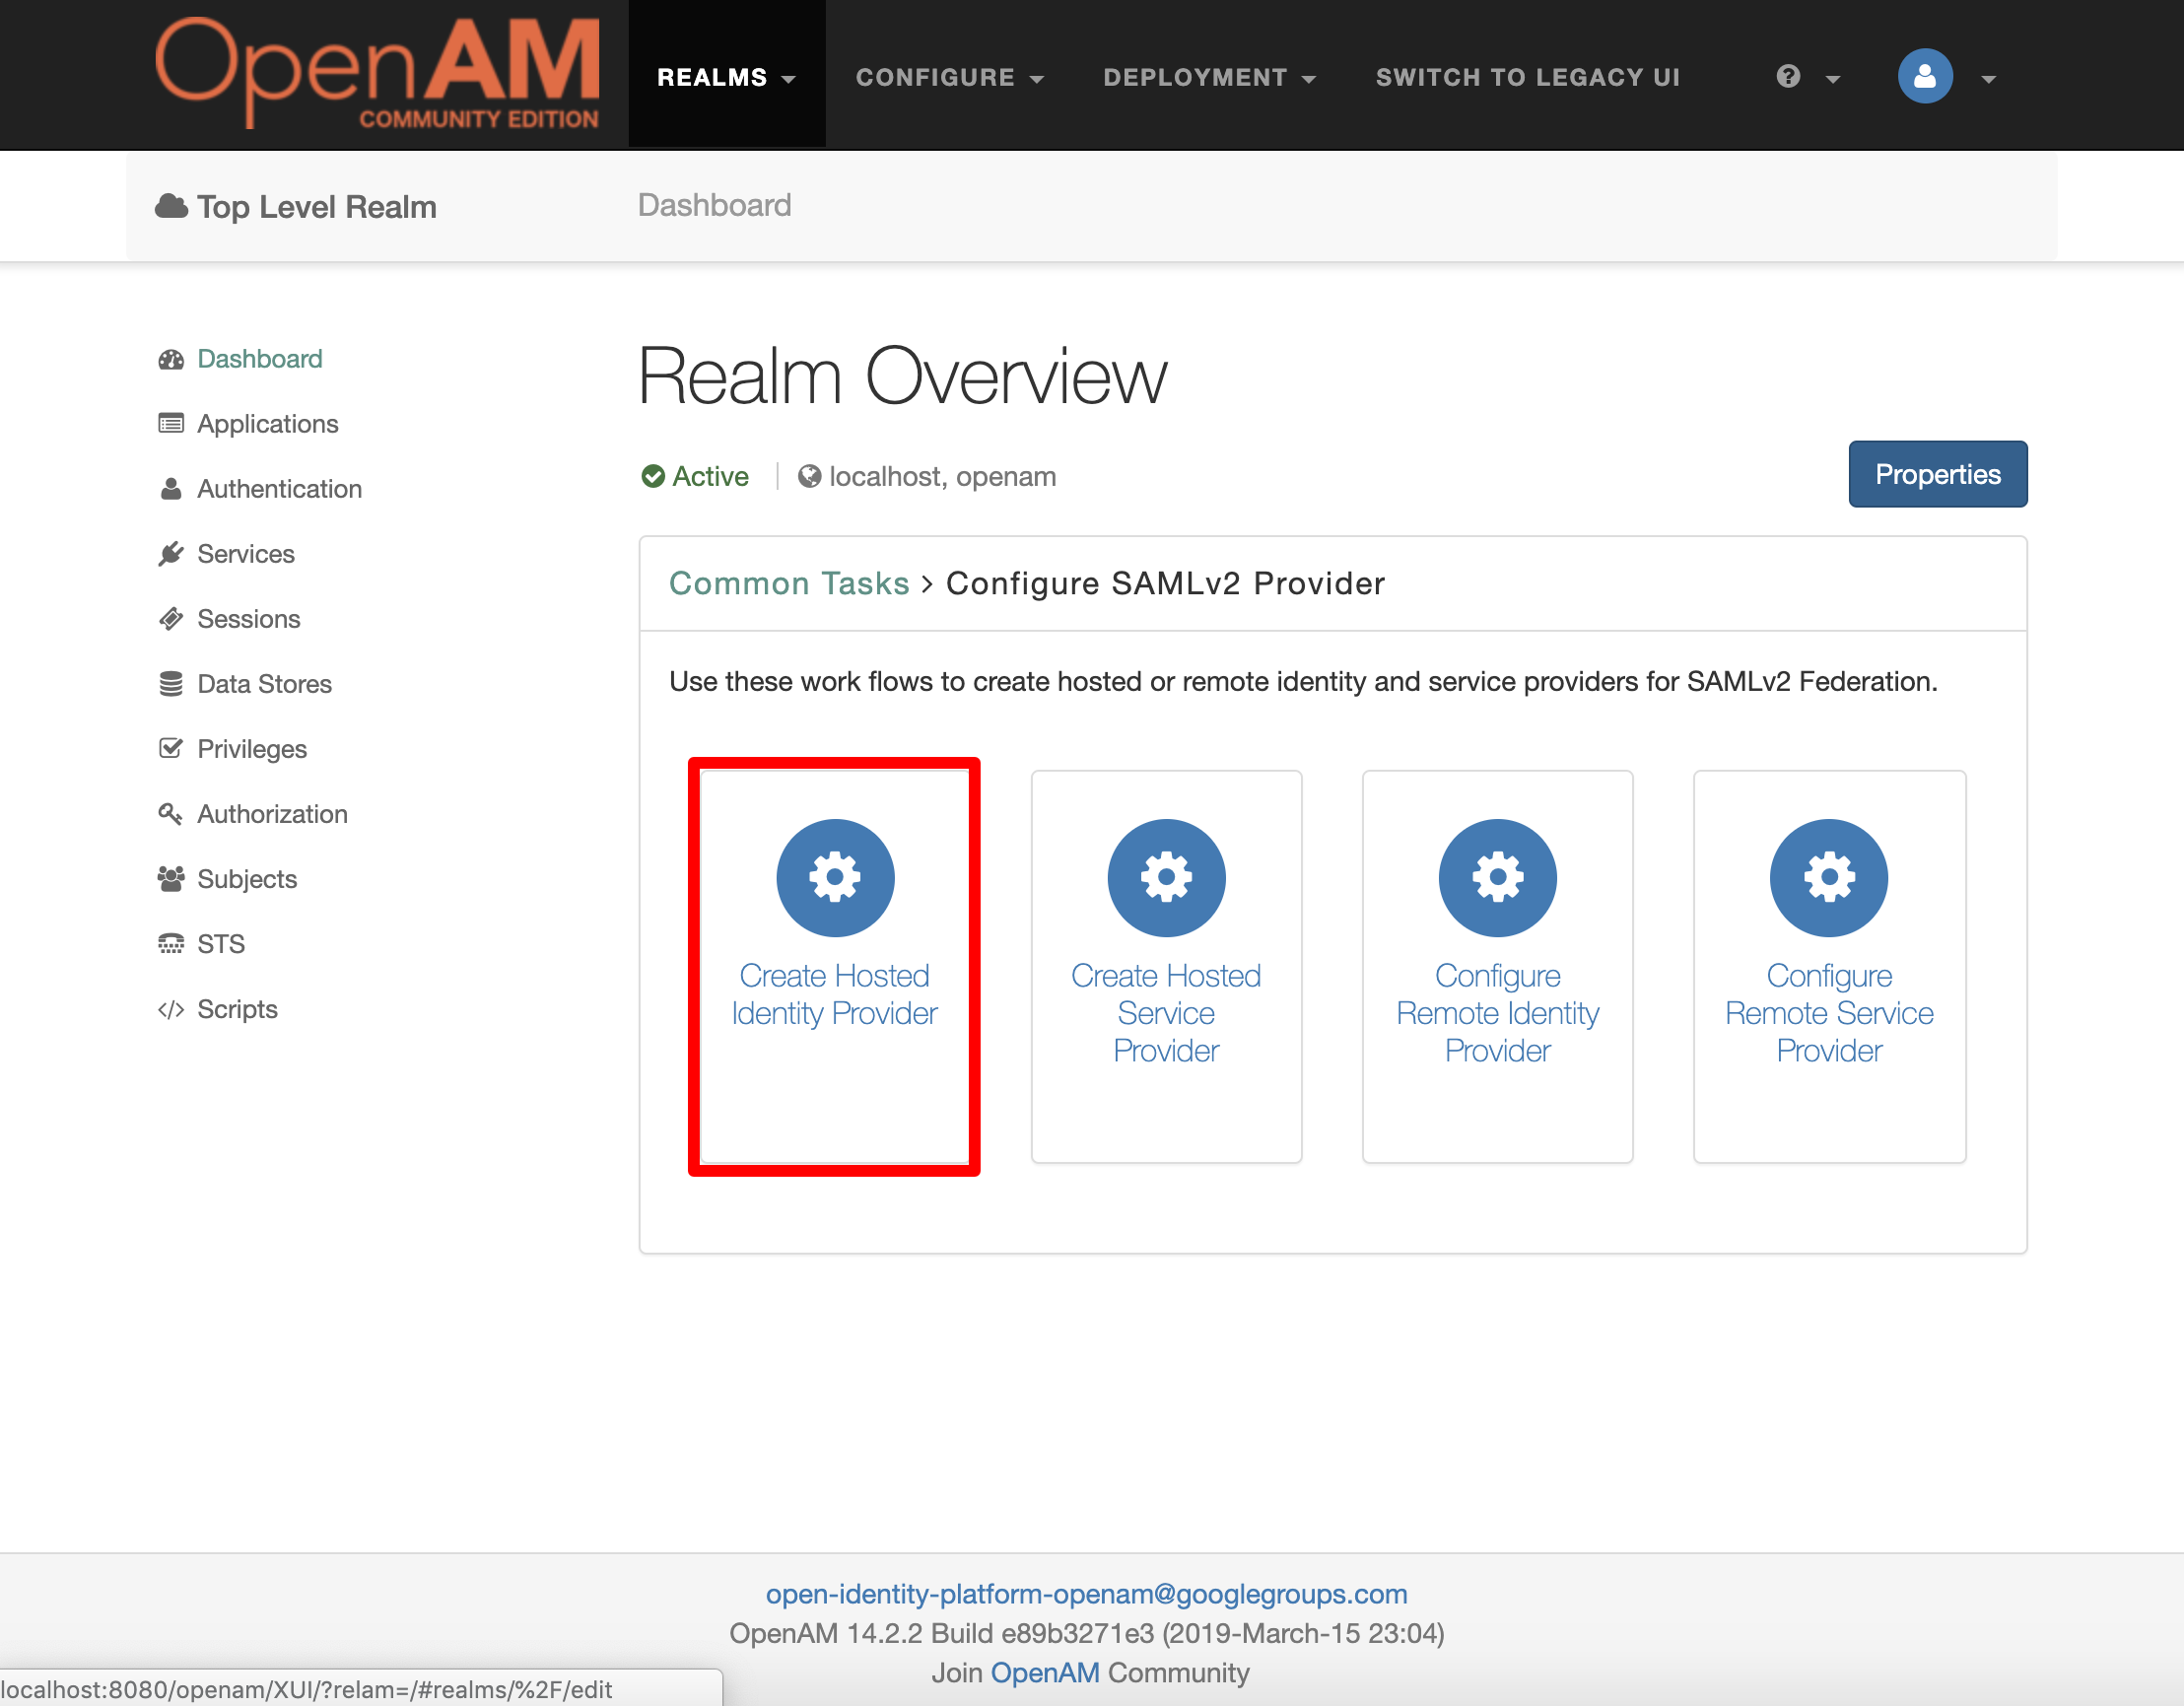
Click on "Create Hosted Identity Provider".

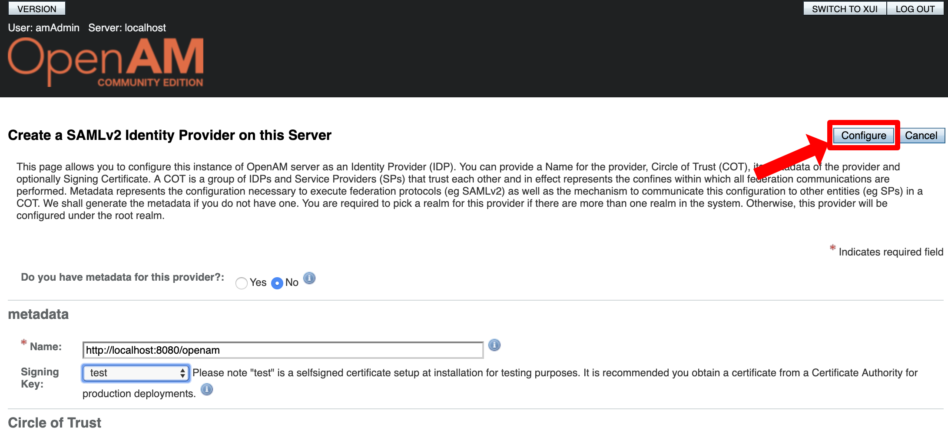
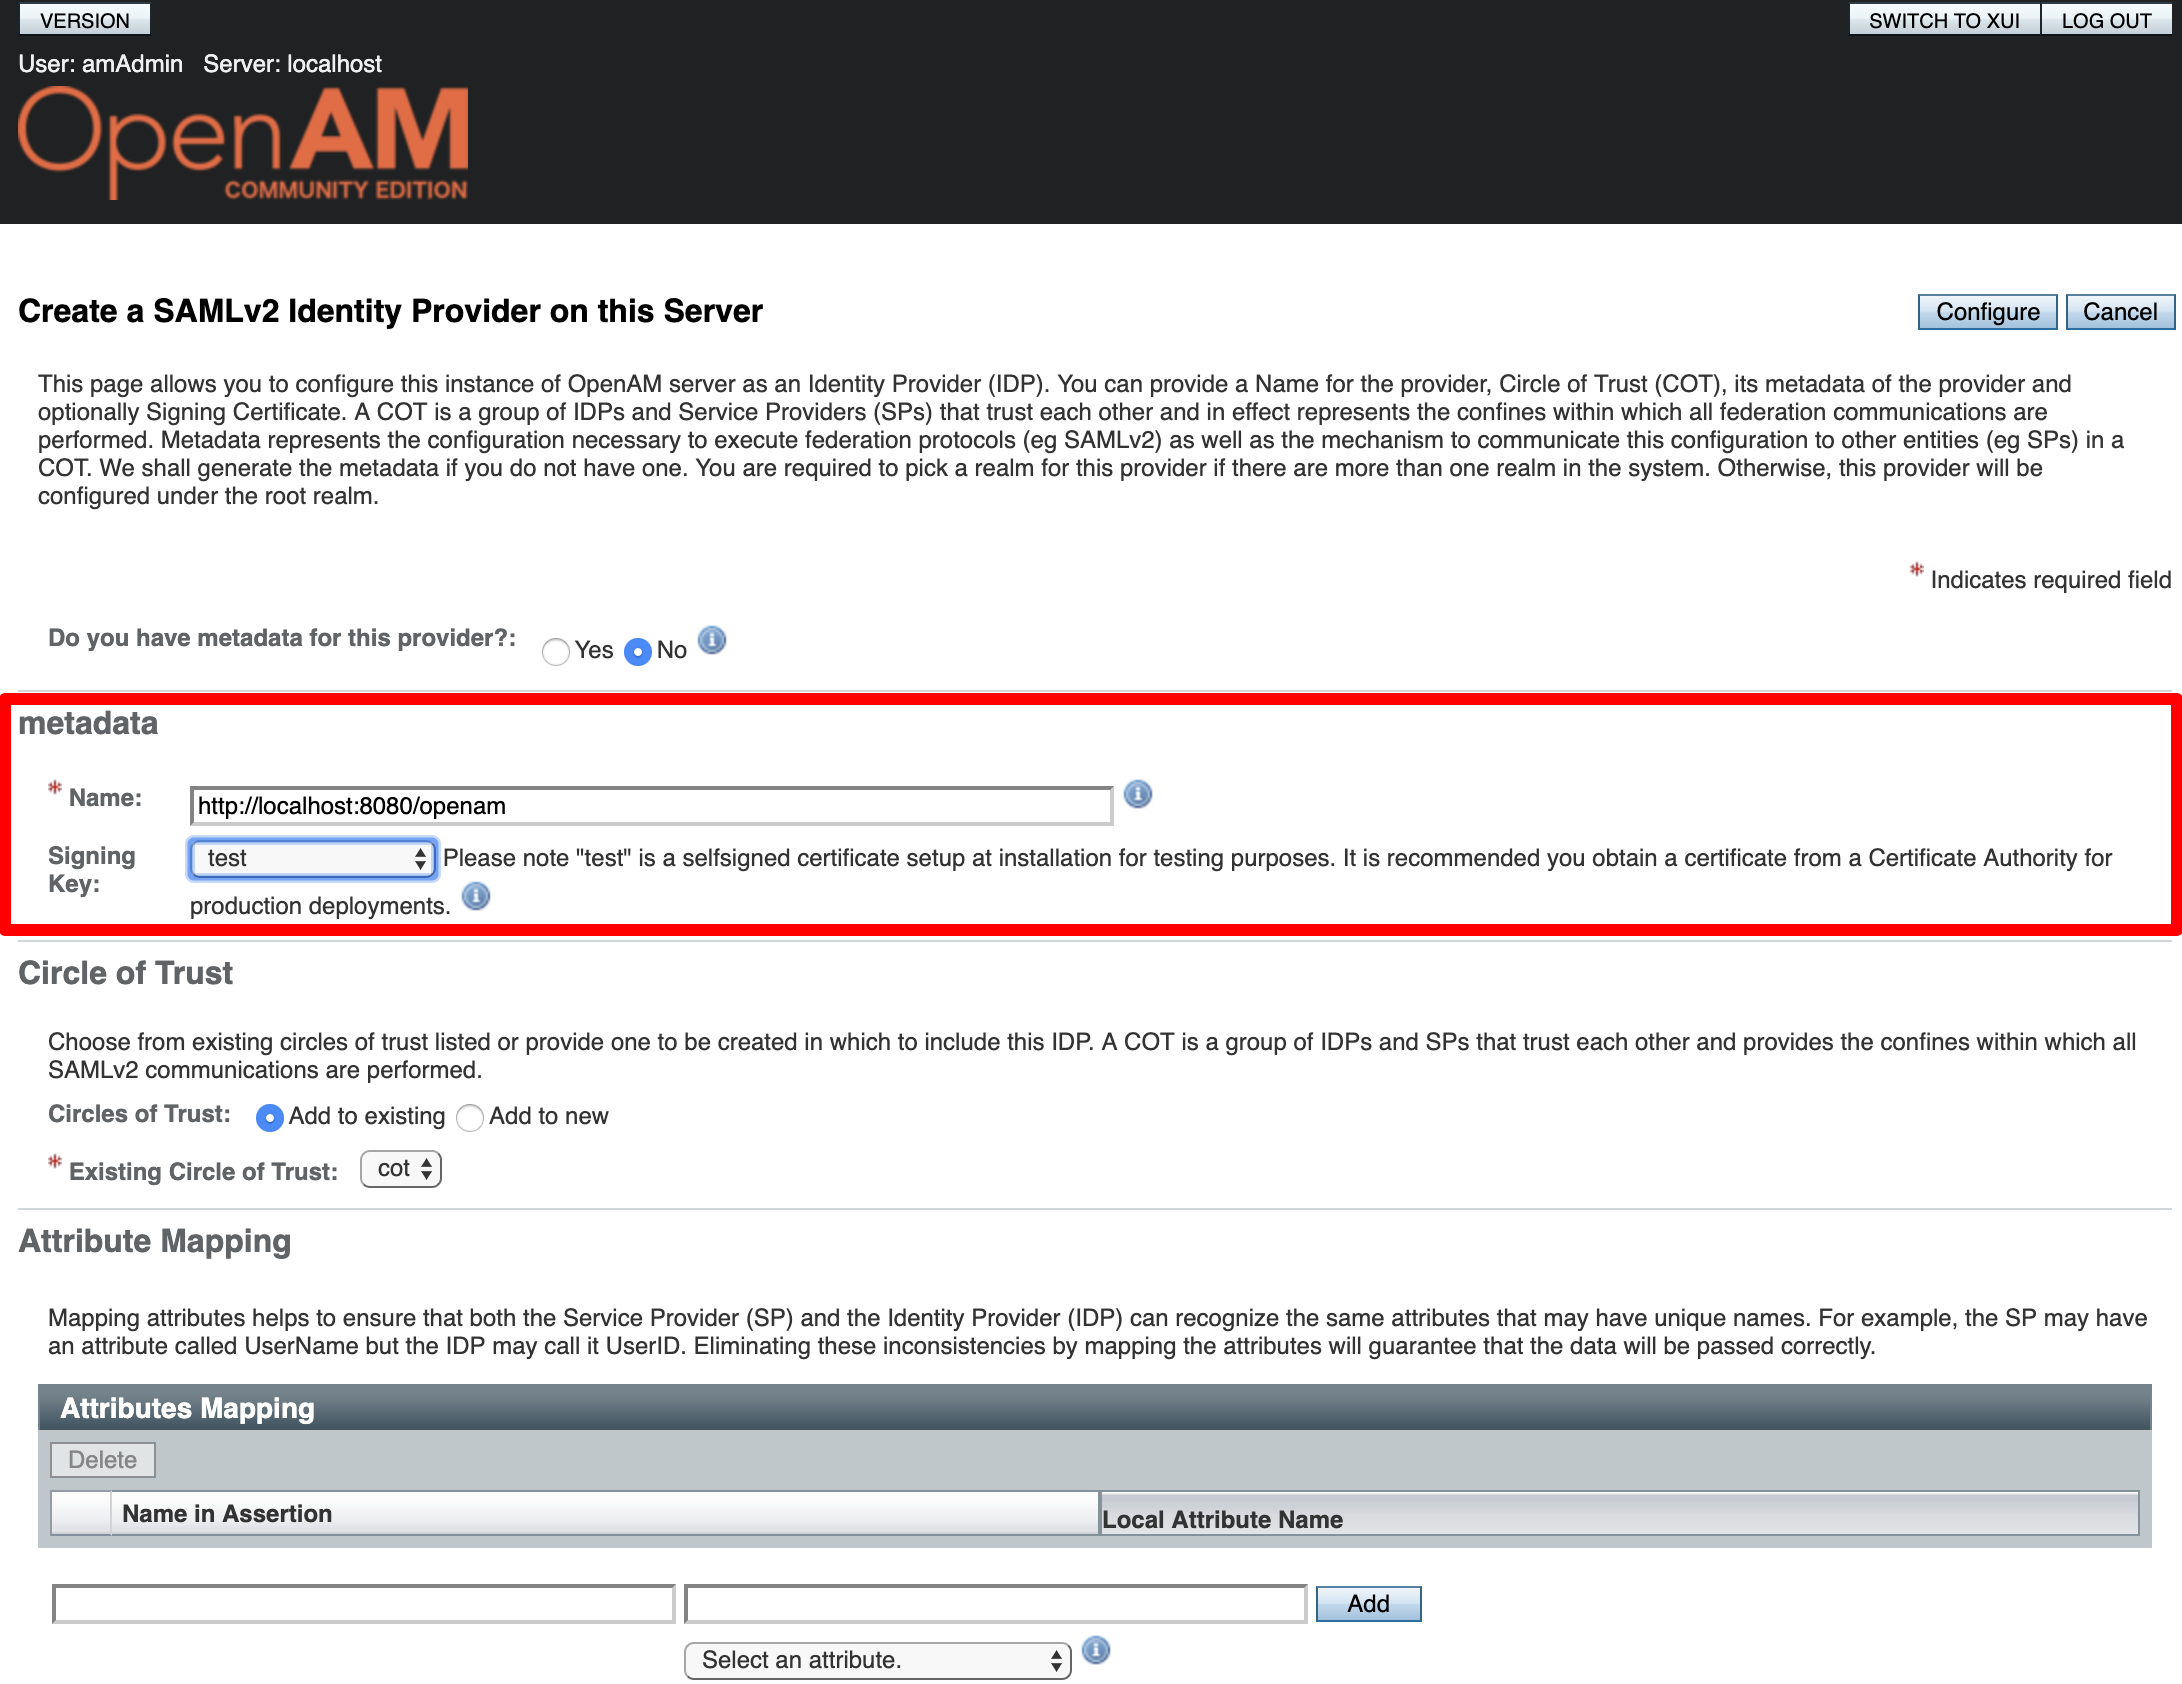
Provide a Name for the Identity Provider and choose a Singing Key. Furthermore, choose an existing Circle of Trust or create a new one by providing a name.

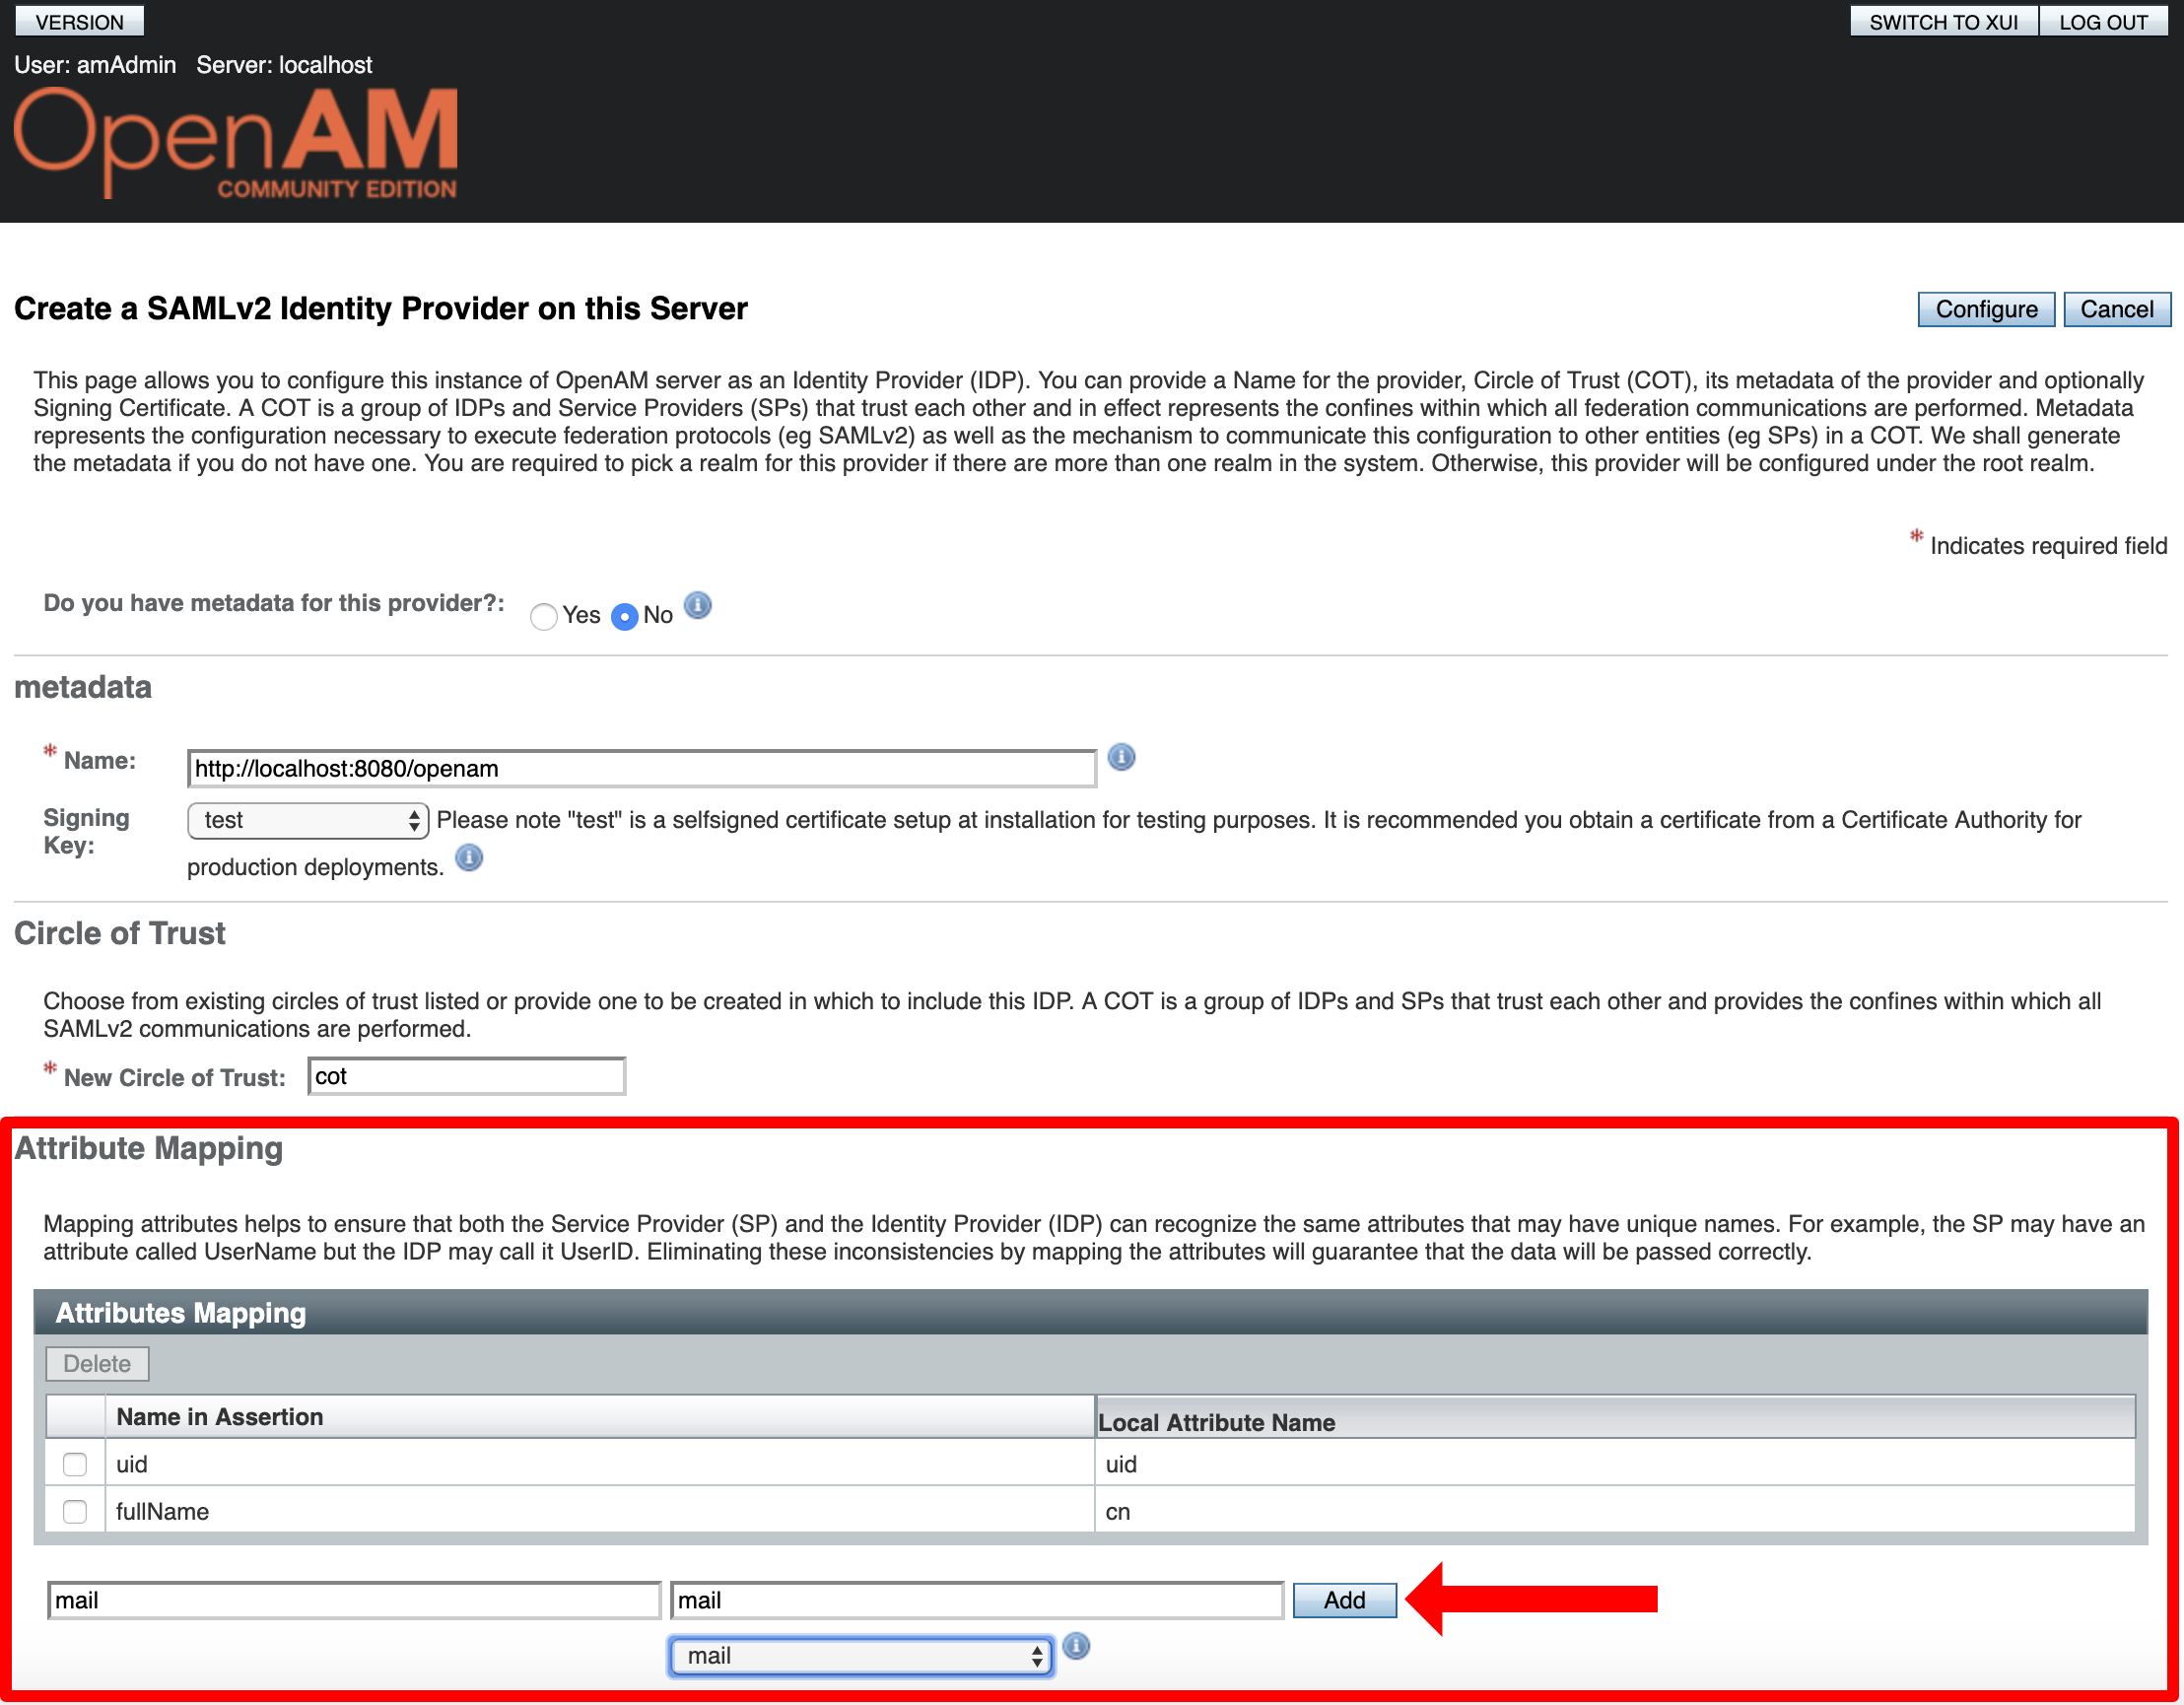
Add the following Attribute Mappings: "uid" → "uid", "fullName" → "cn" and "mail"→ "mail" (see Screenshot) by pressing the "Add" button.

Click "Configure" to continue.
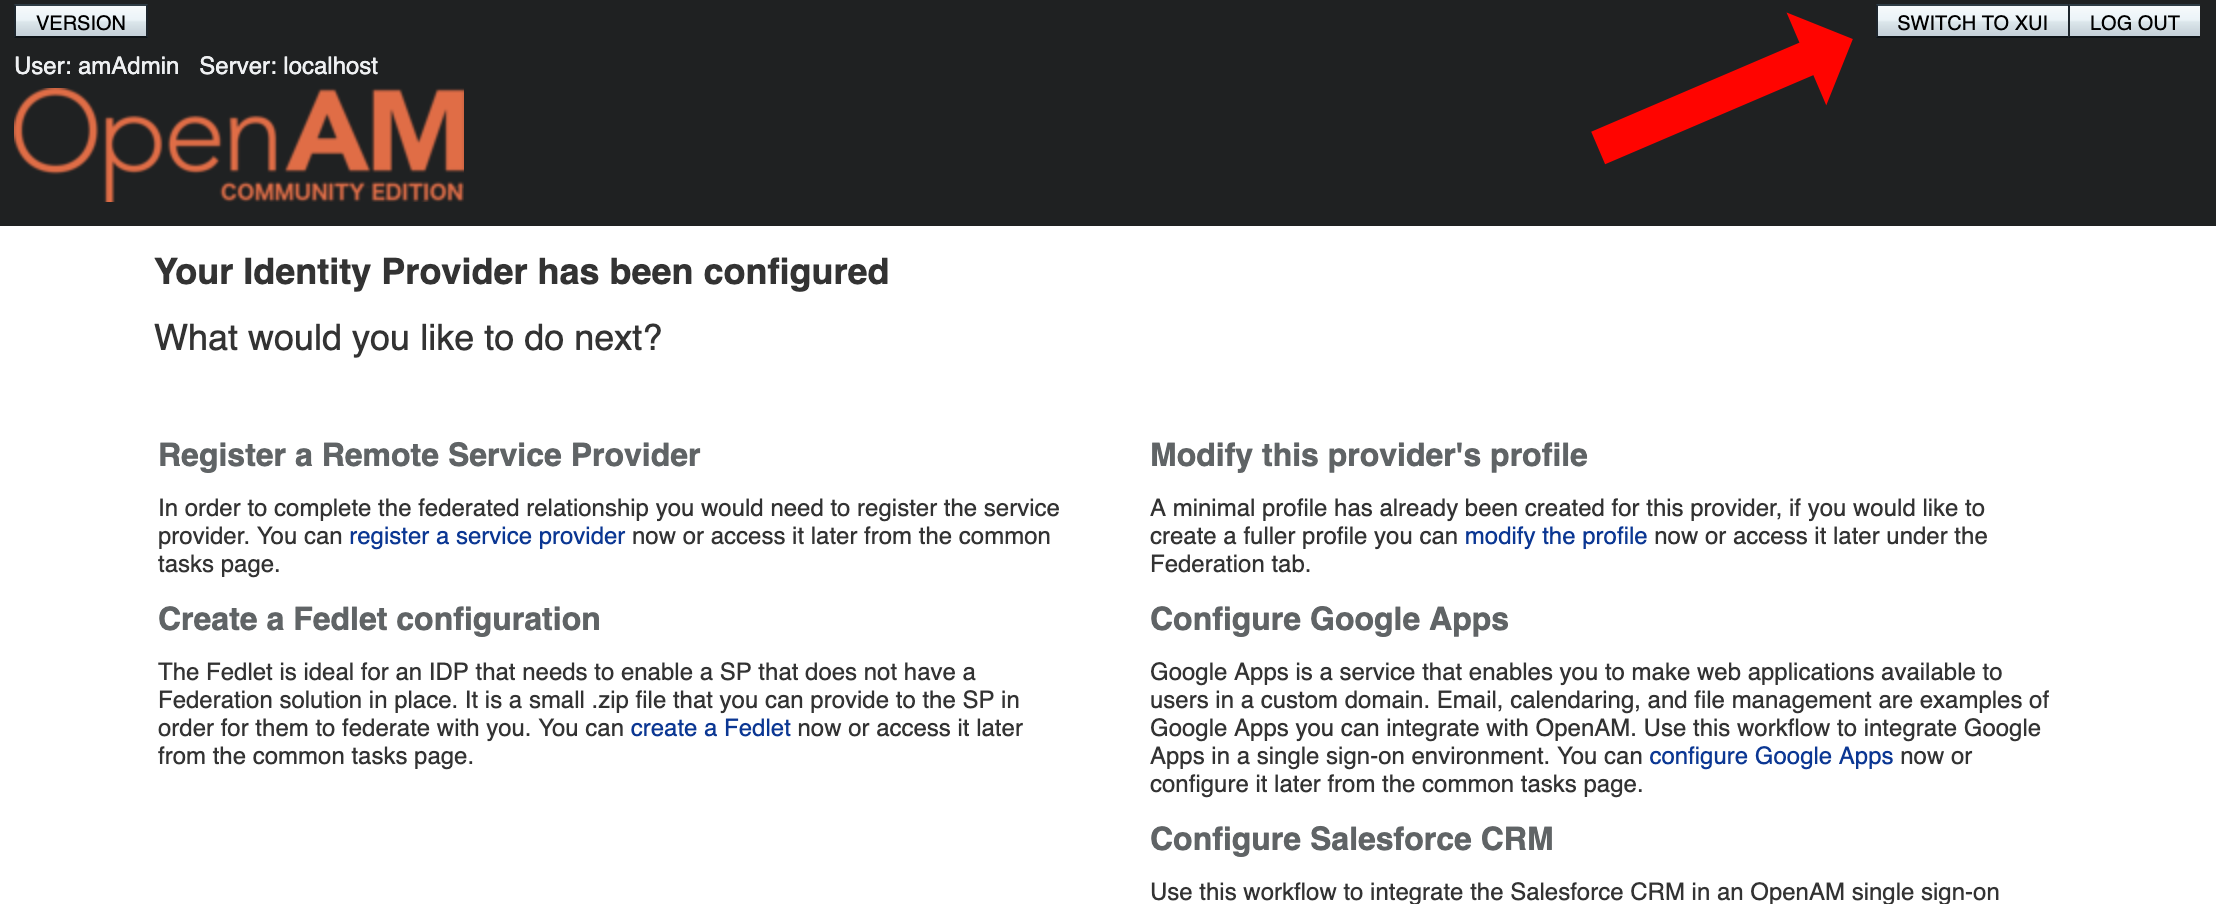
In the next window, click "SWITCH TO XUI".


Configure Remote Service Provider
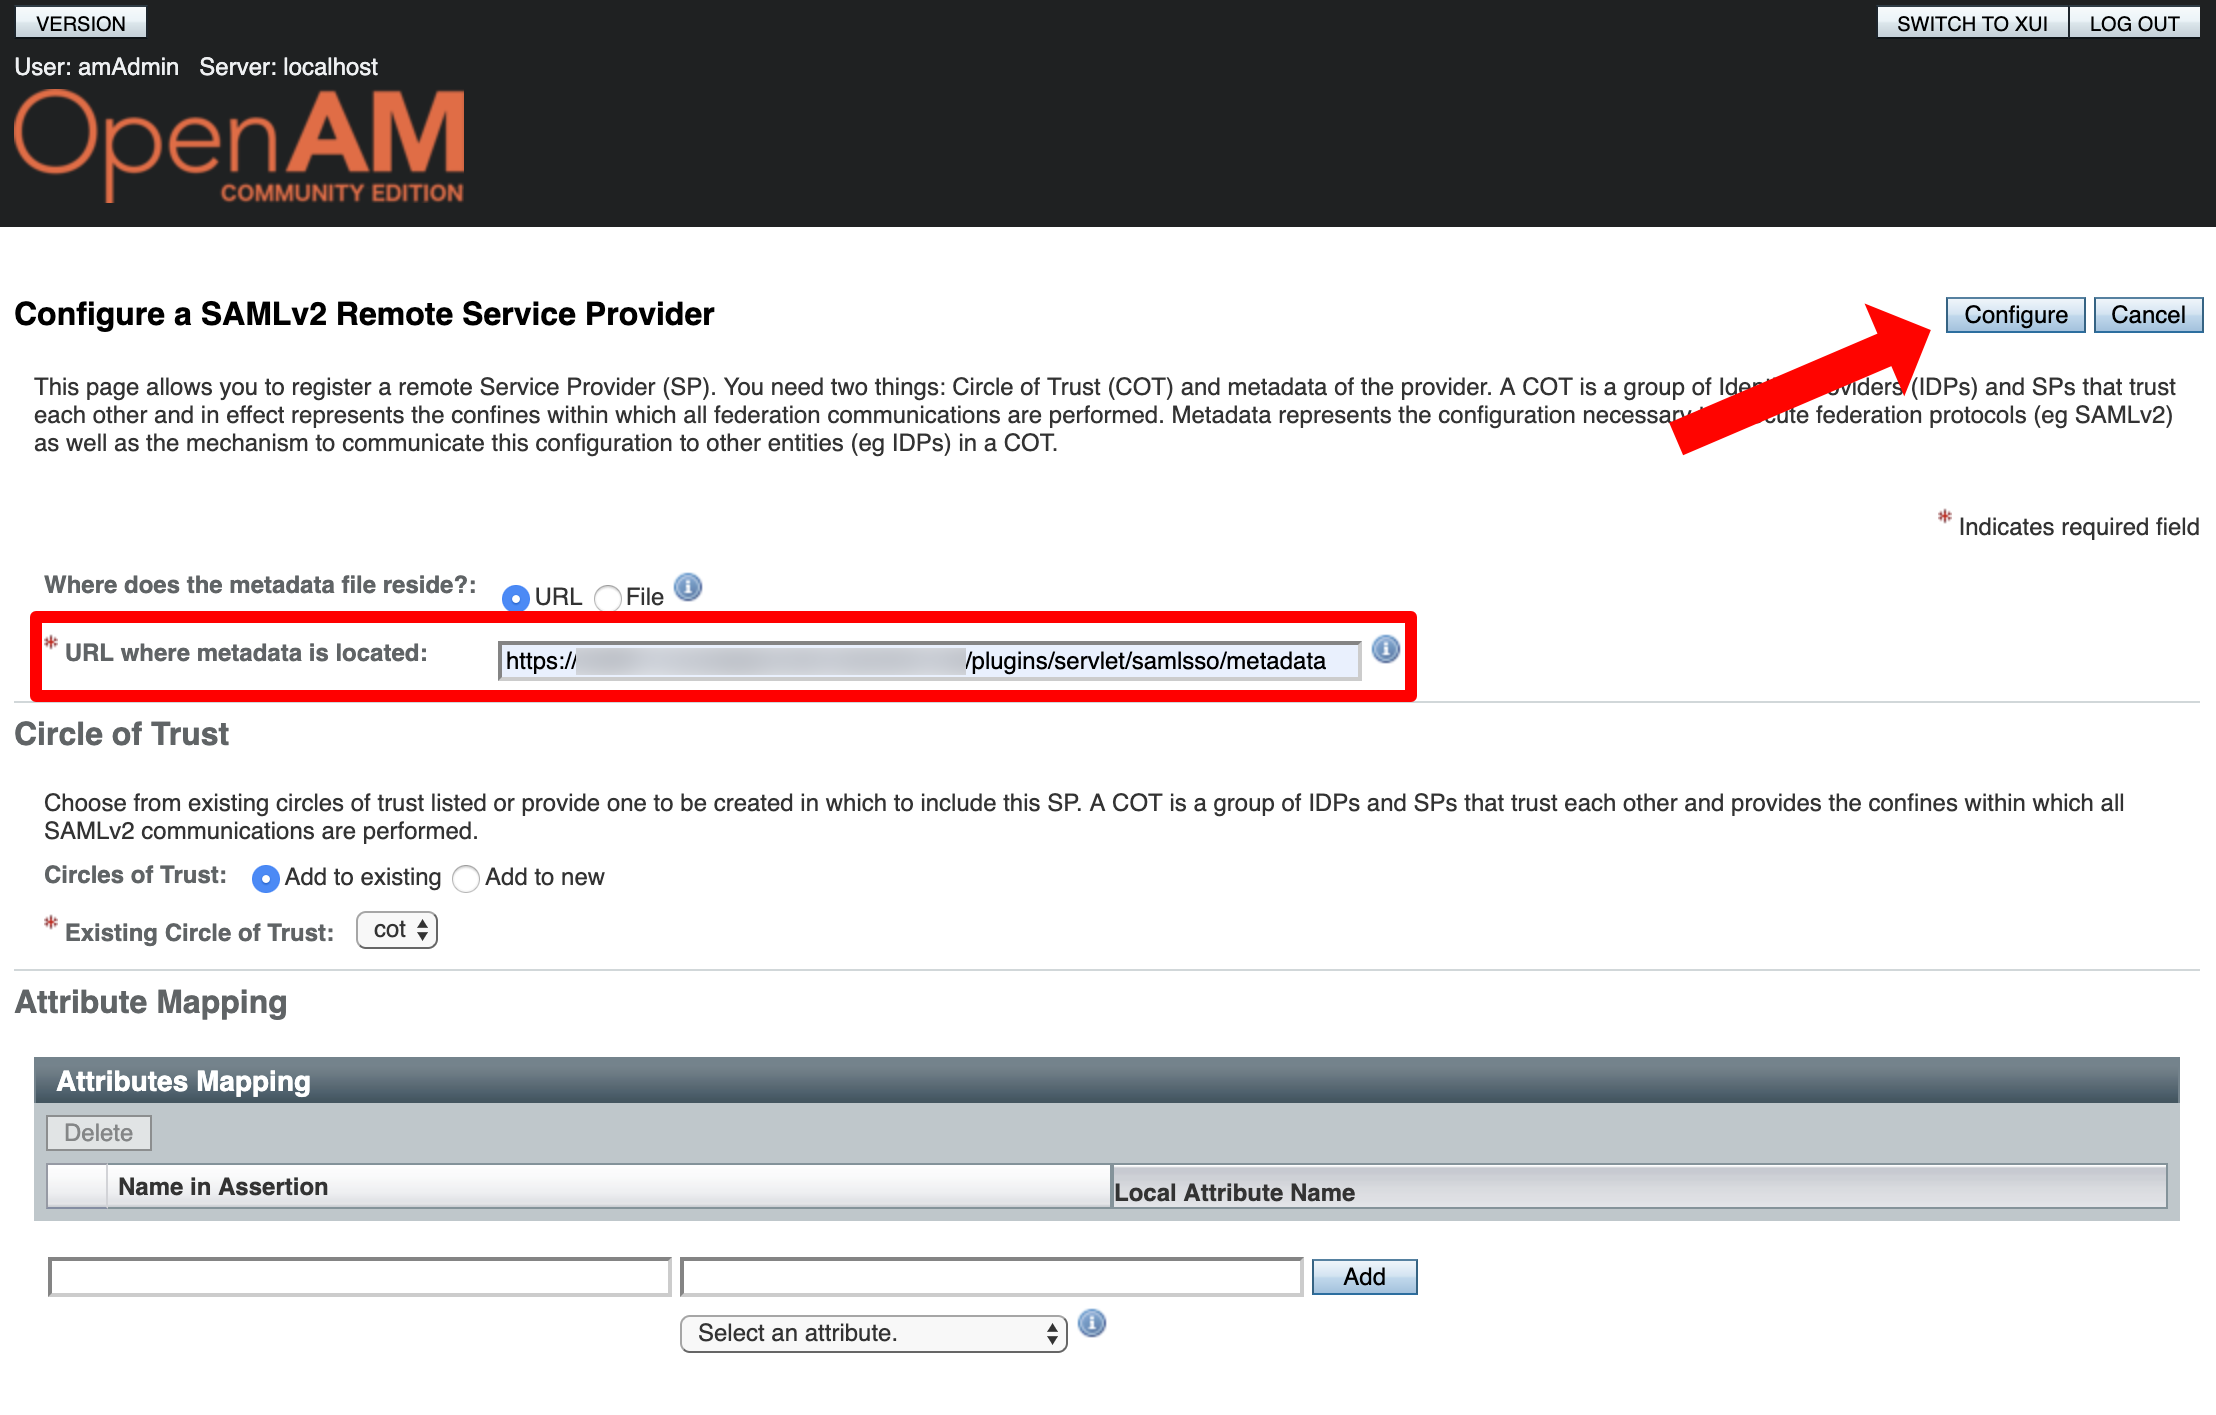
Click "Configure Remote Service Provider".
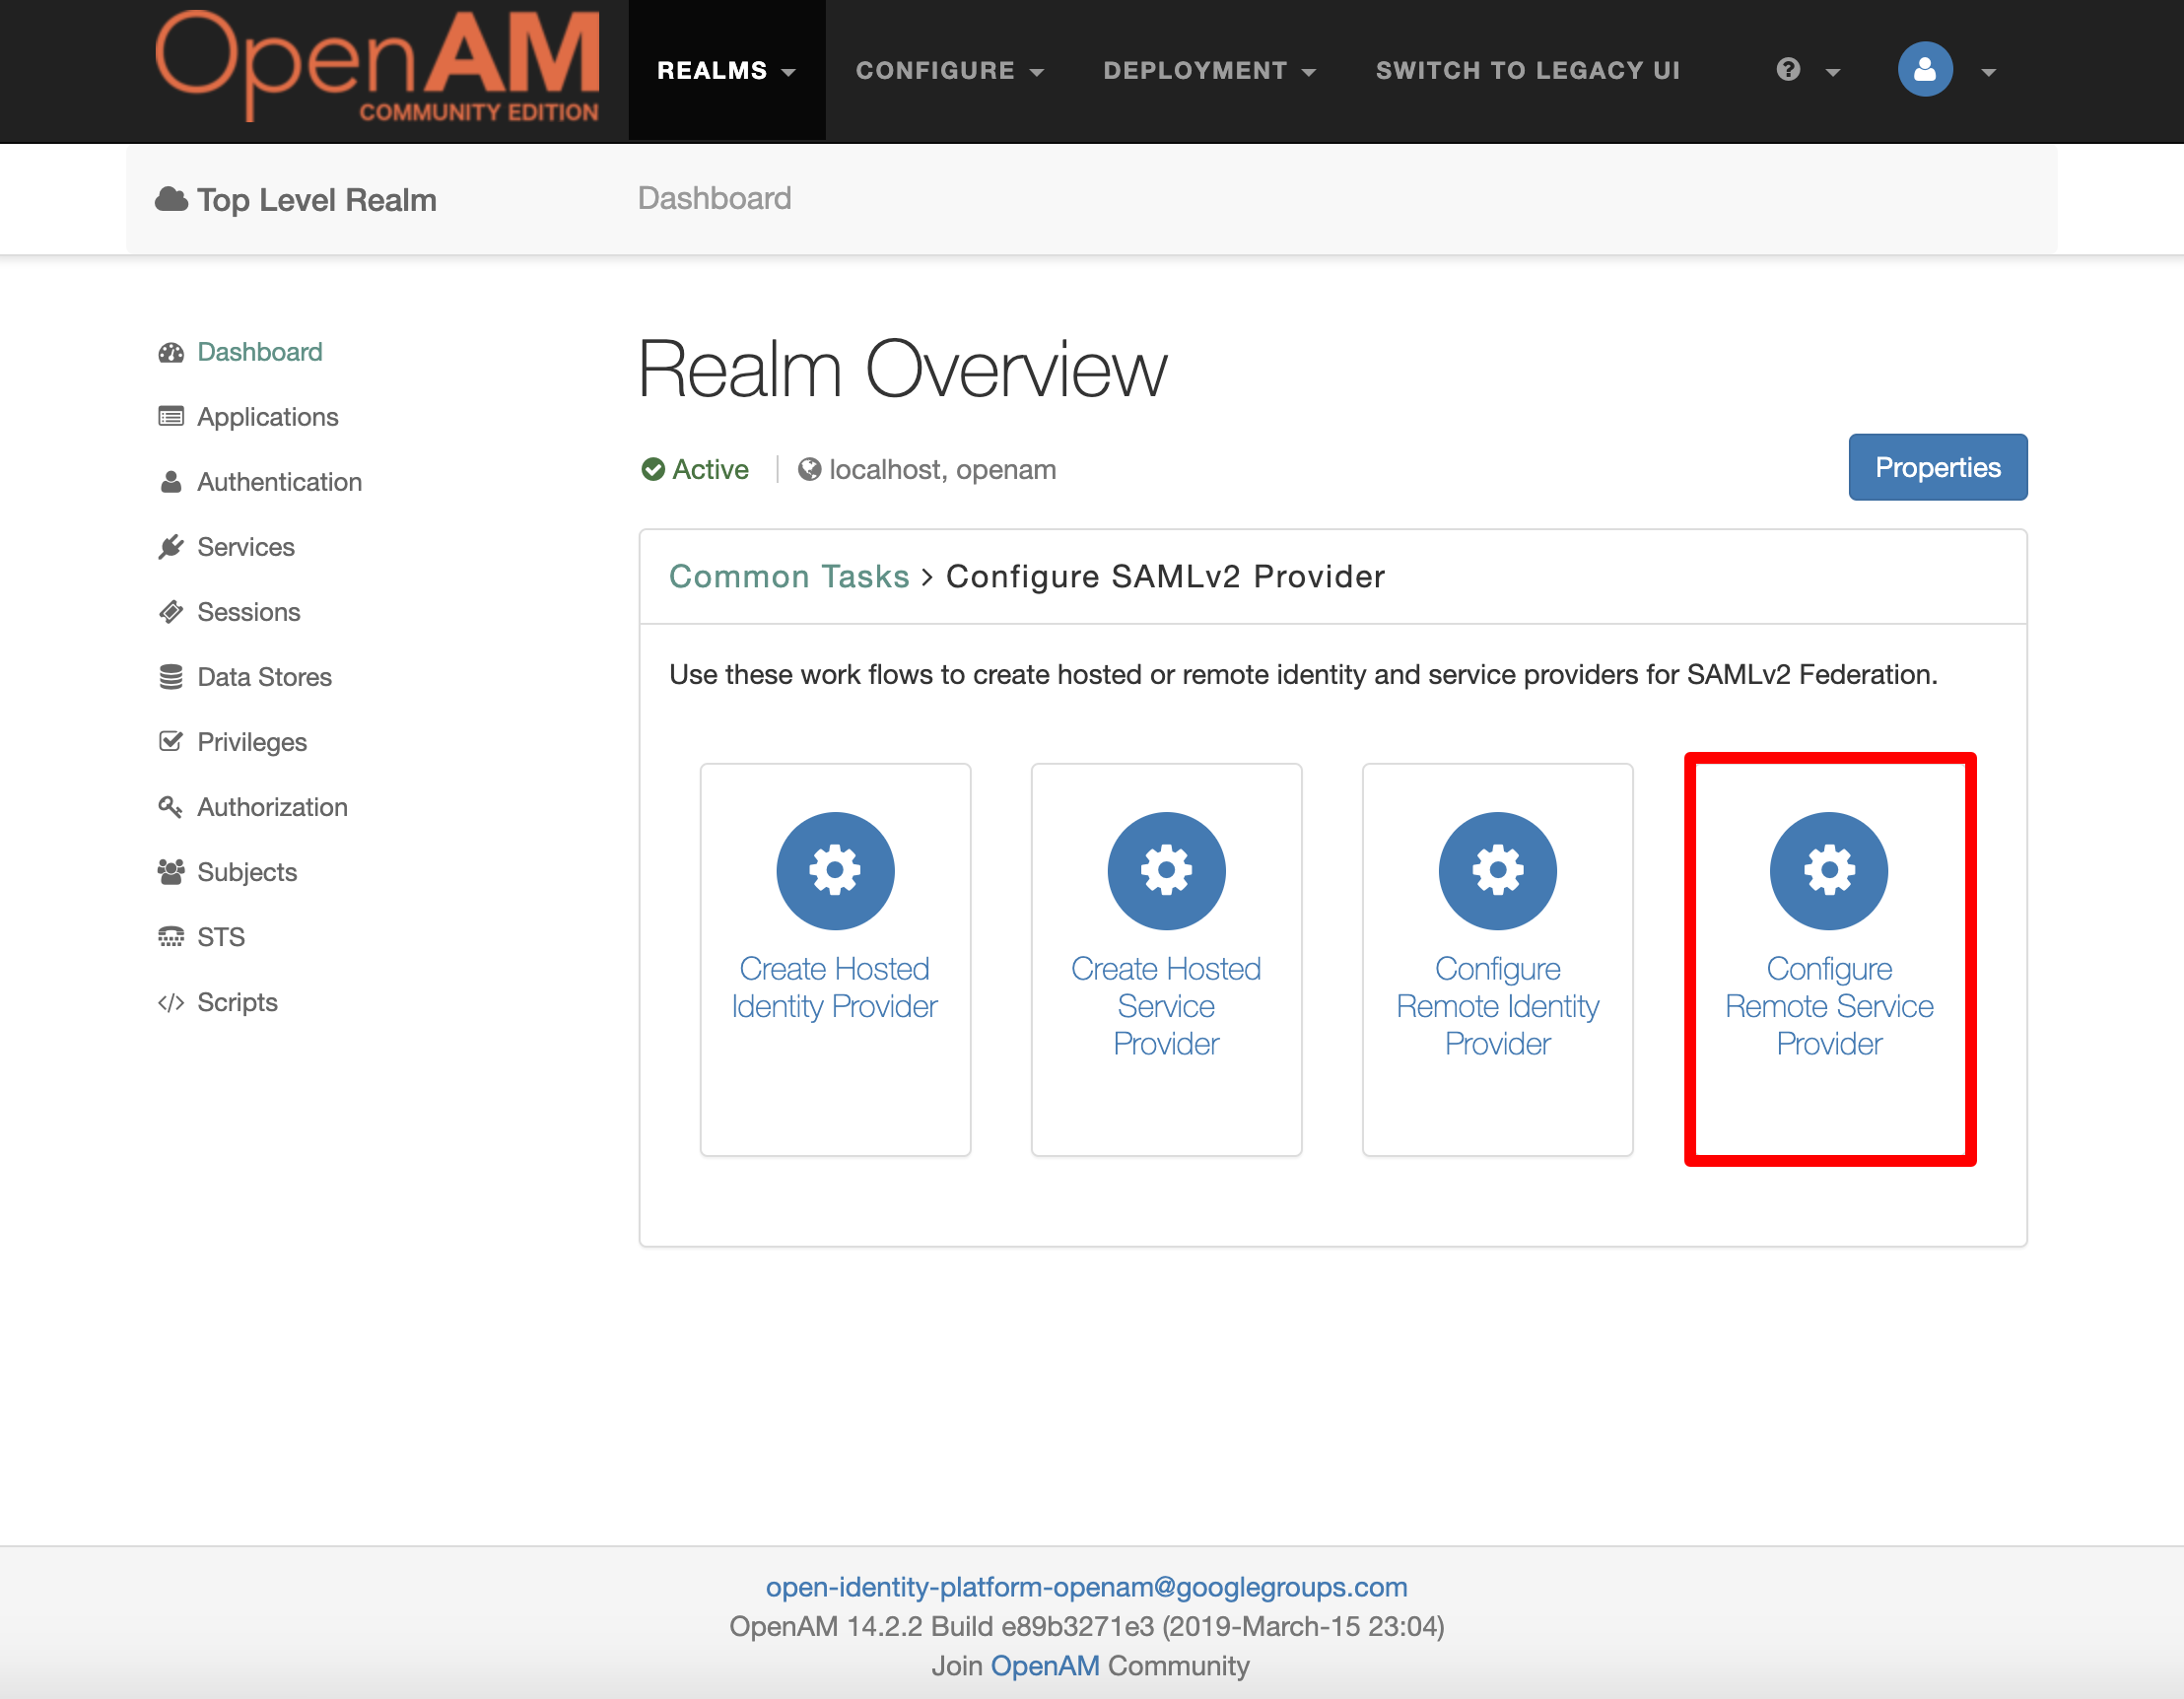
Provide the metadata URL of your Atlassian product: https://<baseURL>/plugins/servlet/samlsso/metadata and substitute <baseURL> with the base URL of your instance. Click "Configure" to continue.
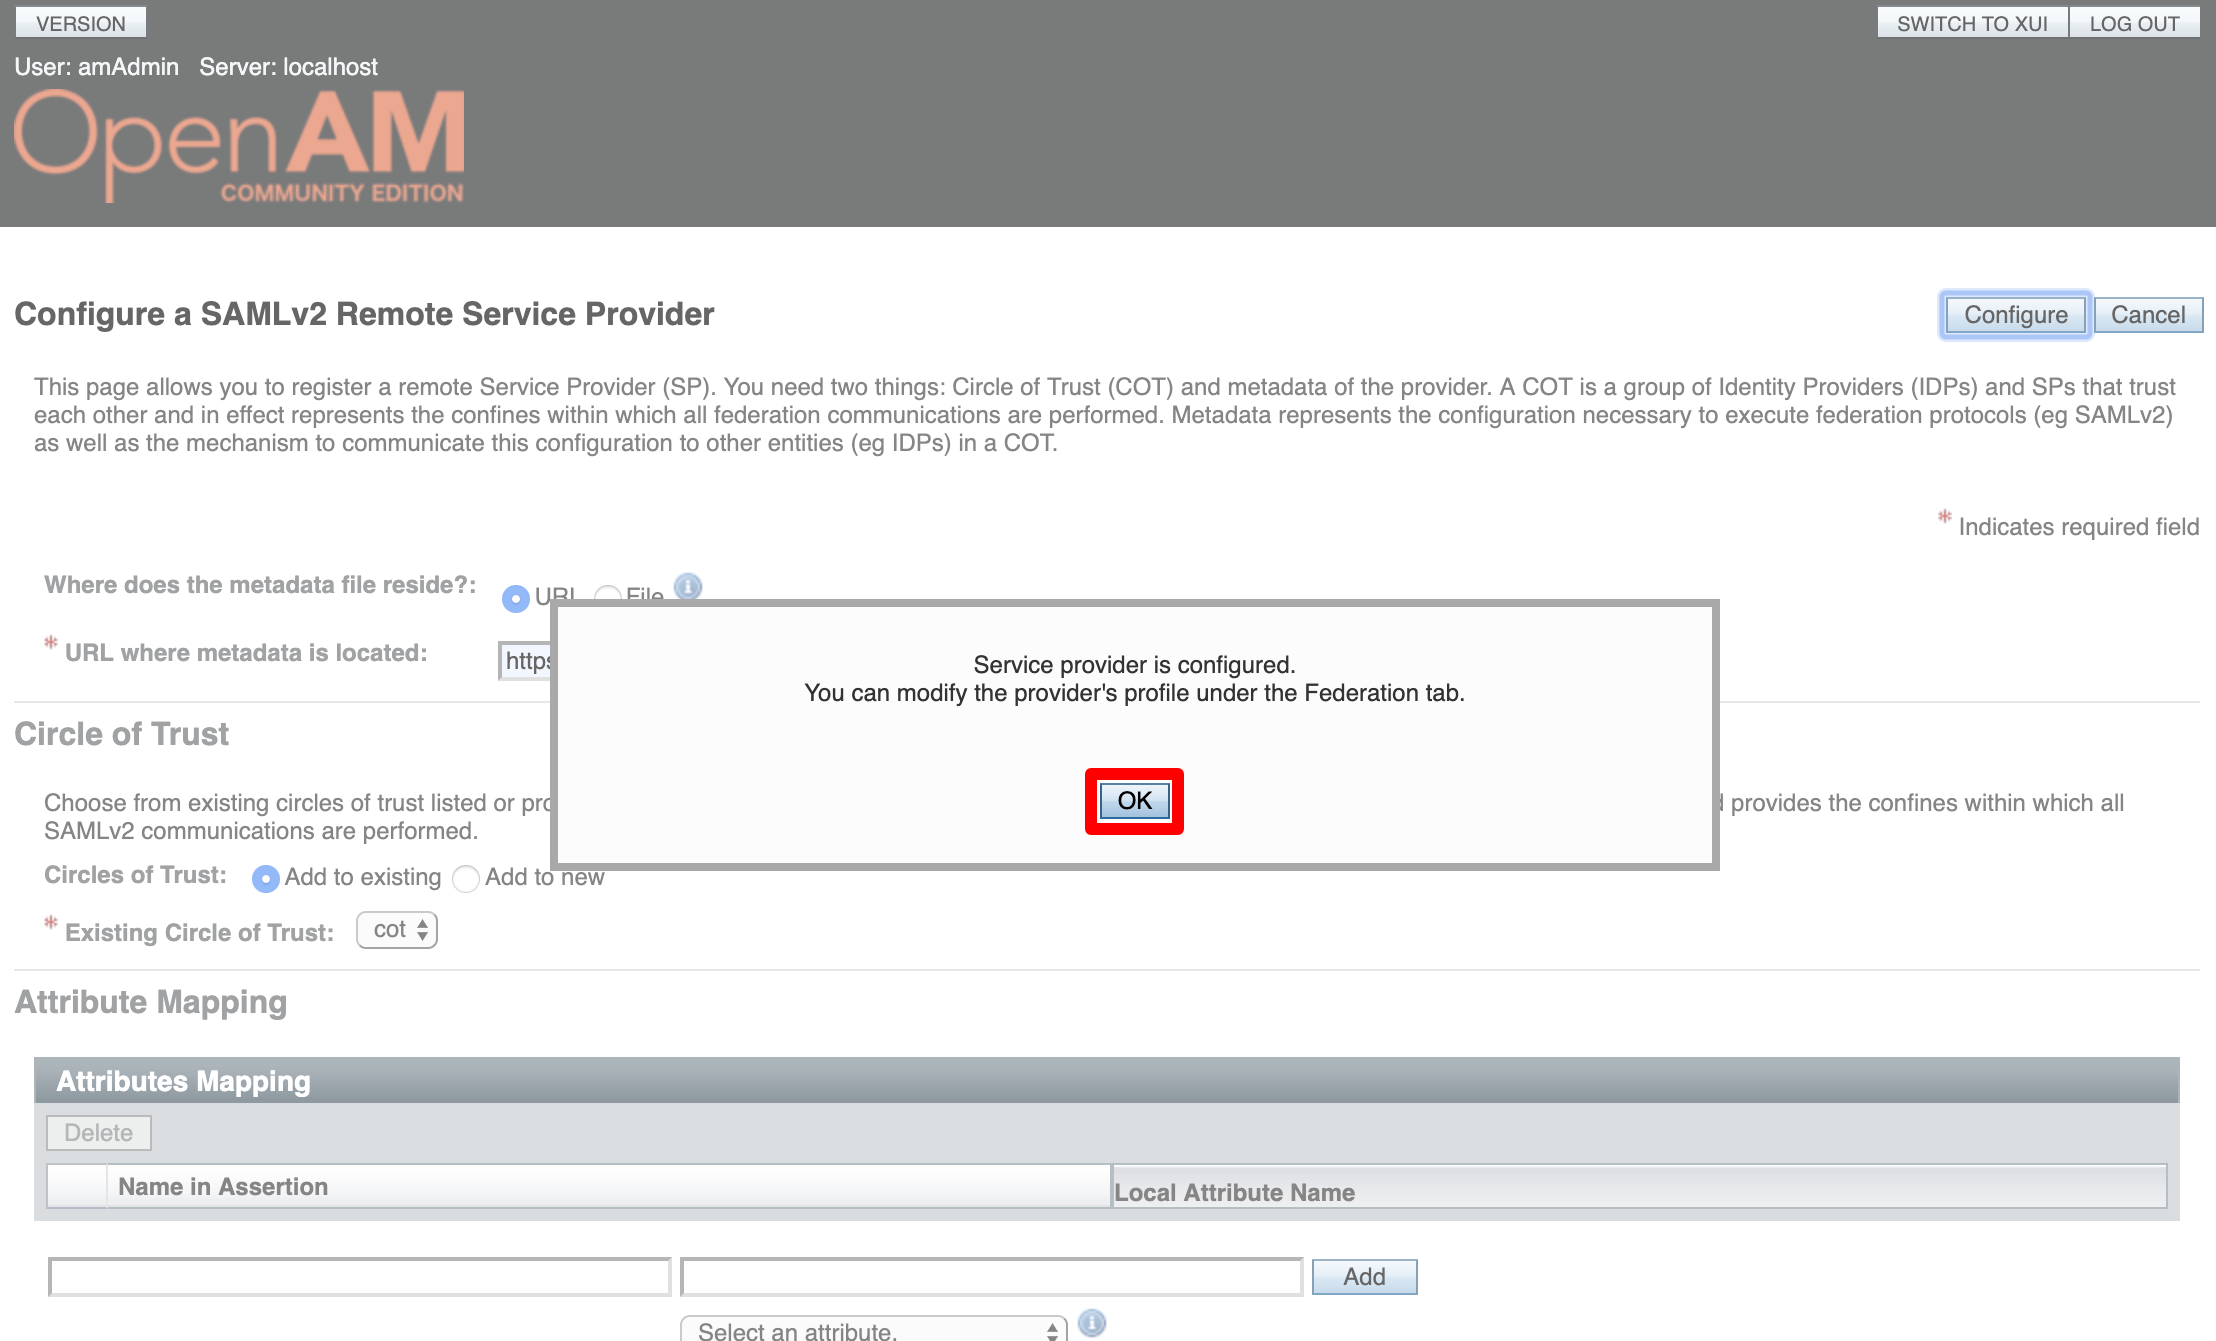
Click "OK" to continue.
Tweaking of the Hosted Identity Provider Configuration
Next, expand "Applications" in the left panel and click "SAML 2.0".
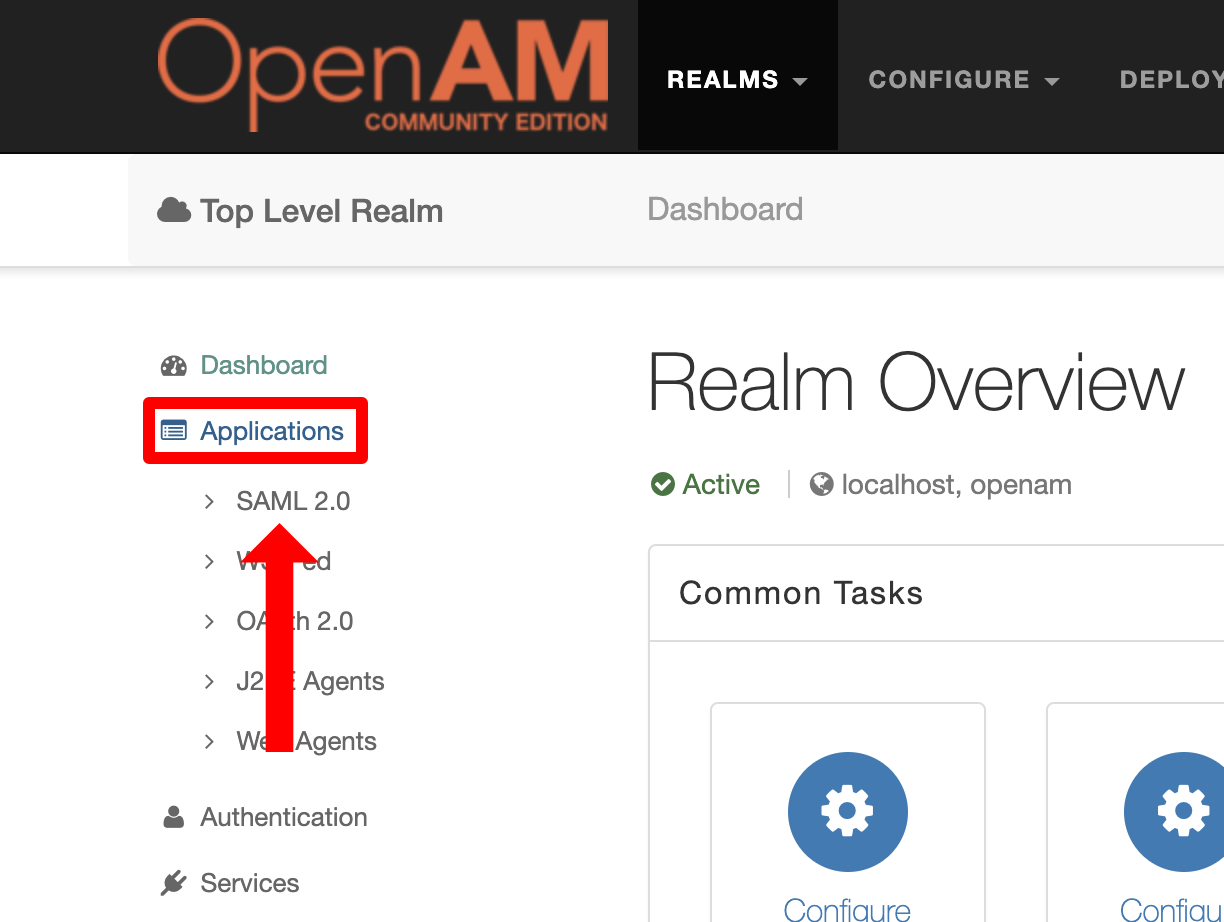
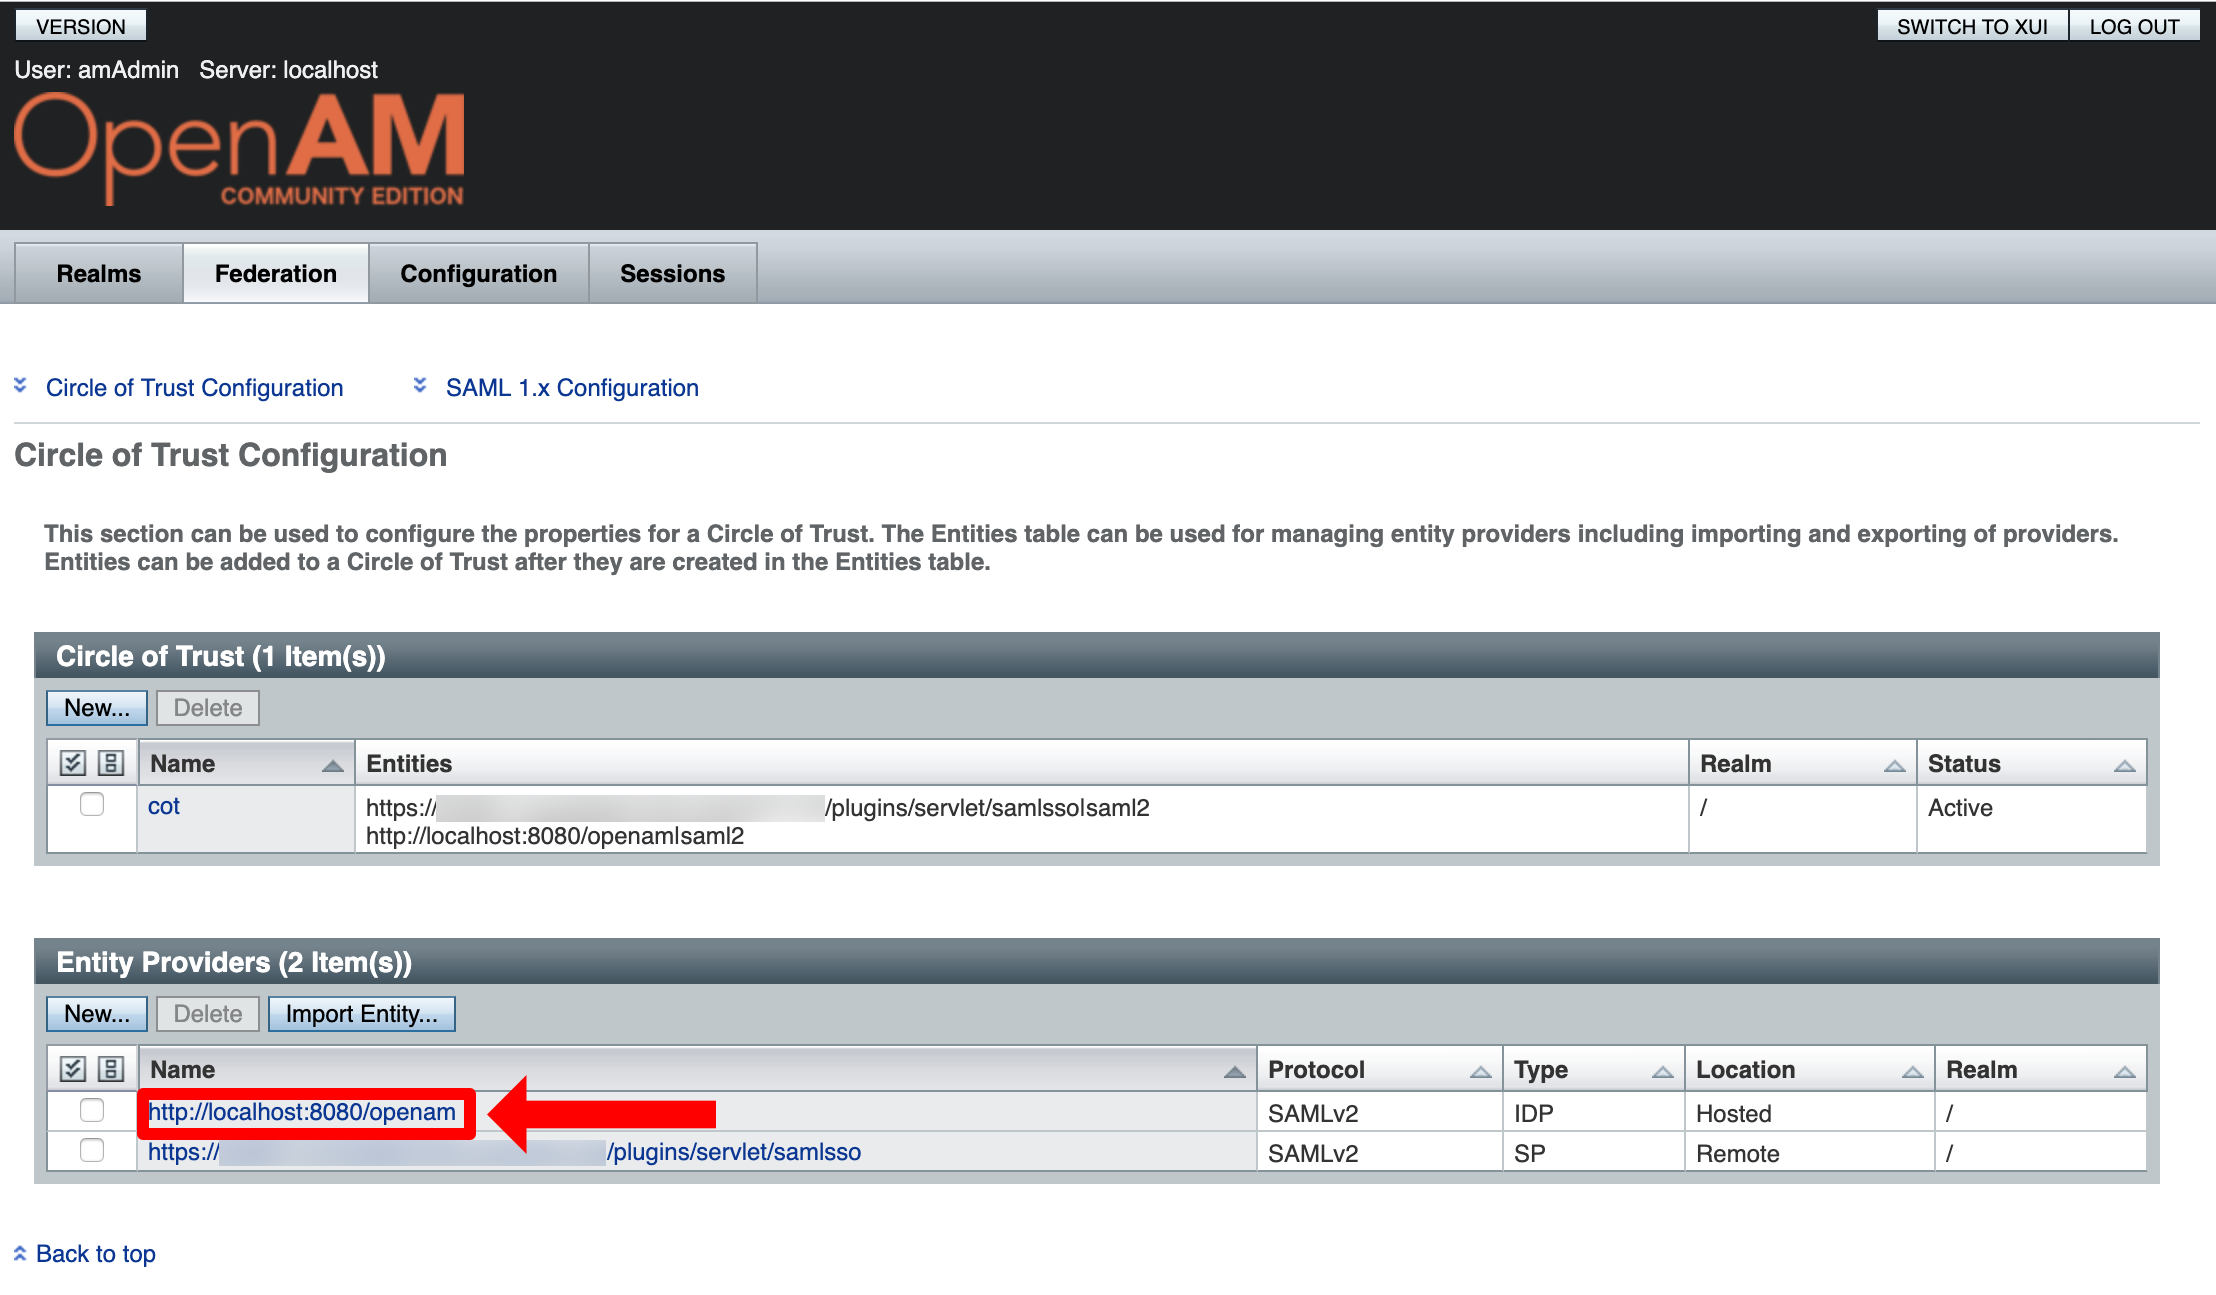
In the "Entity Providers" box, click on the hosted identity provider you created before.
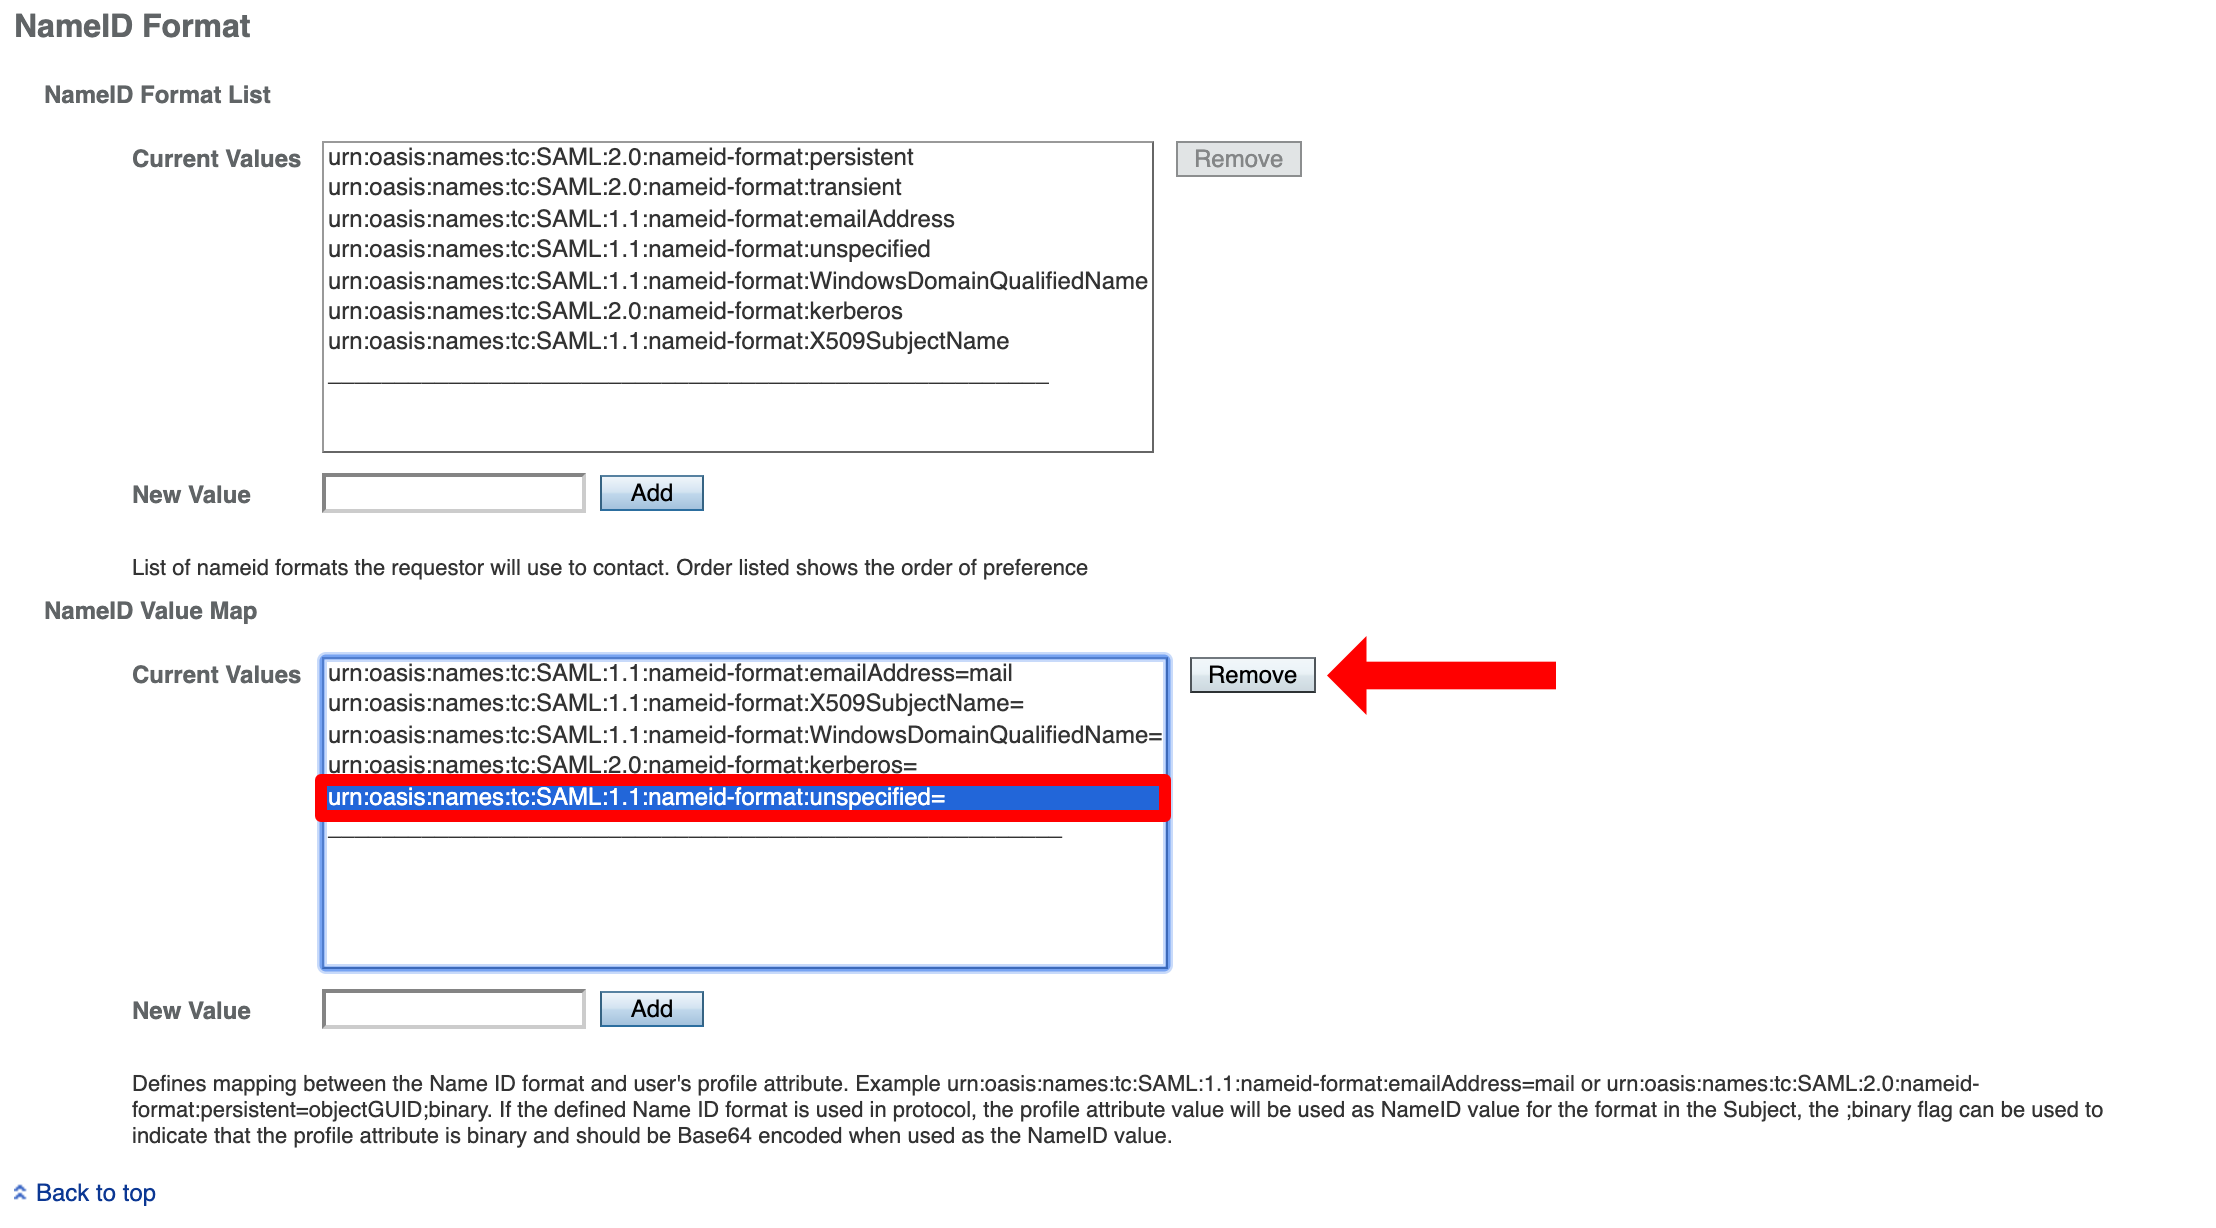
Scroll down to "NameID Format". In the "NameID Value Map", click on "urn:oasis:names:tc:SAML:1.1:nameid-format:unspecified=" and press "Remove".
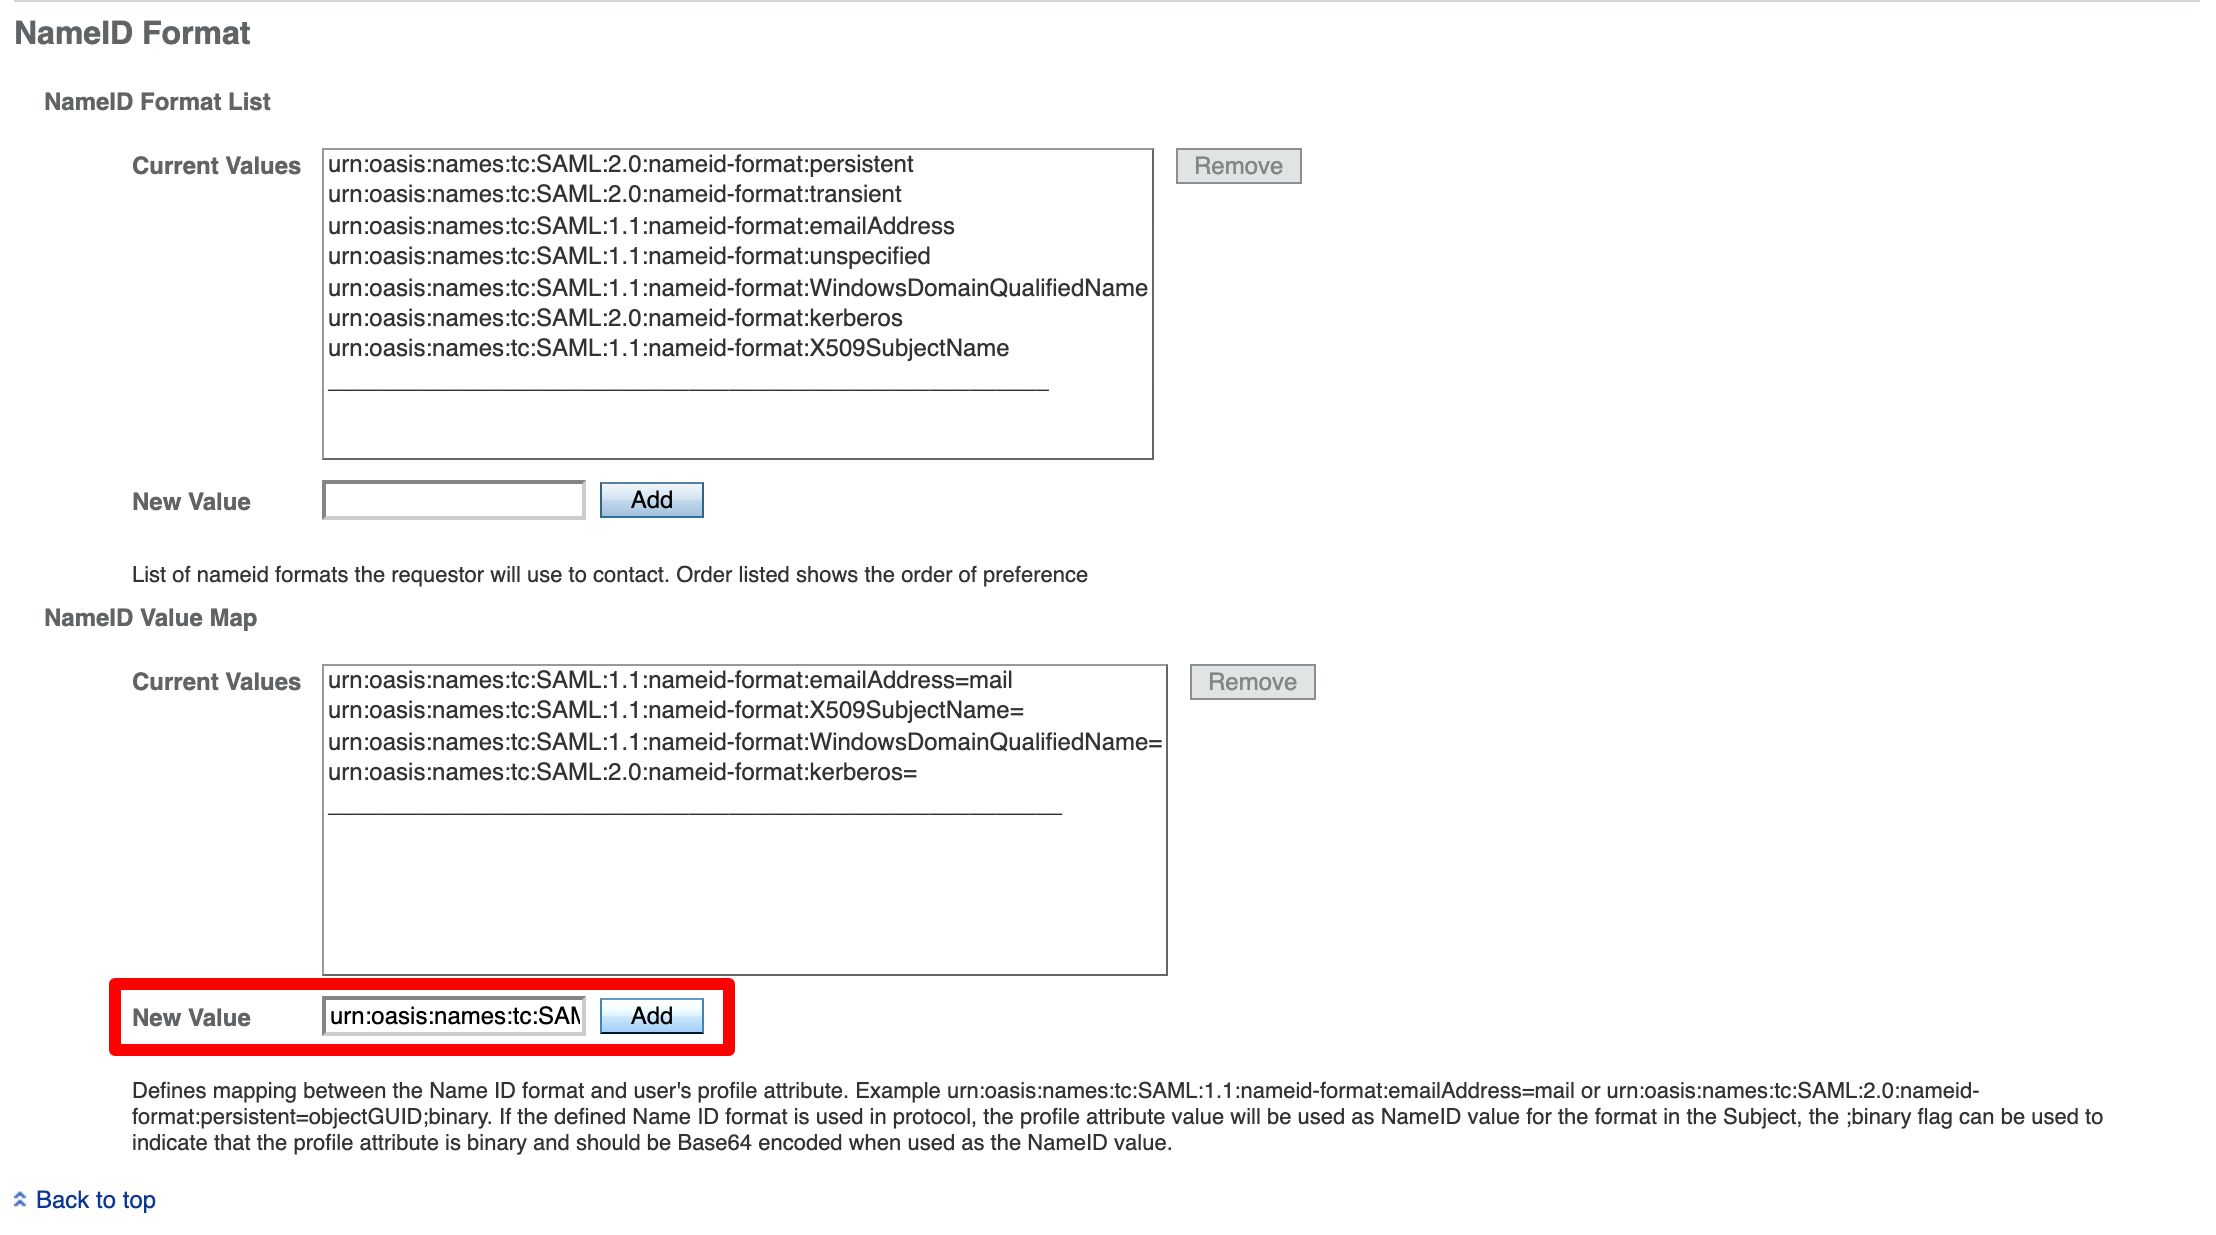
Next, add urn:oasis:names:tc:SAML:1.1:nameid-format:unspecified=uid as a "New Value" by pressing "Add".
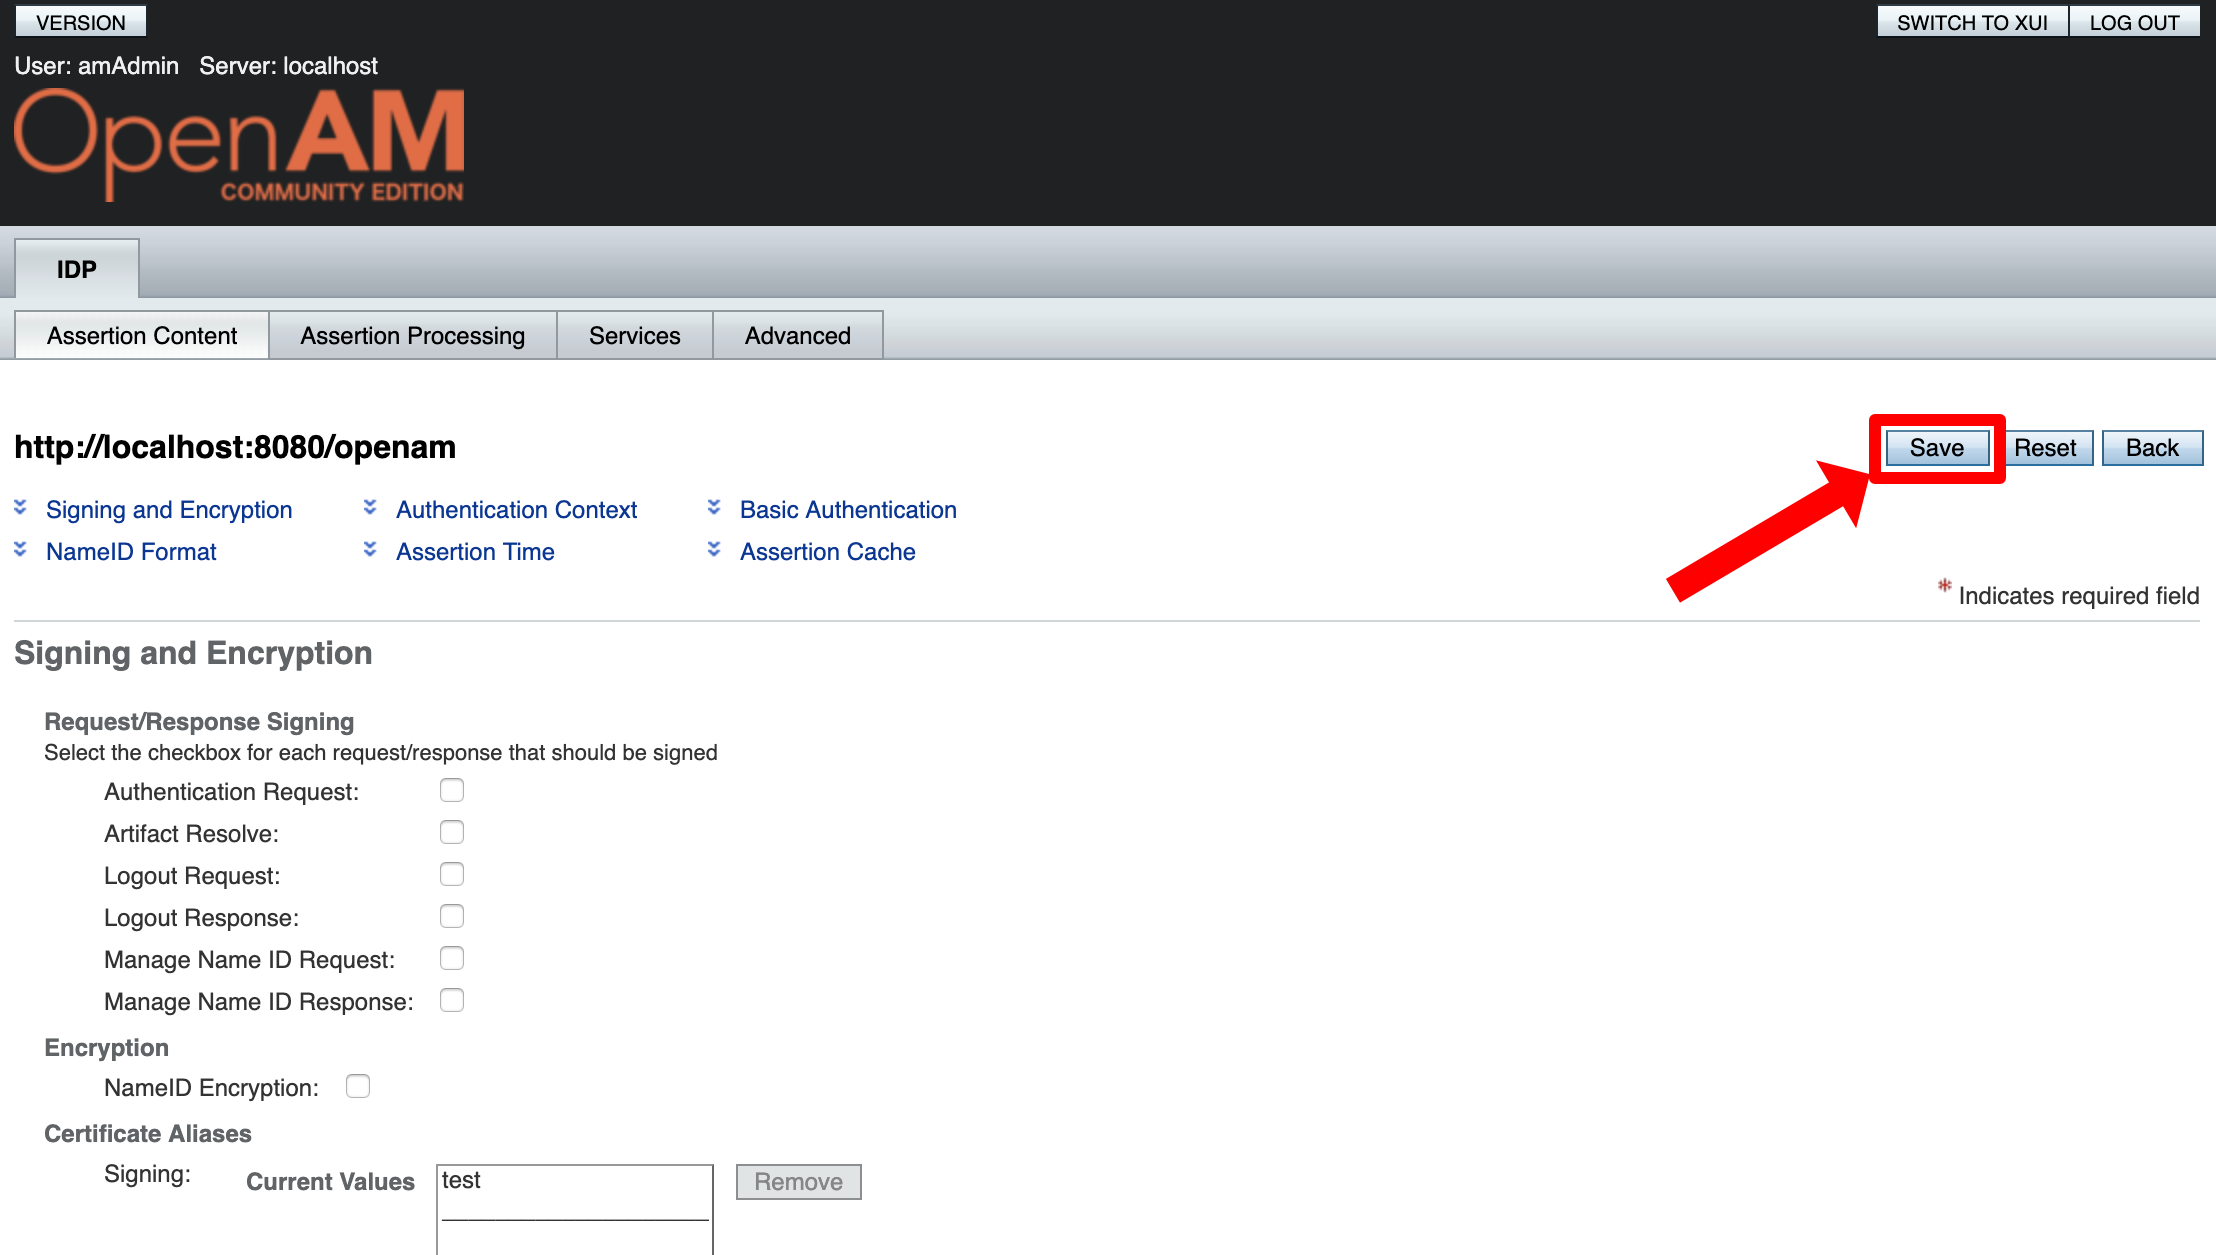
Scroll to the top of the page and click "Save".
Configure Your Atlassian Product for the SAML SSO App
Install the SAML SSO App
In your Atlassian product, open the in-product marketplace as described in the Atlassian documentation.
Search for "resolution saml" and click "Install" for SAML Single Sign On (SSO) by resolution Reichert Network Solutions GmbH.
After the installation is complete, click on Manage, then choose Configure.
Now, you are on the Add-on / app configuration page and the first step of the setup wizard will appear.

Configure the SAML SSO App
After you clicked "Configure", the Wizard will be triggered. If not, or if you want to add another Identity Provider (IdP) to your existing configuration, click on "Add new IdP +". This guide assumes, that you there is no IdP configured.
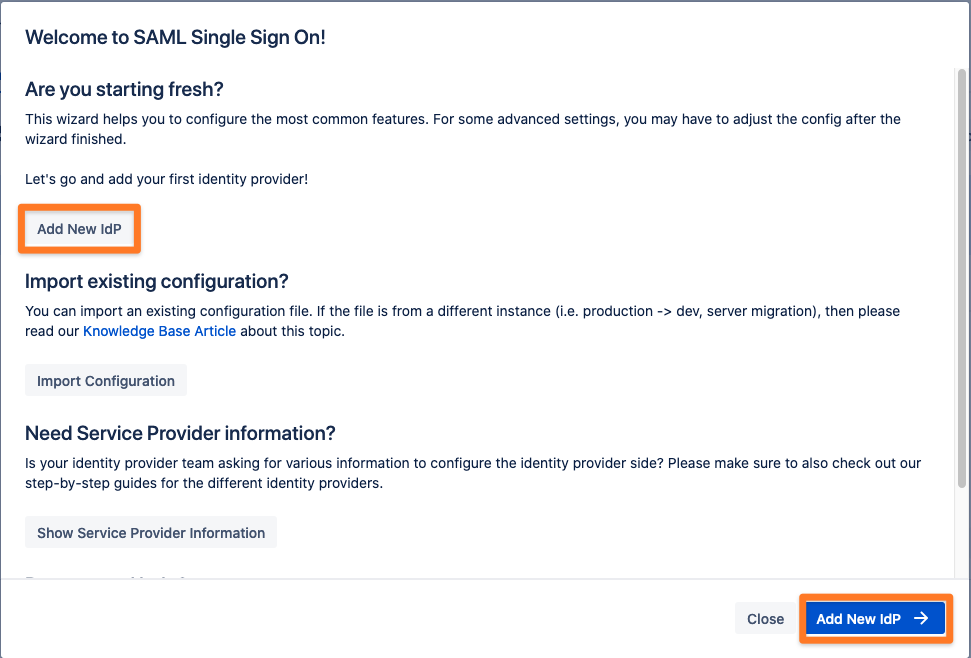
The Wizard greets you with information, click on "Add New IdP" to proceed.
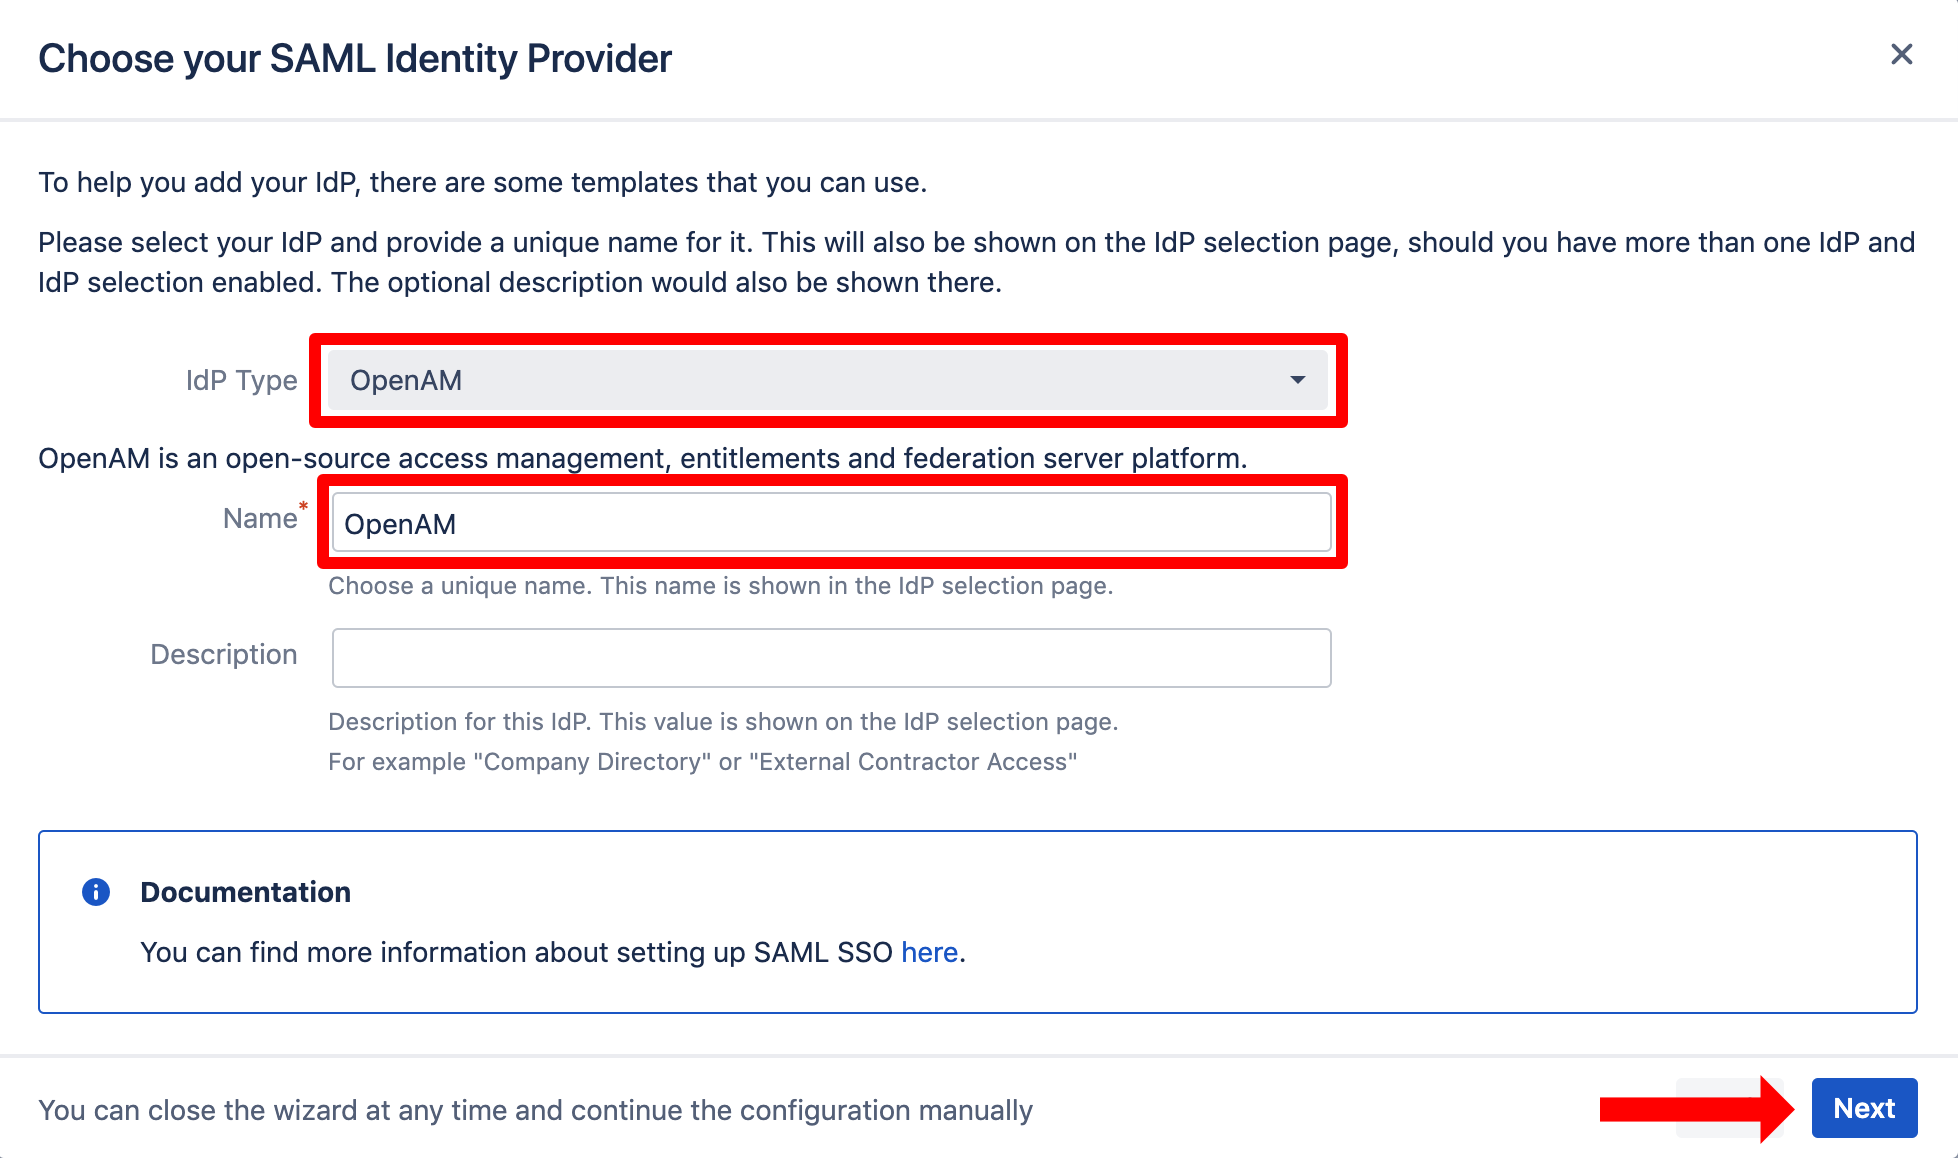
For the IdP Type, choose "OpenAM". You can also choose a name. Click on "Next" to continue.
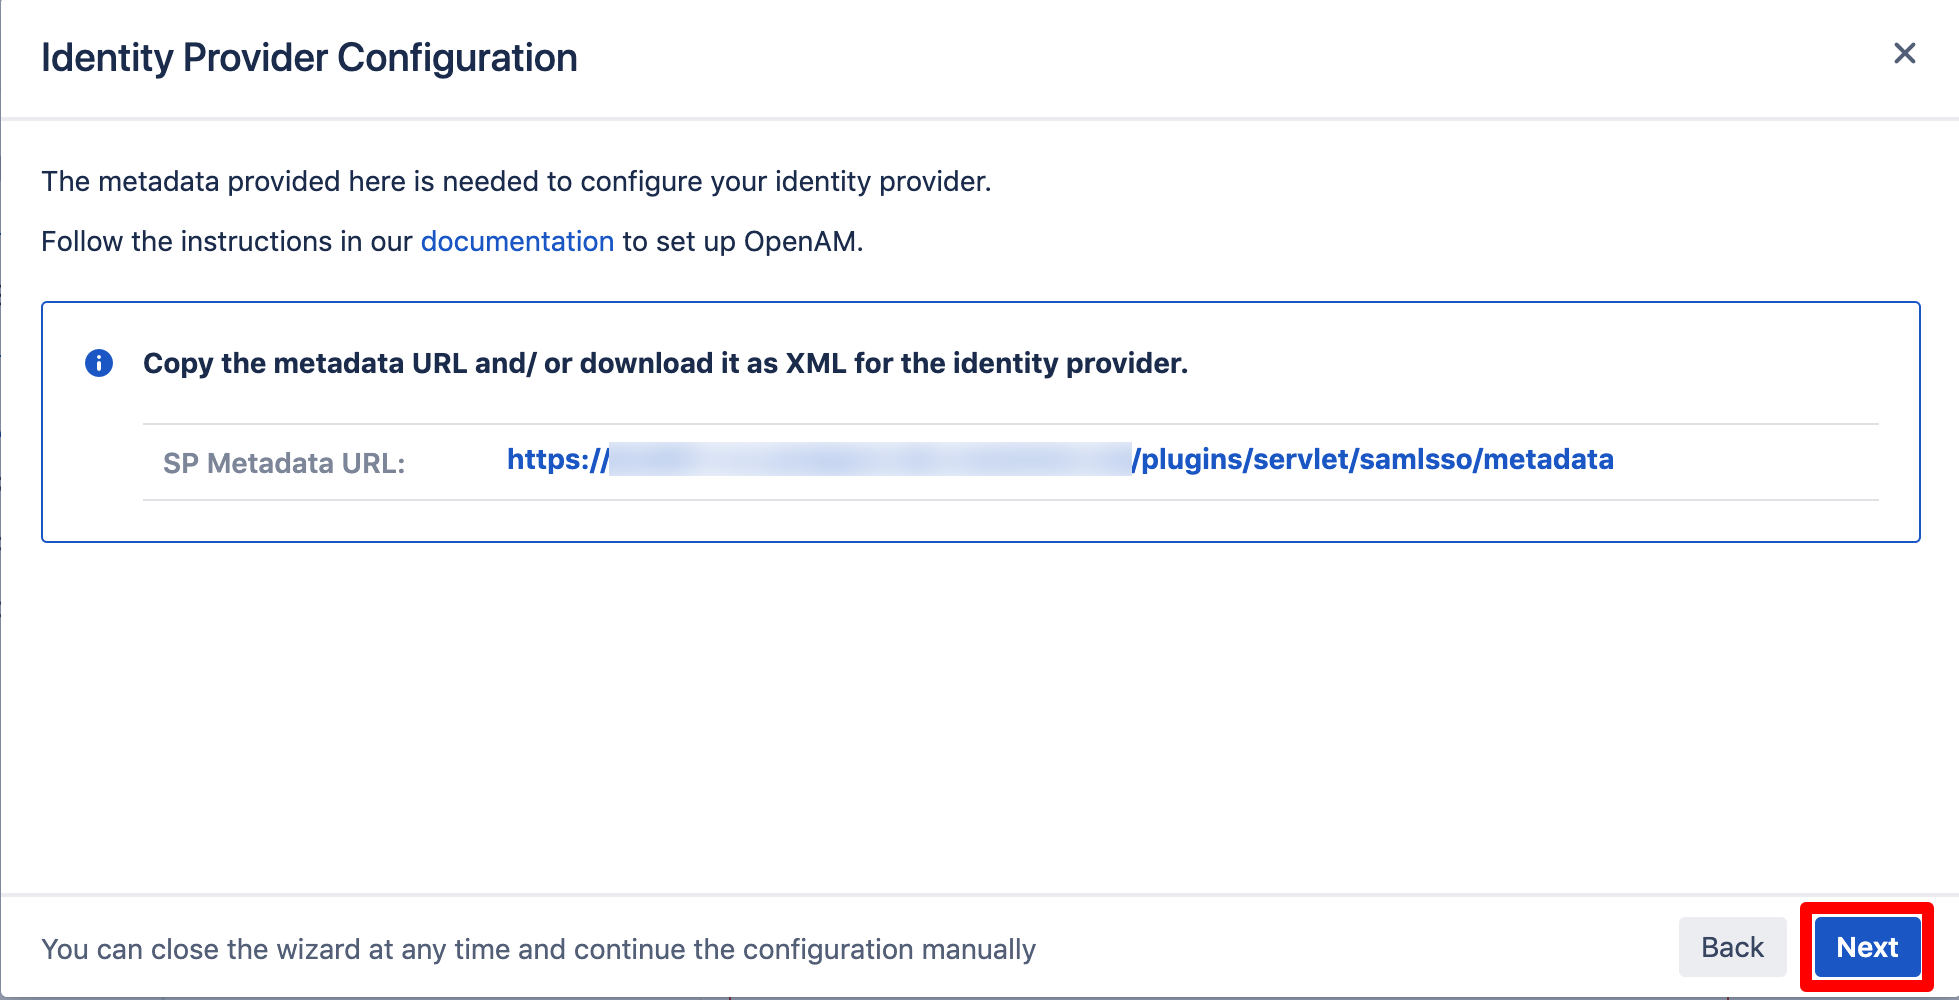
Here, click on "Next" again. You might recognise the provided URL since you added them in OpenAM before.
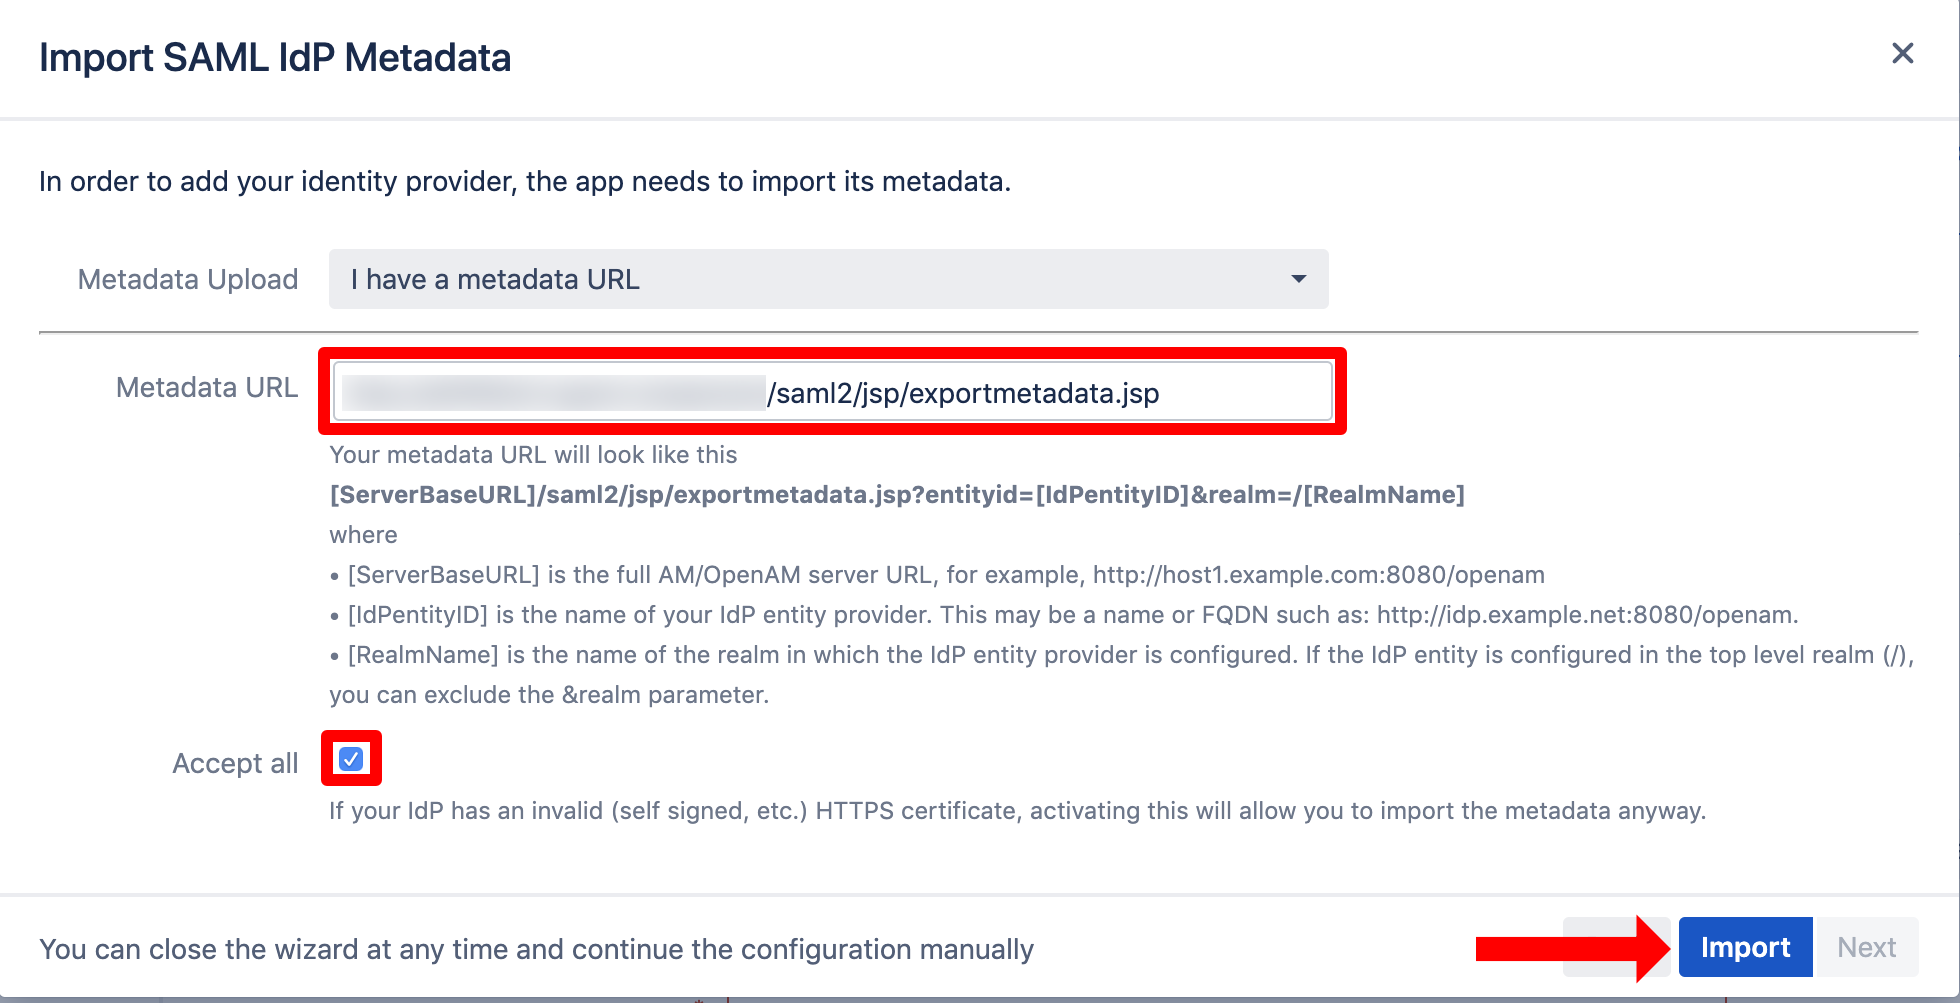
Now, provide the Metadata URL. It will look like this [ServerBaseURL]/saml2/jsp/exportmetadata.jsp?entityid=[IdPentityID]&realm=/[RealmName]
where
• [ServerBaseURL] is the full AM/OpenAM server URL, for example, http://host1.example.com:8080/openam
• [IdPentityID] is the name of your IdP entity provider. This may be a name or FQDN such as: http://idp.example.net:8080/openam.
• [RealmName] is the name of the realm in which the IdP entity provider is configured. If the IdP entity is configured in the top level realm (/), you can exclude the &realm parameter.
Click Import to proceed.
You can also configure the plugin without the metadata XML URL. Please choose another option from the dropdown menu and proceed as the wizard guides you.
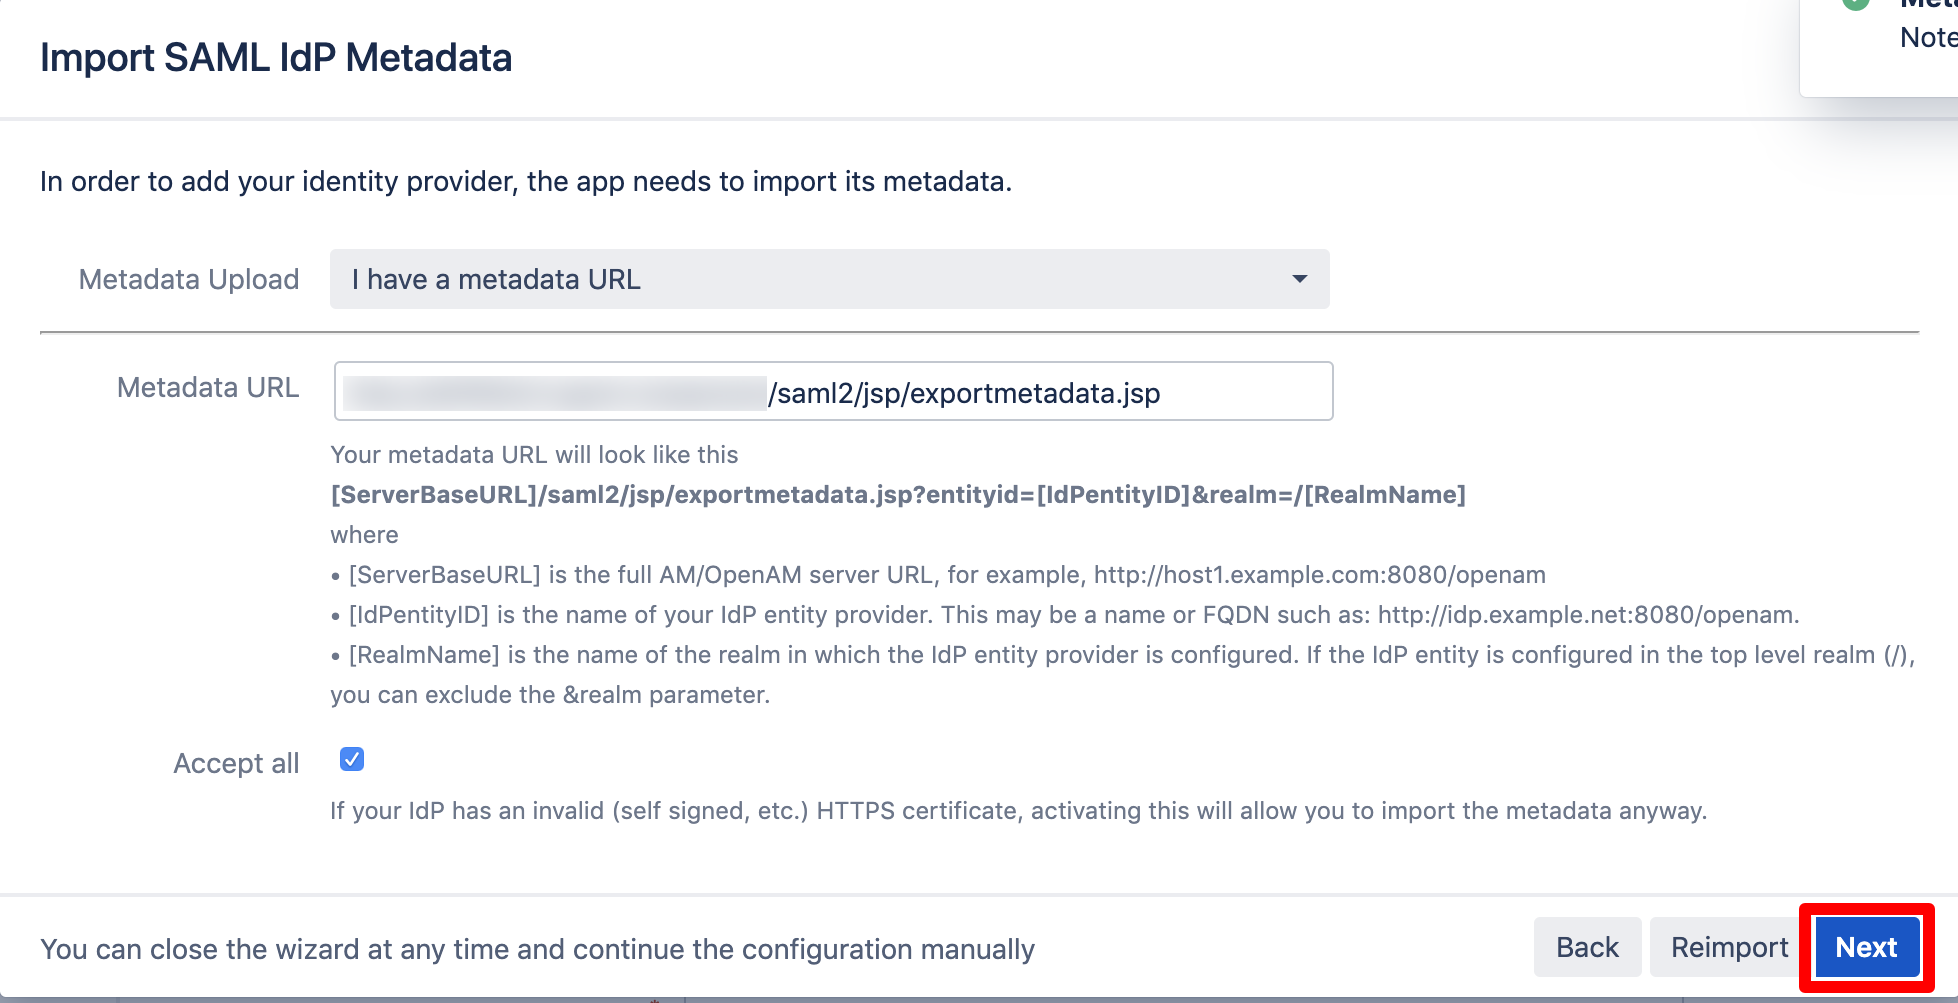
Click Next to continue.
If you configured your Atlassian product and your Identity Provider in a common way, you do not need to change anything here. In that case, just click "Next".

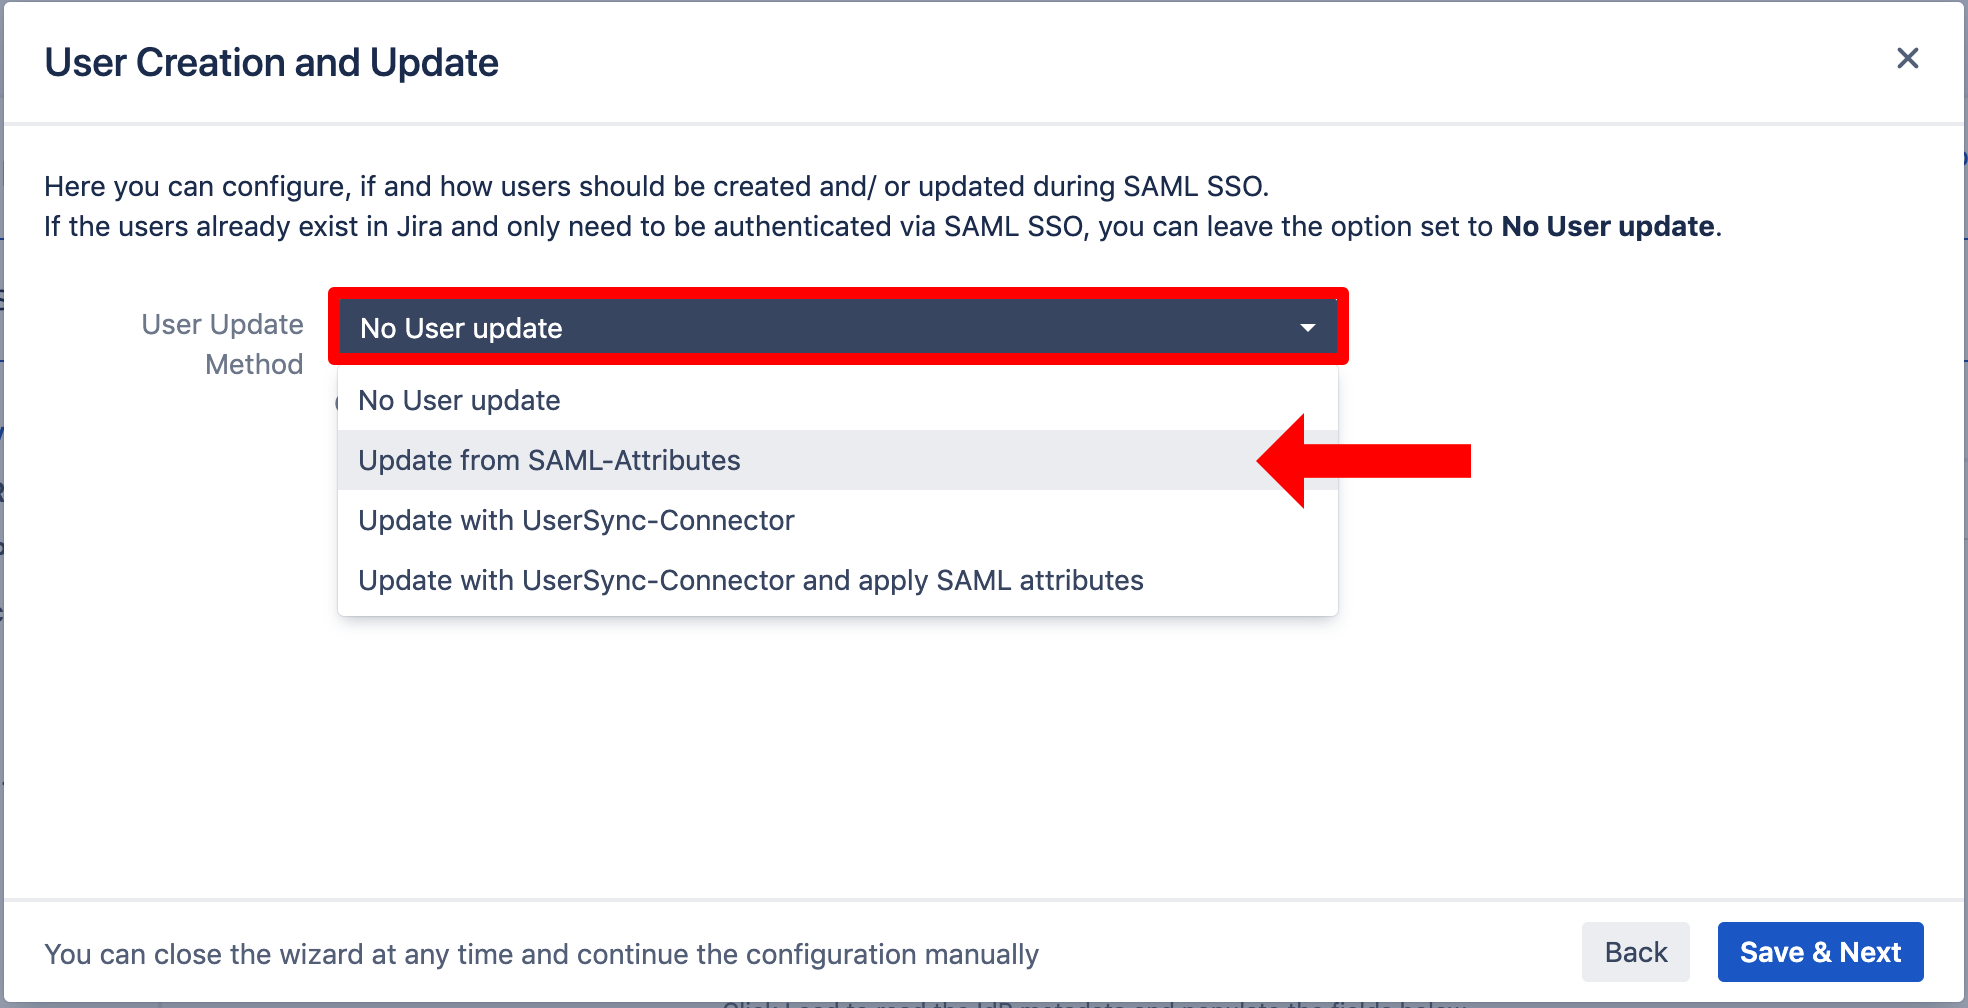
For User update, choose "Update from SAML-Attributes".
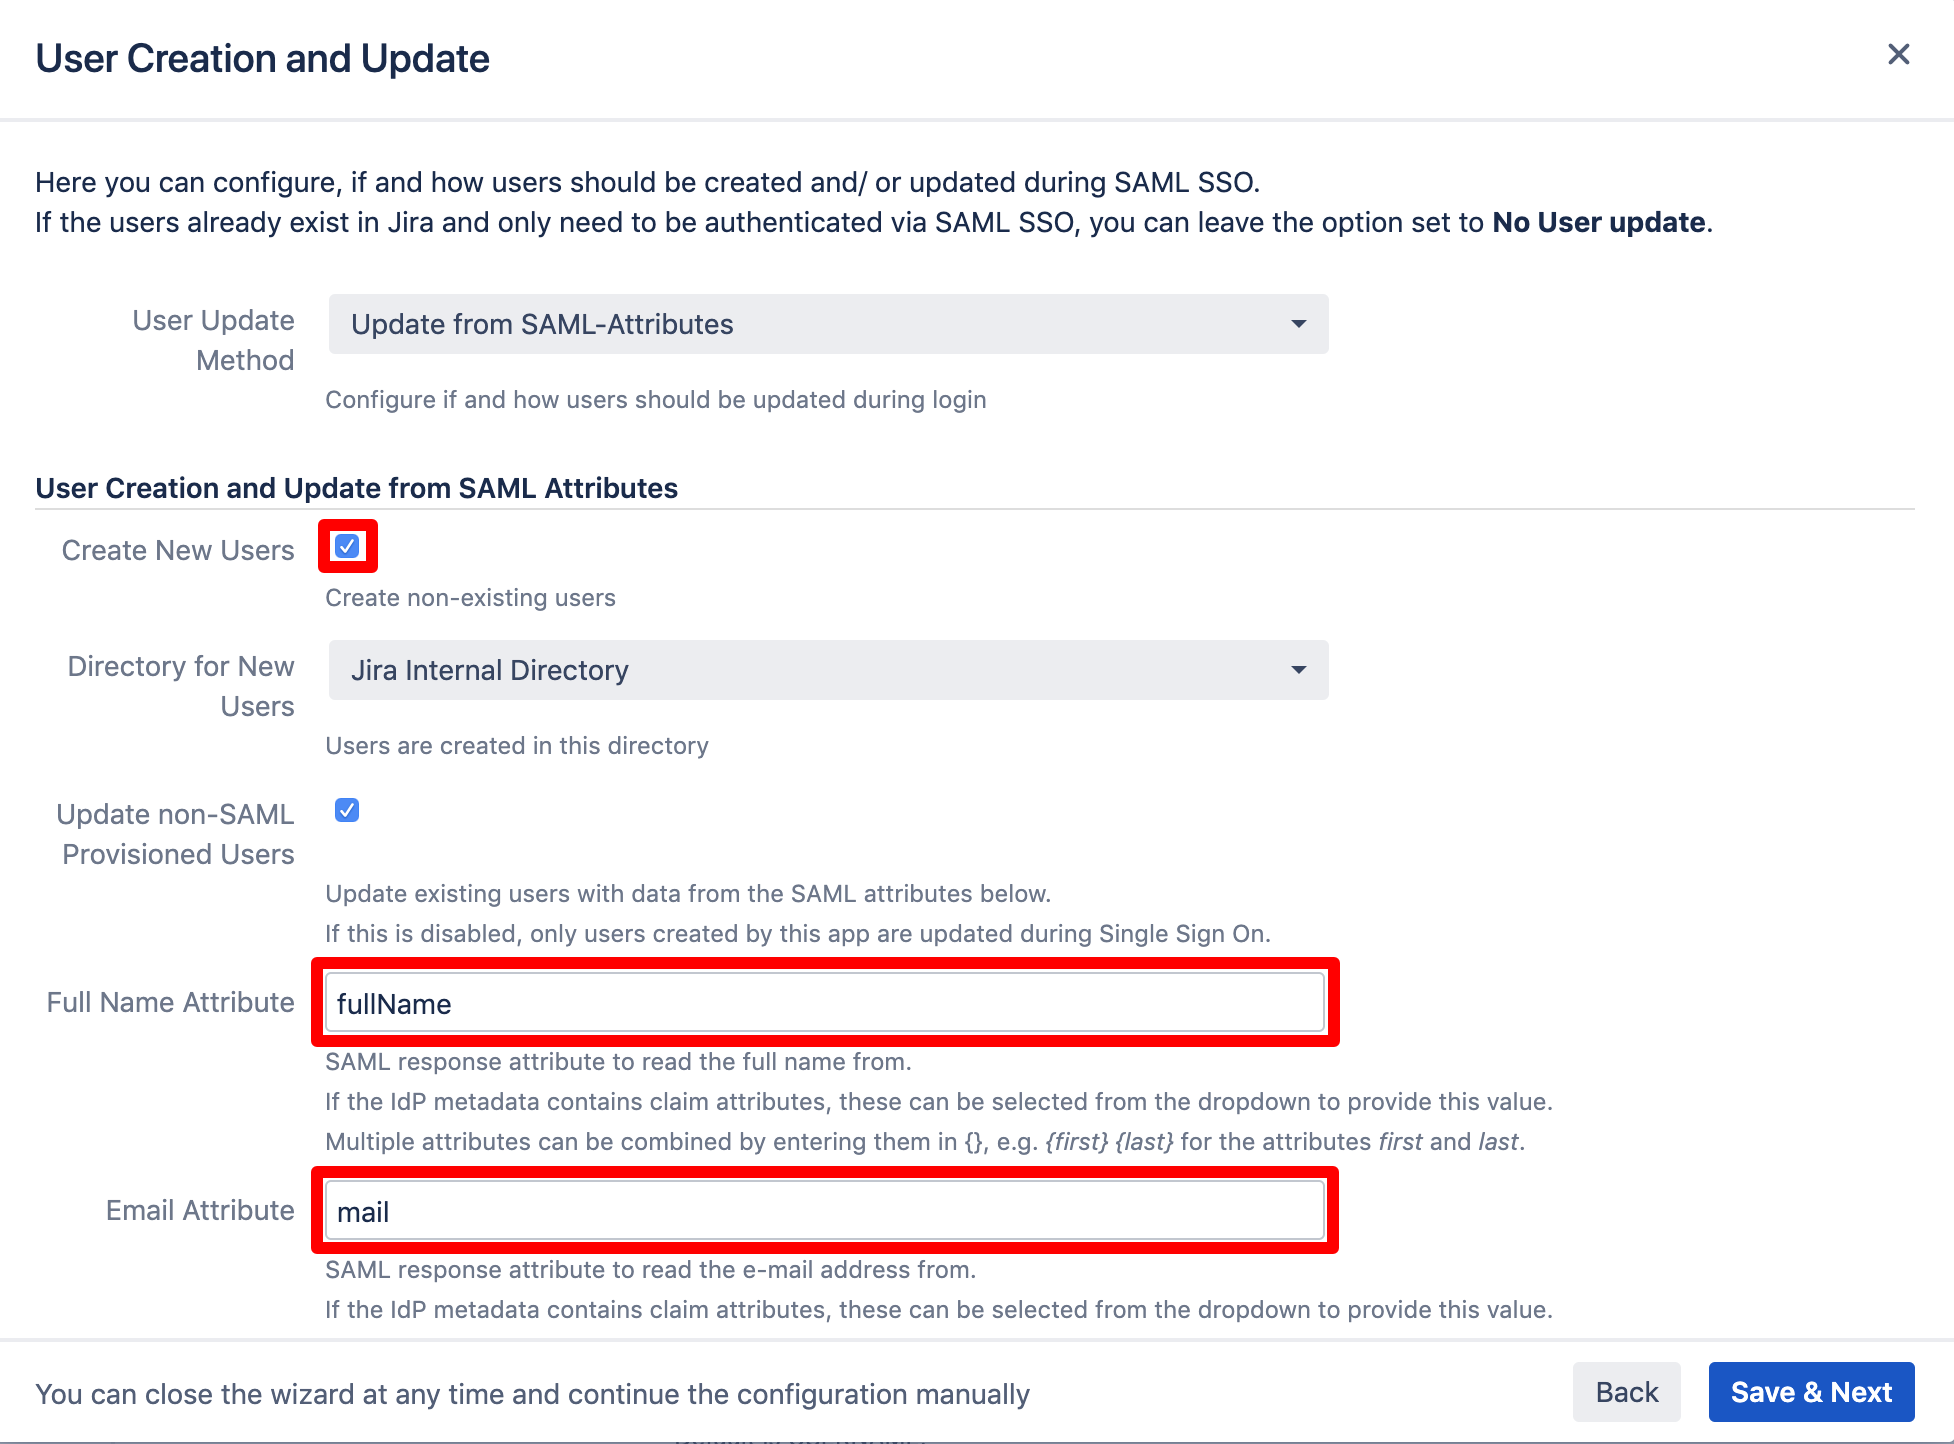
The window now expands. There are various options you can set. For this tutorial, new users should be created automatically when first accessing your Atlassian product instance, thus tick "Create New Users".
You can also choose the directory for new users or to update non-SAML provisioned users, i.e. which are already present in your Atlassian product. By activating the option, they can also be updated via SAML attributes when they log in.
Further, the "Full Name Attribute" and "Email Attribute" must be set which you have configured when setting up OpenAM. Set the first to "fullName" and the second to "mail" (both without quotation marks).
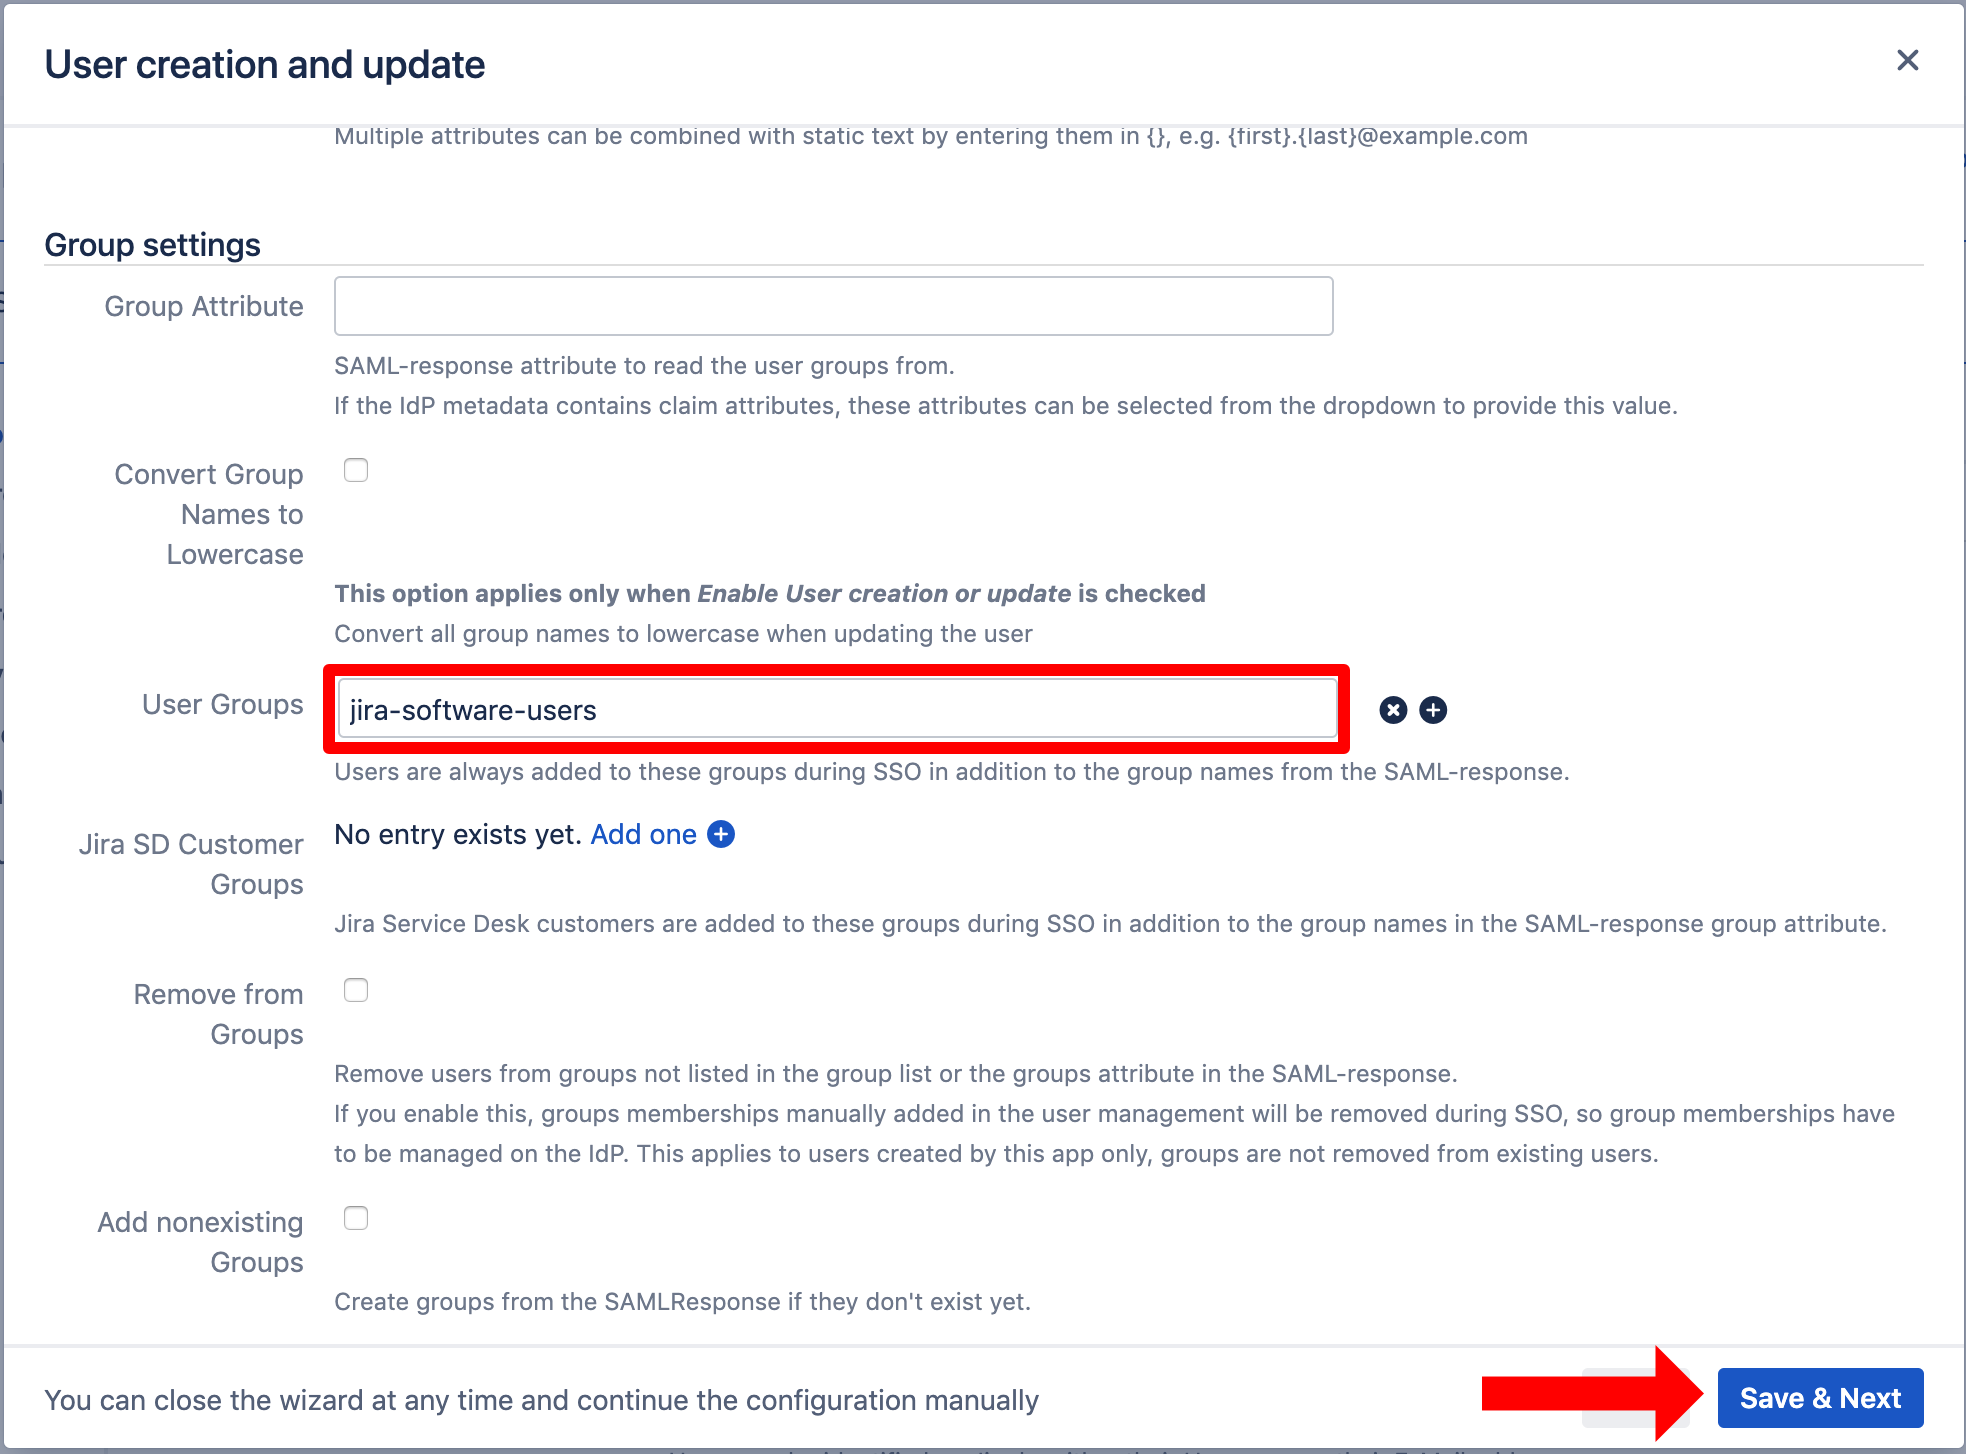
Scroll down to the group settings.
Depending on your Atlassian product, it is a good idea to set (default) user group(s) for new users, such as "jira-software-users" for Jira or "confluence-users" for Confluence. Without assigning new users to the product specific group, they are not able to use your Atlassian product. Also, feel free to activate any option which suits your needs.
Testing SSO
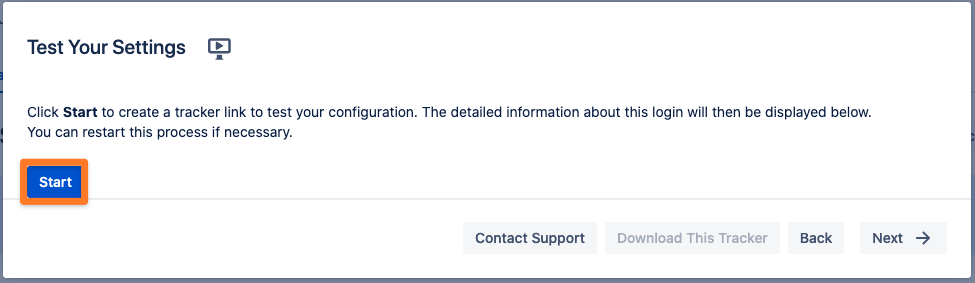
The wizard also allows to test the Single Sign On. Just follow the steps to test if the login works as expected.
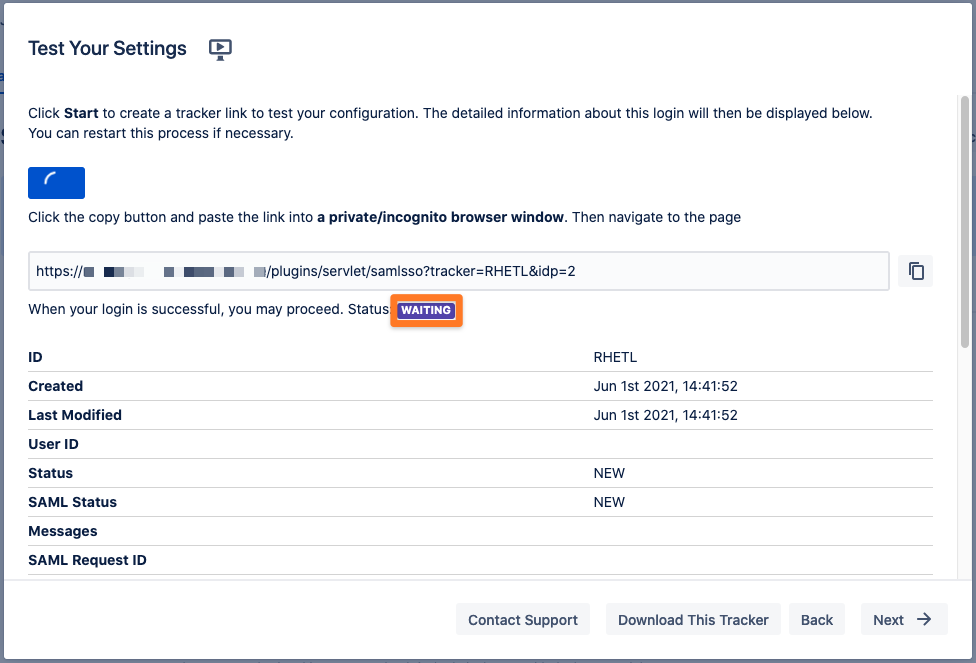
Click on "Start test" to proceed.
Copy the orange marked link and open a new incognito/private tab or a different web browser. Then, paste the link and navigate to it.
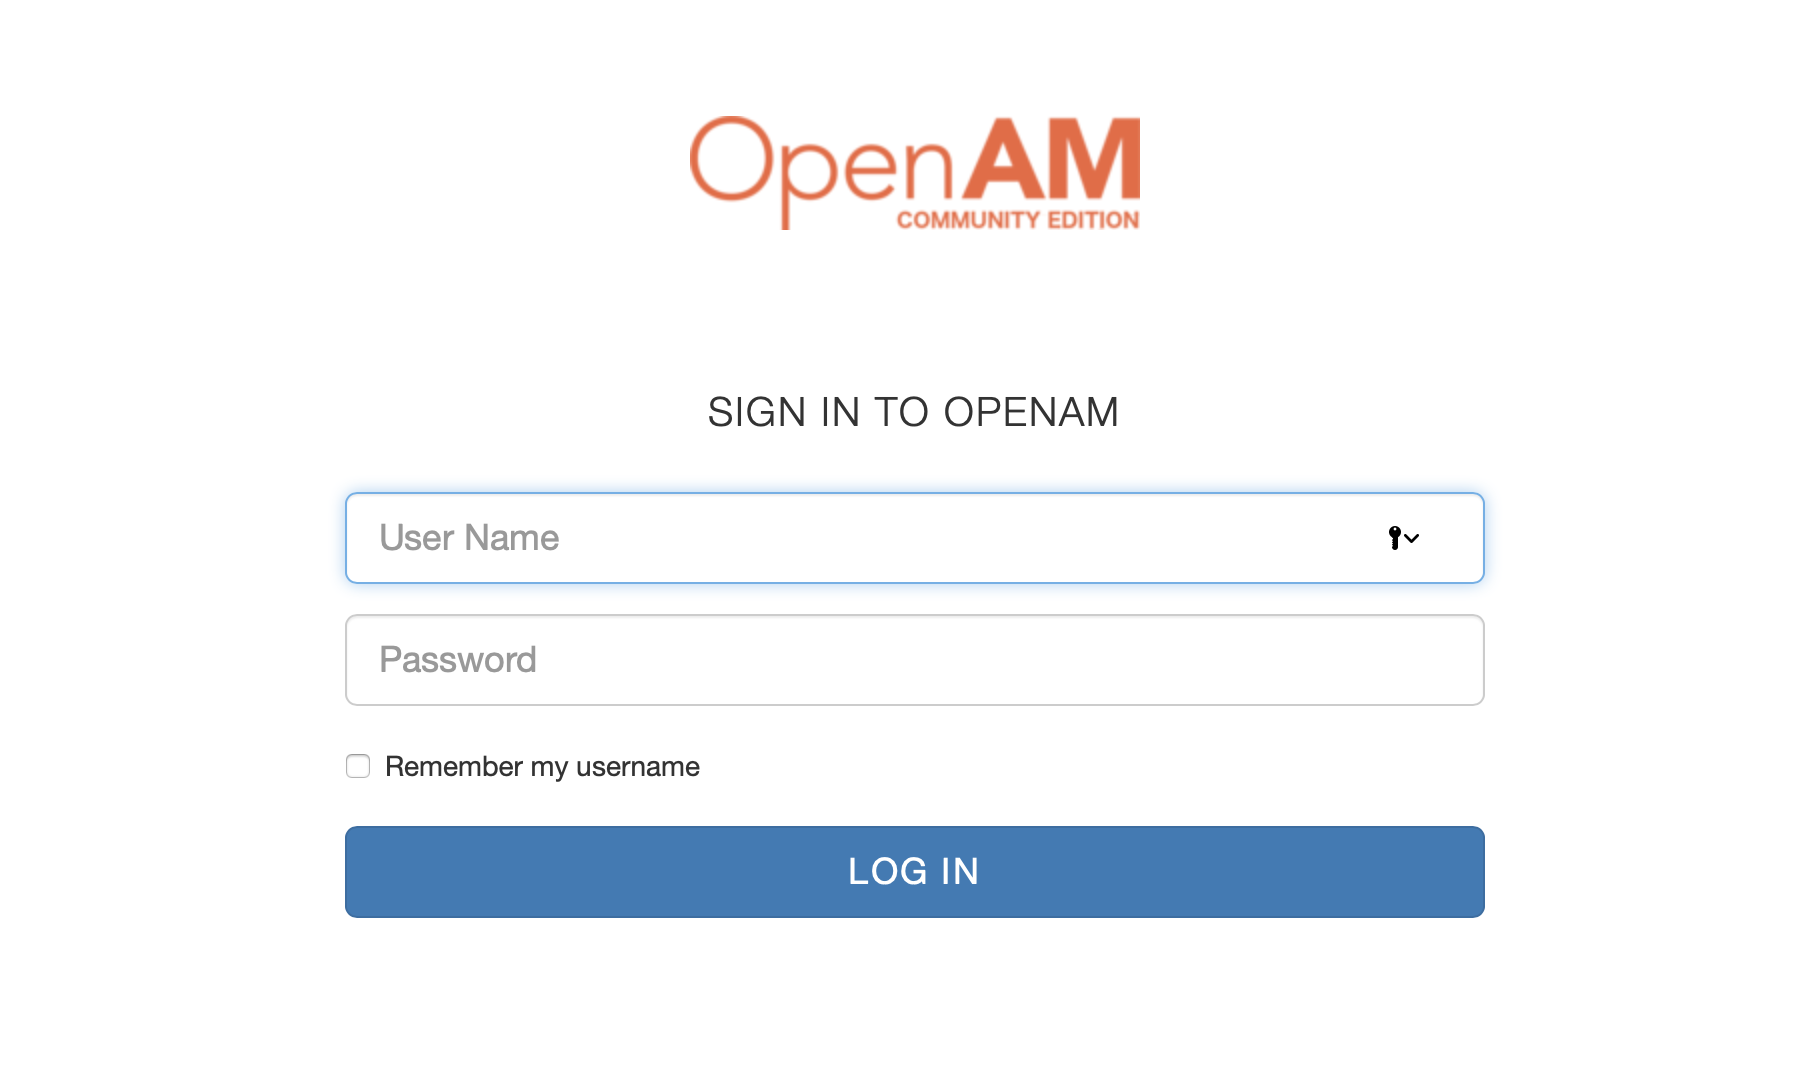
You will be now redirected to OpenAM's login page. Please log-in with you username and password.
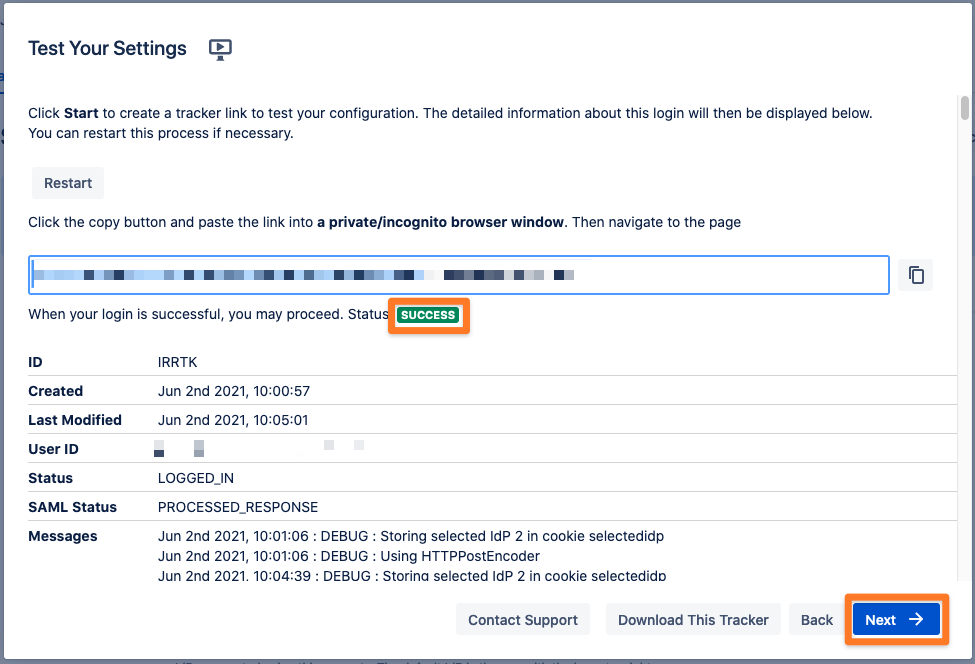
If everything worked fine, you will log in into your Atlassian product. In the other tab/browser in which you were configuring the SAML SSO plugin, you can see also the "SUCCESS" status, if everything worked as expected. Click Next to proceed.
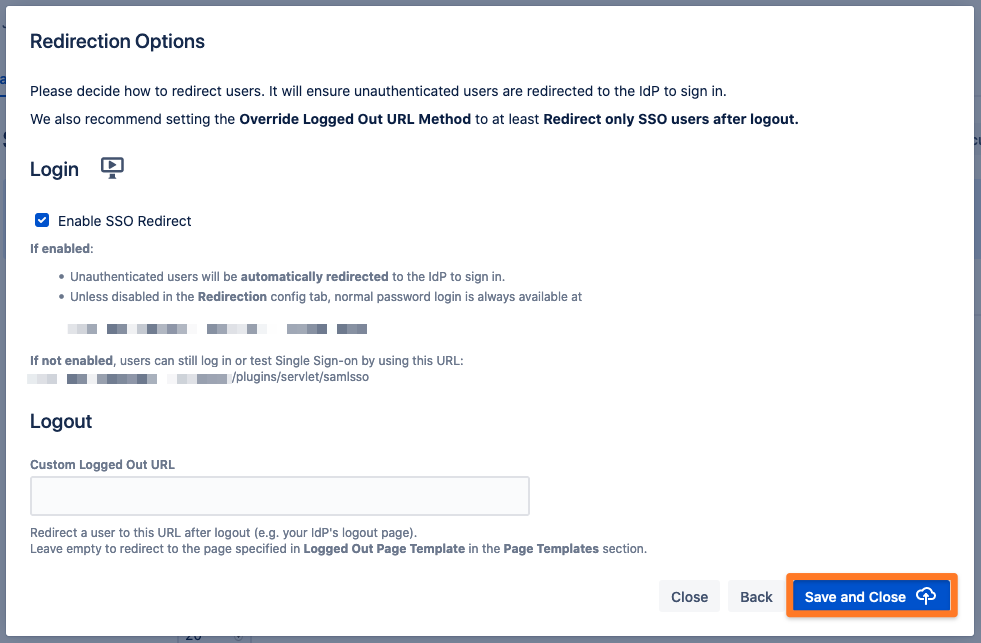
SSO Redirection
As a last step, you can set the Enable SSO Redirect option. If set, all users will be redirected to Single Sign On, thus they will be logged in via the IdP. Click on Save & Close to finish the configuration.