
LinkedIn with Manual Provisioning
Goal
After completing this setup guide, you will have set up LinkedIn with manual provisioning and your Atlassian product for the SAML SSO for Atlassian Server or Data Center app. Additionally, you will enable the SSO redirection and test SSO.
If you need help, please reach out to us at https://www.resolution.de/go/support. You can also book a free meeting via https://www.resolution.de/go/calendly.
Prerequisites
To use the SAML SSO app for Atlassian Server or Data Center with Azure AD, you need the following:
A LinkedIn Account
A (trial) subscription for the SAML SSO app
Admin access to your Atlassian product
Step-by-Step Setup Guide
Install the SAML SSO App
In your Atlassian product, open the in-product marketplace as described in the Atlassian documentation.
Search for "resolution saml" and click "Install" for SAML Single Sign On (SSO) by resolution Reichert Network Solutions GmbH.
After the installation is complete, click Manage Apps/Addons.

Configure SAML SSO
After you clicked "Configure", the Wizard will be triggered. If not, or if you want to add another Identity Prover (IdP) to your existing configuration, click on "+ Add IdP". This guide assumes, that there is no IdP configured.
The Wizard greets you with information, click on "Add new IdP" to proceed.

Choose LinkedIn for your Identity Provider and click Next.
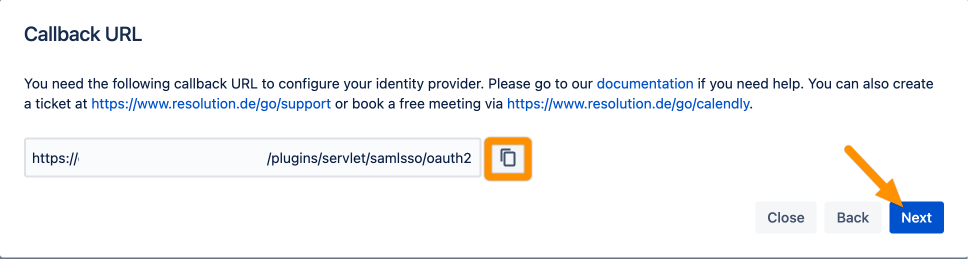
Copy the Callback URL and keep it ready for the next step. Click Next.
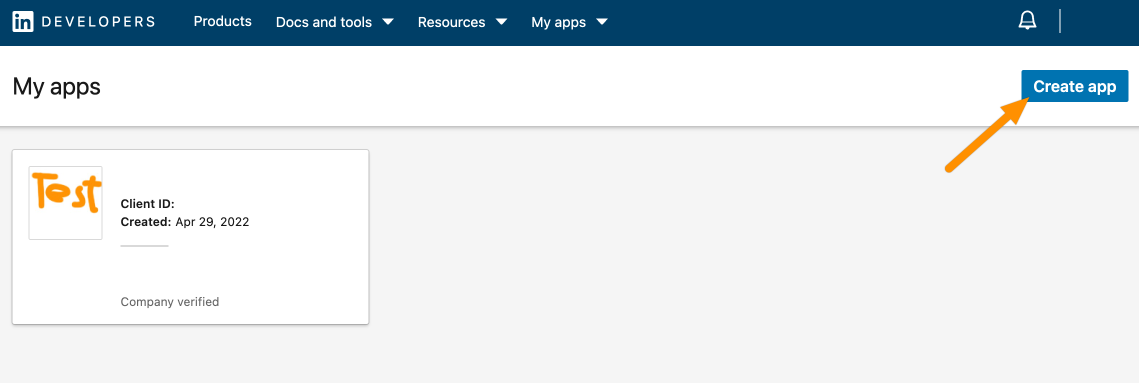
Go to https://www.linkedin.com/developers/apps and log in with your LinkedIn account.
Click Create app.
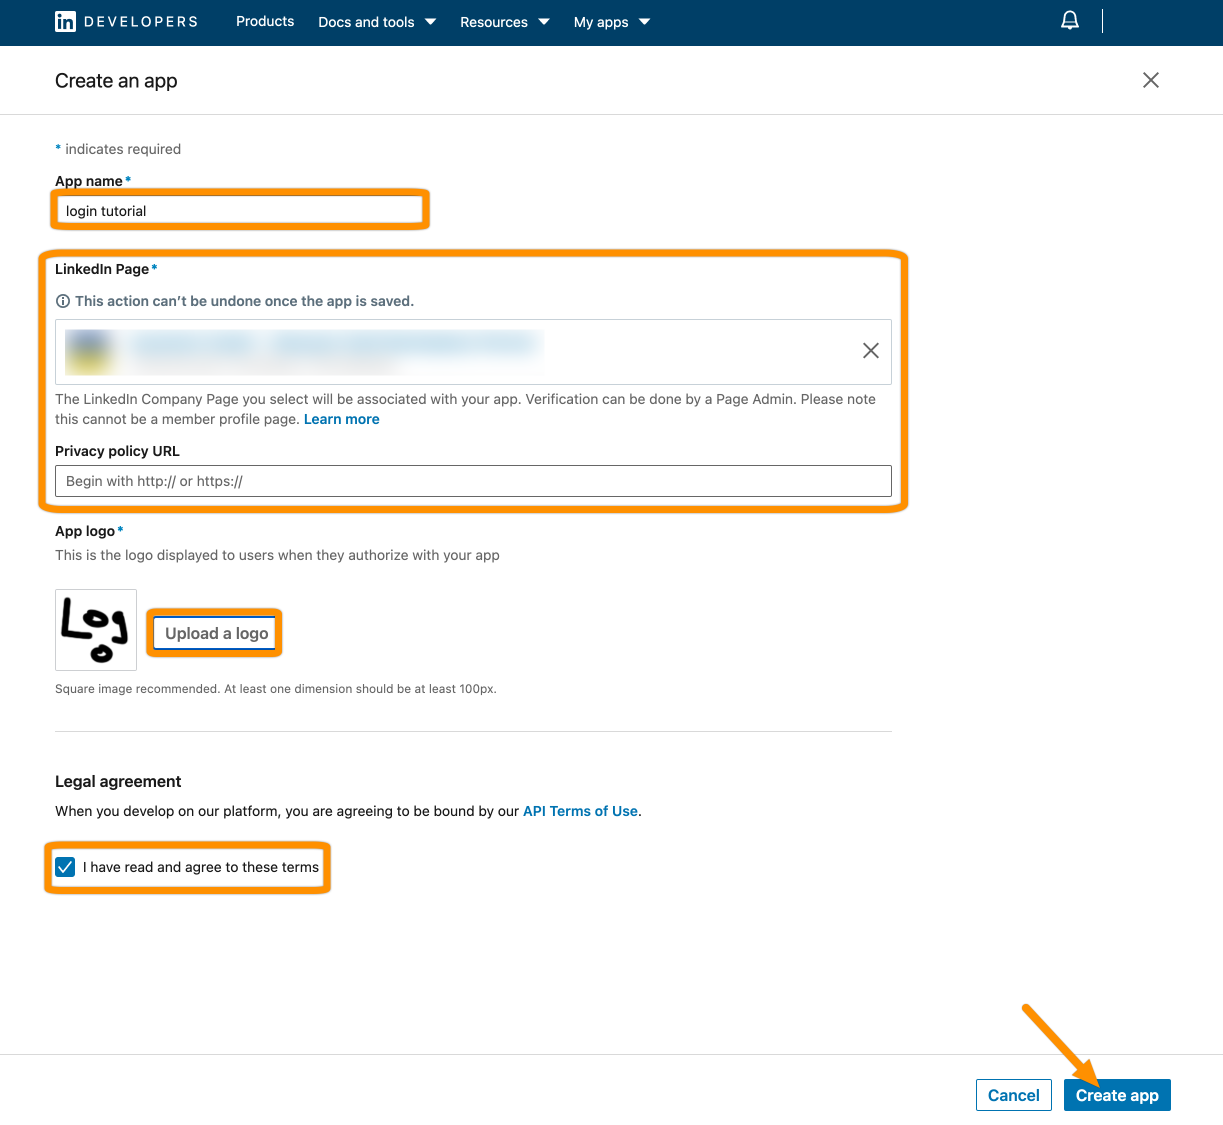
Provide an App name, either link or create a new LinkedIn page, upload a logo and accept the terms. Then click Create app.
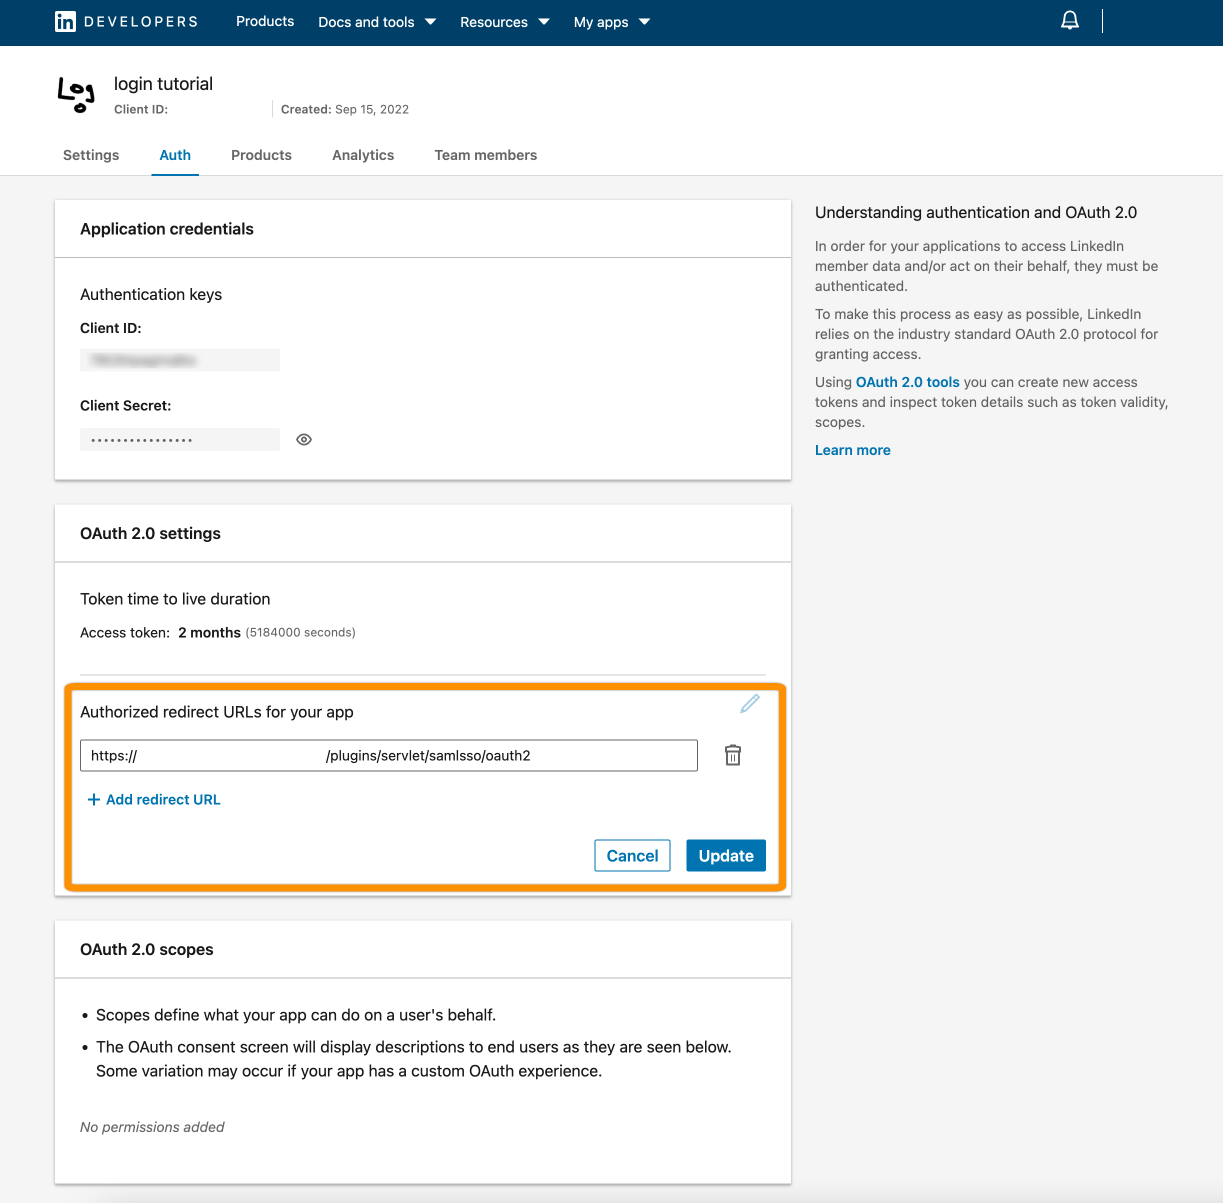
Click Auth from the item bar. Next, copy the Client ID and Client Secret (click the eye button) to your favorite text editor.
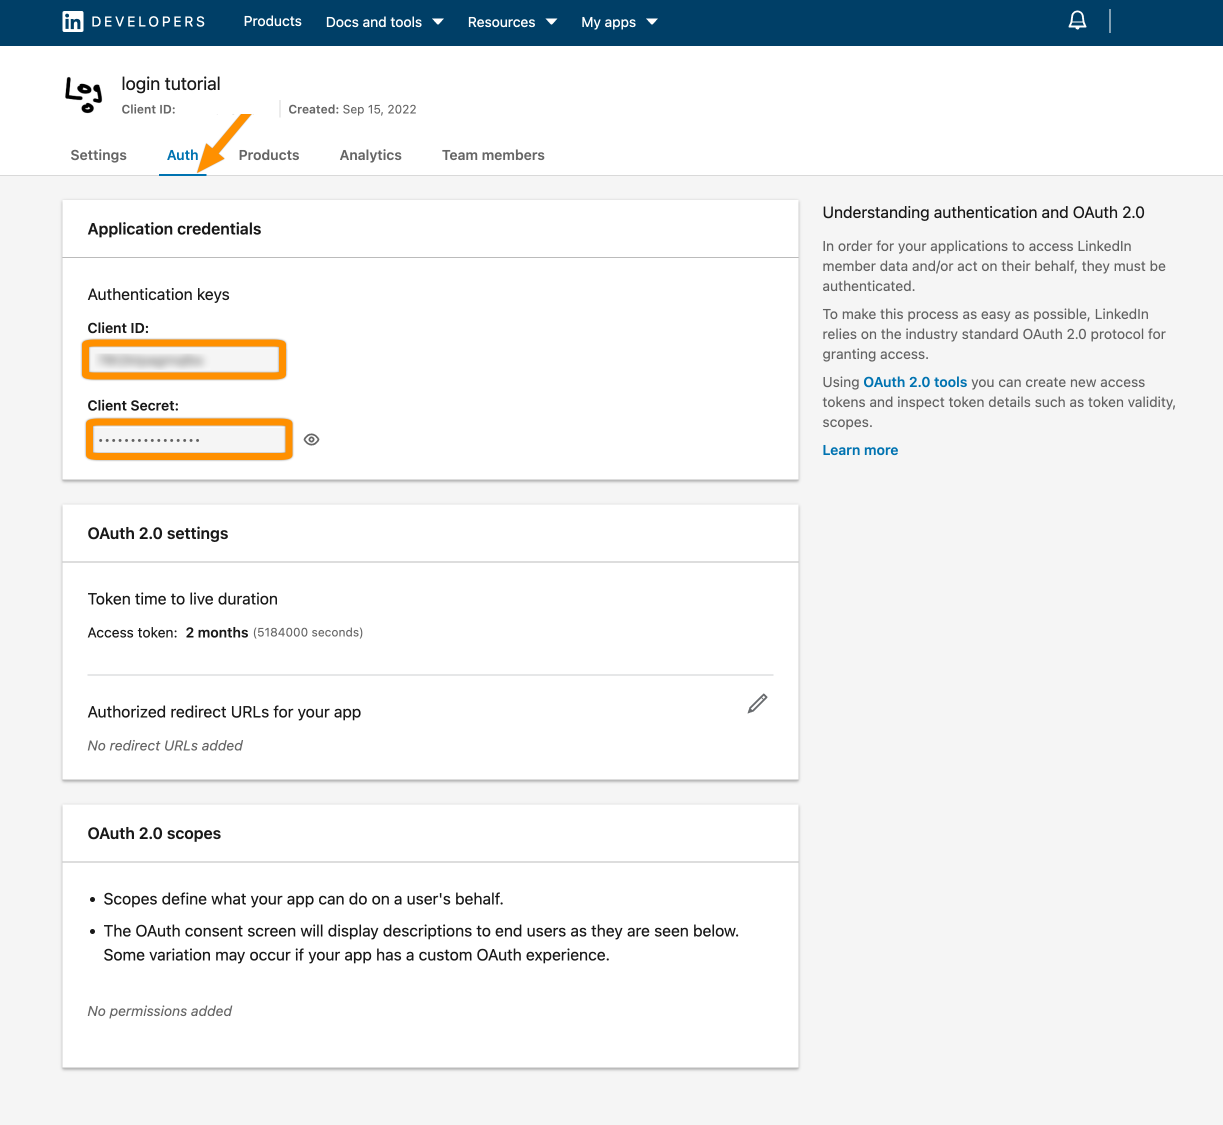
Now, click the pen icon and add the callback URL from the wizard. Hit Update to save this.
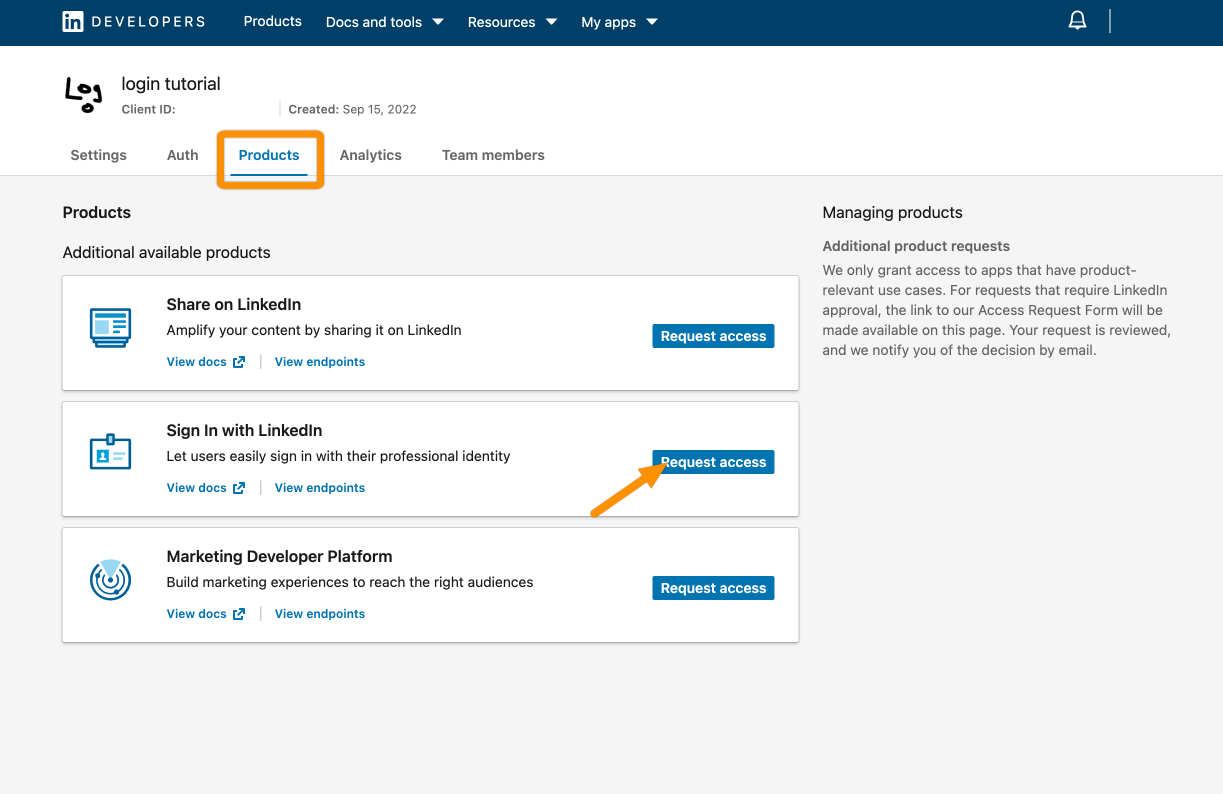
Next, we must activate Sign in with LinkedIn. Click Products and then Request access.
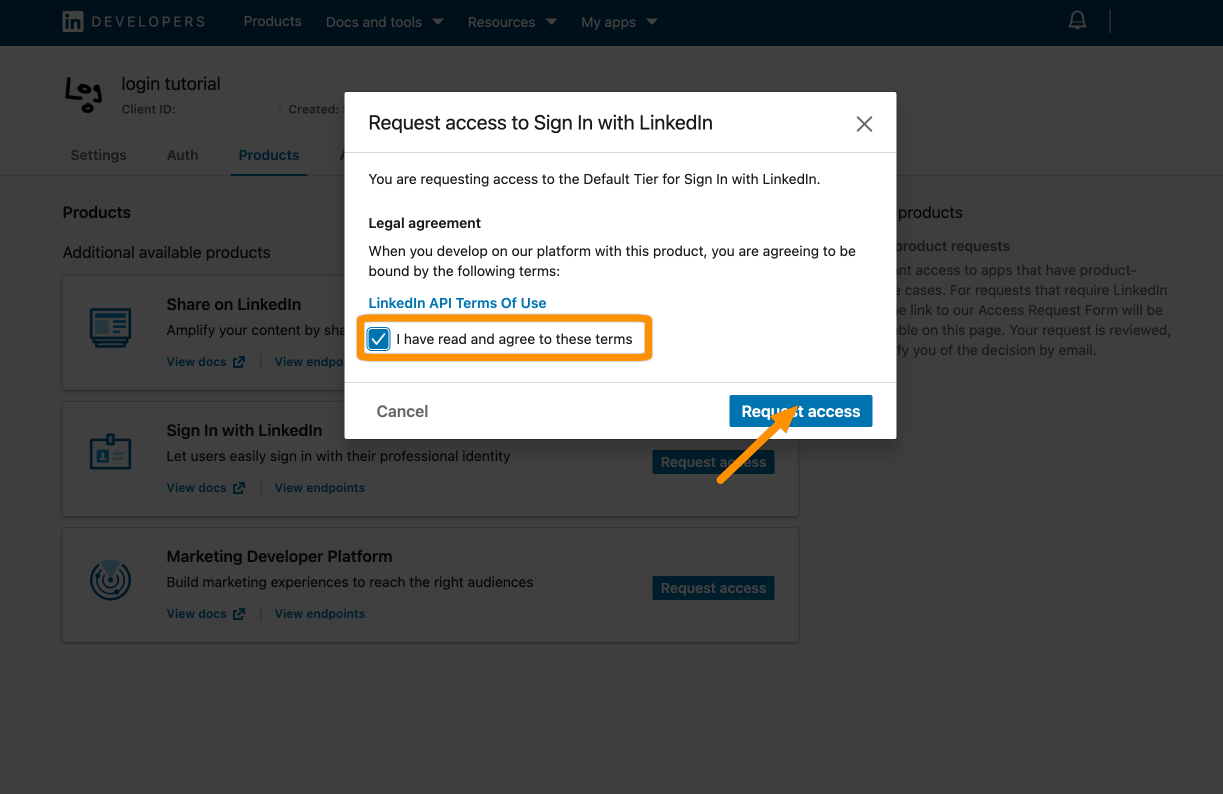
Mark that you "read" the terms and click Request access.
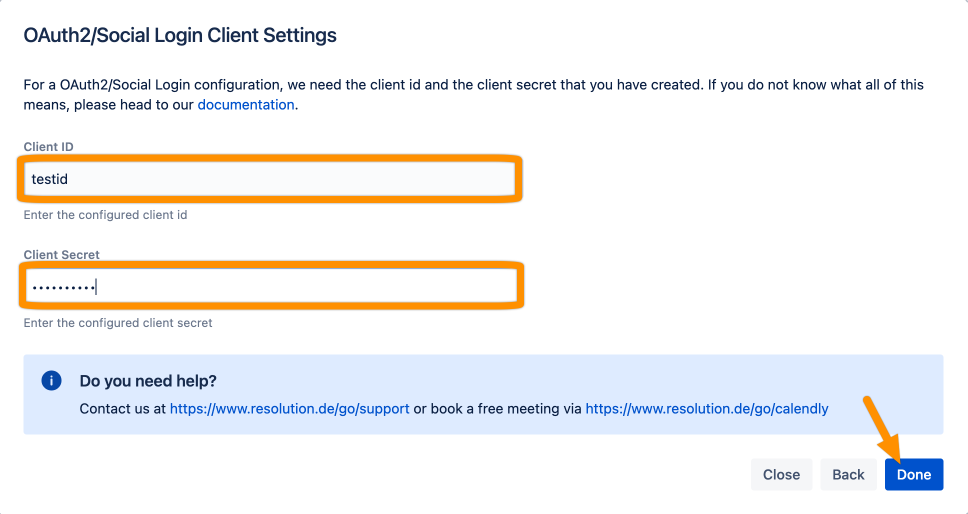
Add the Client ID and Client Secret. Click Done.
Click Save to save the configuration.
That's it!