
OpenID Connector for AD FS with LDAP User Directory
Goal
Configure SAML Single Sign-On for Atlassian Data Center and Server to work with AD FS and an existing LDAP based directory.
Prerequisites
ADFS 2.0/2.1/3.0/2016
Atlassian Data Center / Server application with a user directory of type LDAP
Your Atlassian application must be accessible via HTTPS. (read more about it in the Atlassian documentation, i.e. for Jira or Confluence)
This is necessary because ADFS accepts only HTTPS-URLs for SAML endpoints.
Step-by-Step Setup Guide
Install the SAML SSO App
In your Atlassian product, open the in-product marketplace as described in the Atlassian documentation.
Search for "resolution saml" and click "Install" for SAML Single Sign On (SSO) by resolution Reichert Network Solutions GmbH.
After the installation is complete, click Manage Apps/Addons.

Configure SAML SSO
For the next steps, please go to Manage apps (or addons), choose SAML SSO and click Configure.
First Steps - Wizard
After you clicked "Configure", the Wizard will be triggered. If not, or if you want to add another Identity Prover (IdP) to your existing configuration, click on "+ Add IdP". This guide assumes, that there is no IdP configured.
The Wizard greets you with information, click on "Add new IdP" to proceed.

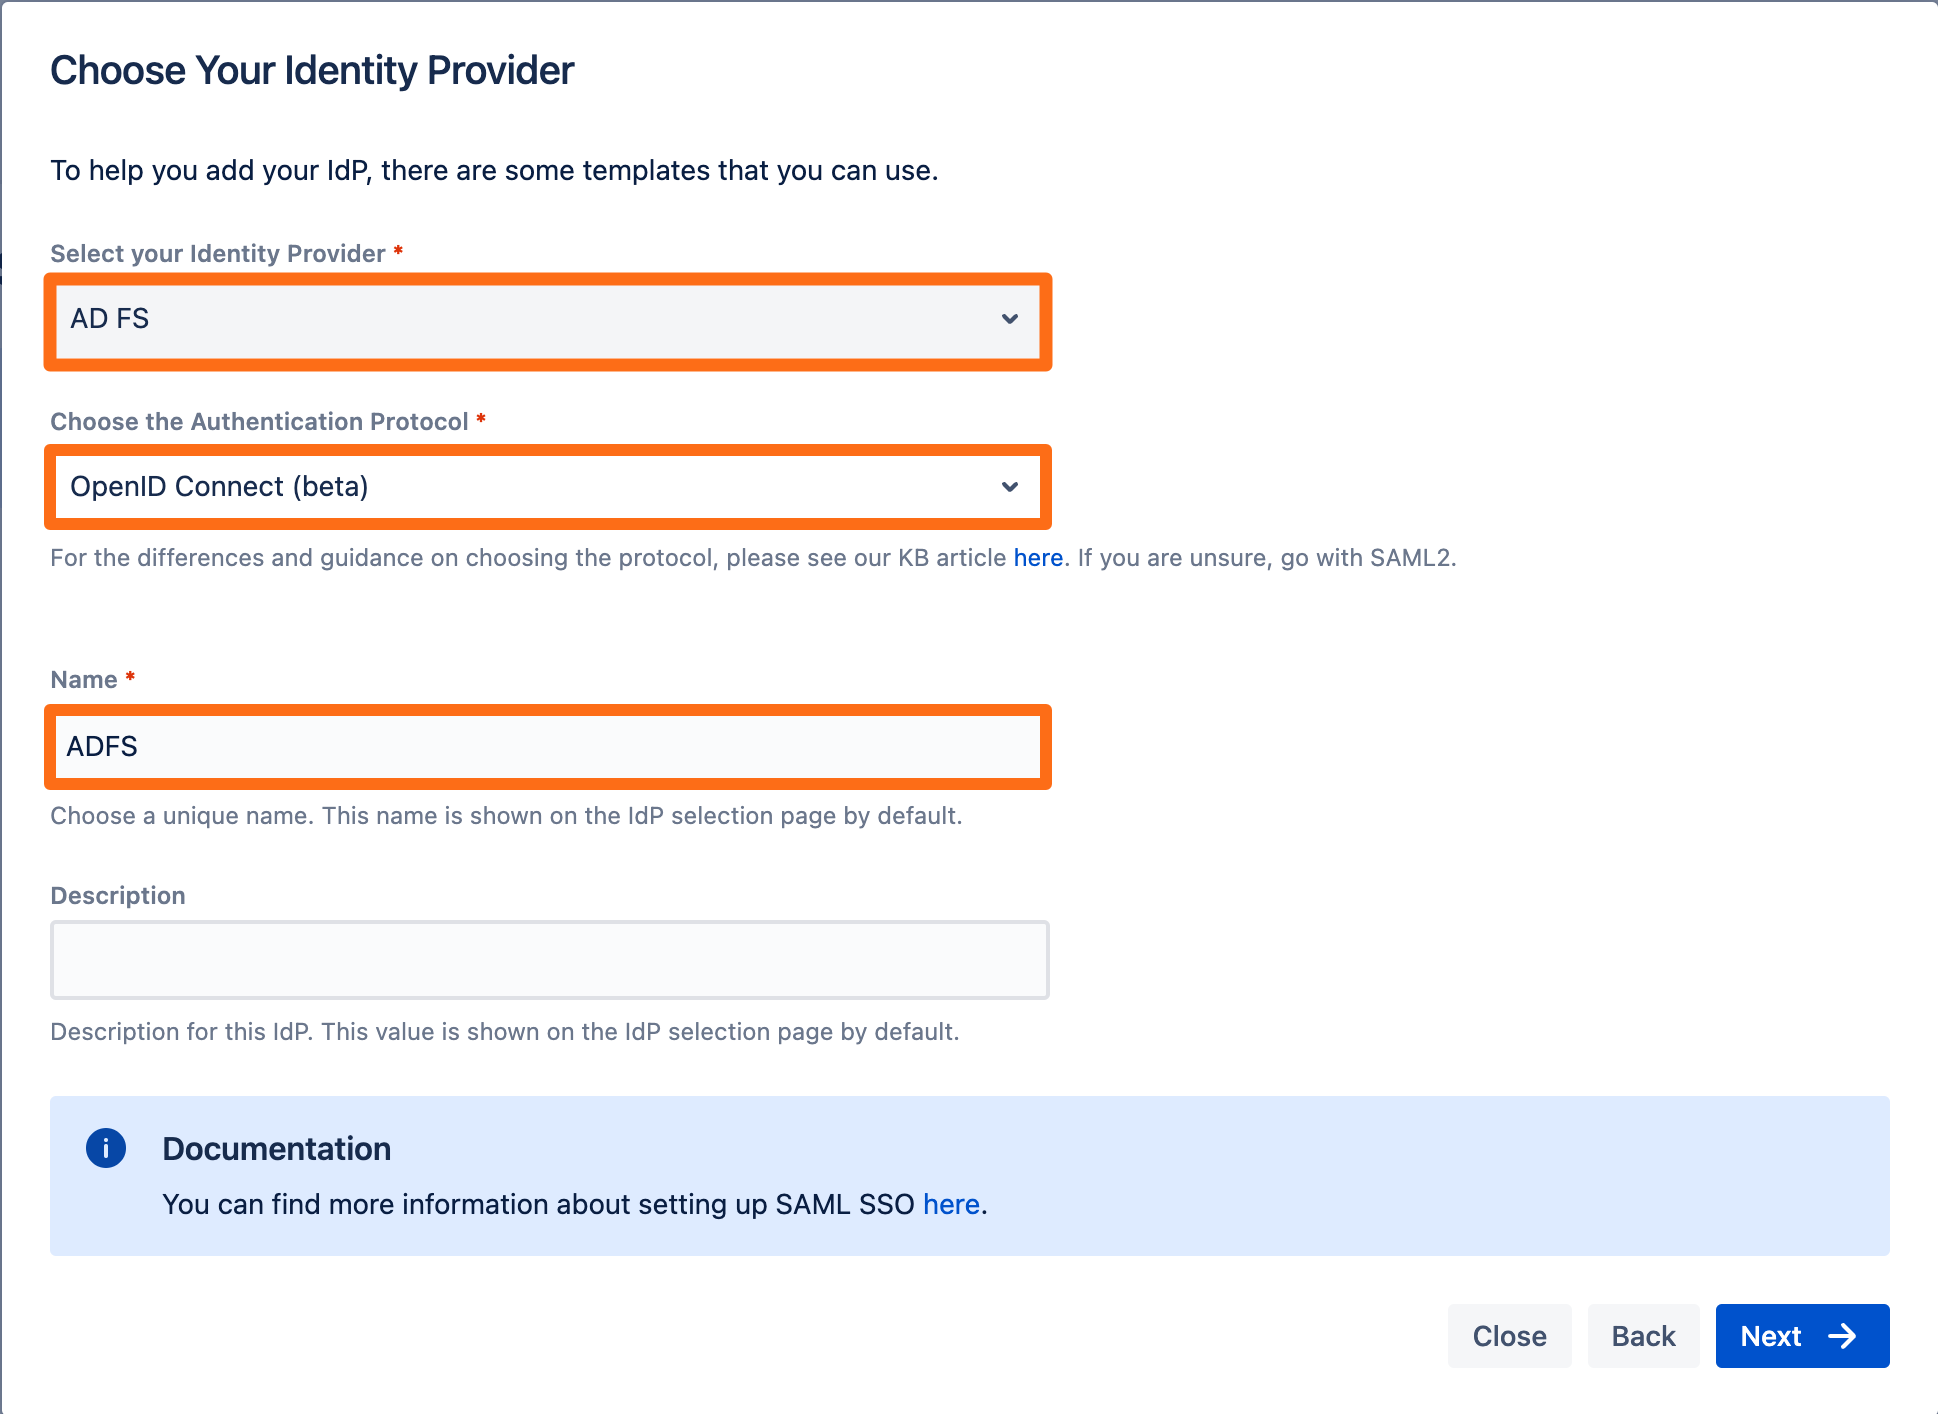
Select ADFS for your identity provider and select OpenID Connect for the authentication protocol. Enter a unique name and click Next to continue.
Copy the callback url to your favourite text editor. 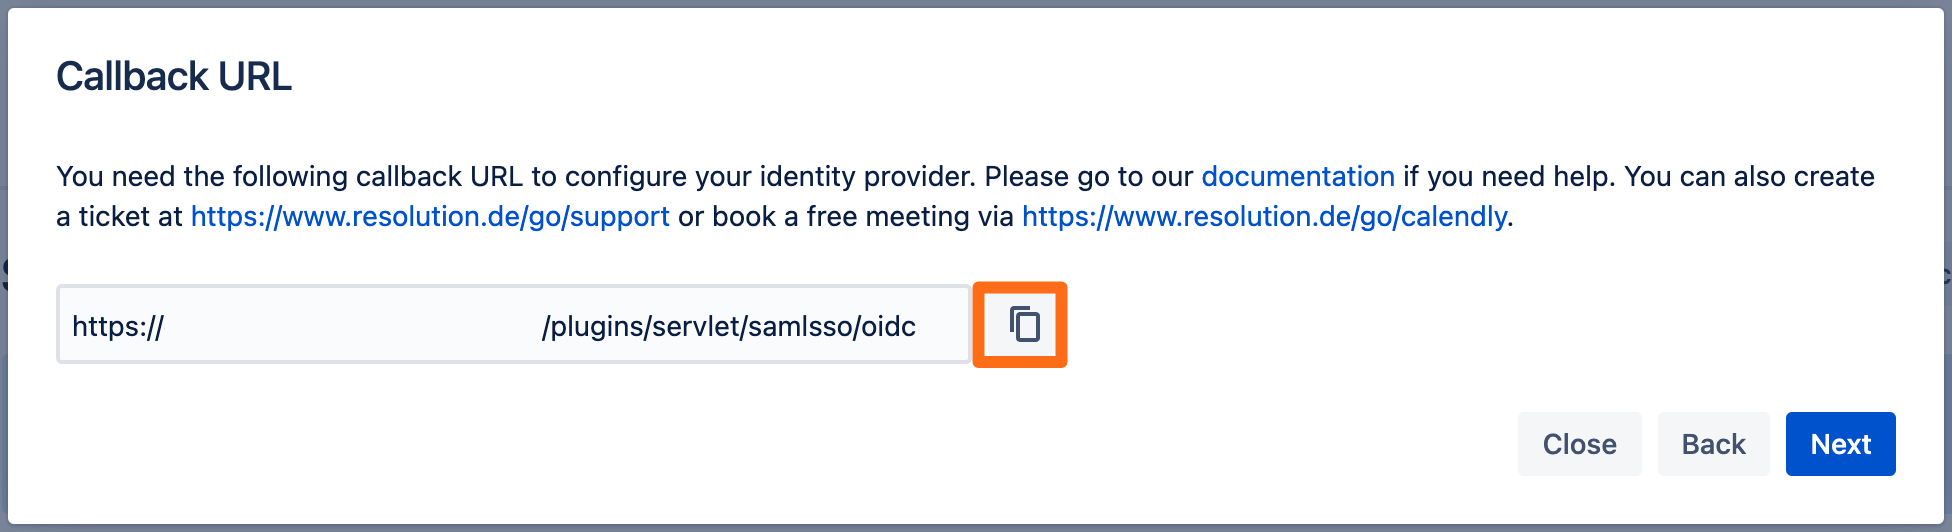
Go to your Windows Server, open the AD FS administration console and click Add Application Group.

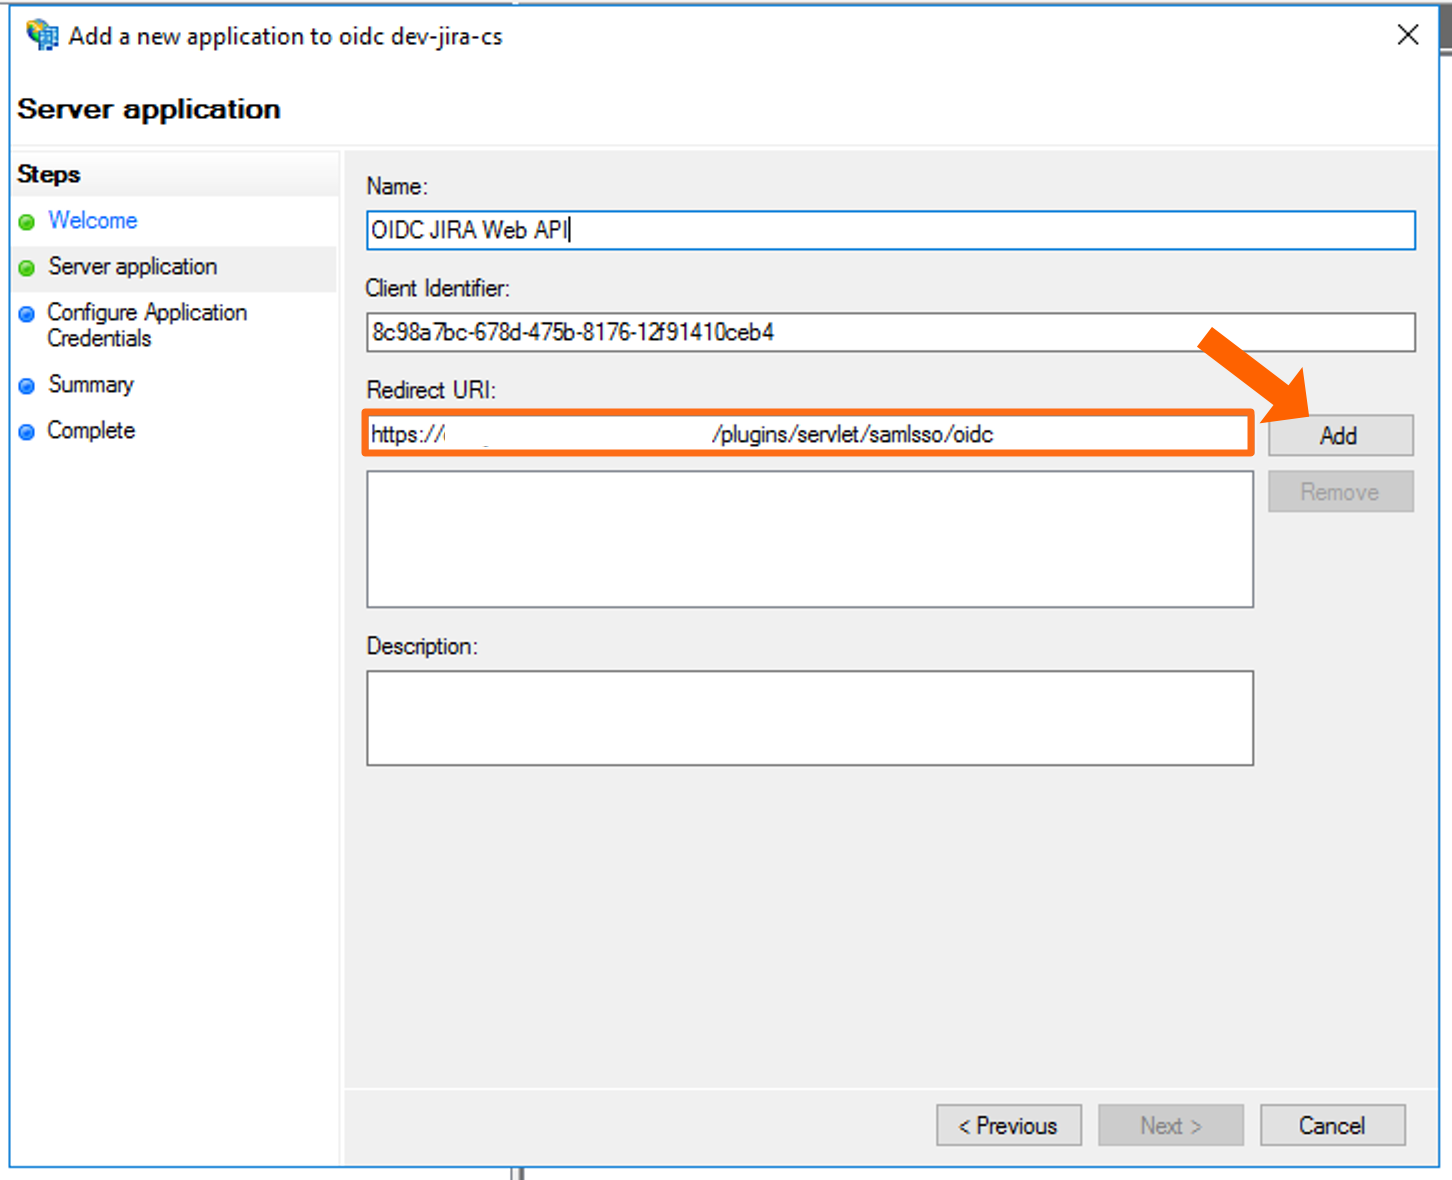
Provide a name for the integration, select Server Application from the Standalone applications section and click Next:
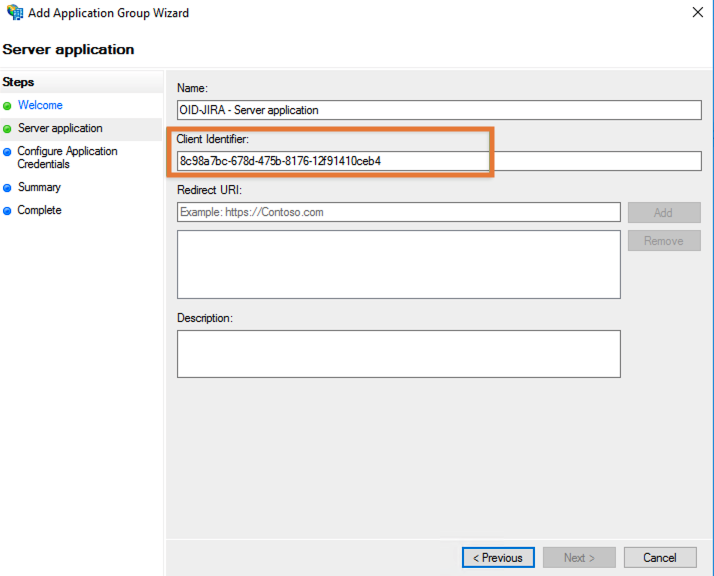
Copy the Client Identifier into a text editor of your choice:
Paste and Add the callback URL from the app configuration and click Next:
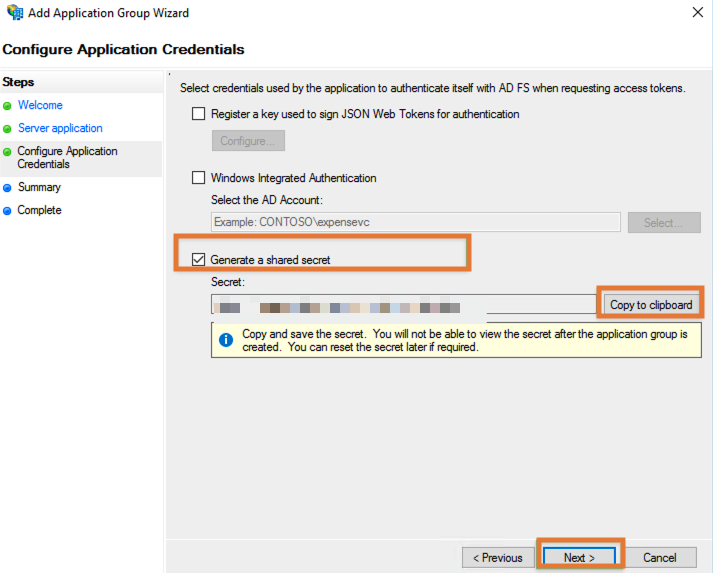
Check the Genrate a shared secret box, and use the Copy to clipboard to get the secret. Add the secret to your text editor, we will need it later. Click Next to continue. On the summary screen press Next again.
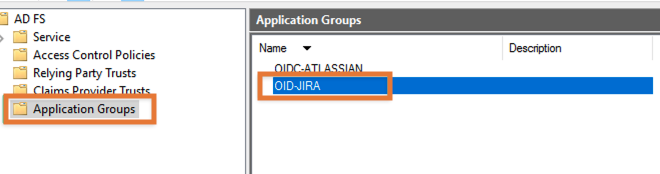
Open the Application Group again.
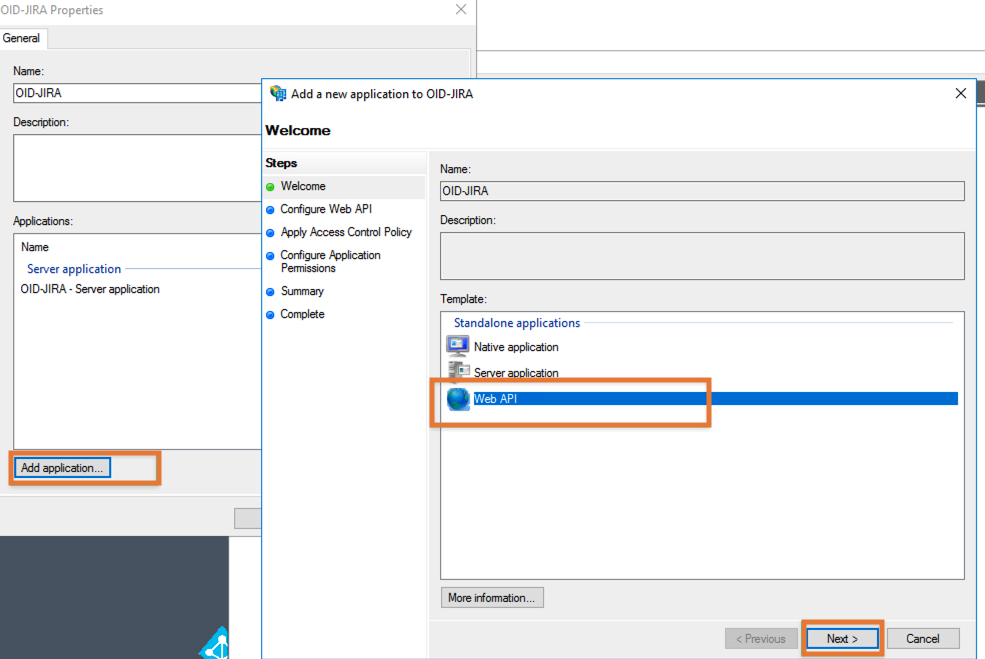
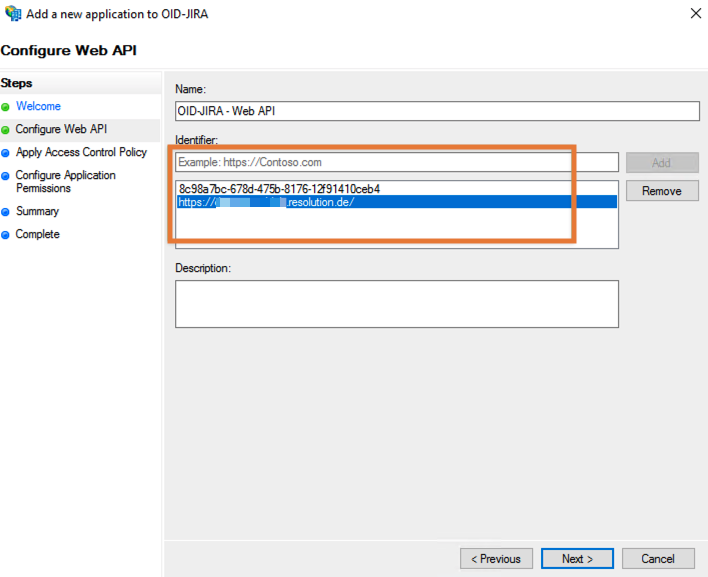
Click on Add application again but this time select Web API and press Next:
In Identifier, add the Base URL of your Jira or Confluence and the AD FS Server app client ID from earlier
(8c98a7bc-678d-475b-8176-12f91410ceb4 in this tutorial) and click Next:
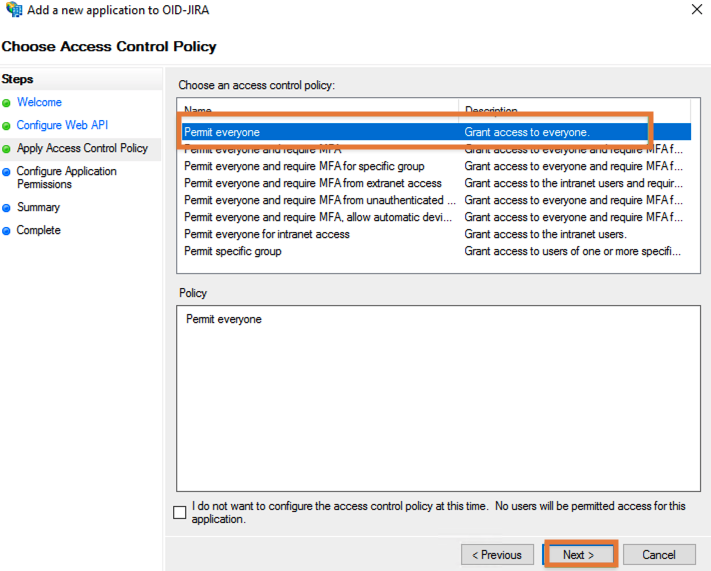
On the Access Control Policy screen, select the a policy, usually Permit everyone and click Next:
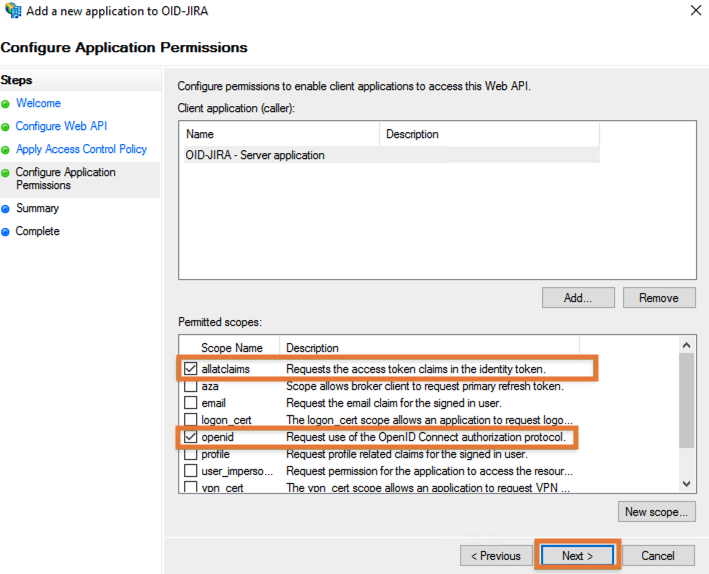
On the Configure Application Permissions screen, select two scopes: allatclaims and openid and press Next:
Confirm the summary screen and close the setup wizard.
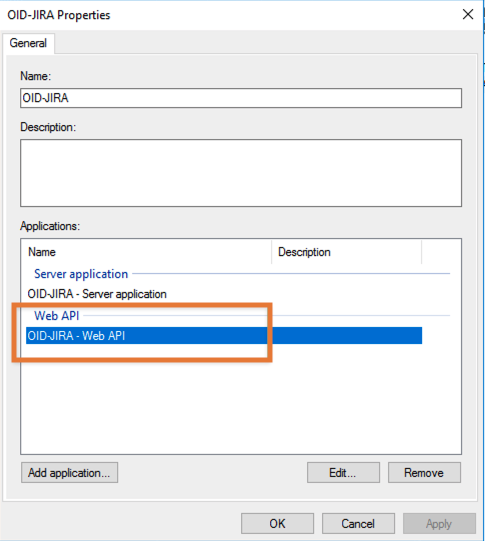
There is one more thing which needs to be changed now on the new Application group.
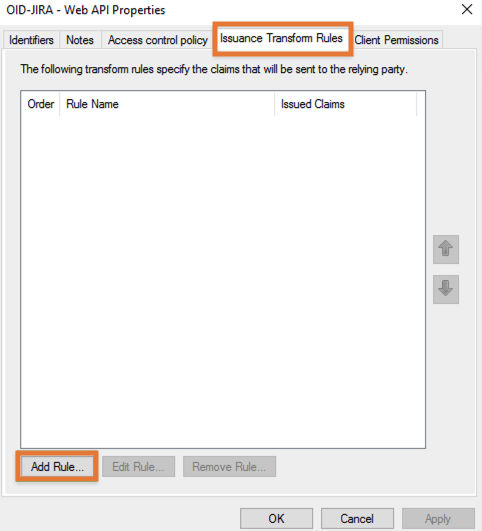
Open it again and double click on the Web-API entry
Open the Issuance Transform Rules tab and click on Add Rule:
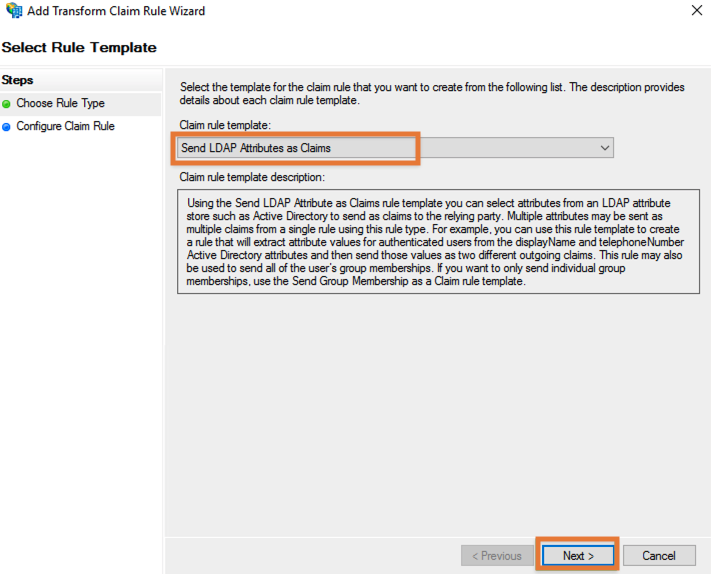
Select the Send LDAP Attributes as Claims template and click Next:
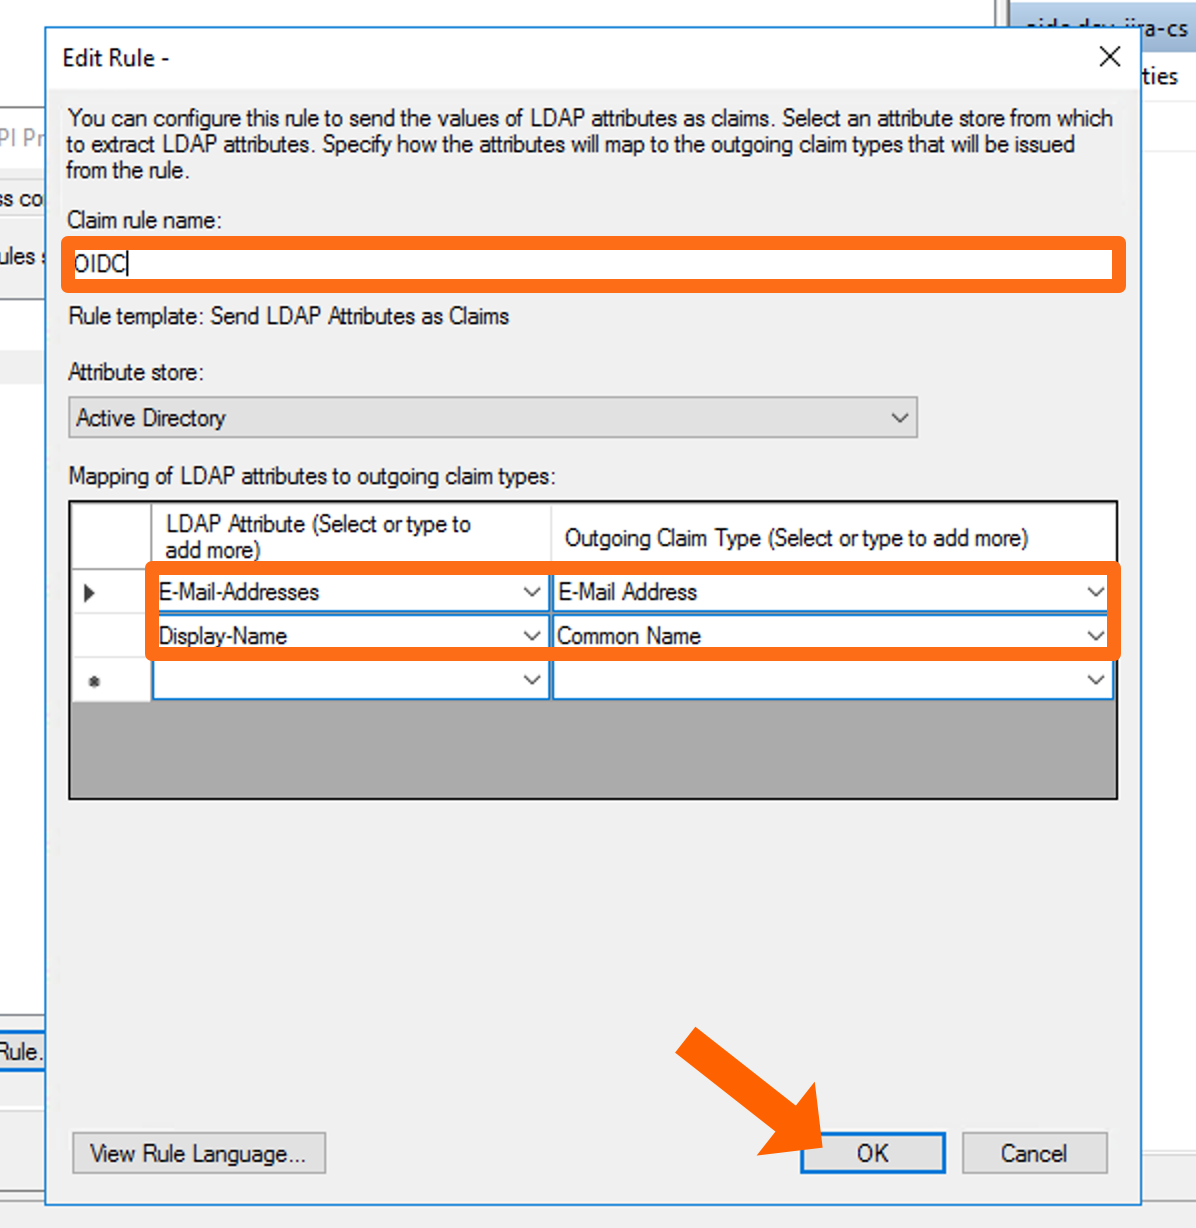
Give it a Claim rule name, select Active Directory as Attribute store, add E-Mail-Addresses as LDAP attribute
and map E-Mail-Address as Outgoing Claim Type against it. Do the same for Common Name in case of Just-In-Time provisioning:
Click Finish/ OK/ OK to leave the configuration again.
Next, enter your ADFS domain from before and click the Import Metadata button.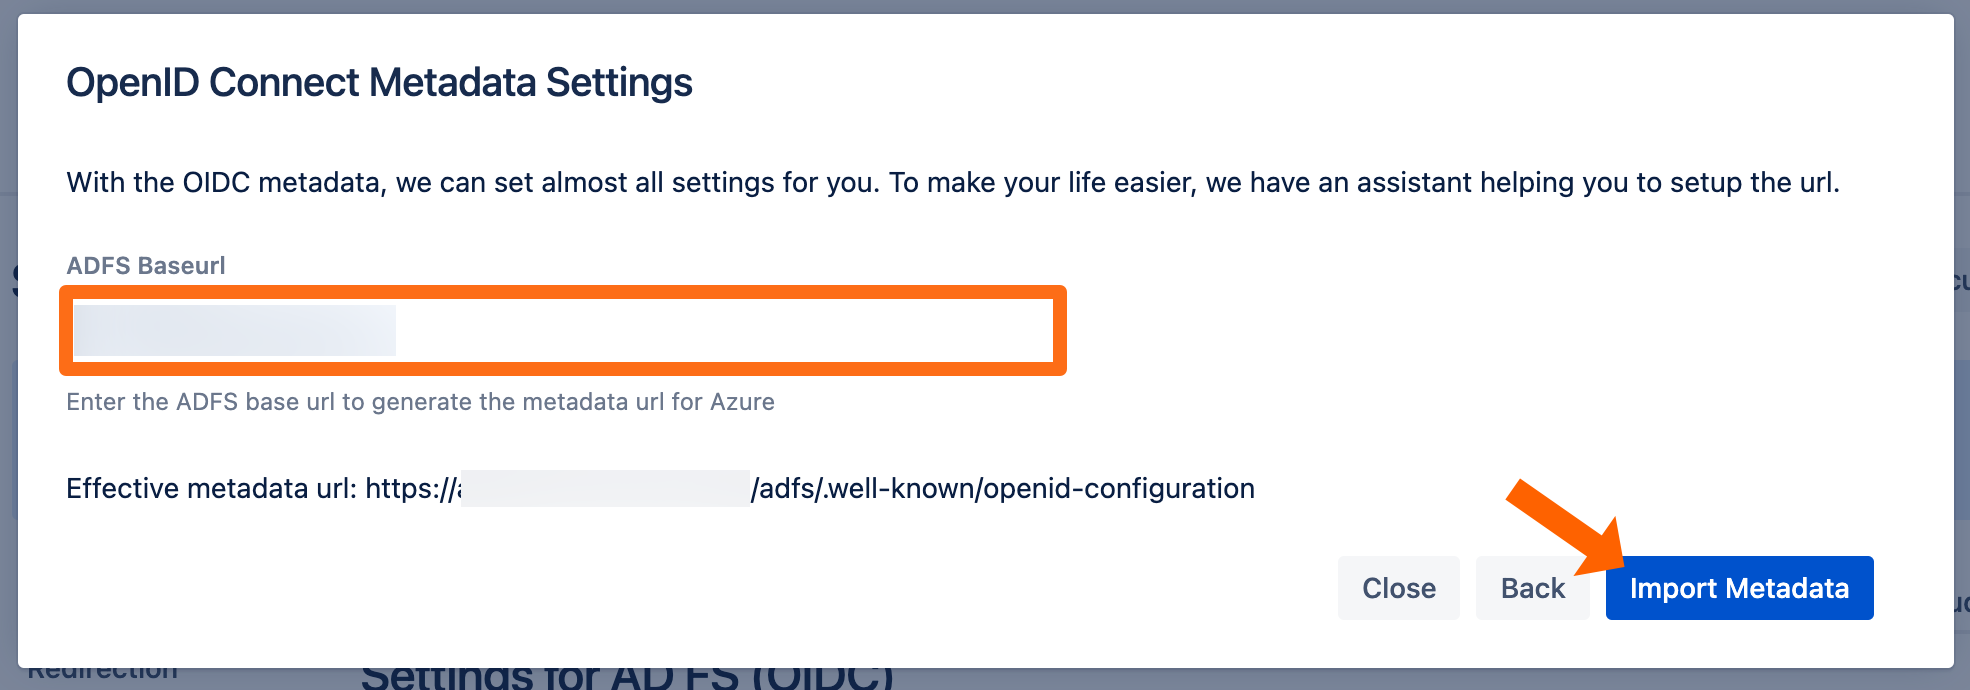
You will see this message if the import was successful.
To finish the wizard, click Save and Close.

Testing SSO
To test you configuration, go to the System & Support section of the app and scroll down to the Tracker List.
Click New Tracker. If you have more than one identity provider configured, you must choose which configuration should be used for the log in test.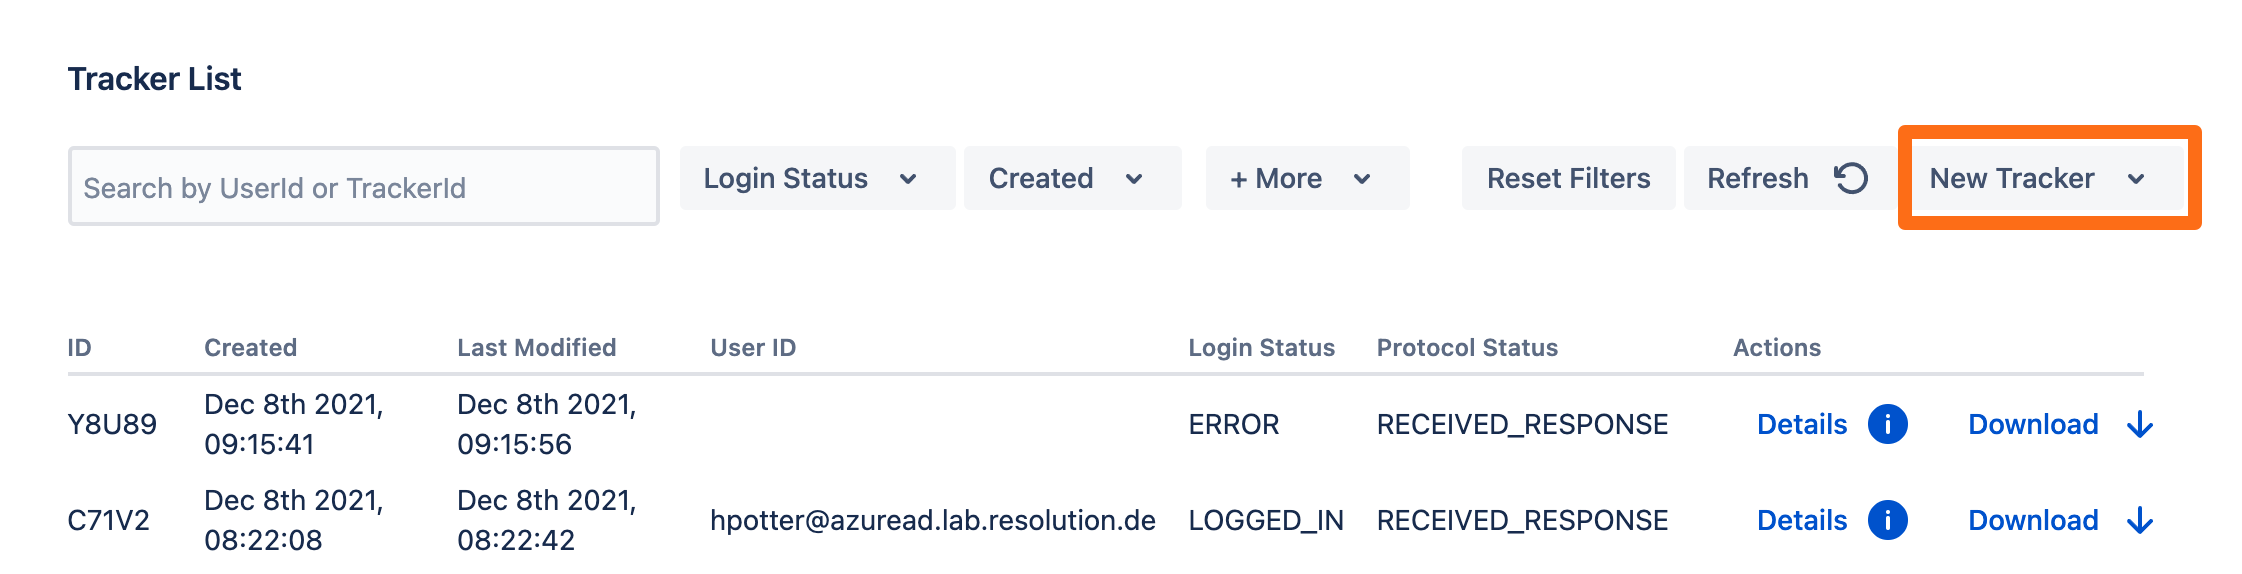
Copy the test url and open the link an incognito web browser. If something goes wrong during the test, you can easily create a support ticket that includes this tracker by click Contact Support. Additionally, you can contact us by going to https://www.resolution.de/go/support or booking a free meeting via https://www.resolution.de/go/calendly.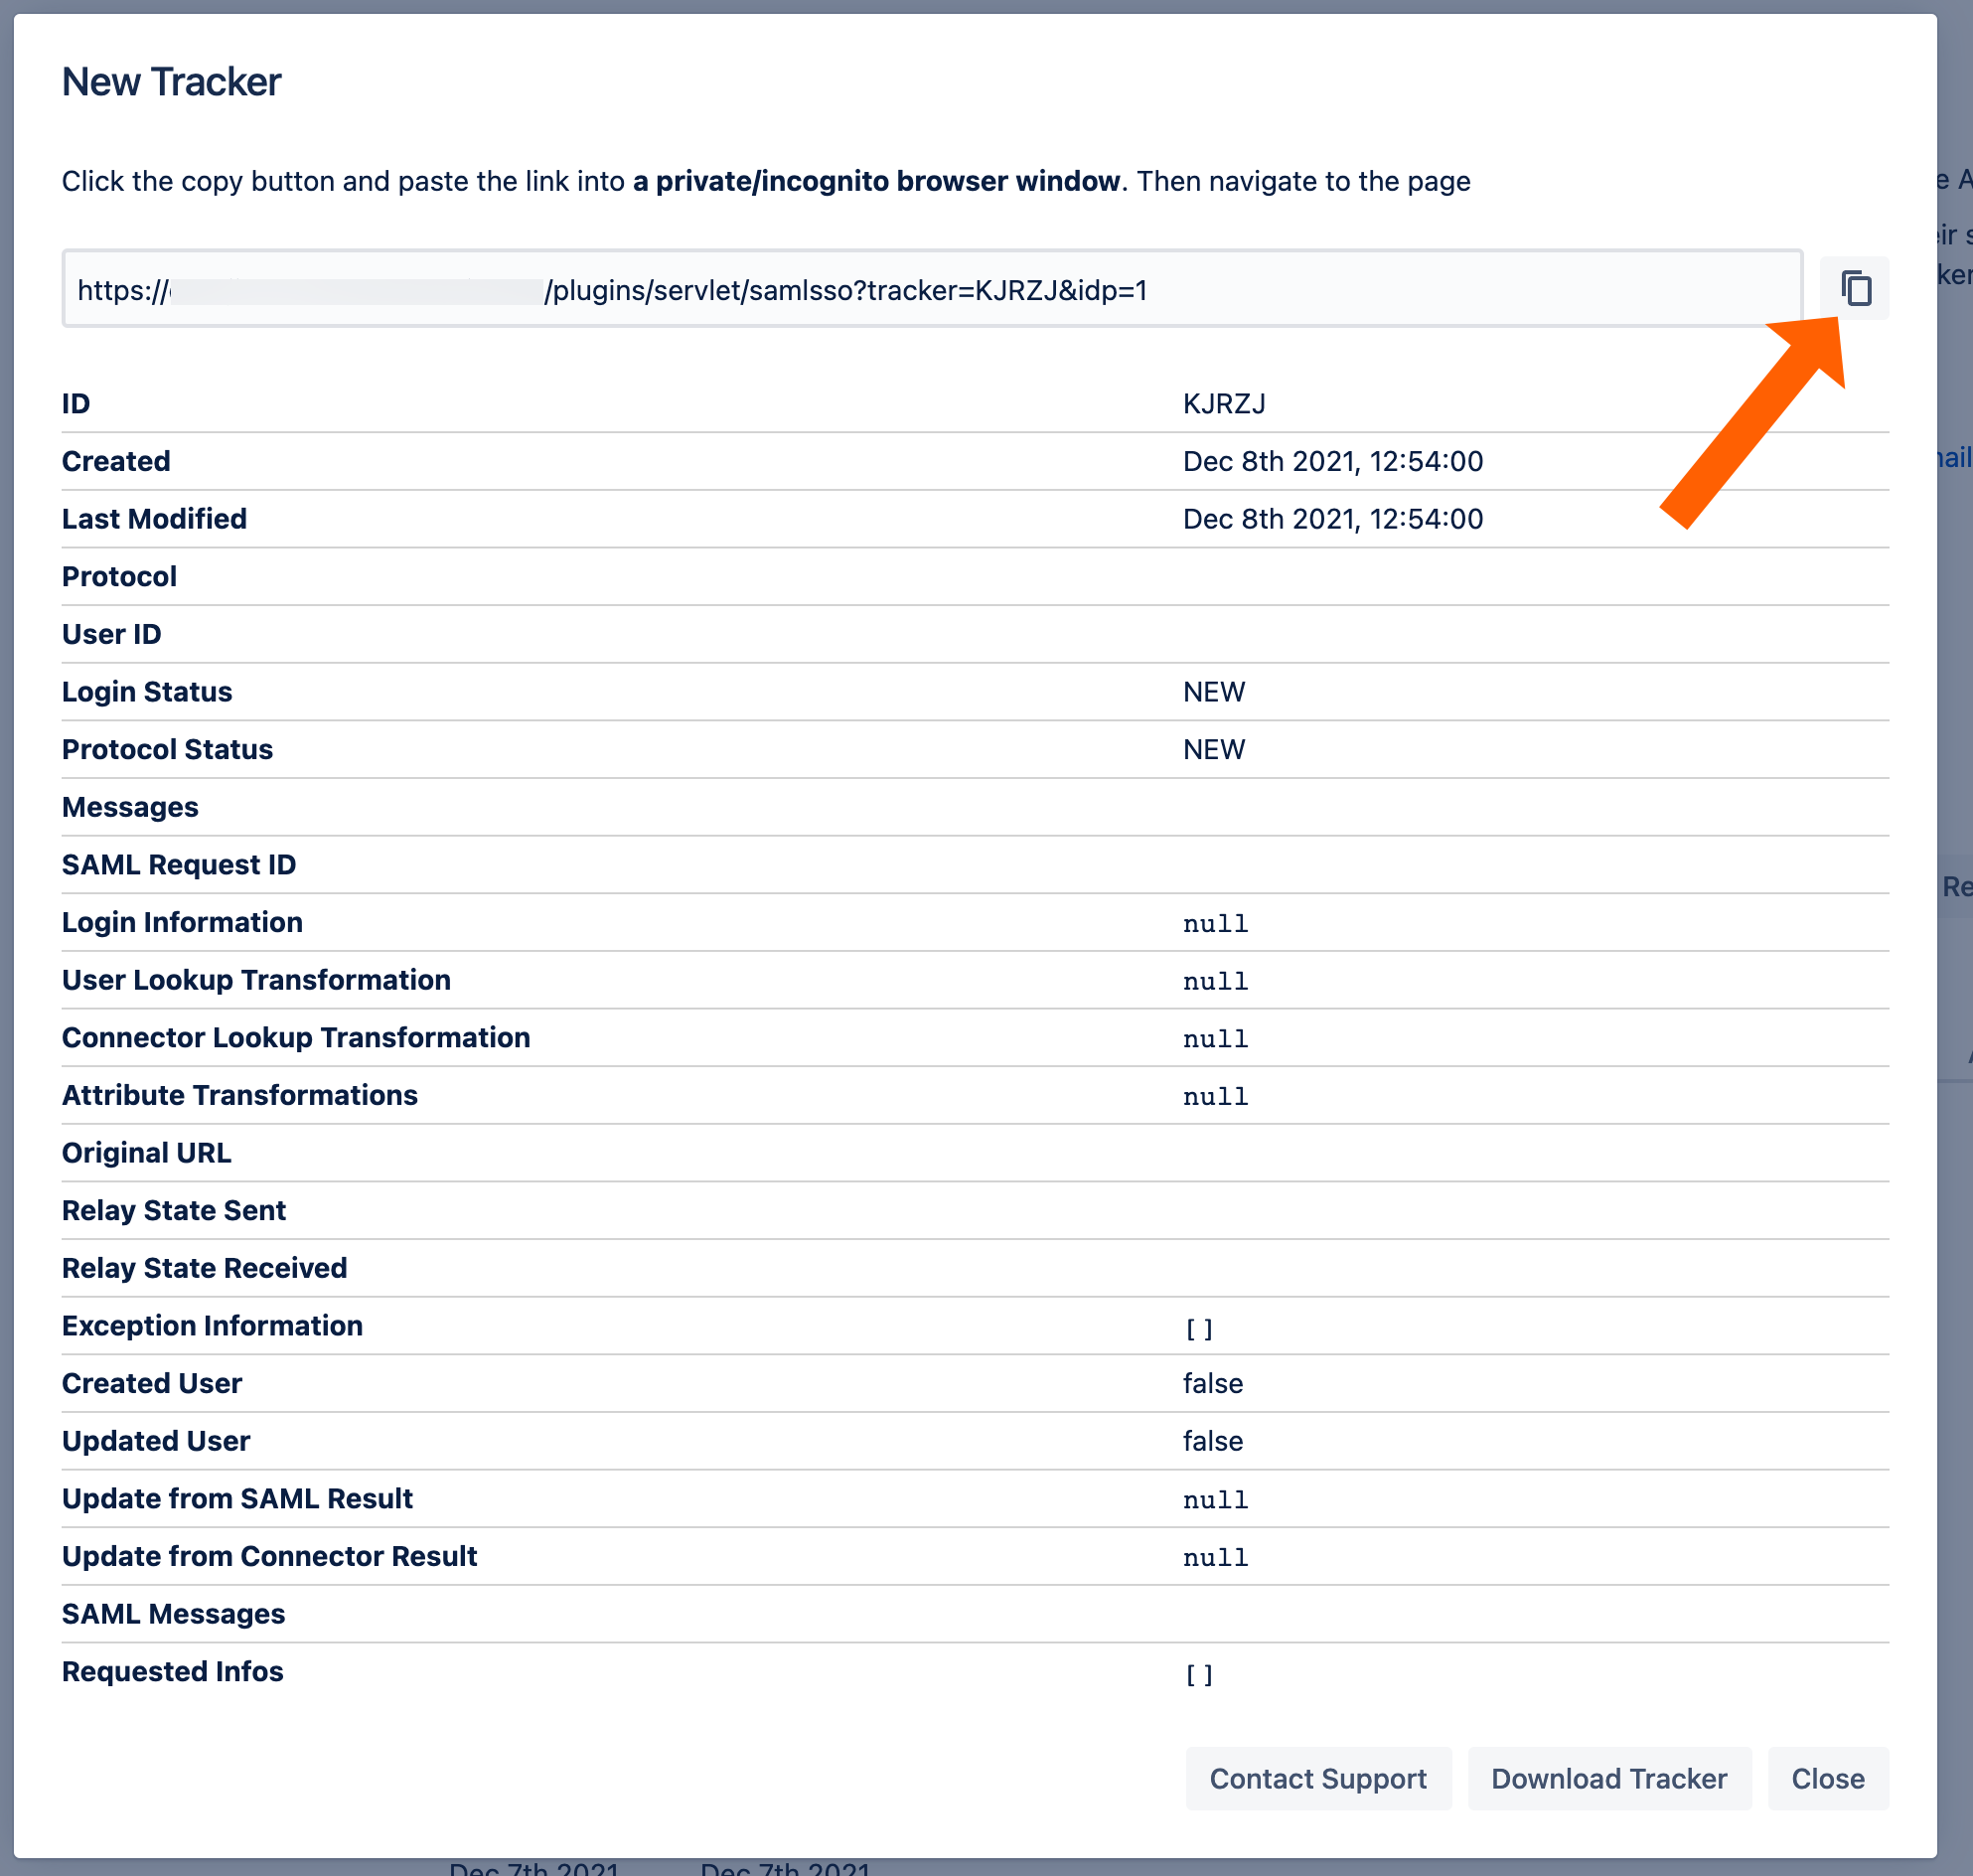
Redirect to SSO
After a successful test, the next step is to configure the redirection. With the redirection setting, the app can automatically redirect users to log in via OpenID Connect.
Go change this setting, go to Redirection from the middle panel.
By checking Enable SSO Redirect, users will get redirected to the configured SSO provider for login. If you are running JSM, you find a second option below.
Click Save to finish the configuration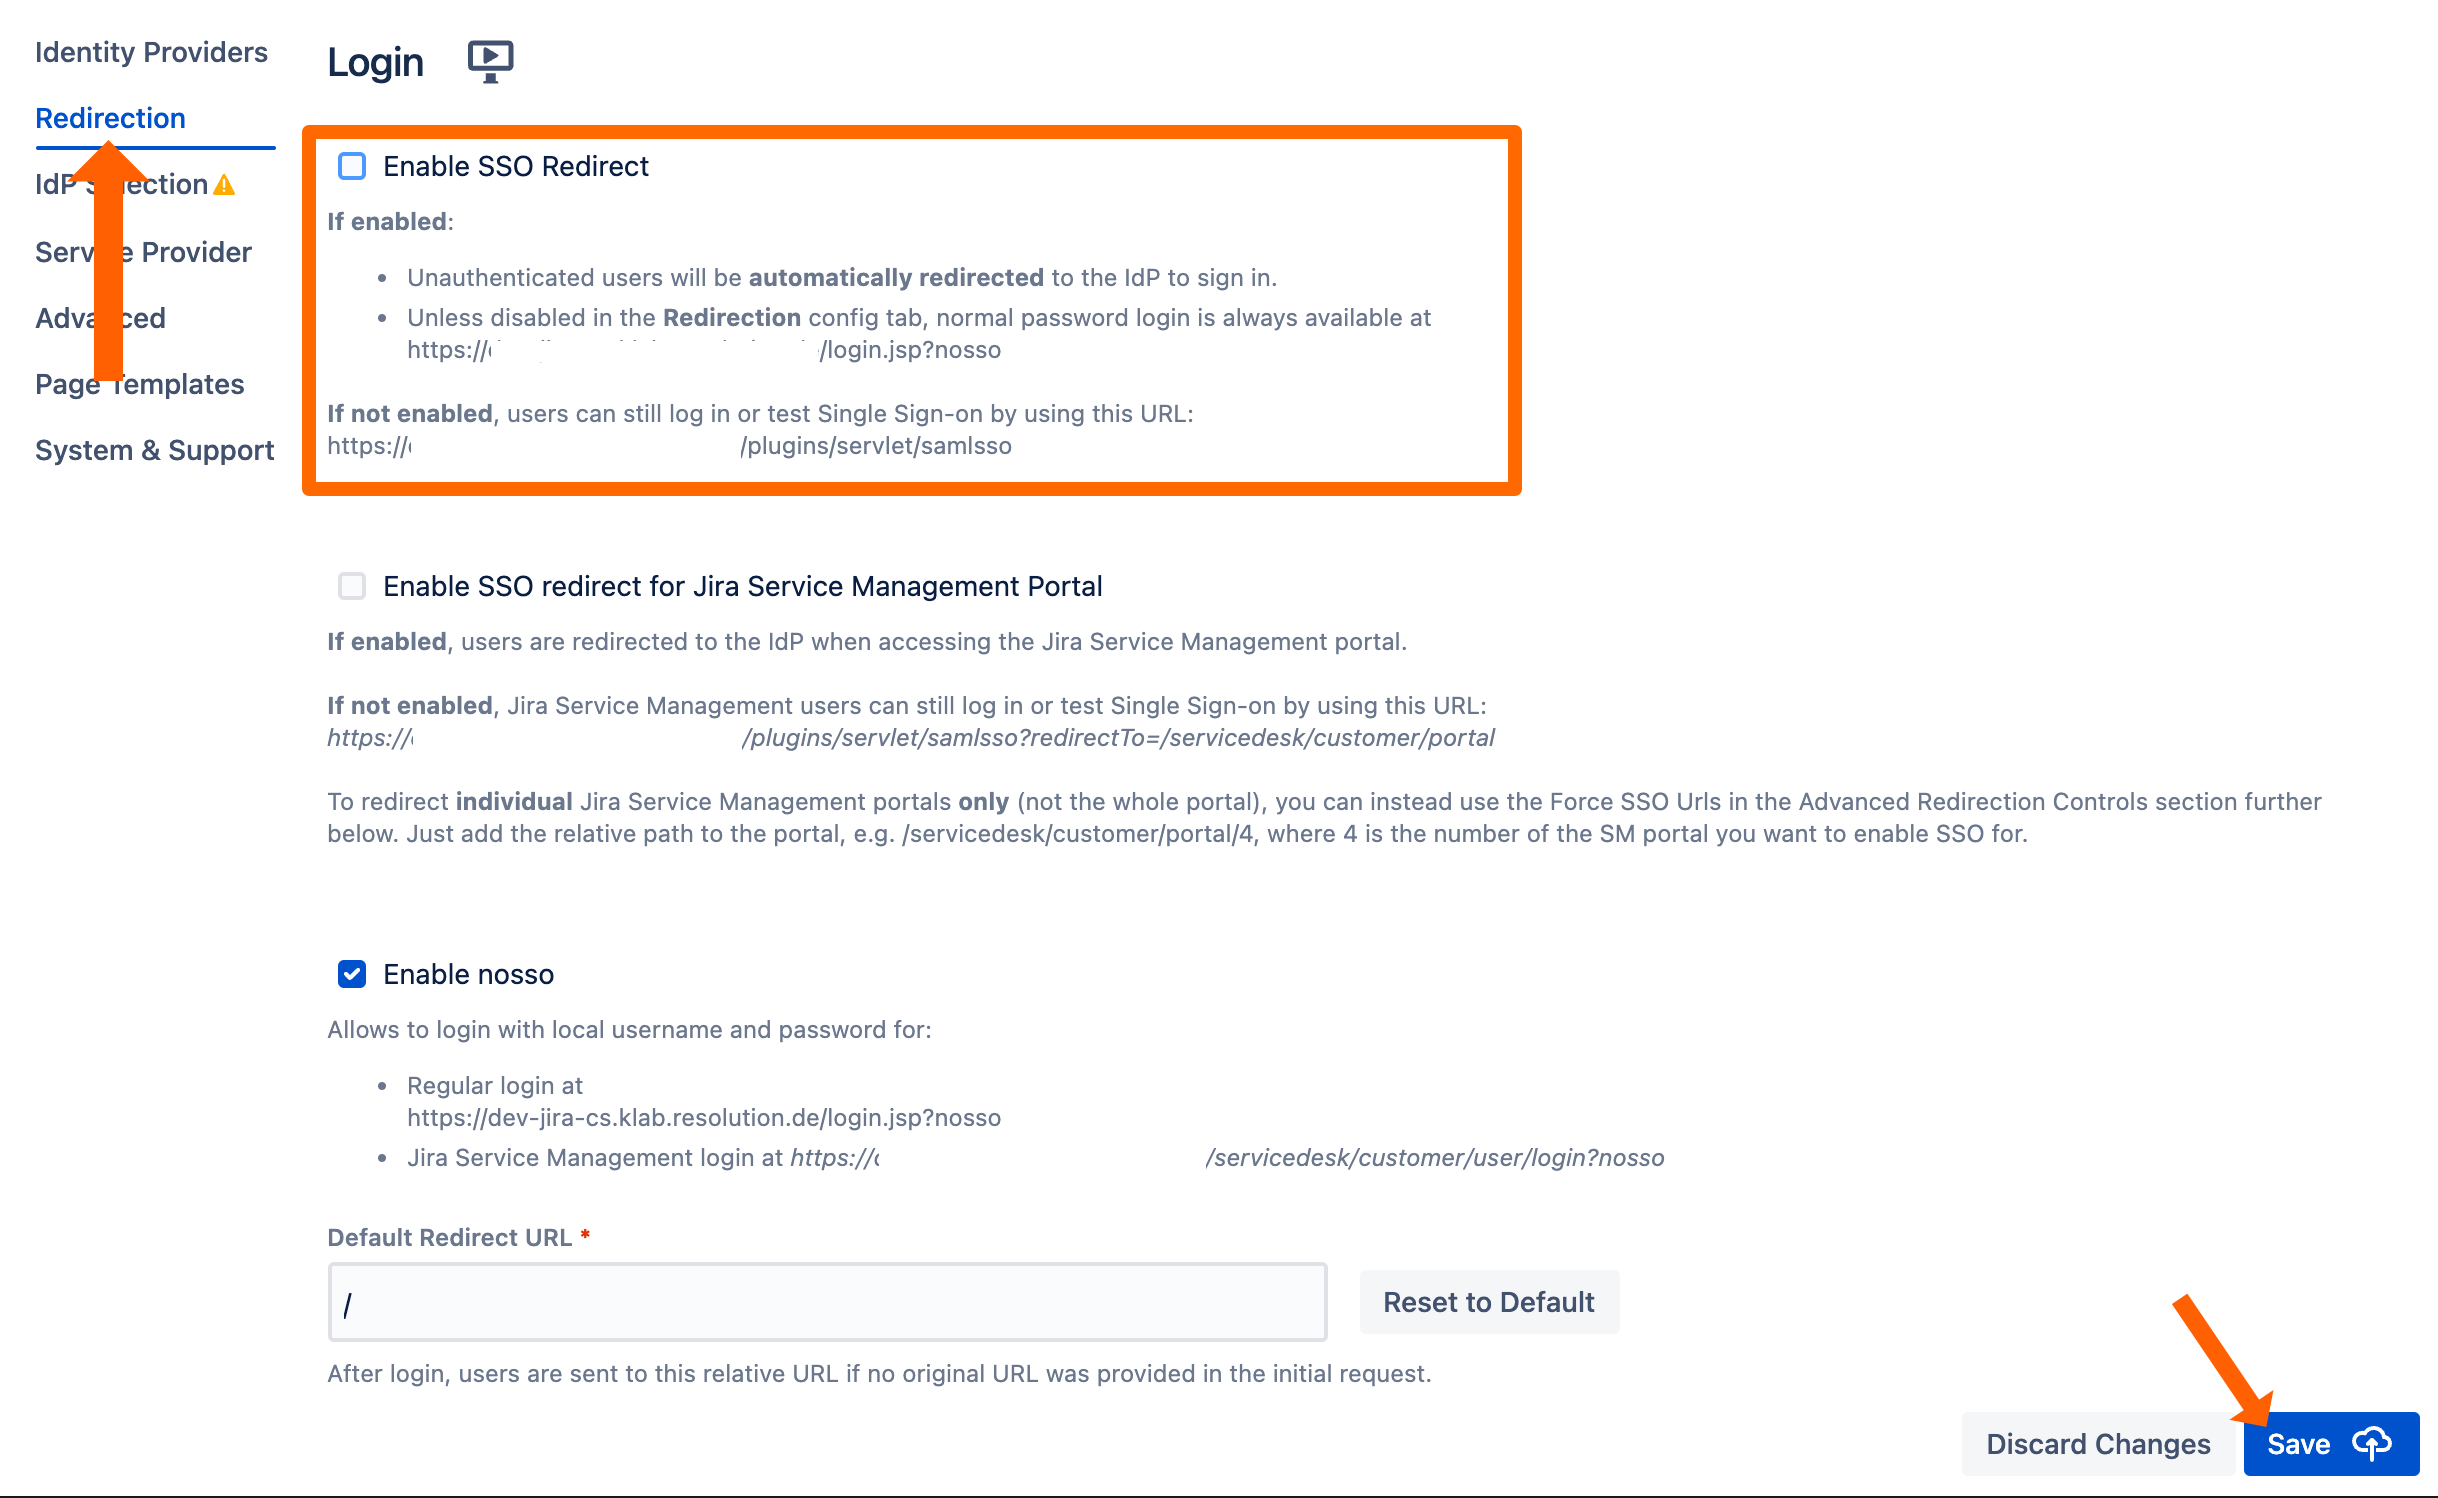
If Enable SSO Redirect is enabled, you can log in to your Atlassian Data Center / Server application manually by browsing to the URL that fits your Atlassian application as listed below.
Use this URL, if you need to log in a local user unknown to the ADFS or if there are any issues with Single Sign On.
Jira: https://<baseurl>/login.jsp?nosso
Confluence: https://<baseurl>/login.action?nosso
Bitbucket: https://<baseurl>/login?nosso
Bamboo 5: https://<baseurl>/userlogin!default.action?nosso
Bamboo 6: https://<baseurl>/userlogin!doDefault.action?nosso