
Google Workspace Calendar Integration
Overview
The Google Workspace Calendar integration enables automatic synchronization of Out of Office events from Google Calendar into Jira. When users create “Out of Office” events in their business Google Calendar, Out of Office Assistant automatically creates corresponding absence rules in Jira, ensuring seamless coordination across teams and projects.
Understanding Google Calendar Integration
How the Integration Works
Event-Driven Synchronization:
Event Detection: Out of Office Assistant monitors Google Calendar for events tagged as “Out of Office”
Automatic Rule Creation: Creates Jira absence rules based on Google Calendar event details
Template Application: Uses configurable templates to define rule parameters
Bidirectional Updates: Changes in Google Calendar automatically sync to Jira rules
Integration Benefits:
Unified Calendar Management: Manage absences from familiar Google Calendar interface
Automatic Jira Updates: Eliminate manual rule creation in Jira
Team Coordination: Ensure all team members see accurate absence information
Mobile Accessibility: Update absences on-the-go using Google Calendar mobile apps
Integration Architecture
- Google Calendar Integration Flow:
- ┌─────────────────┐ ┌──────────────────┐ ┌─────────────────┐
- │ Google Calendar │───▶│ Out of Office │───▶│ Jira Project │
- │ "Out of Office" │ │ Assistant │ │ Absence Rules │
- │ Events │ │ Sync Engine │ │ │
- └─────────────────┘ └──────────────────┘ └─────────────────┘
- │ │ │
- │ ▼ │
- │ ┌──────────────────┐ │
- └──────────────│ Rule Templates │──────────────┘
- │ Configuration │
- └──────────────────┘
Prerequisites and Requirements
Google Workspace Requirements
Account Type:
Business Account Required: Integration only works with Google Workspace (business) accounts
Personal Accounts Not Supported: Personal Gmail accounts will not connect successfully
Administrator Approval: May require Google Workspace admin approval for app permissions
Required Permissions:
Jira Requirements
User Permissions:
Access to Out of Office Assistant app
Permission to create absence rules
Project access for rule targeting
Integration configuration permissions
System Requirements:
Jira Cloud instance
Out of Office Assistant app installed
Active user account with appropriate permissions
Initial Setup and Configuration
Step 1: Access Integration Interface
Navigation Path:
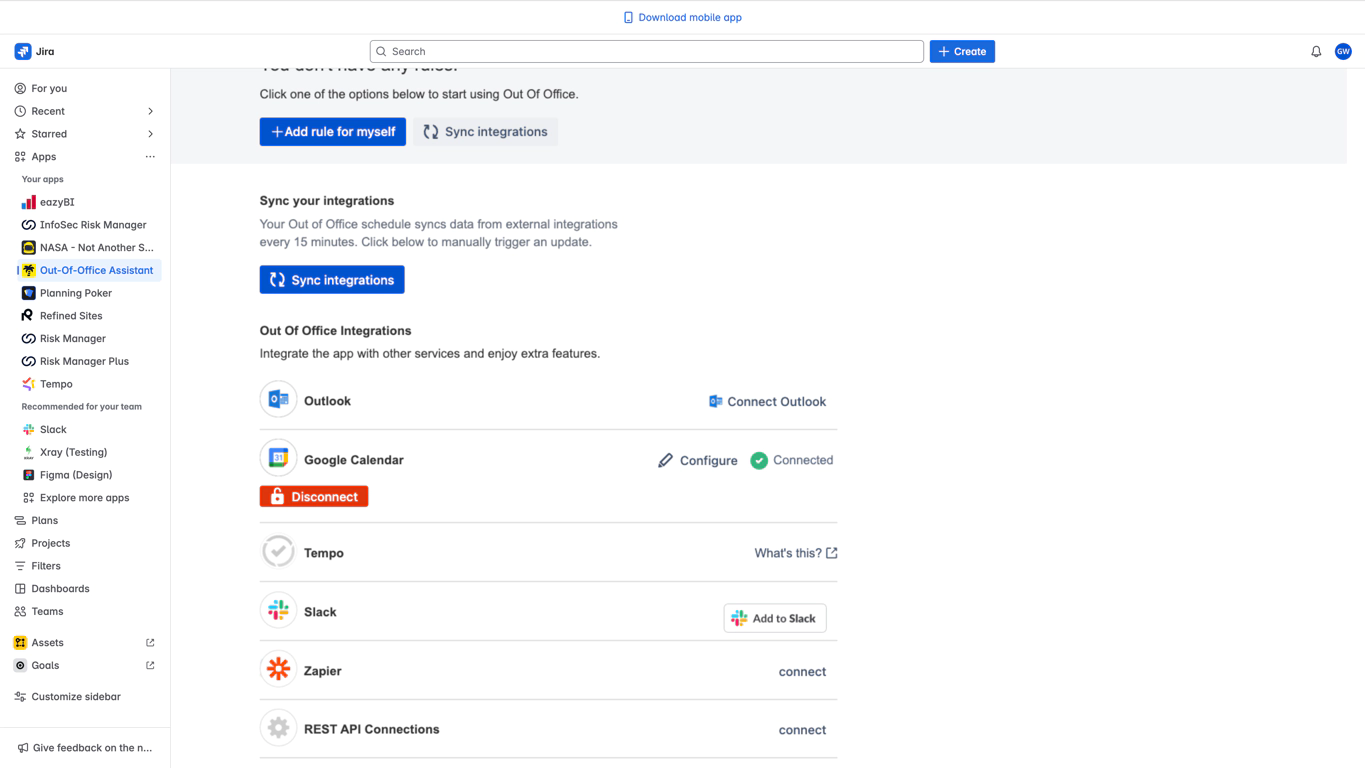
Open Out of Office Assistant: Apps → Out-Of-Office Assistant
Access Integrations: Click “Integrations” tab
Locate Google Calendar: Find Google Calendar section in integration list
Connection Status: Review current connection status (Connected/Disconnected)
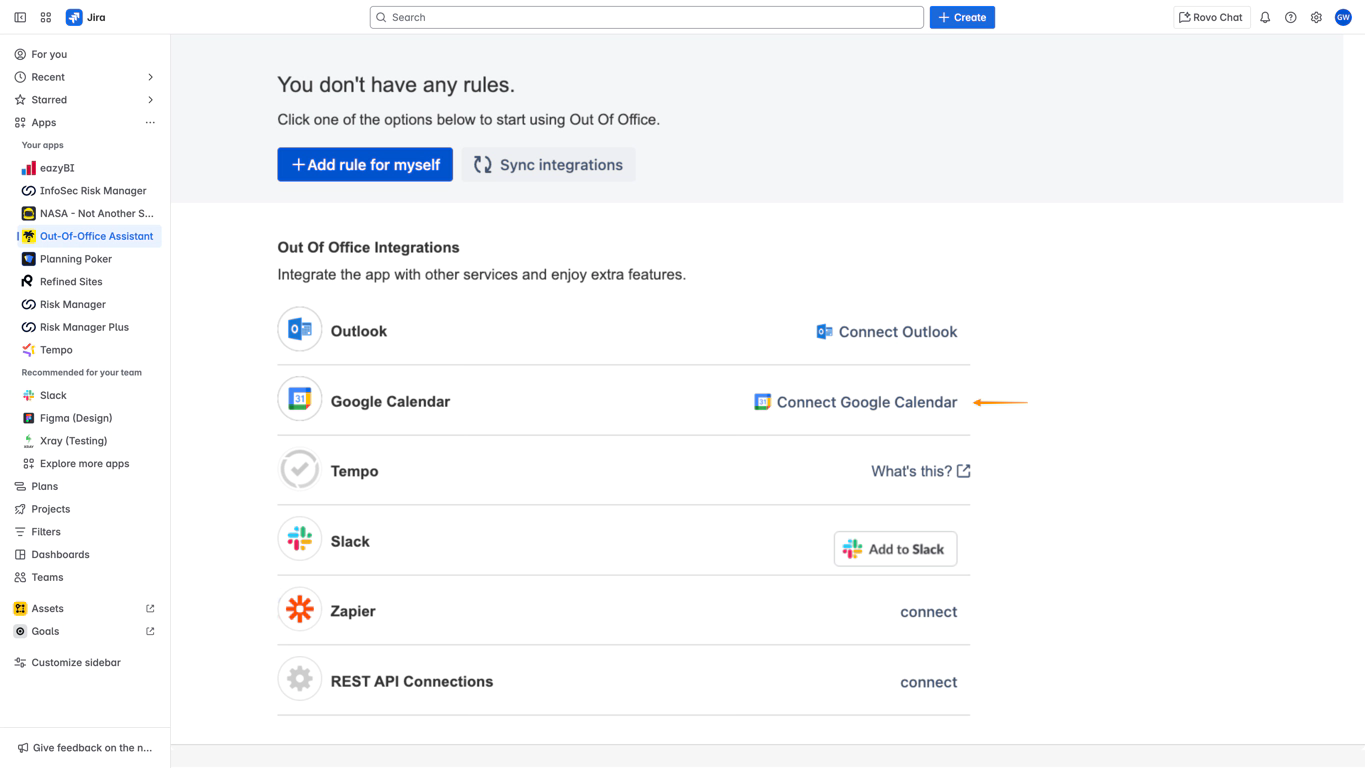
Step 2: Connect Google Calendar
Connection Process:
Click Connect: Click “Connect Google Calendar” button next to Google Calendar
Account Selection: Choose your Google Workspace account
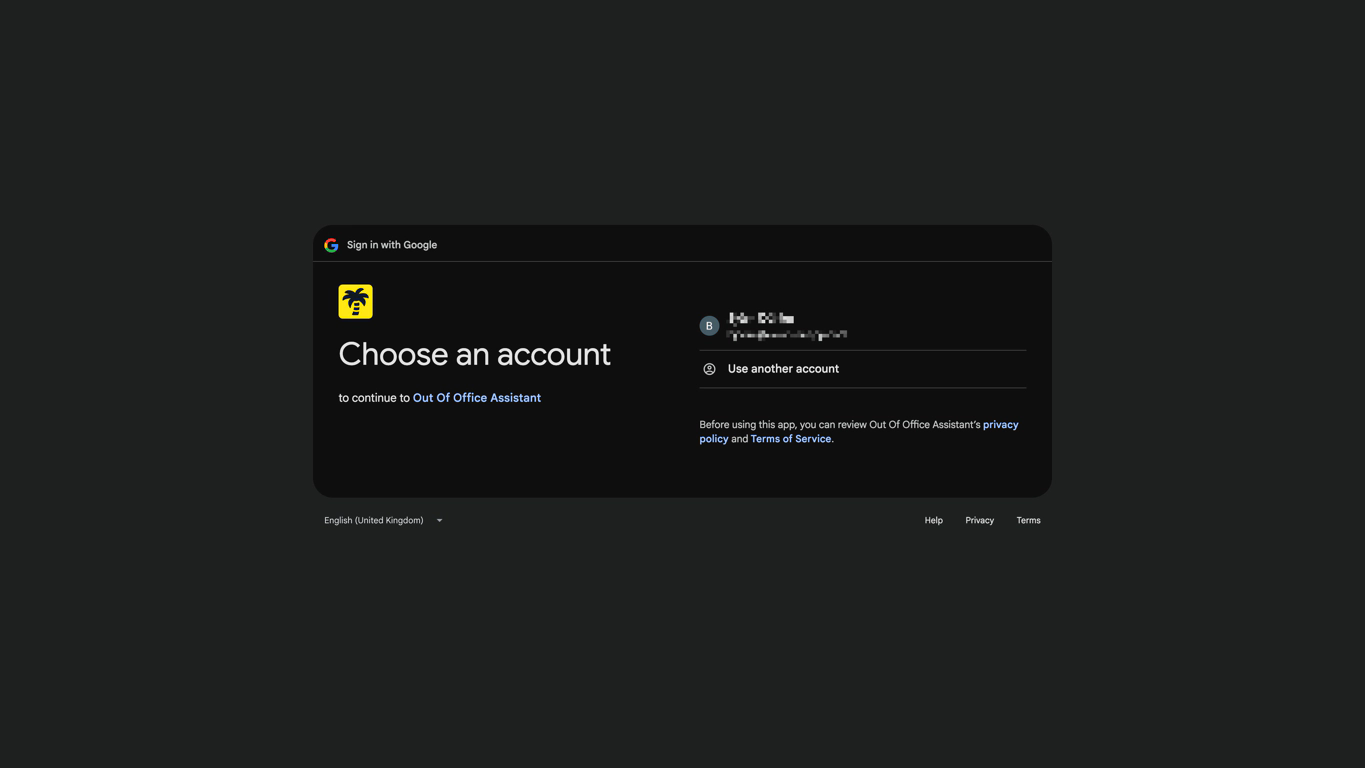
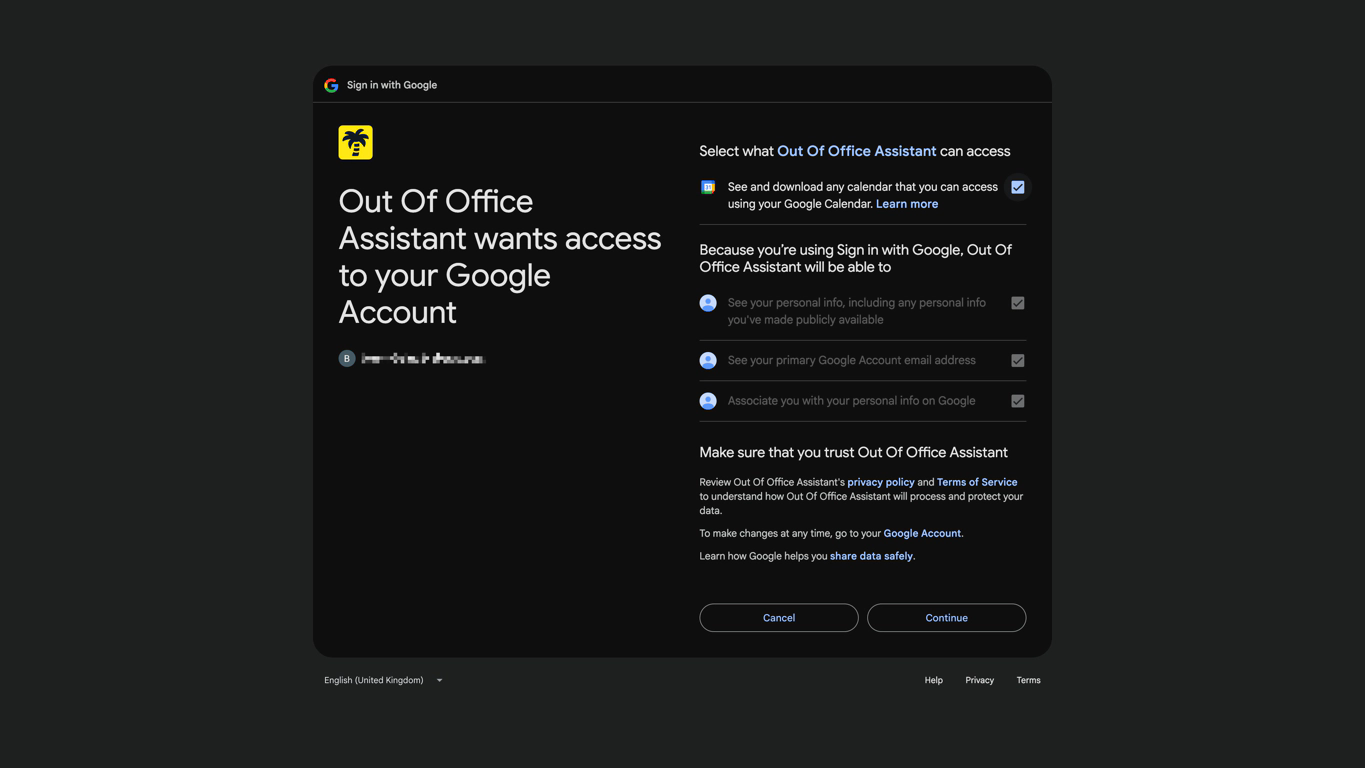
Permission Grant: Review and accept required permissions
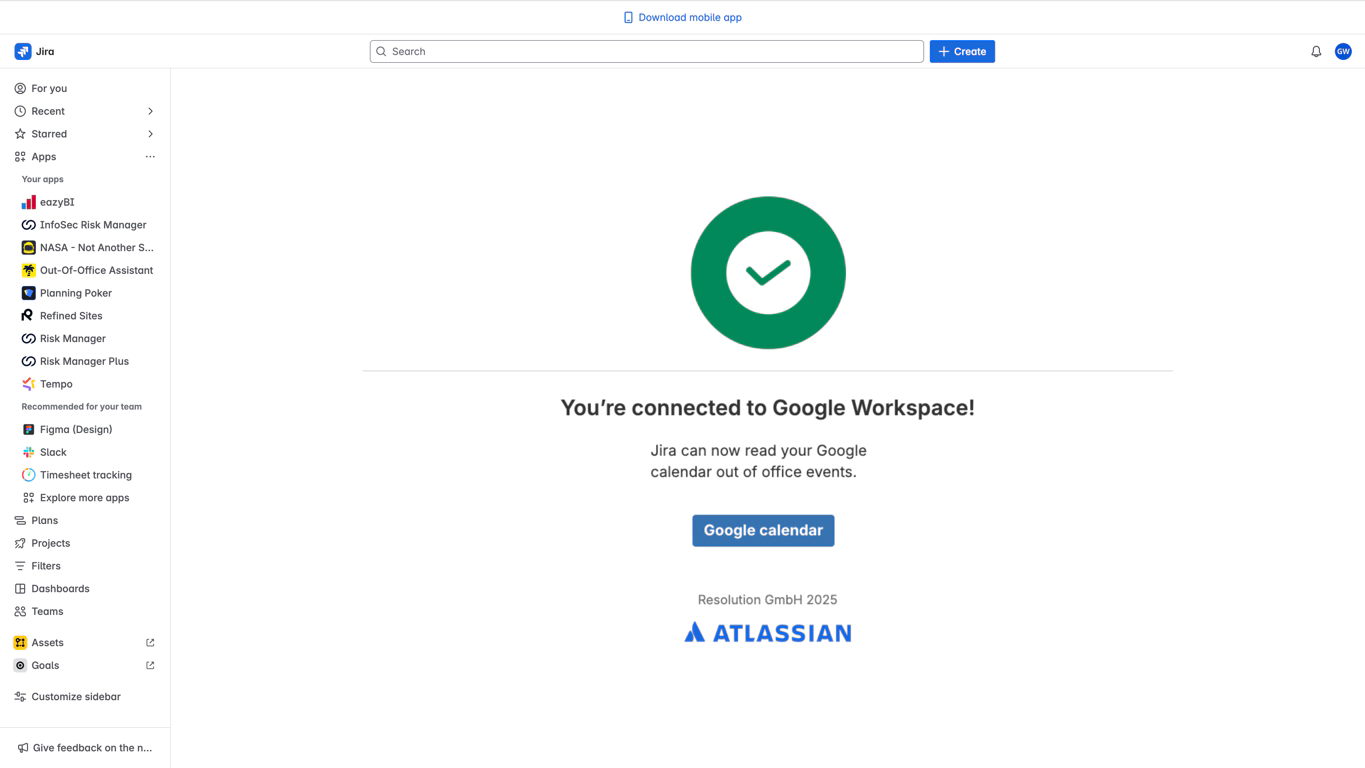
Connection Confirmation: Verify successful connection status
Important Notes:
Business Account Only: Ensure you select a Google Workspace (business) account
Permission Review: Carefully review requested permissions before granting access
Single Account: Only one Google account can be connected per Jira user
Using Google Calendar Events
Event Creation Process
Step-by-Step Event Creation:
Open Google Calendar: Access your business Google Calendar
Create New Event: Click on desired date/time
Event Details: Enter event title and duration
Tag Selection: Select “Out of Office” tag/category
Duration Configuration: Set all-day or specific hours
Save Event: Confirm event creation

Event Configuration Options
Event Types Supported:
- Supported Google Calendar Event Types:
- 📅 All-day events: Full day absences
- ⏰ Timed events: Partial day absences (depending on Event Duration Filter)
- 🔄 Recurring events: Repeating absence patterns
- 📊 Multi-day events: Extended absence periods
Event Duration Examples:
- Event Duration Options:
- Single Day: "Dec 15, 2024" (all day)
- Multi-Day: "Dec 20, 2024 - Dec 24, 2024" (all day)
- Partial Day: "Dec 15, 2024 9:00 AM - 5:00 PM"
- Recurring: "Every Friday afternoon" (weekly pattern)
Event Duration Filter
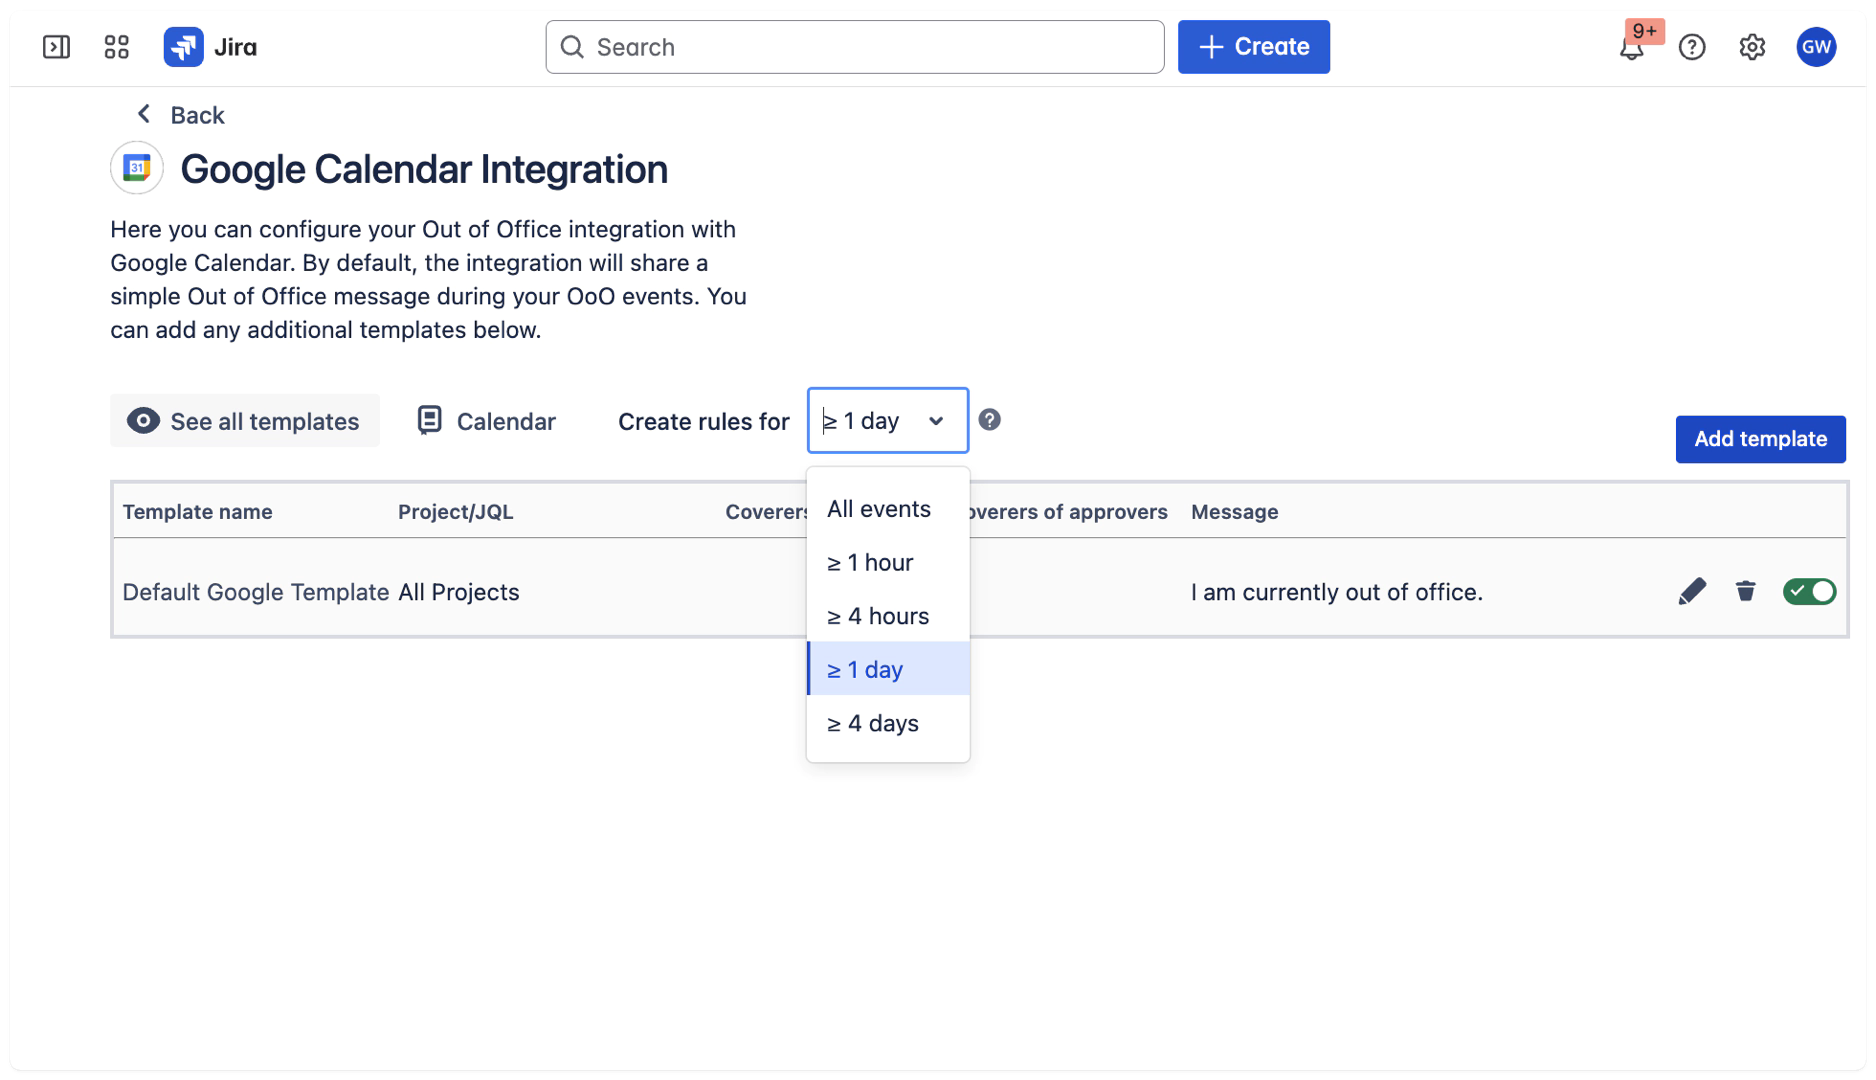
The "Create rules for" dropdown allows you to filter which Google Calendar Out of Office events will trigger your automatic Out of Office message in Jira. The integration only processes events that are specifically marked as "Out of Office" in Google Calendar. You can further refine this by setting a minimum duration requirement:
All events - Creates Out of Office messages for any Out of Office calendar event, regardless of duration
≥ 1 hour - Only triggers for Out of Office events lasting 1 hour or more
≥ 4 hours - Only triggers for Out of Office events lasting 4 hours or more
≥ 1 day - Only triggers for Out of Office events lasting 24 hours or more (default setting)
≥ 4 days - Only triggers for extended Out of Office events lasting 4 days or more
This filter helps you control which Out of Office events should activate your Jira Out of Office status. For example, if you select "≥ 1 day", the integration will ignore shorter Out of Office appointments and only activate for full-day or multi-day absences, ensuring your Jira Out of Office message is only set for significant time away from work.
Synchronization Behavior
Automatic Sync Process
Sync Frequency:
Automatic Sync: Every 15 minutes
Manual Sync: Available via “Sync integrations” button
Event Detection: New events detected within one sync cycle
Update Processing: Changes reflected in next sync cycle
Template Application:
Default Template: Applied to all Google Calendar events
Custom Templates: Can be configured for specific event types
Multiple Rules: Single event can trigger multiple rules with different templates
Rule Parameters: Scope, coverers, and messages defined by templates
Access the Google Workspace rule in the Out of Office Assistant
To see the new rule from Google Worspace, click on the Rules tab

Modify Google Workspace rules
Note that Google Workspace rules are read only. The can be modified in two ways from the configuration page:
To modify the dates, change the defined interval in the Google Workspace calendar
To modify the rule configuration, edit the template
Any of these changes will be automatically synced every 15 minutes or with the "Refresh integration" button
Configure Google Workspace Integration
Upon its initial connection, Out of Office provides a default template that delivers a straightforward Out of Office message for the duration of the Google Workspace Calendar Event.
We recommend customizing the integration to facilitate automatic delegations and handovers.
To access the configuration:
Click on the Integrations tab
Click on the Configure button next to the "Connected" badge.
Add or Edit Templates
After the initial connection, Google Workspace is always connected to a default template. You can edit this default template or add more templates.
Your Google Workspace Out-of-Office Event always trigger all activated templates. This means you can define multiple coverers for different projects in a granular way and have complex configurations.
Or you just edit your default template for a simpler configuration.
Click in Configure on the Out of Office Integration page. From that page you can:
Access the Google Workspace Calendar
See all connected templates
Edit connected templates
Connect additional templates by adding them to the table
Remove connected templates from the table
Deactivate templates (without removing them from the table)
To add a Template:
Click on the "Add Template" button.
Please select from the existing templates
Or create a new template
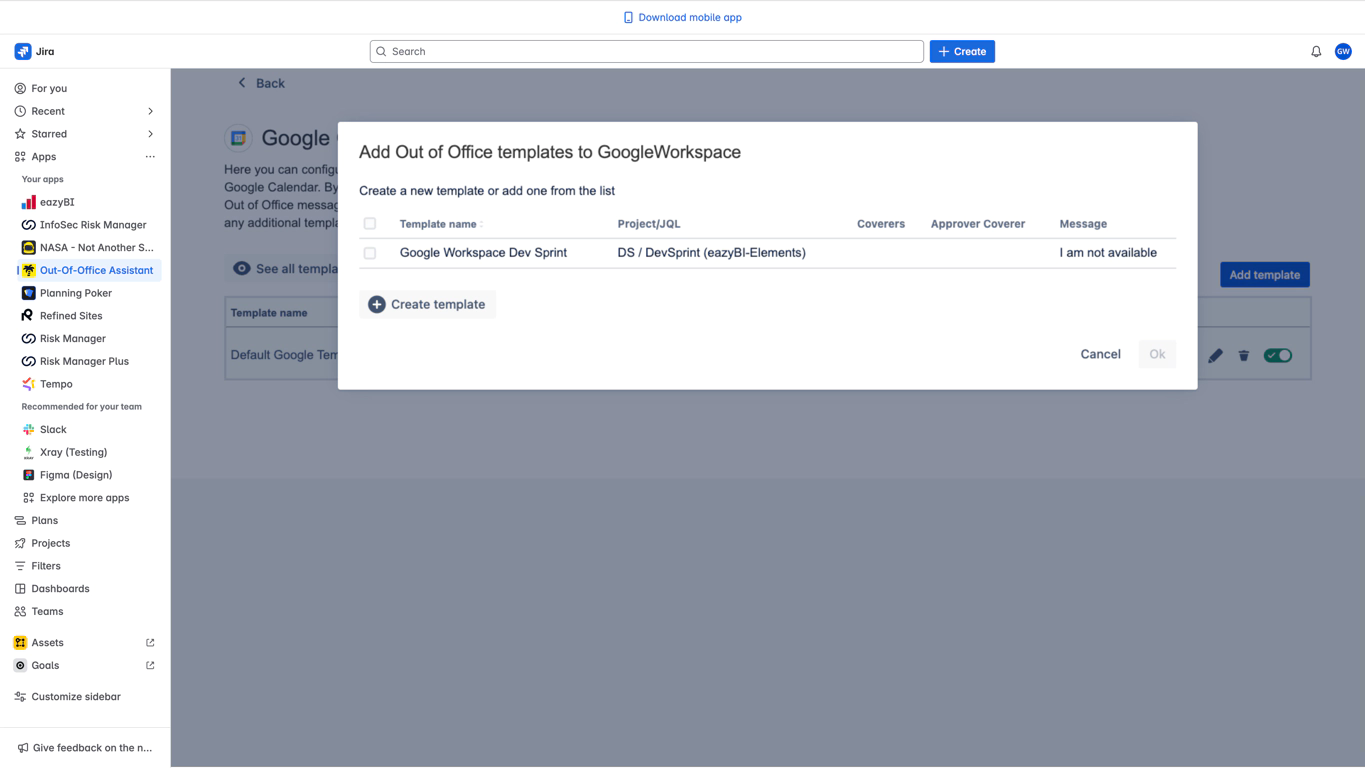
You can connect an unlimited number of templates to the Google Calendar Out-of-Office Event. For each template you connect, a unique rule will be established. Each rule will specify the dates and times for the Auto Reply functionality.
Be mindful when making changes to templates that are used in other connections, as any changes to the template will also affect those connections.
Integration Status: ✅ COMPLETE
Next Step: Out of Office Templates