
OpenID Connect for Keycloak with User Sync
Goal
Configure SAML Single Sign-On to work with Keycloak, using Just-in-Time provisioning to automatically create and update users during Single Sign On.
Prerequisites
Identity Provider Keycloak
Your Atlassian application must be accessible via HTTPS. (read more about it in the Atlassian documentation, i.e. for Jira or Confluence)
Step-by-Step Setup Guide
This setup guide describes how to complete the initial setup for SAML Single Sign On (SSO) Add-on with Keycloak,
applicable for Add-on version starting 3.1.0. If you need any further support, please feel free to contact us here.
Install the SAML SSO App
In your Atlassian product, open the in-product marketplace as described in the Atlassian documentation.
Search for "resolution saml" and click "Install" for SAML Single Sign On (SSO) by resolution Reichert Network Solutions GmbH.
After the installation is complete, click Manage Apps/Addons.

Configure UserSync
Configuration in the Keycloak Web Console
Login to your Keycloak instance with administrator privileges and enter the Administration Console.

Select the realm of the users who should be synchronized and click on Clients in the left-hand navigation bar.
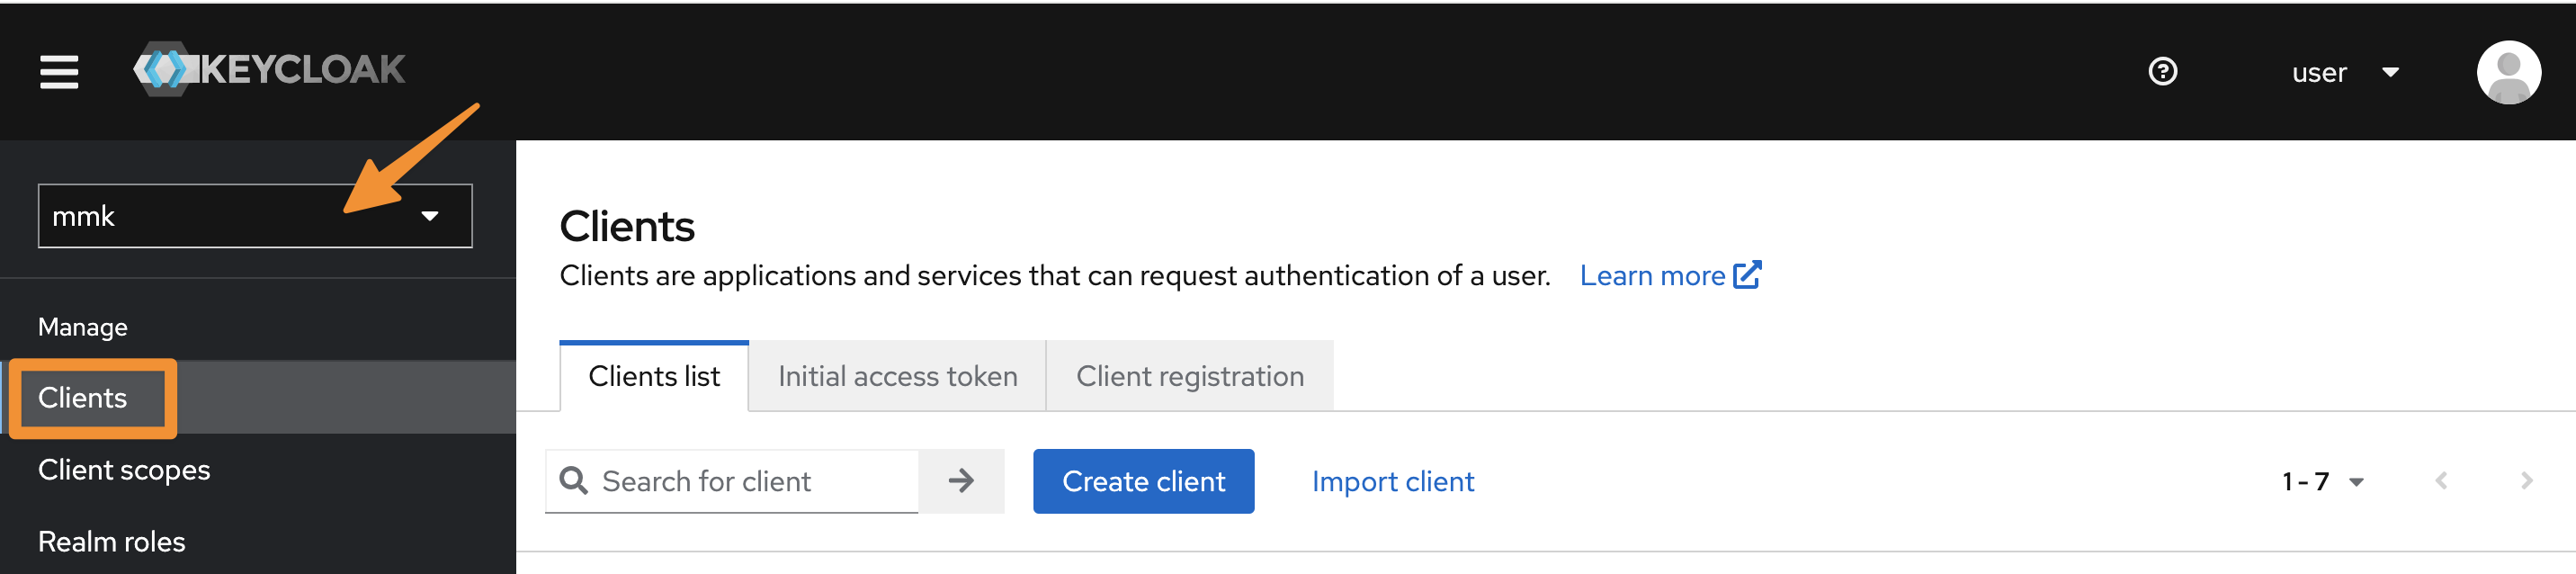
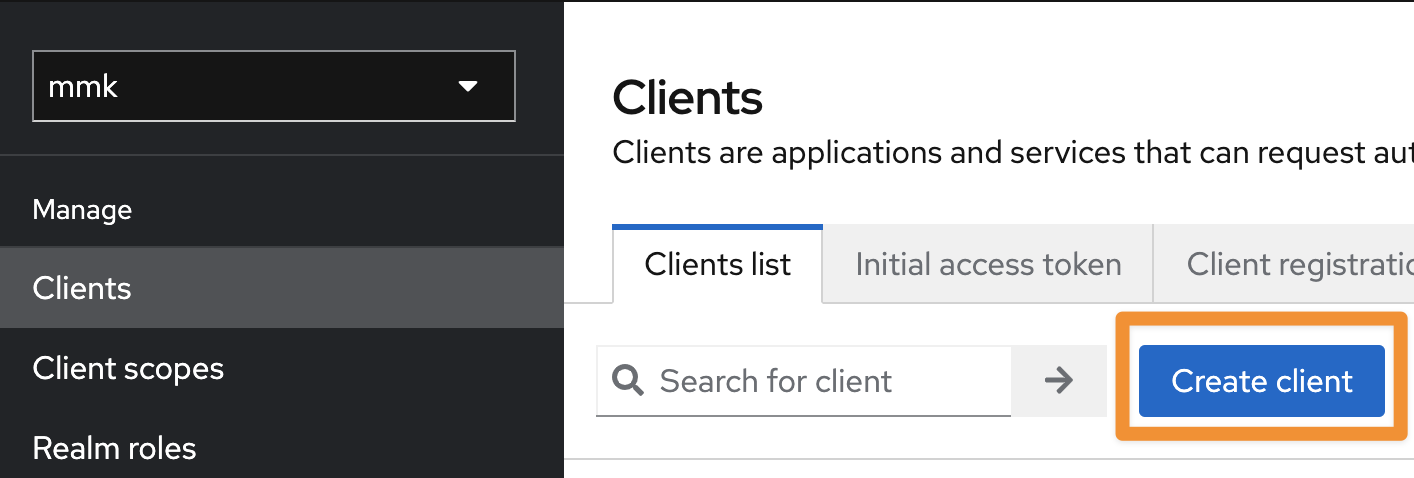
Click on the Create client button of the client view to register a new client for the User & Group Sync connector.
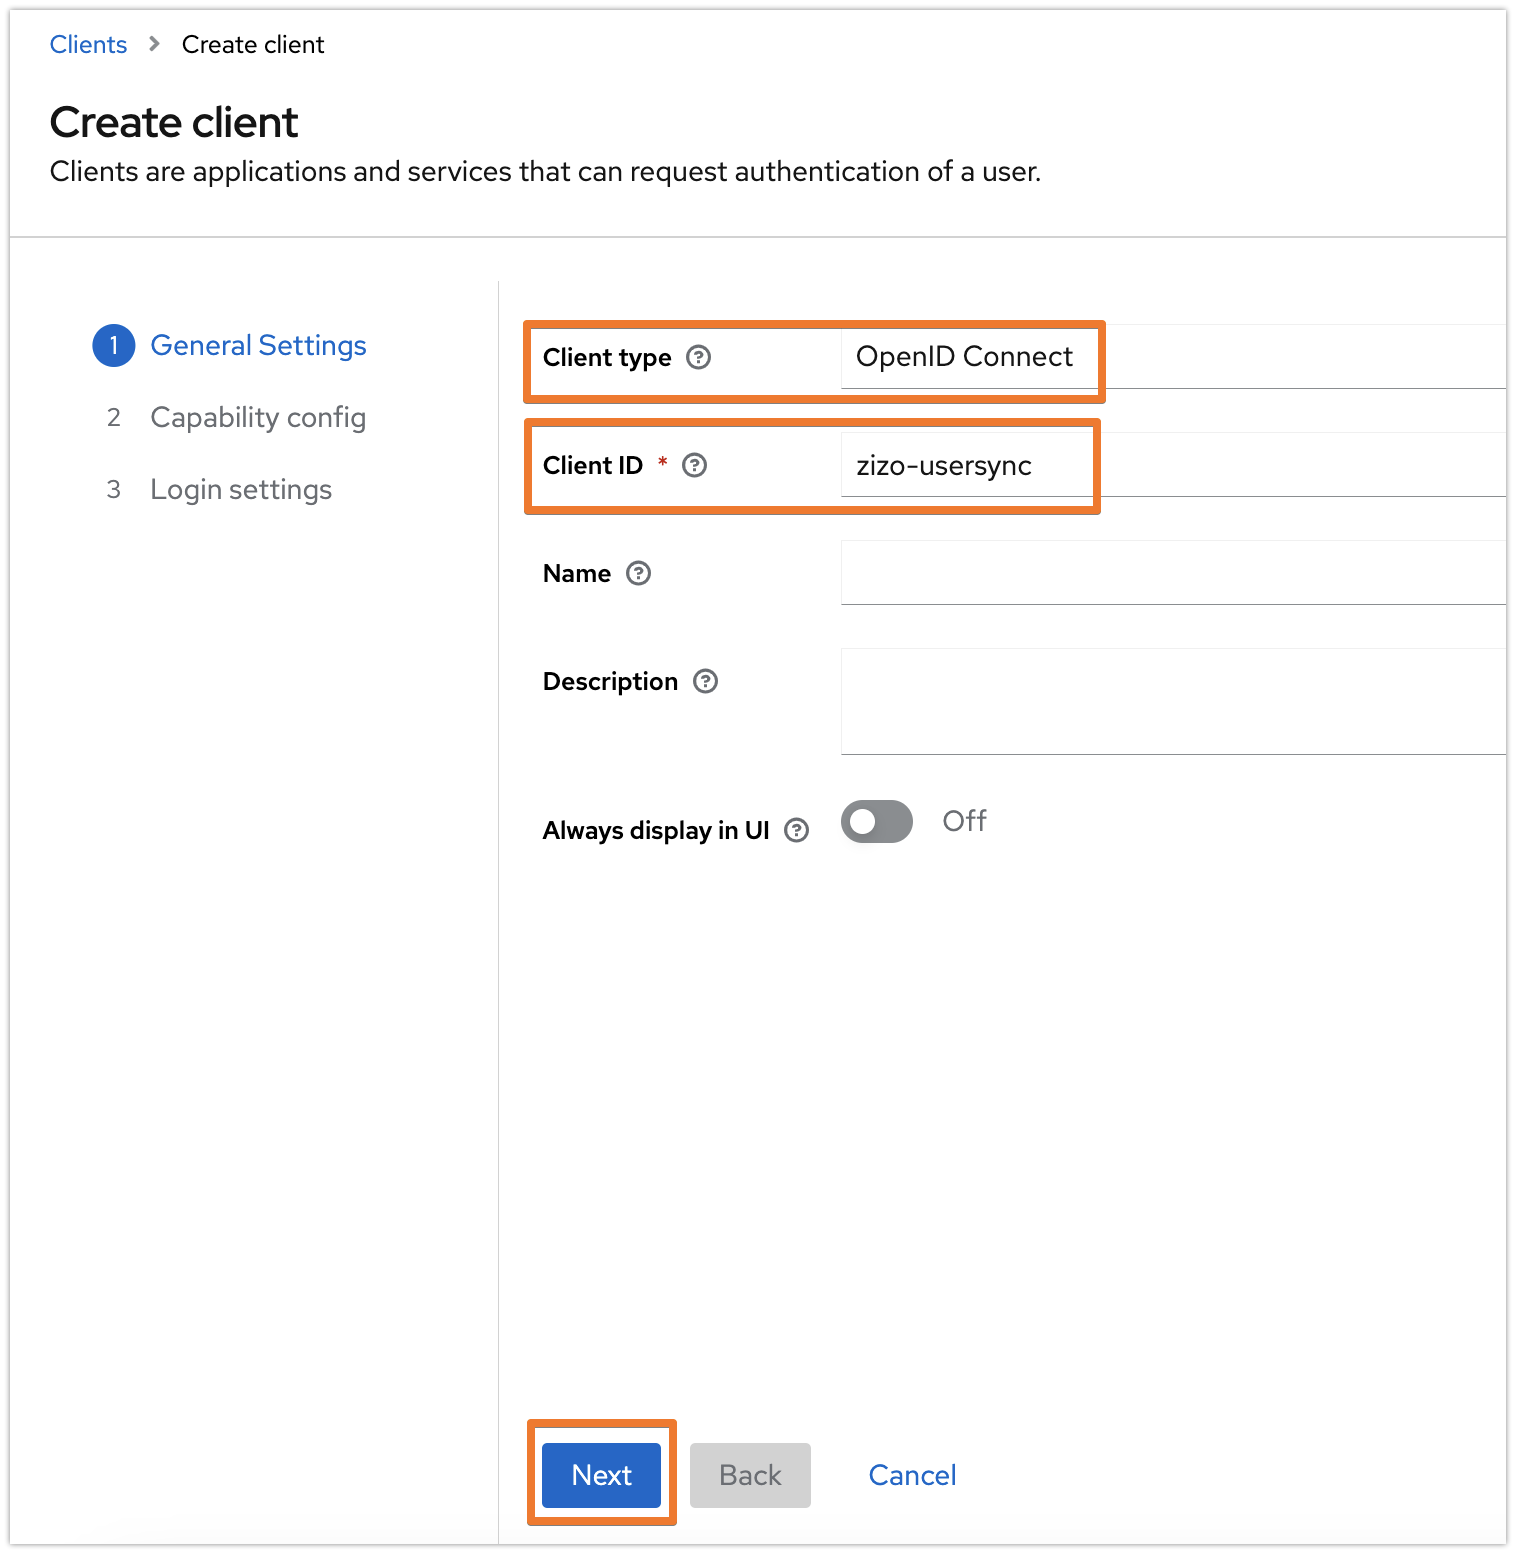
Provide a name for the Client ID and make sure that the Client type is OpenID Connect and click on Next.
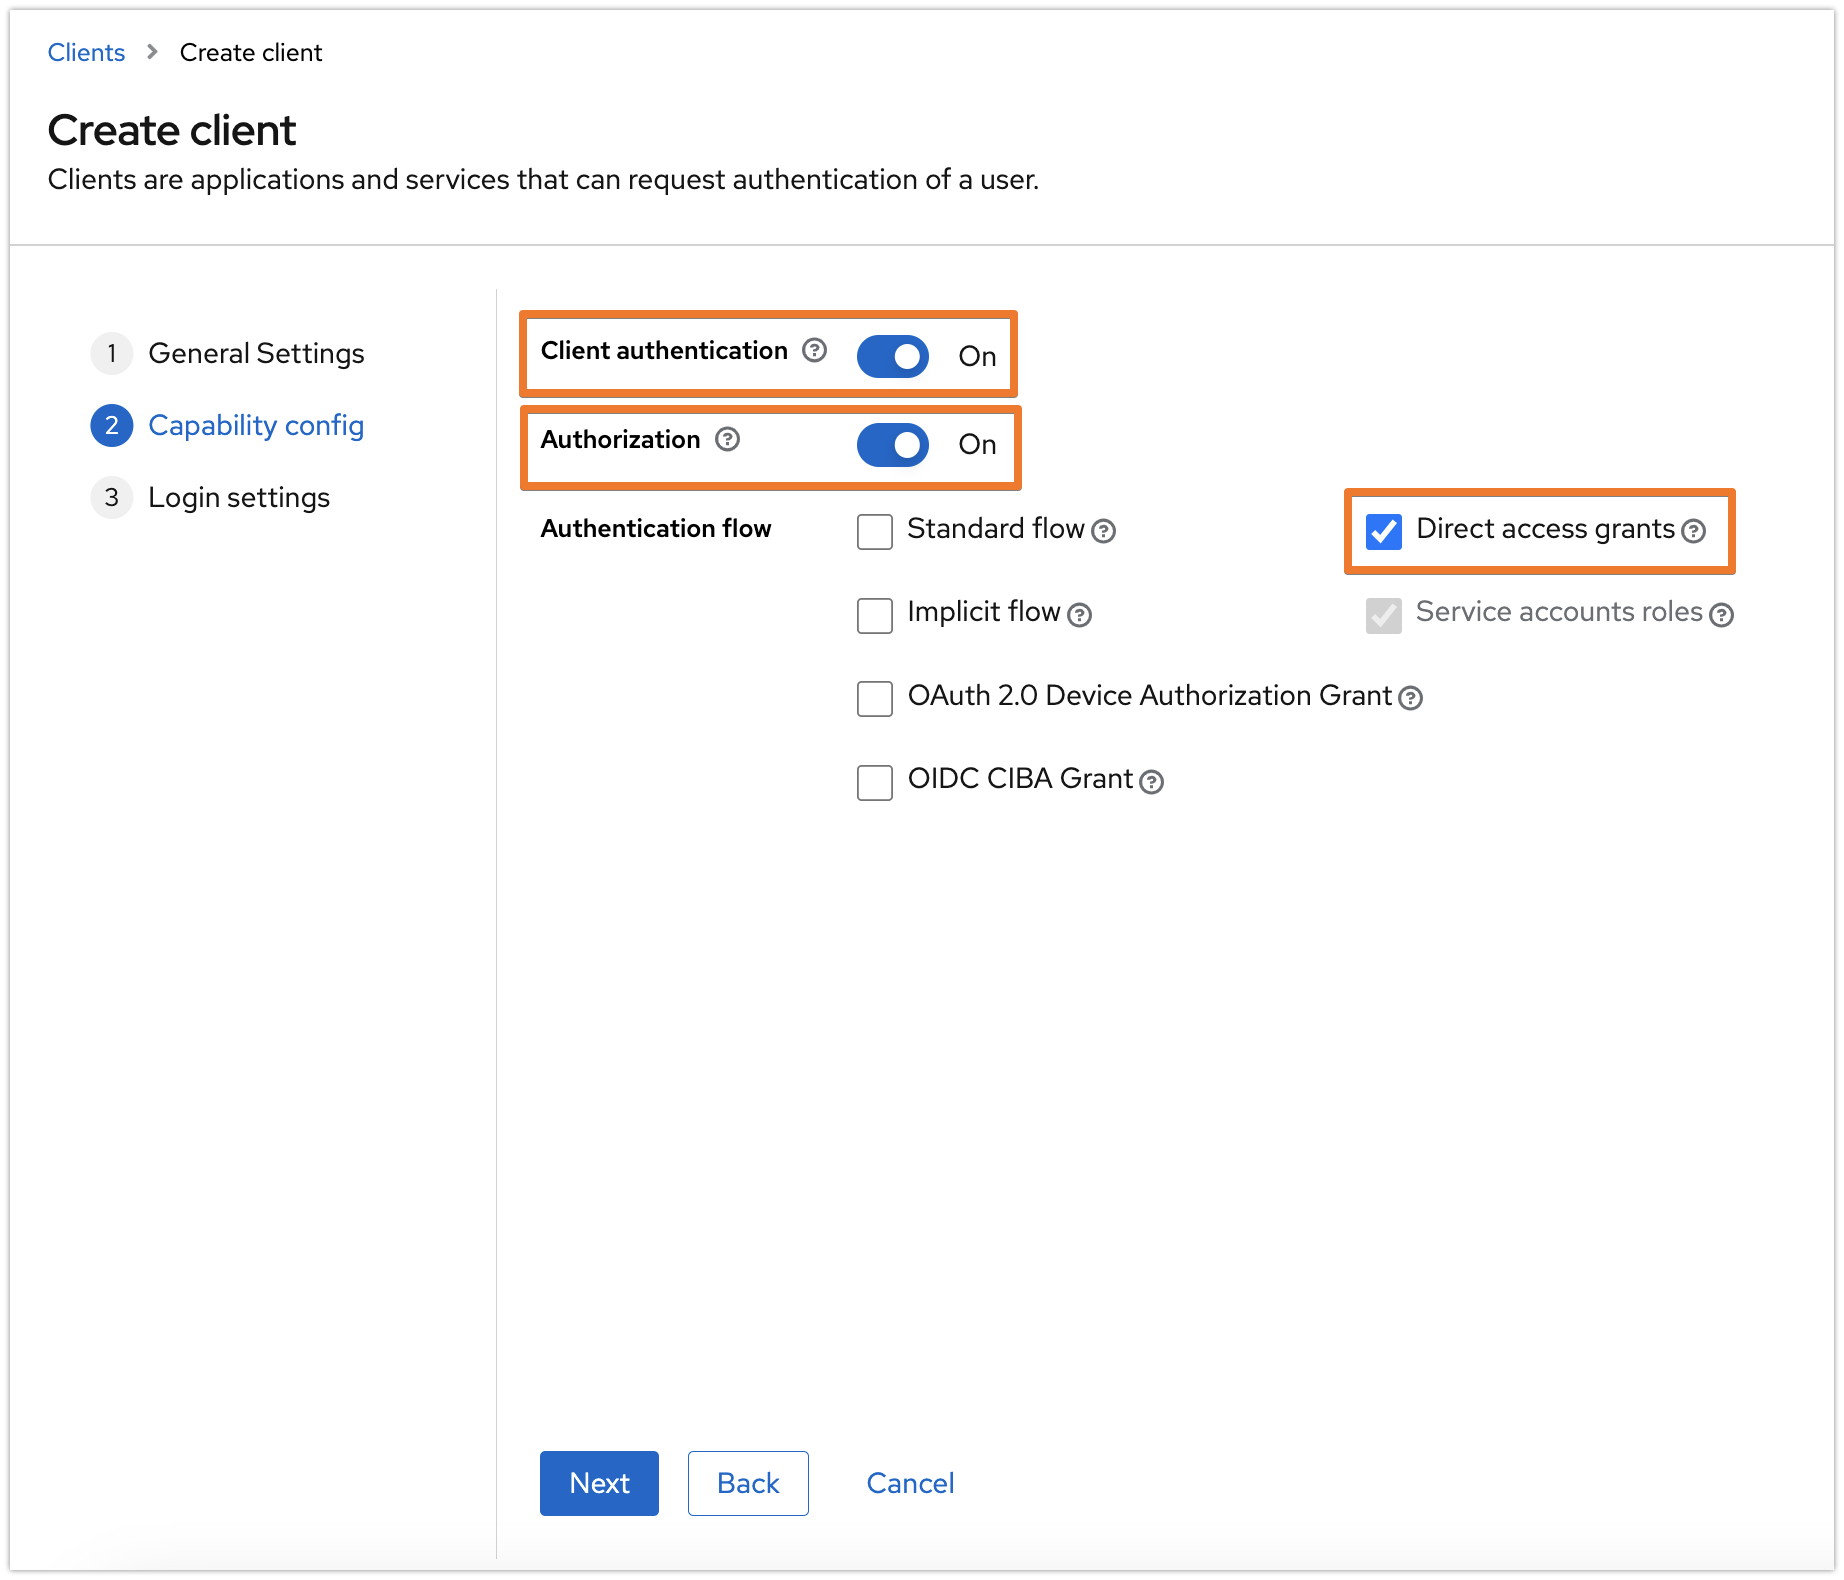
In the Capability config tab, enable both the Client authentication and Authorization options, and have the other options as the following screenshot, then click on Next:
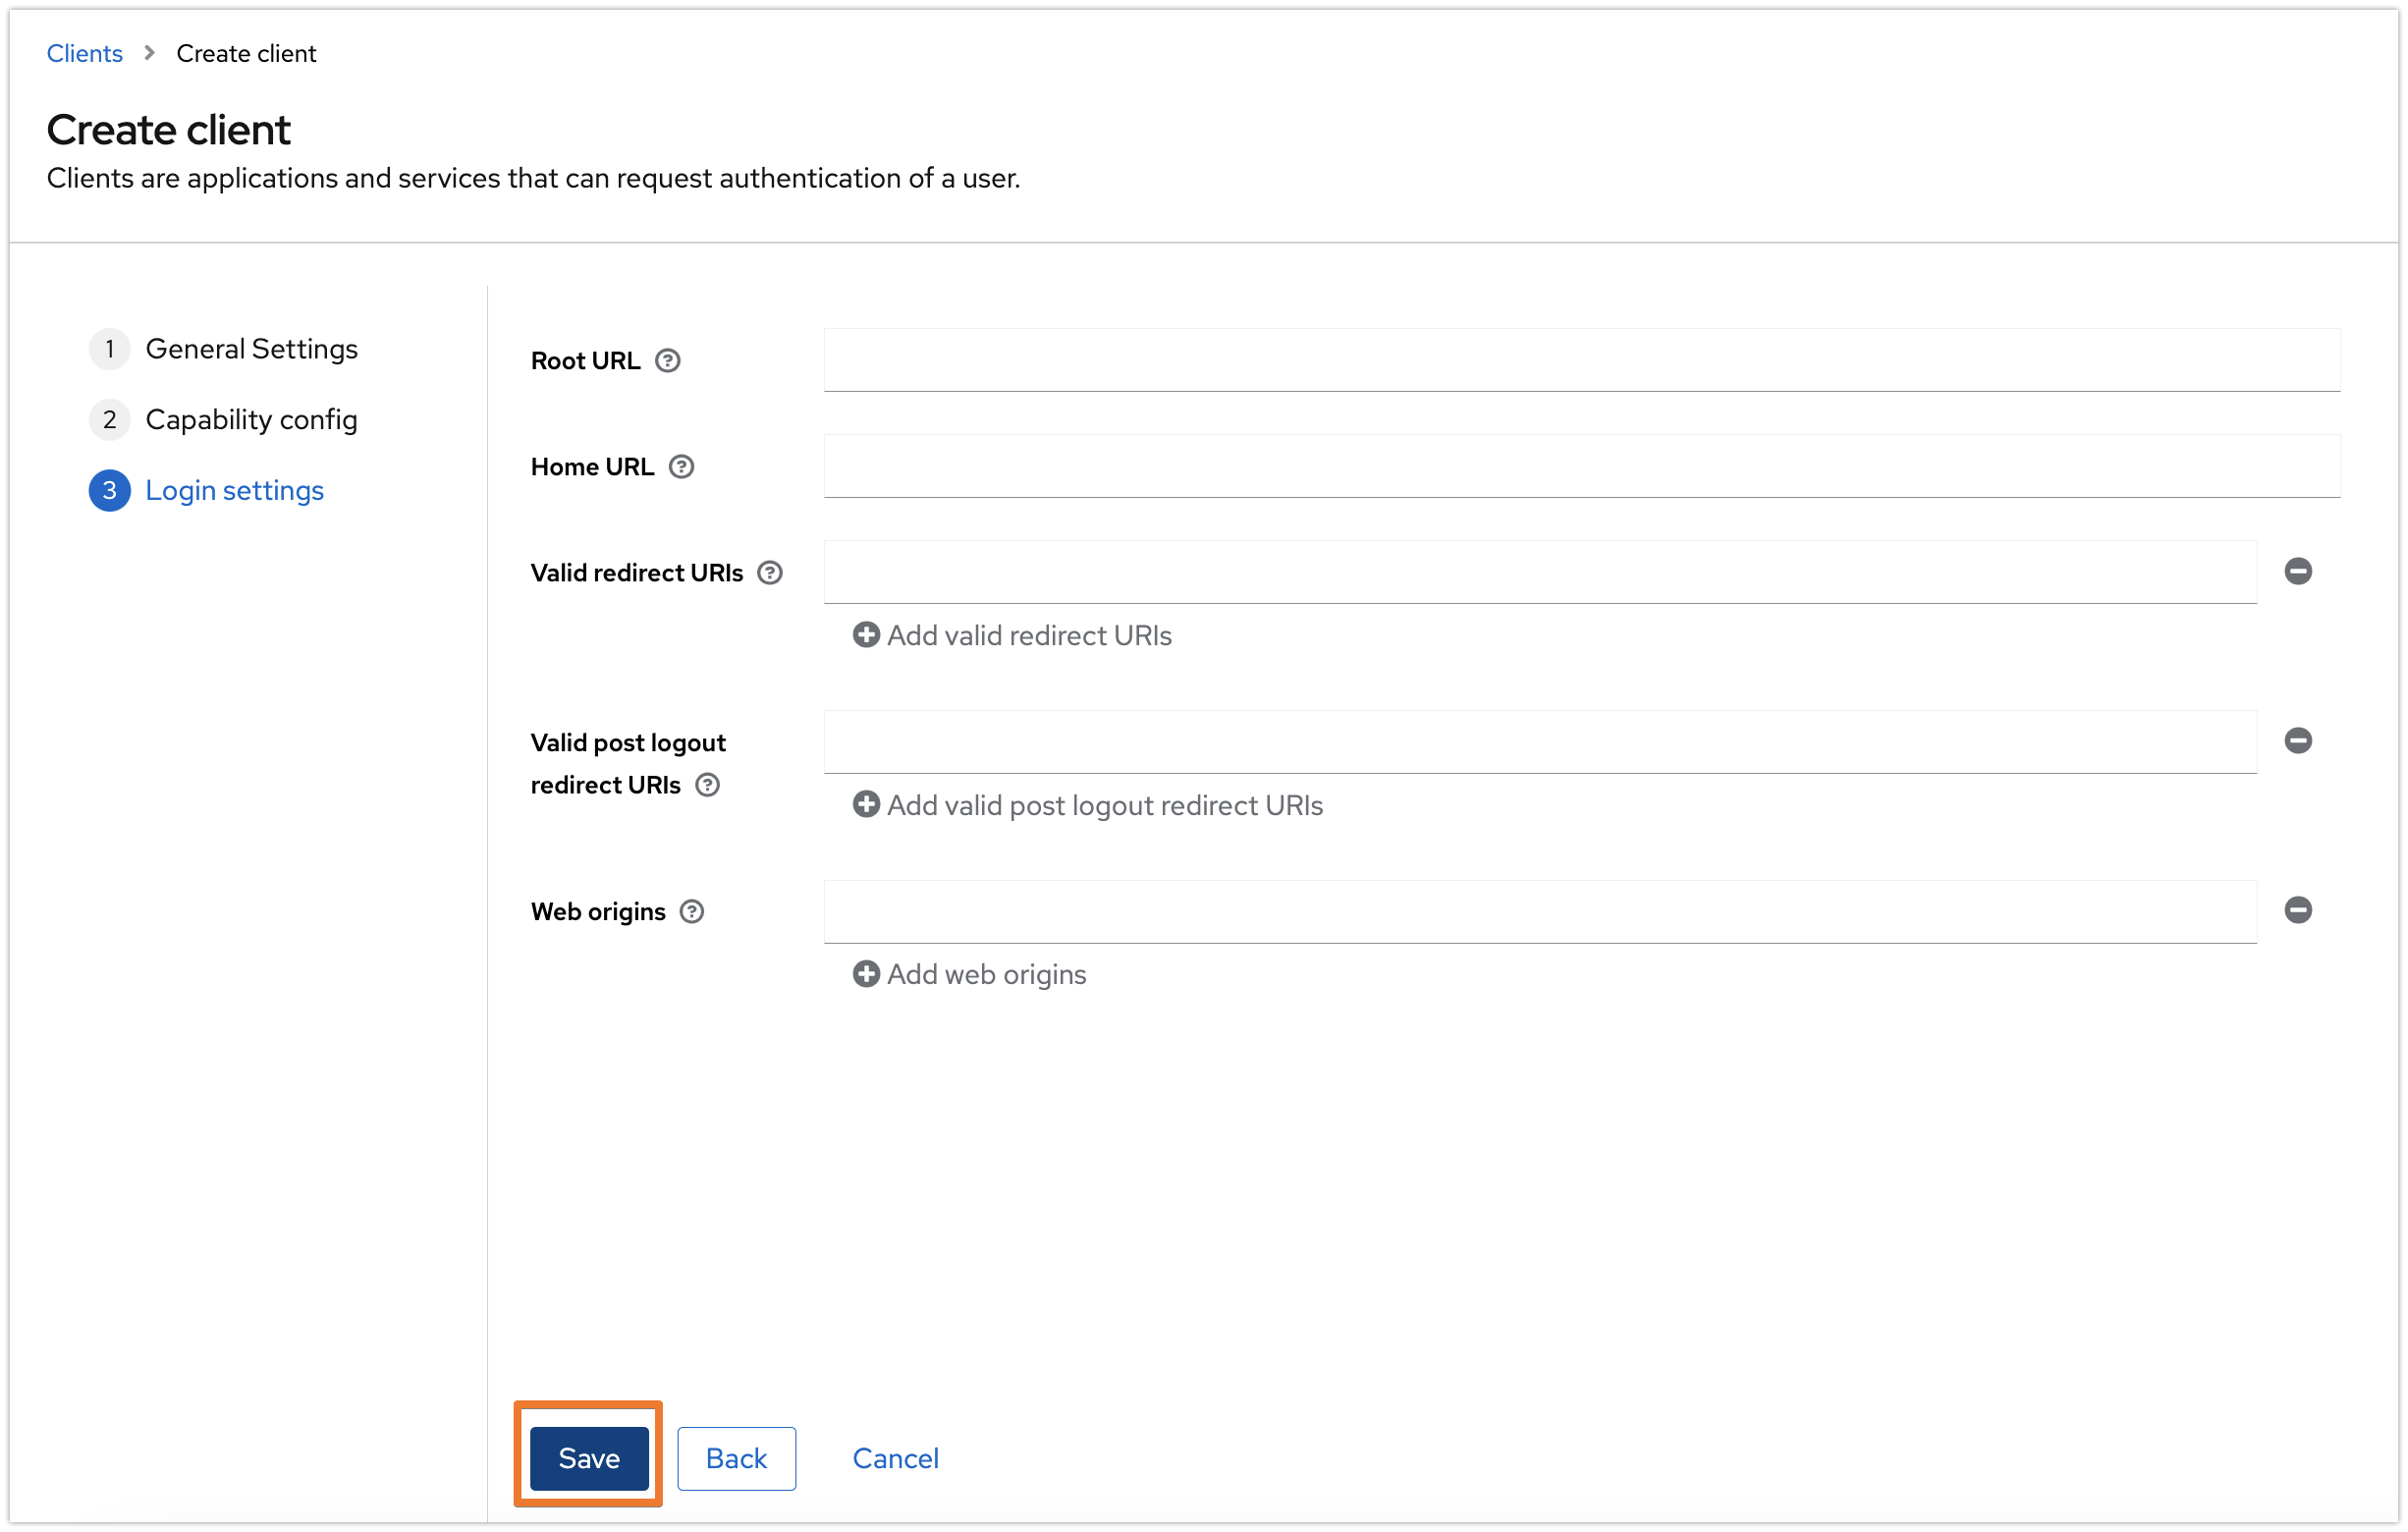
Keep the settings in the next tab as is, and click on Save.
The following assignment might not be required when registering a client in the master realm.
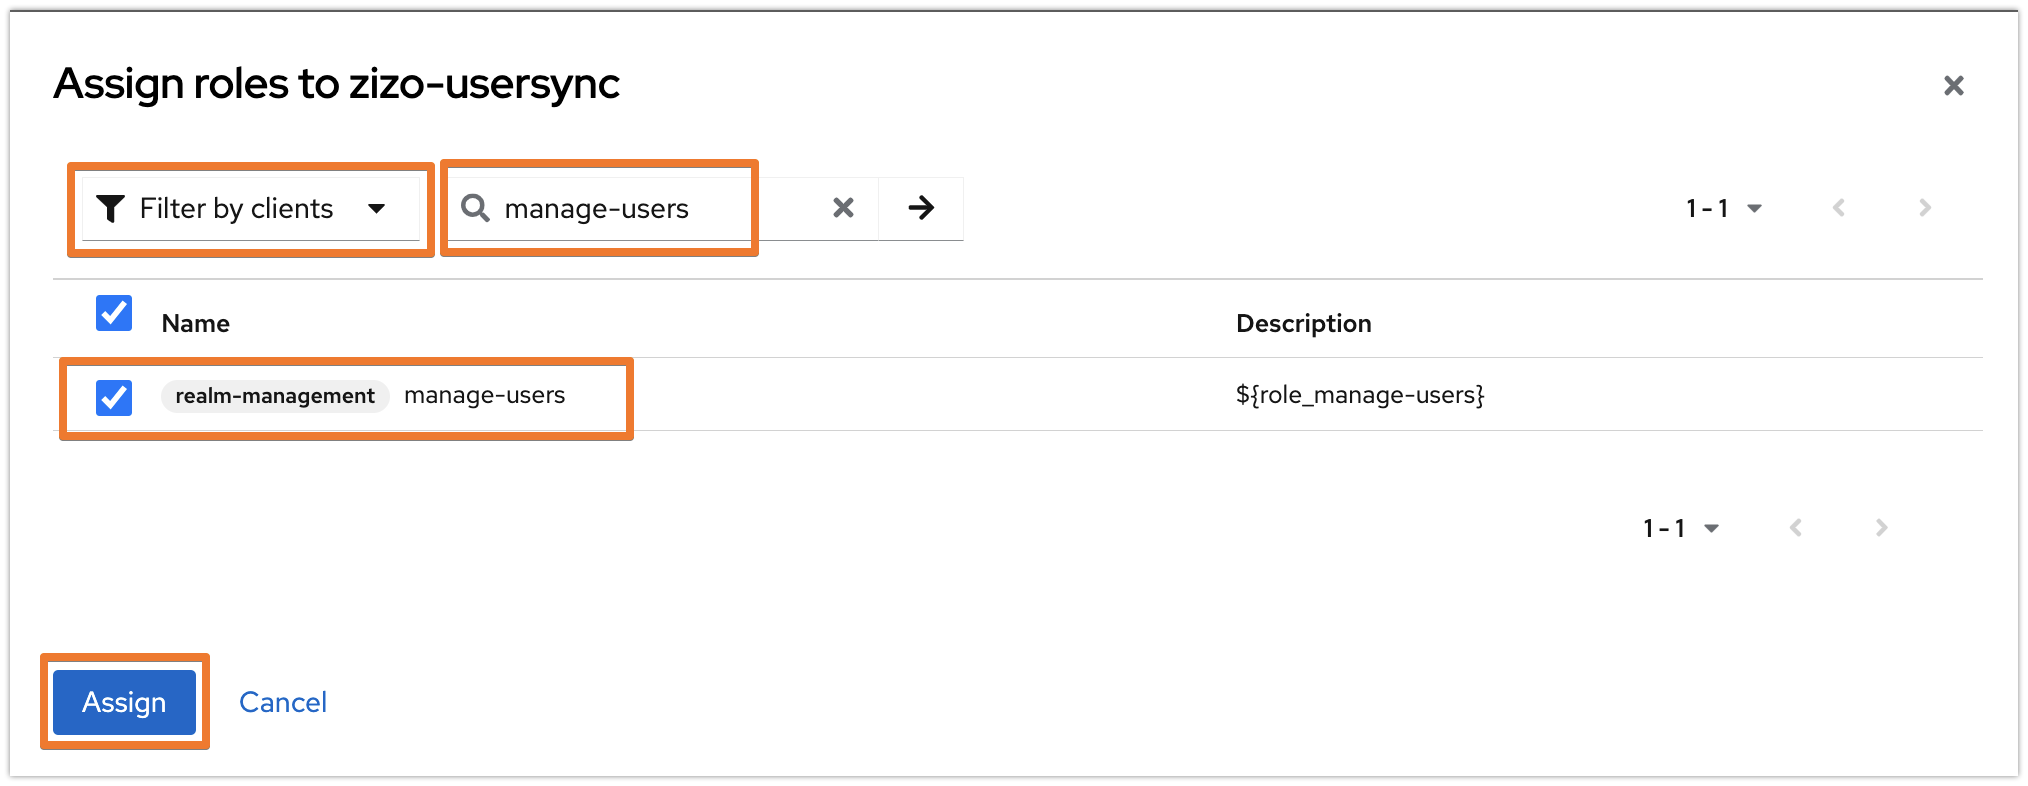
Switch to the Service account roles tab and click on the Assign role button.

Select "Filter by clients" and search for "manage-users" then click enter. Choose "realm-management / manage-users" and click on Assign.
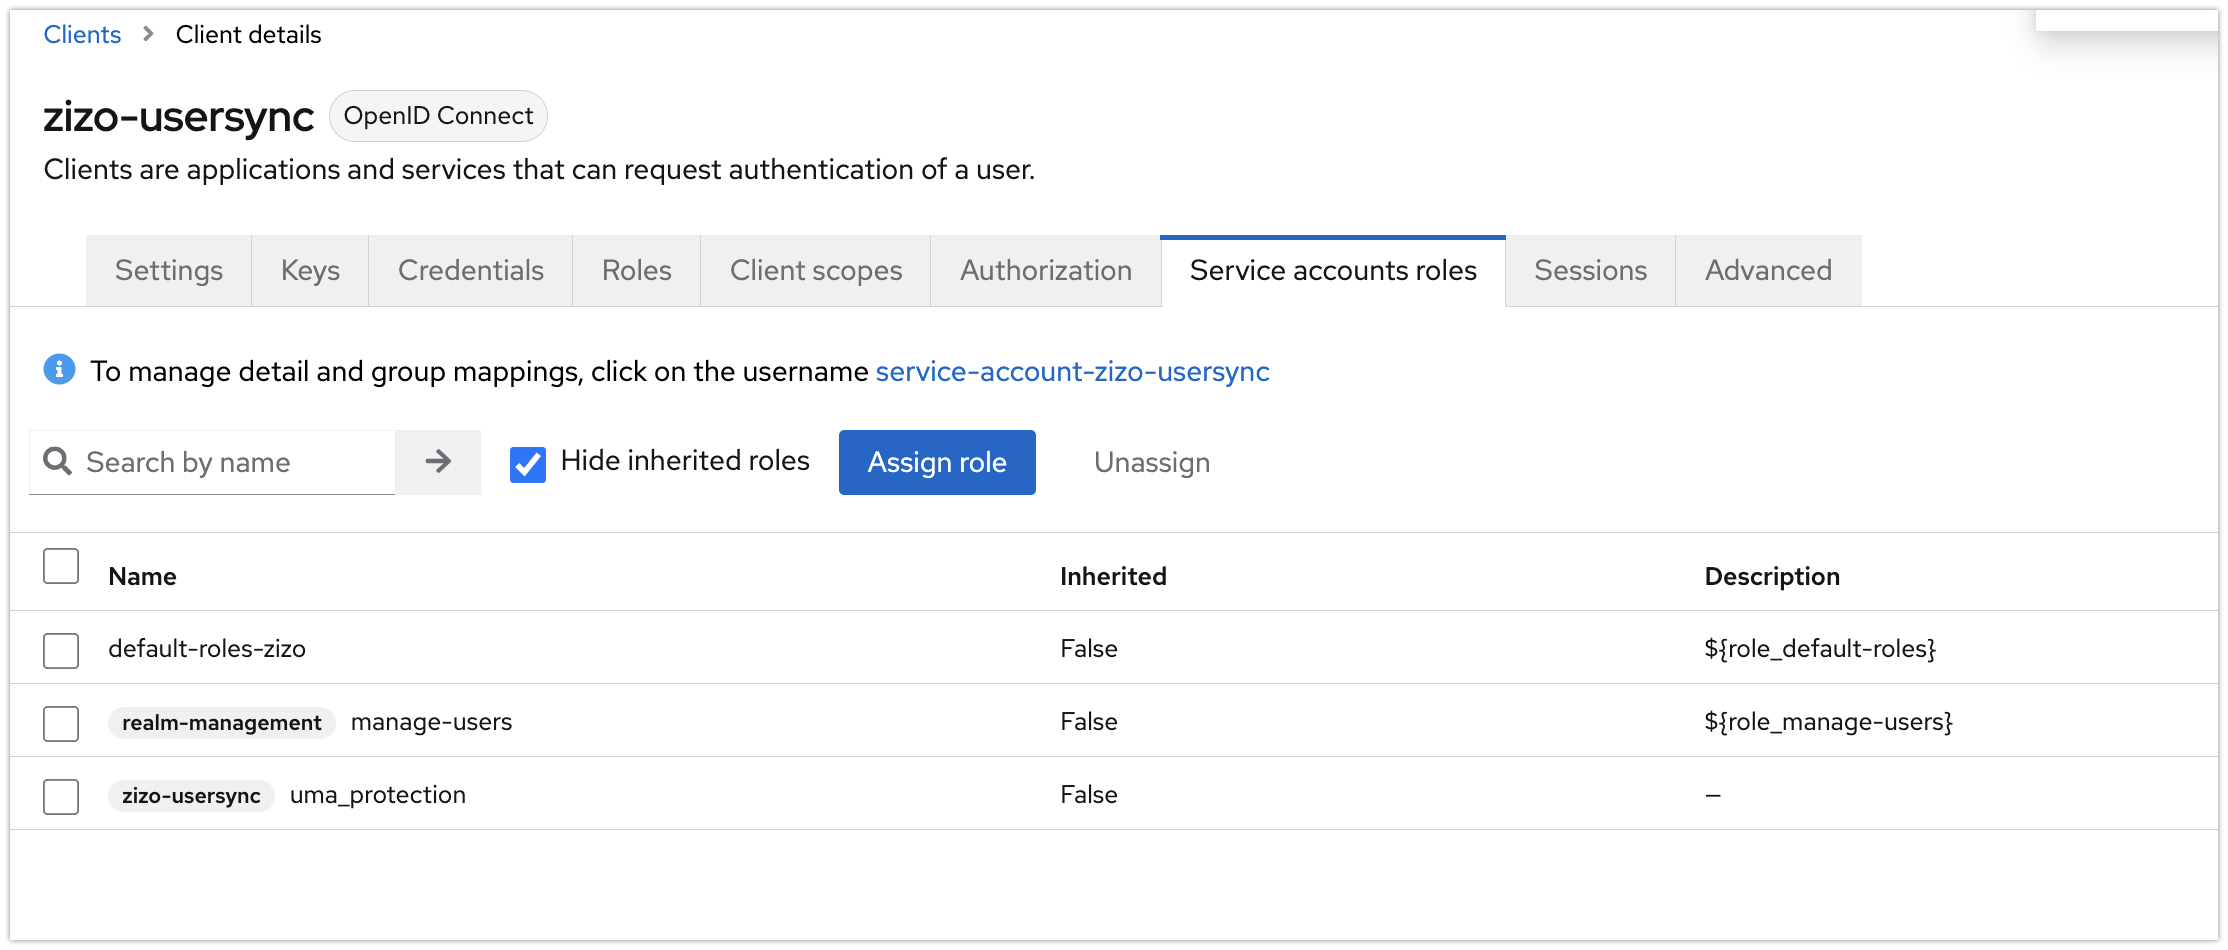
The settings should look like the below now:
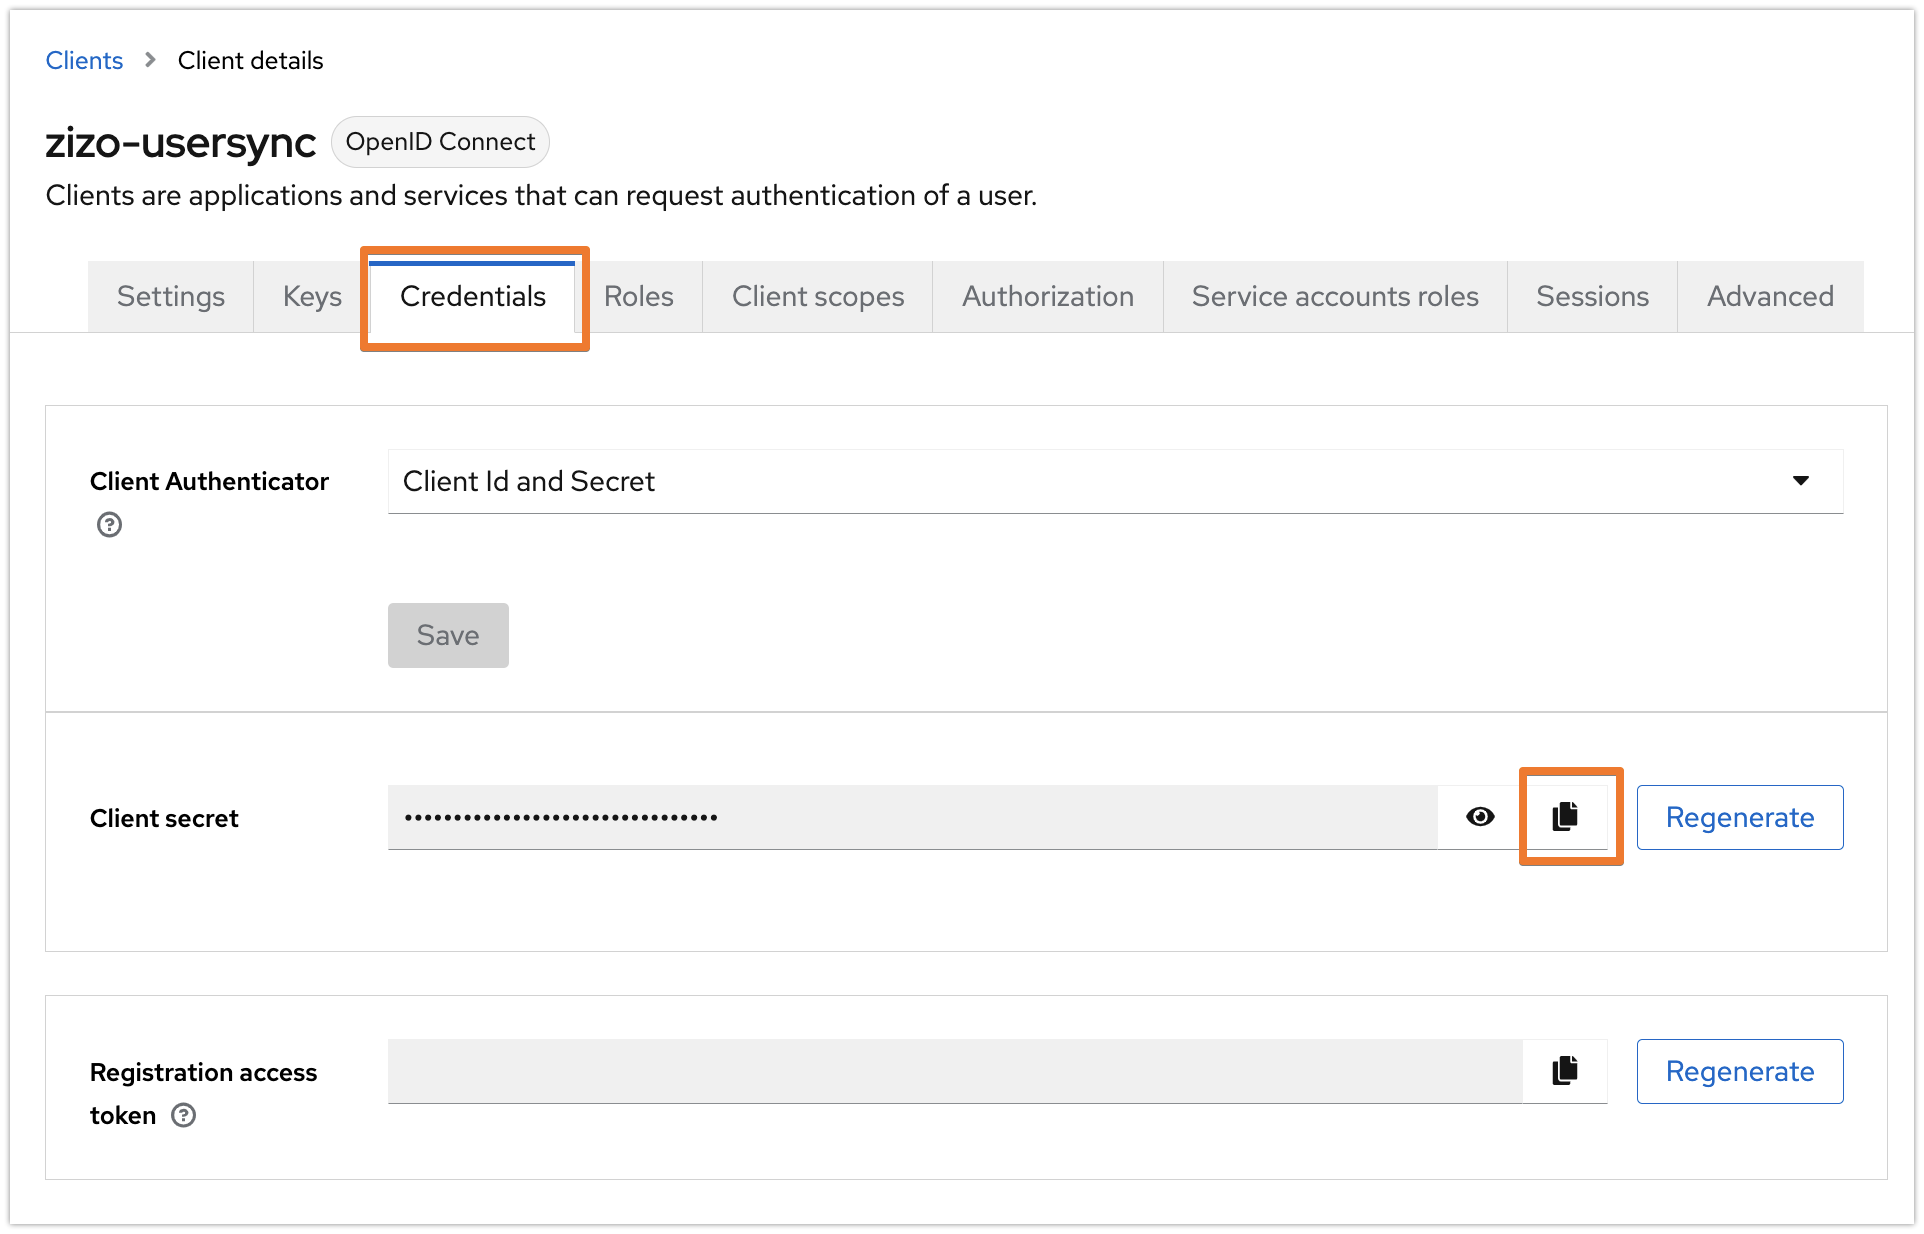
Go to the Credentials tab, and copy the Client secret. You may regenerate it at any time.
Configuration in User & Group Sync Configuration page
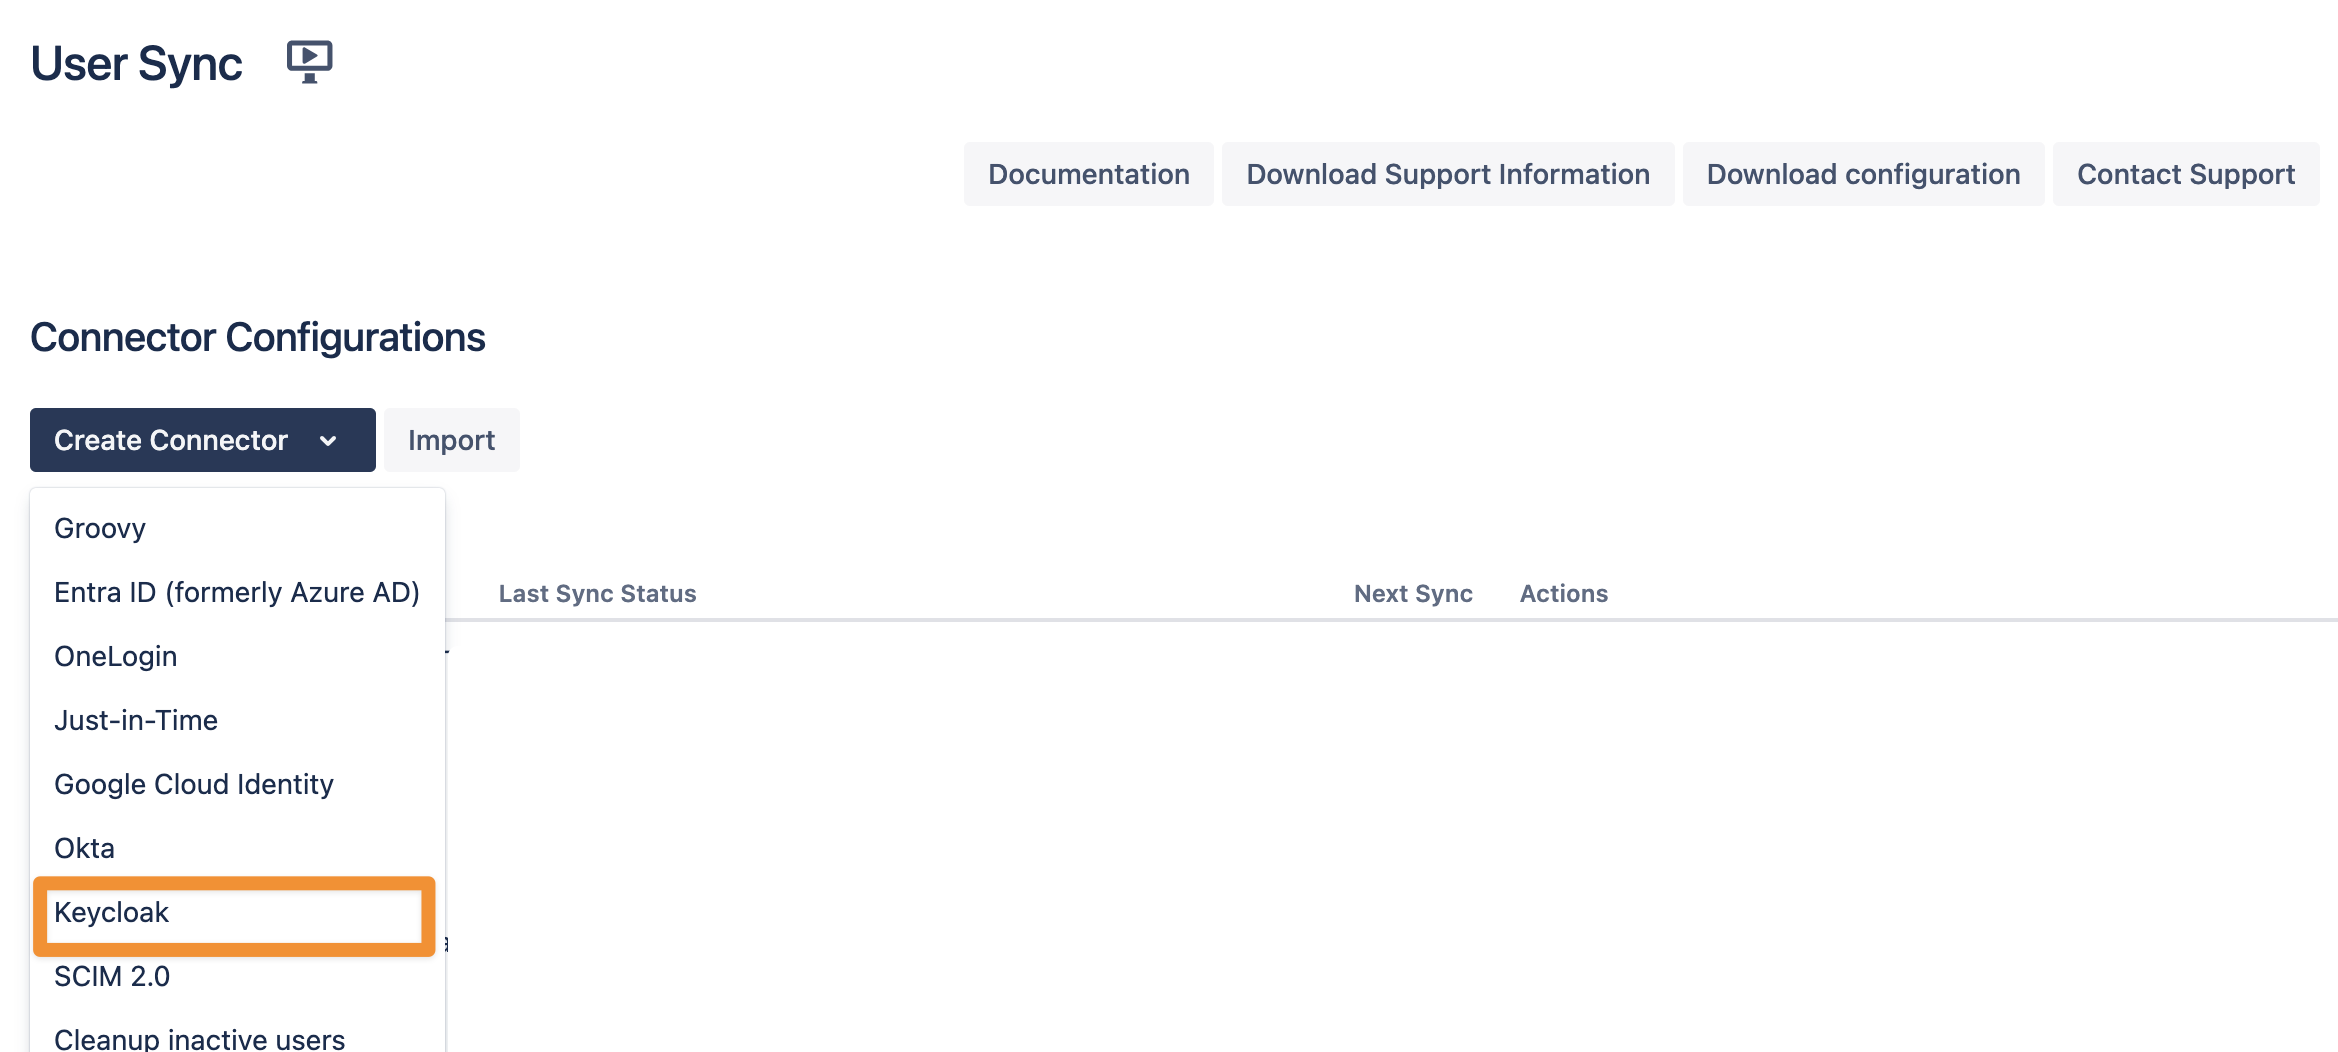
In your Atlassian application, go to User Sync, click Create Connector, and select Keycloak.
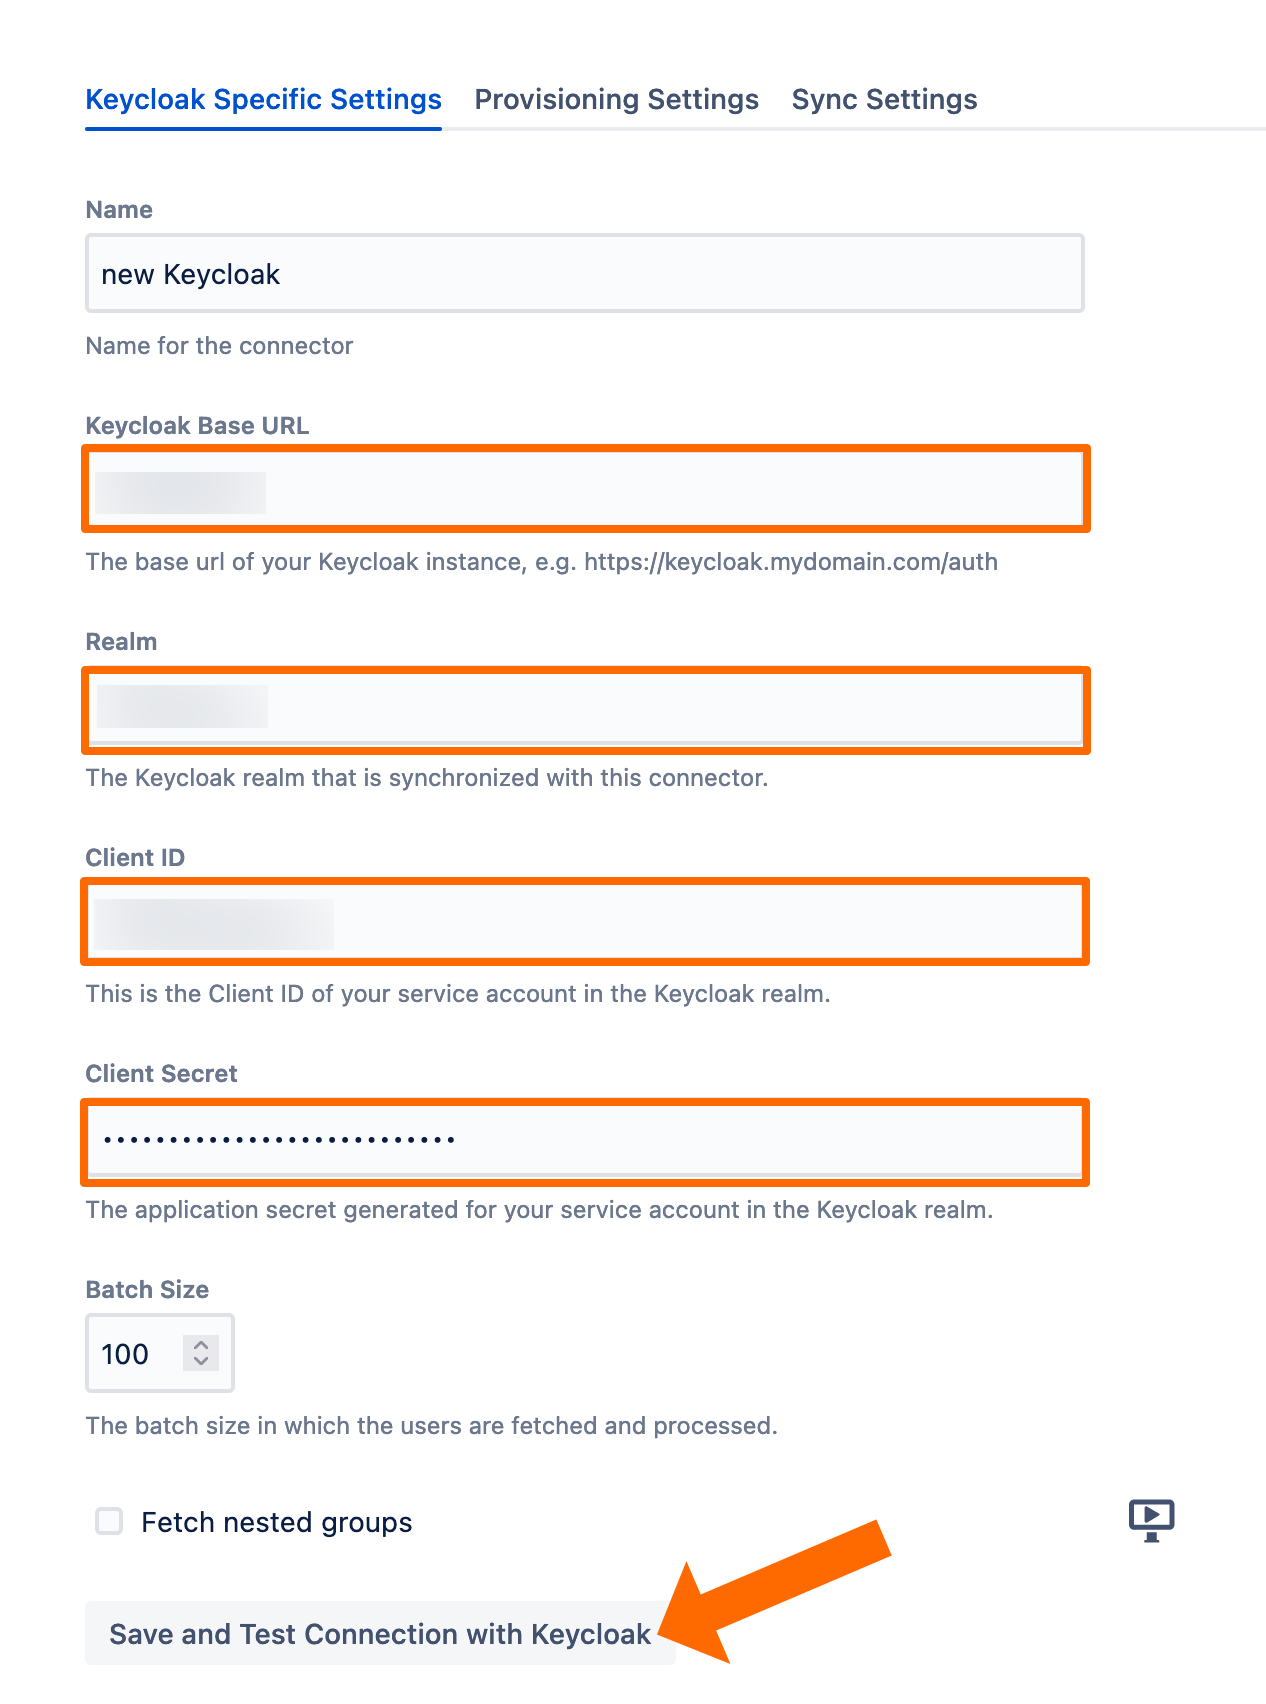
Set a name, insert your Keycloak URL appending /auth at the end, and provide
realm name
client-id
secret
as per your Keycloak setup earlier. Use the Save and Test Connection button to check if User Sync can connect to Keycloak successfully.
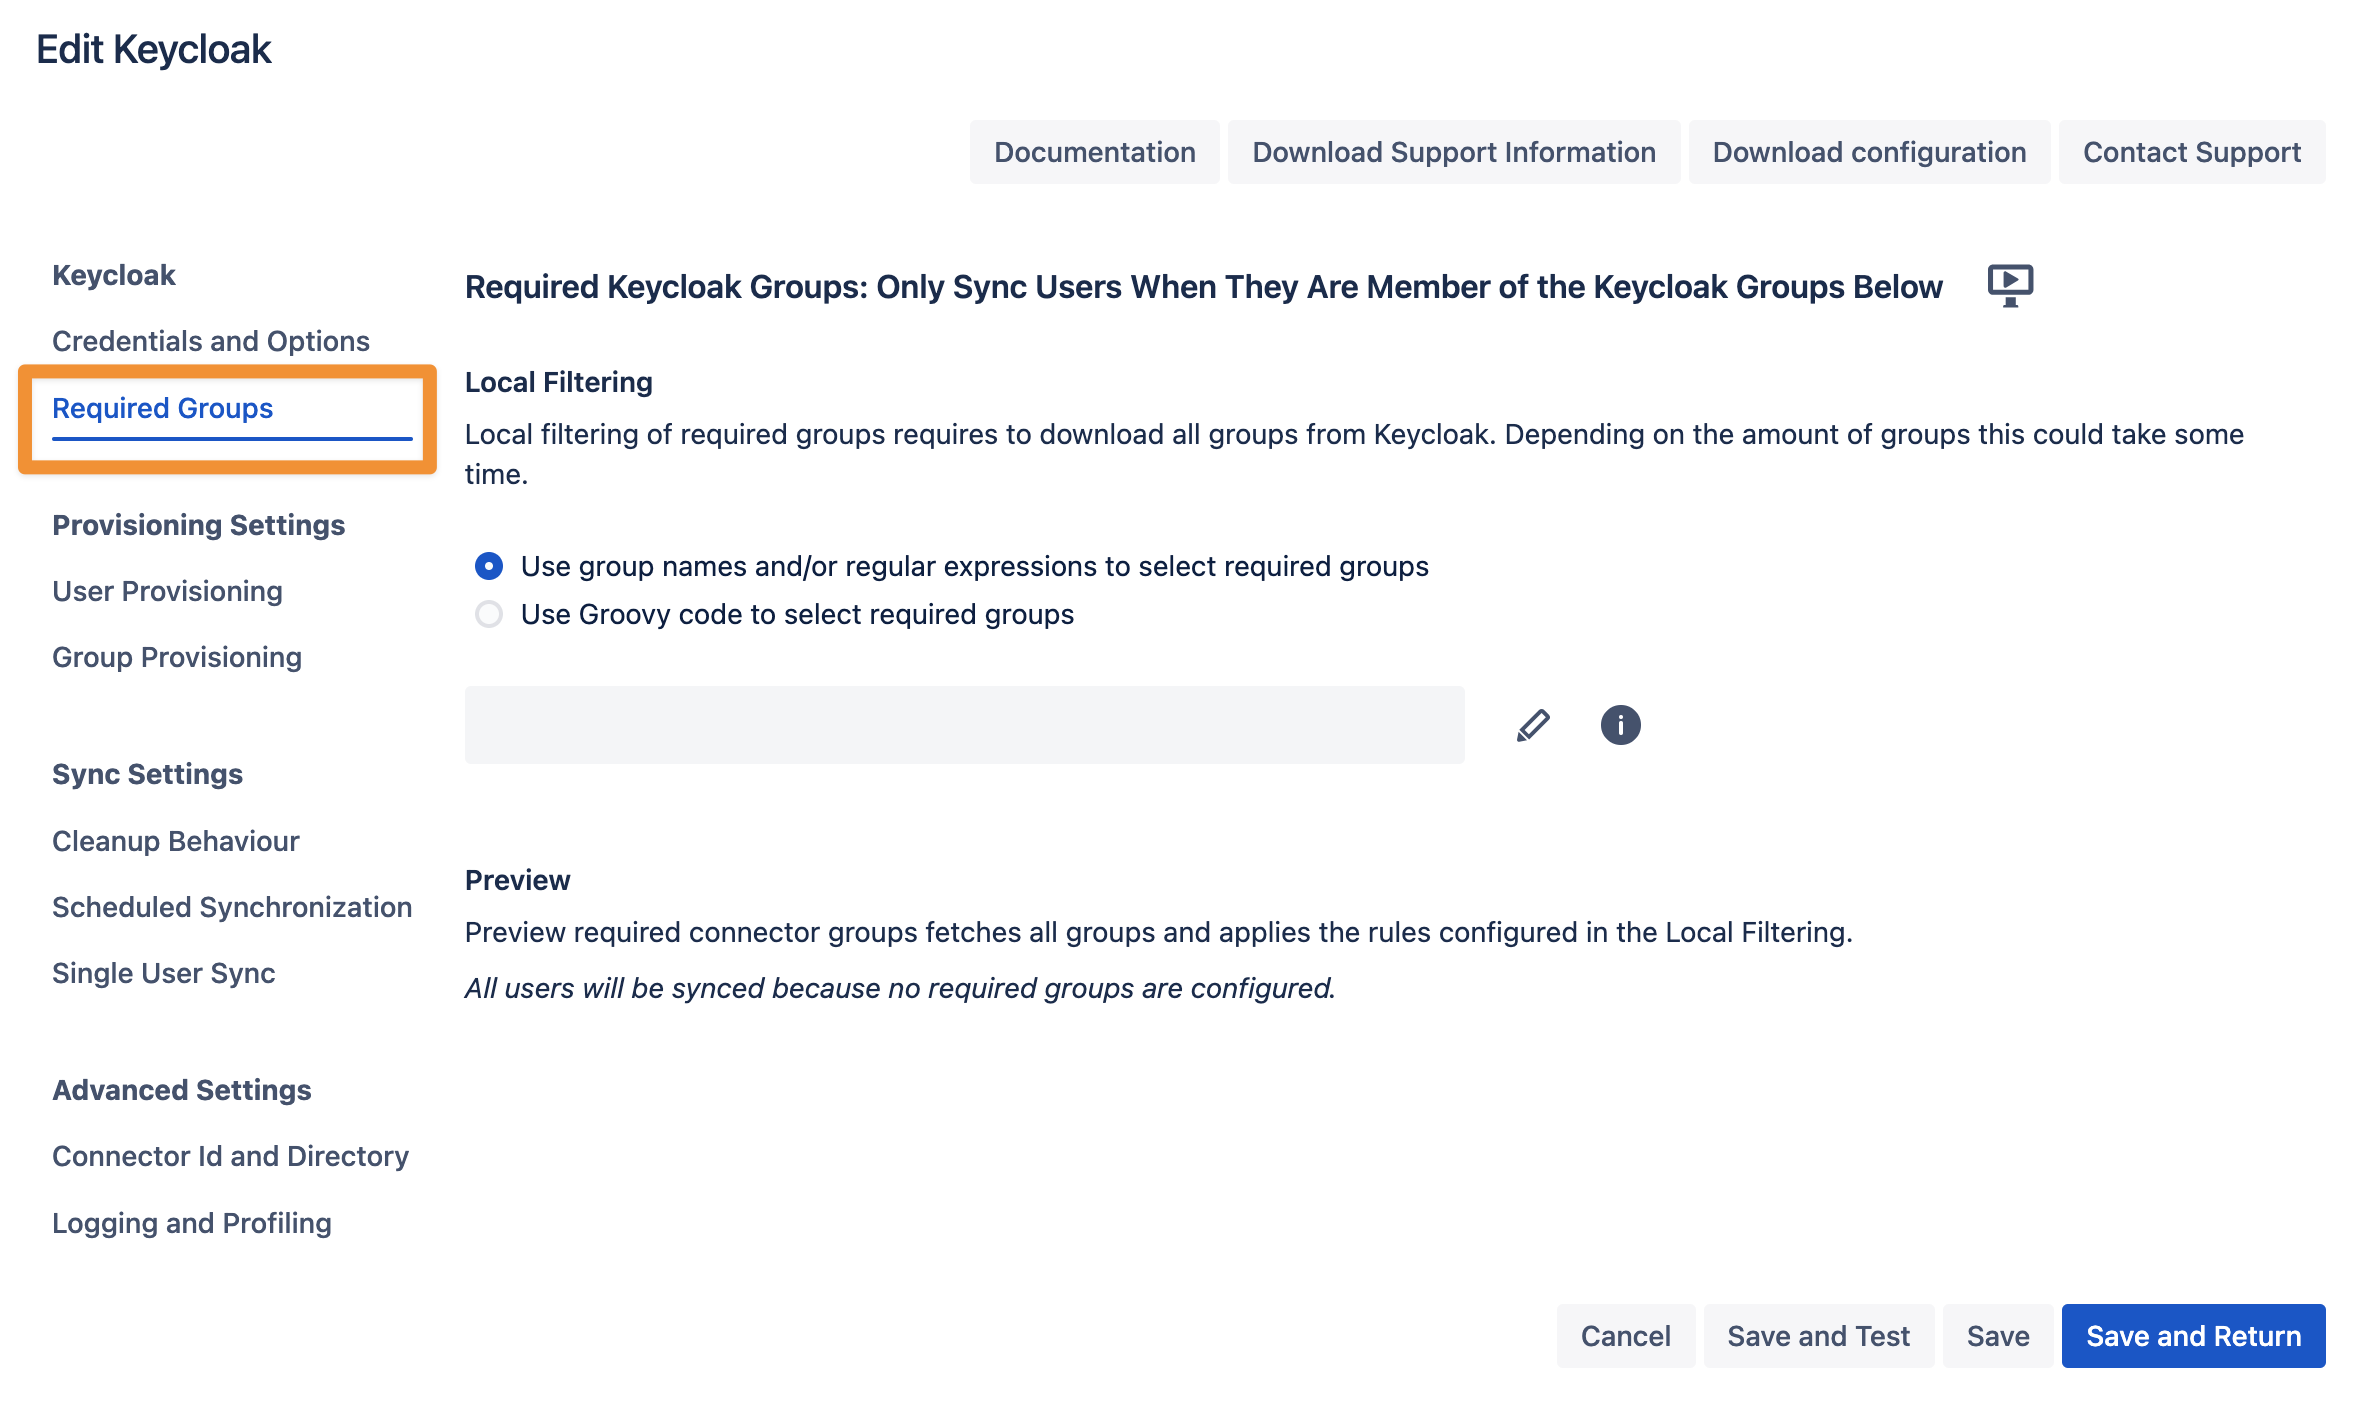
If you want to limit the number of users you sync from Keycloak you can set this up in the Required Groups tab. If you want to sync all users from your realm, you can skip this configuration step.
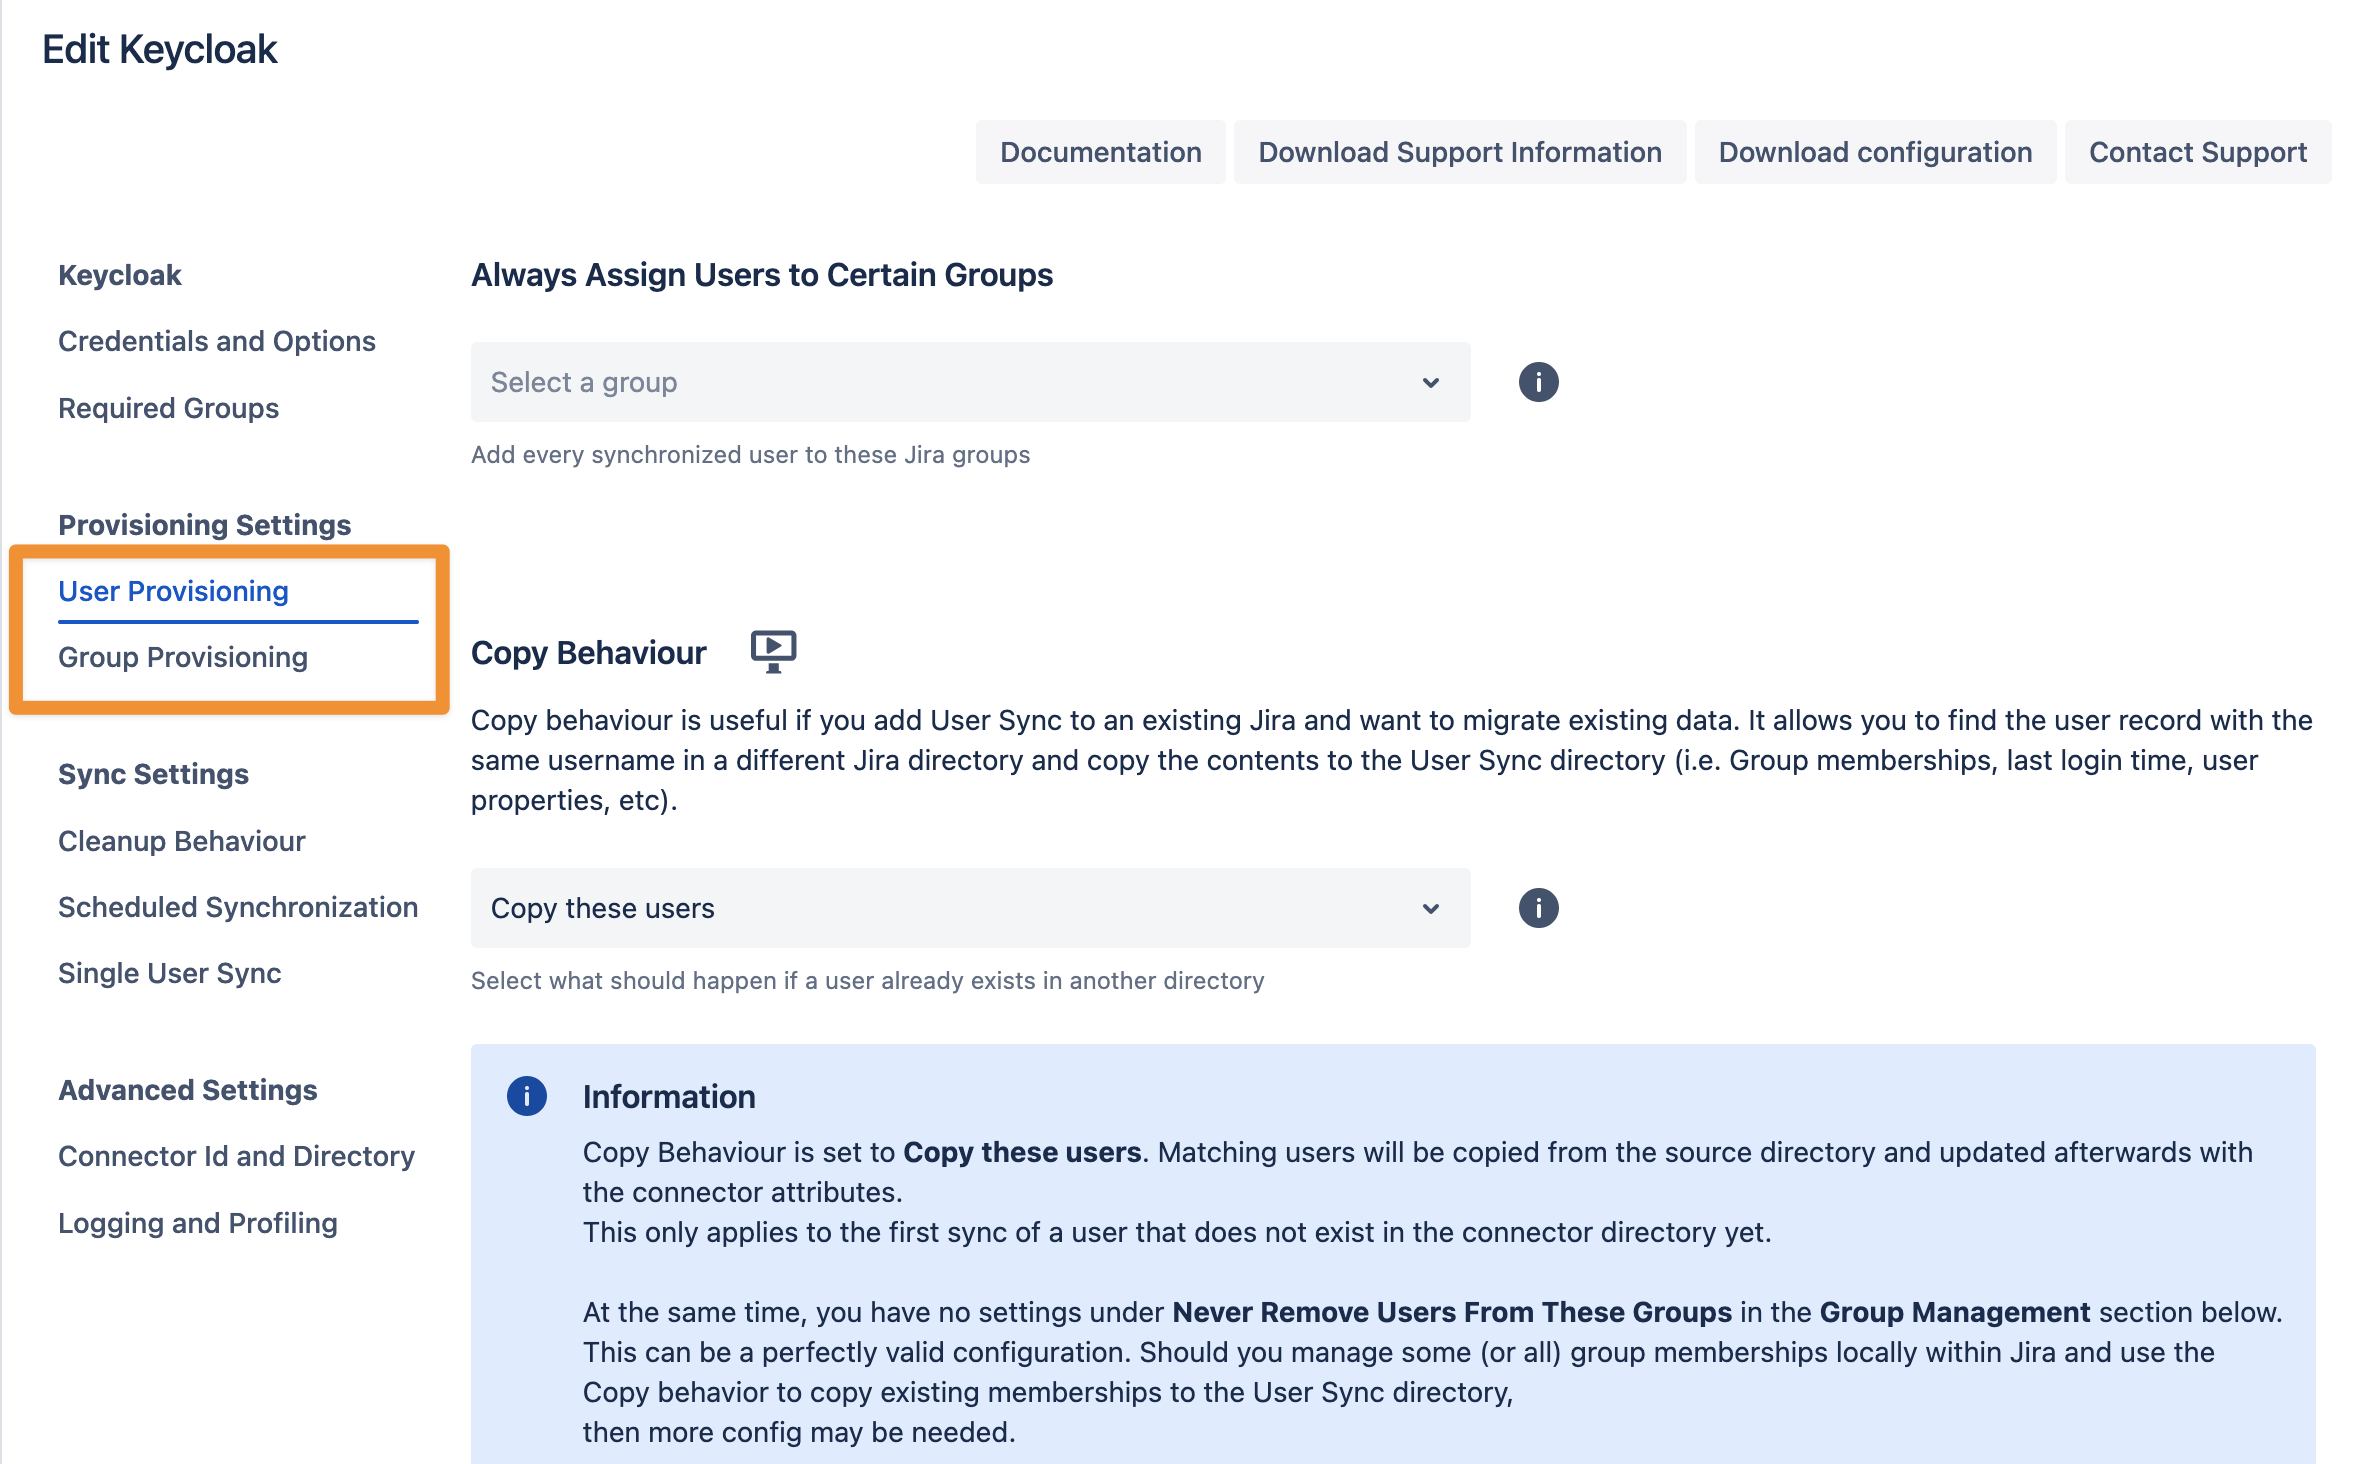
In the User Provisioning and Group Provisioning tab, you can change the attribute mapping for the user and define what groups should be assigned to users in case you don't need all groups from Keycloak. If you leave the settings unchanged, the standard user attributes are synced together with all the groups that have been assigned to the user.
In the Sync Settings section, you can configure the Cleanup Behavior and the Scheduled Synchronization. The clean-up defines what should happen to the user when it is not returned by Keycloak any more. The default is deactivating the user. By configuring the Scheduled Synchronization, you can have the sync run periodically without manual interaction. When enabled, the sync runs daily at 2 am, but you can change this if you want.
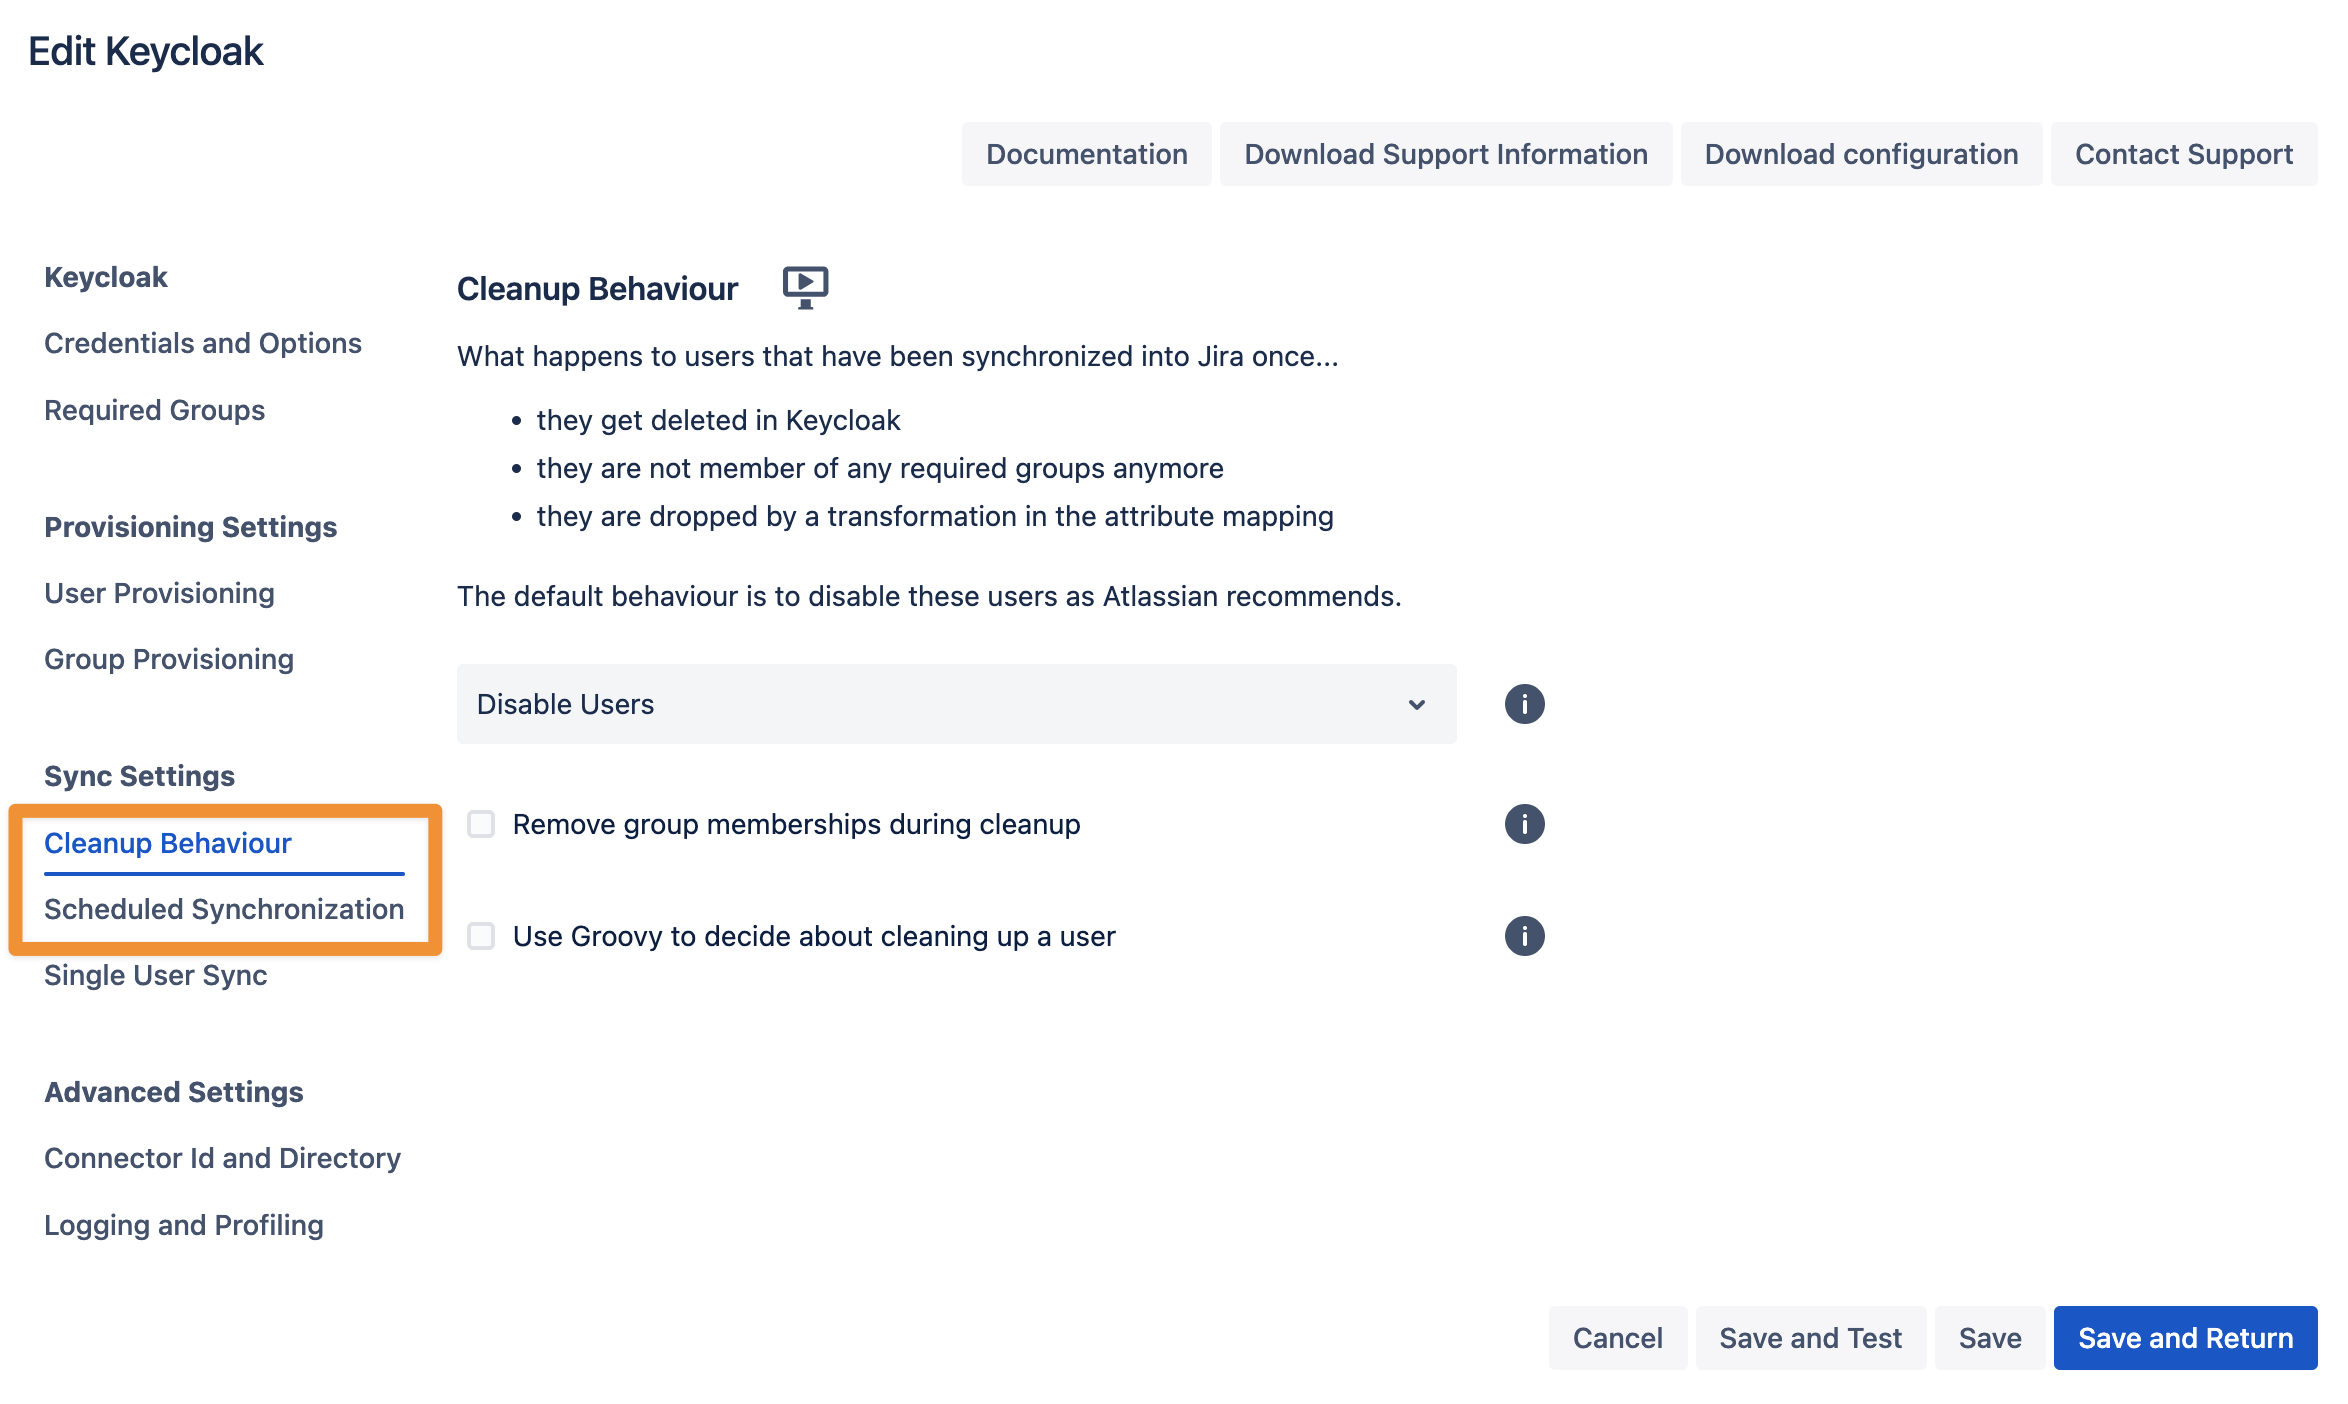
Please ensure that you Save your configuration.
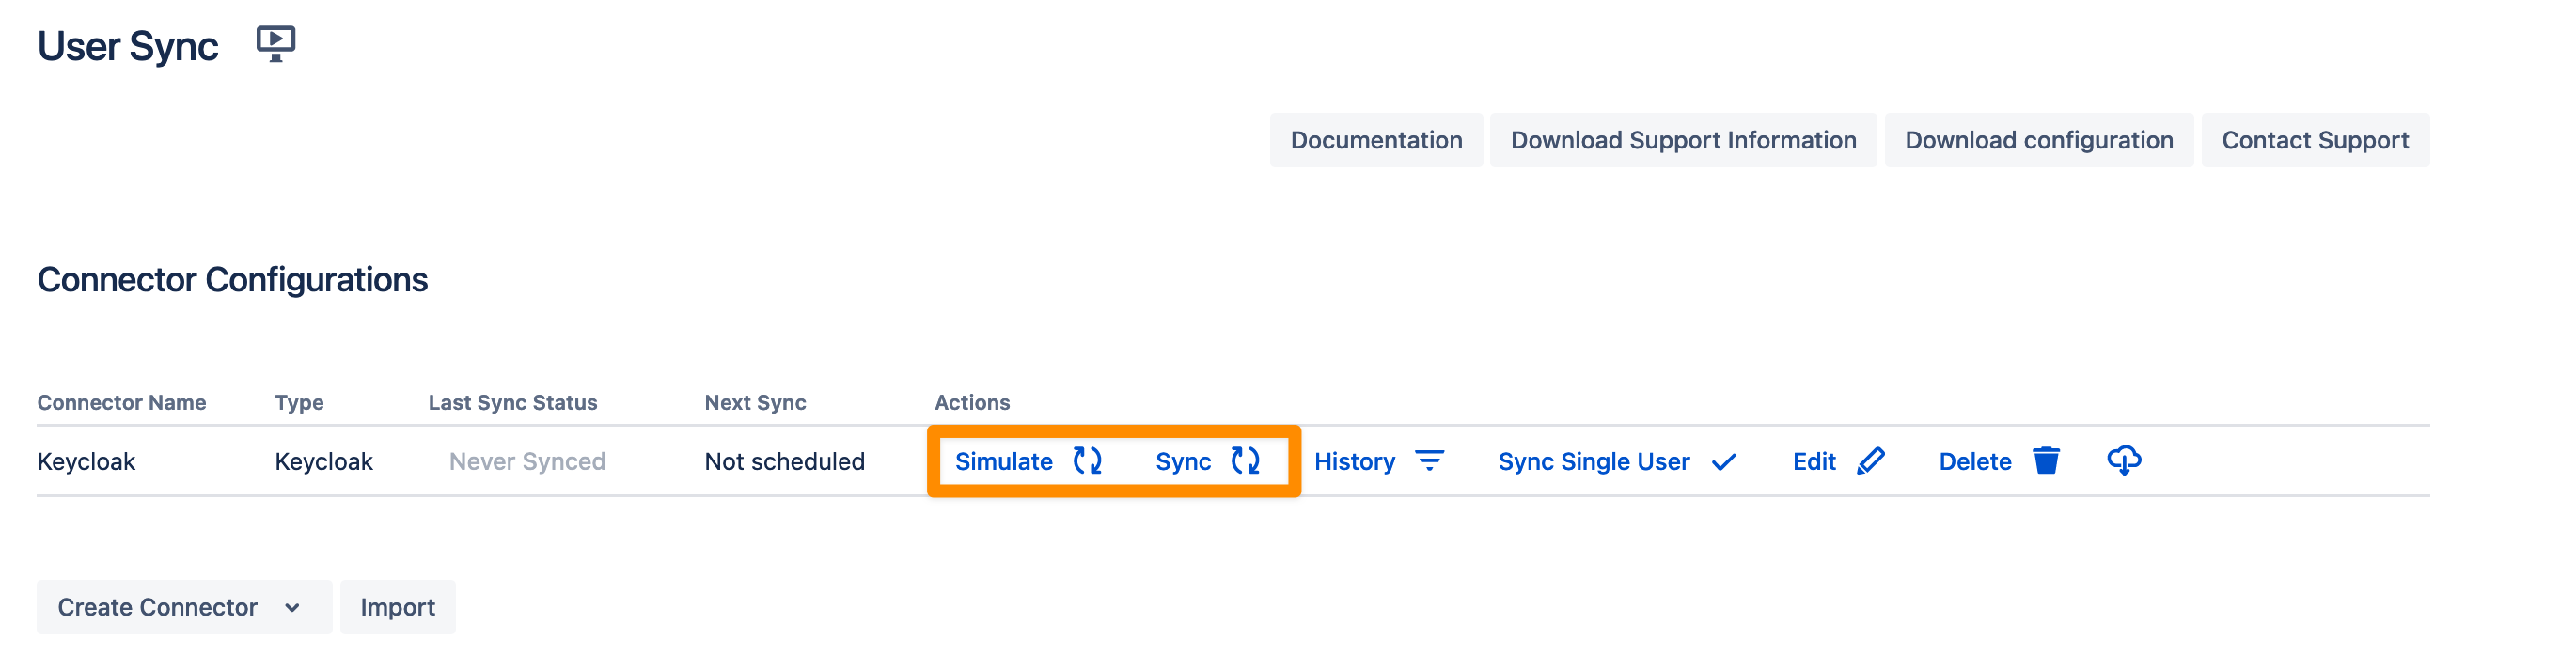
You are now ready to commence either a simulated or a full sync. By simulating the sync first you will be able to verify your configuration and see what changes User Sync would apply like what users will be added, modified, or not modified. With the full sync, User Sync will apply those changes. Both sync actions will run a full sync and will have the same sync duration. For more information on the sync simulation, please refer to Using the Simulated Sync Feature.
Additional Resources:
Configure SAML SSO
For the next steps, please go to Manage apps (or addons), choose SAML SSO and click Configure.
First Steps - Wizard
After you clicked "Configure", the Wizard will be triggered. If not, or if you want to add another Identity Prover (IdP) to your existing configuration, click on "+ Add IdP". This guide assumes, that there is no IdP configured.
The Wizard greets you with information, click on "Add new IdP" to proceed.

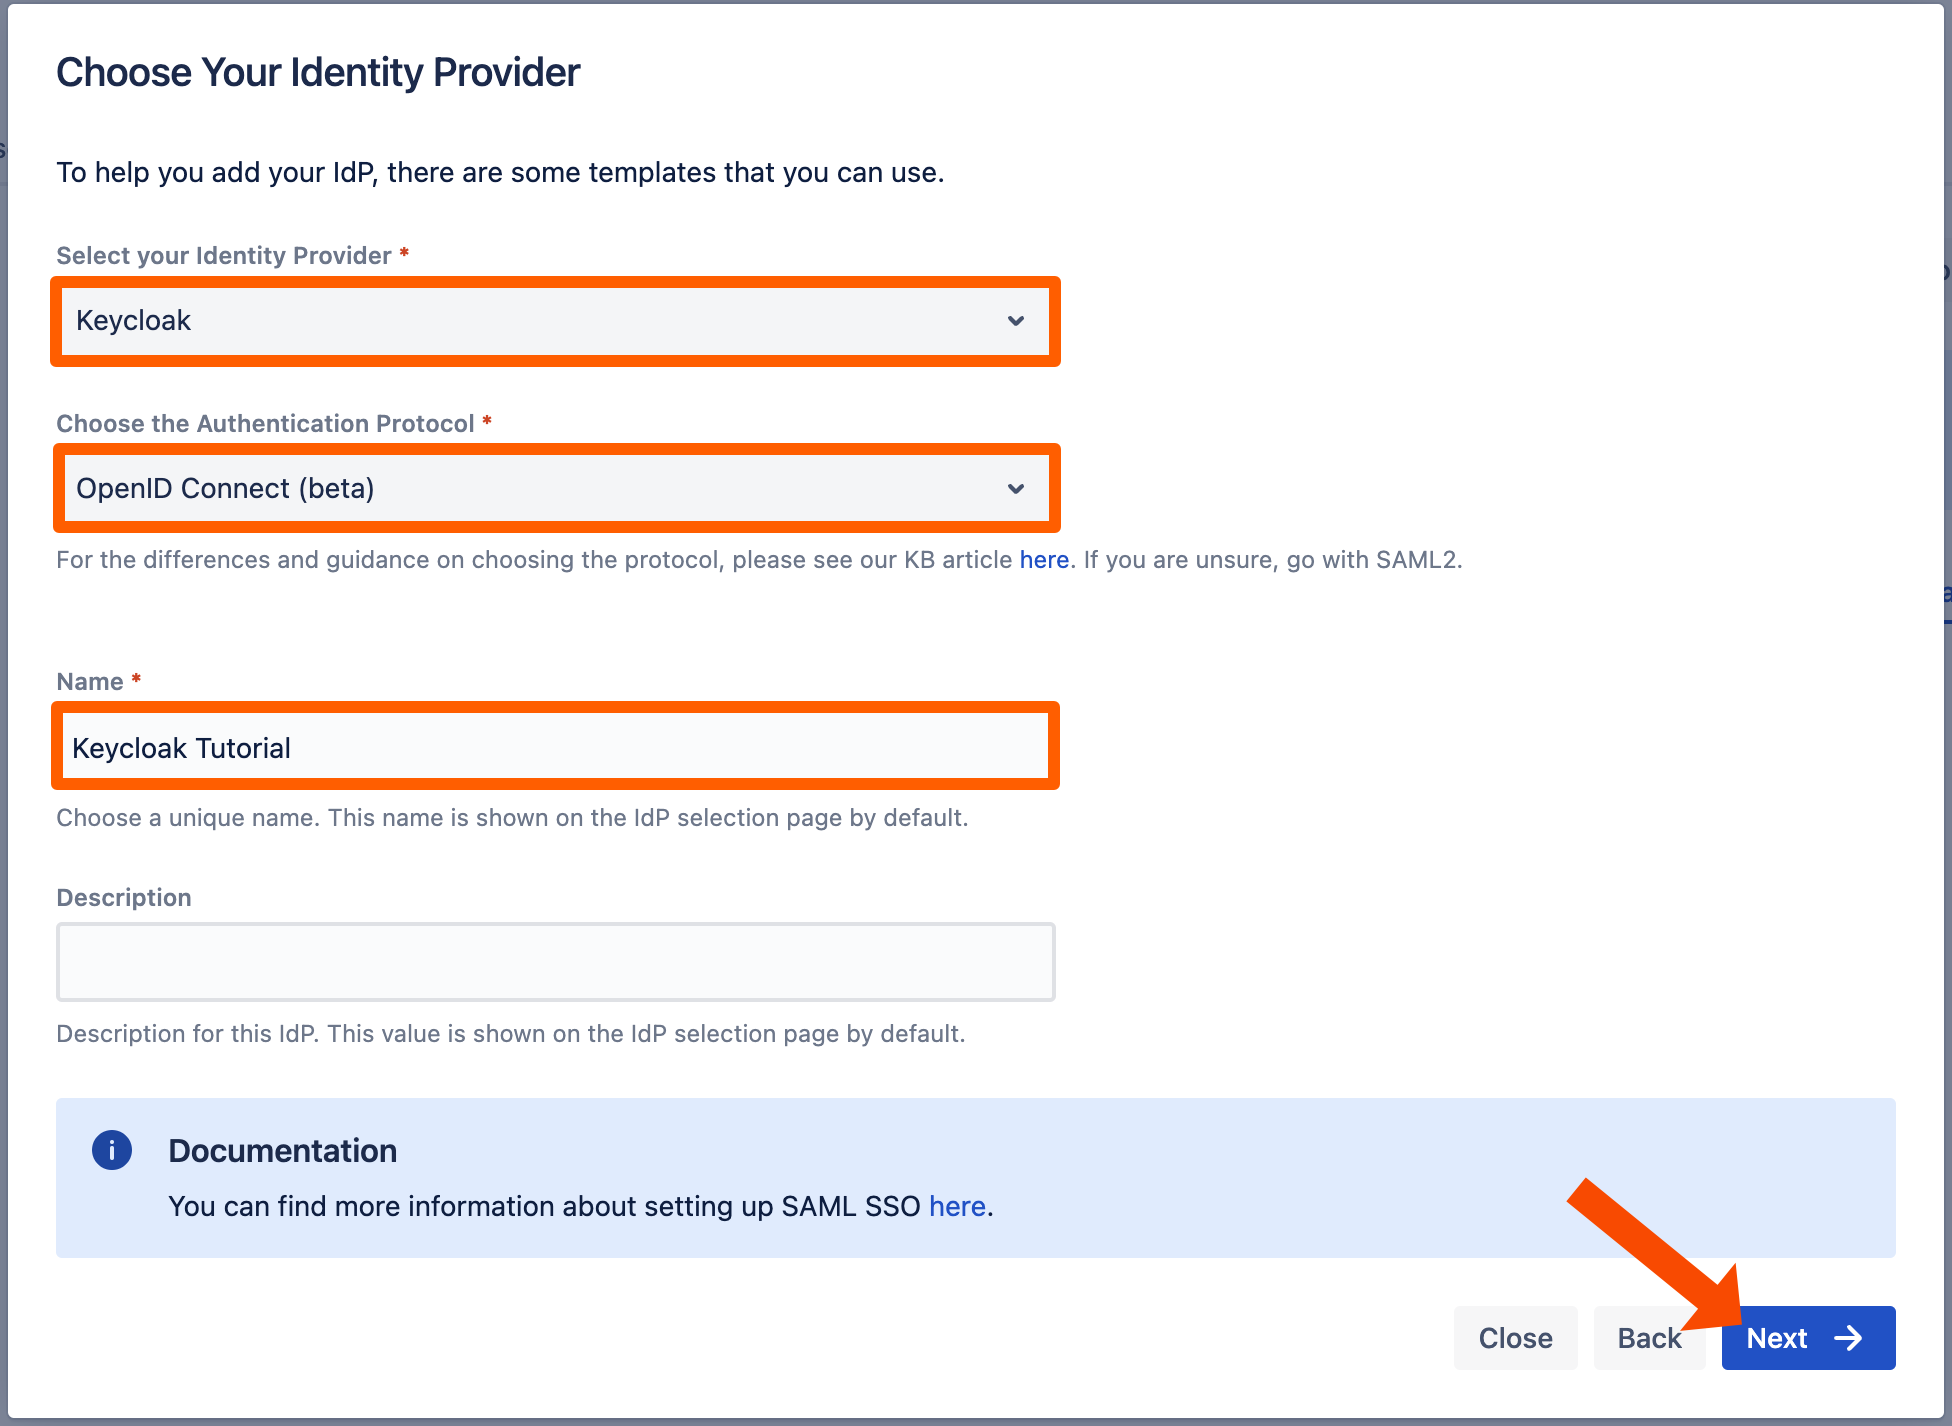
Select Keycloak for your identity provider and select OpenID Connect for the authentication protocol. Enter a unique name and click Next to continue.
Copy the callback url to your favourite text editor. 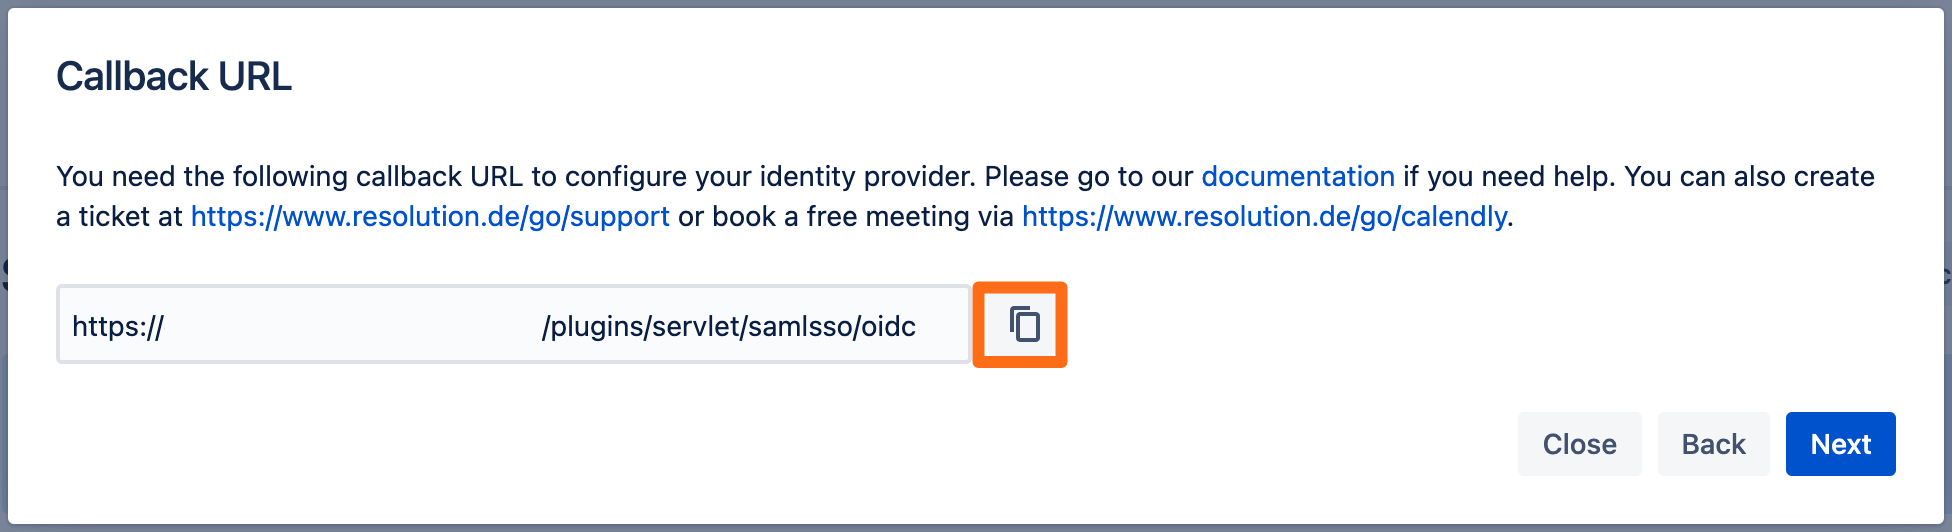
Go to your Keycloak server and choose your realm. Then go to Clients and click Create.
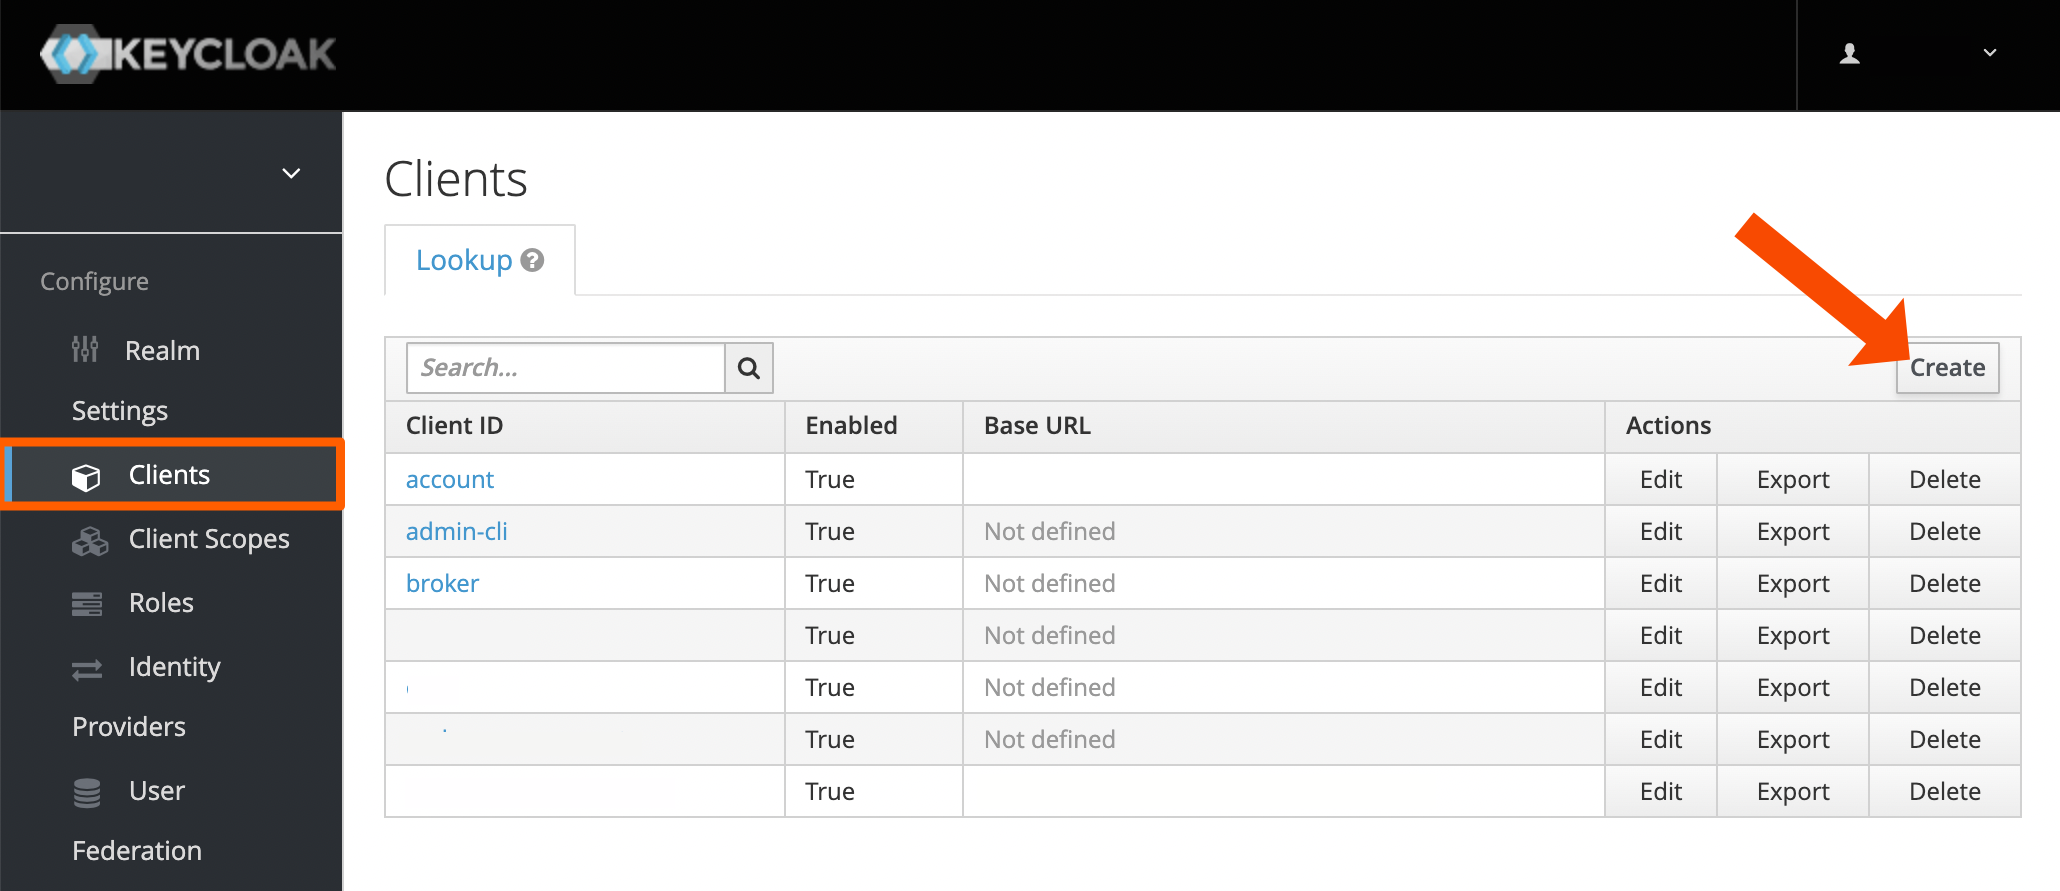
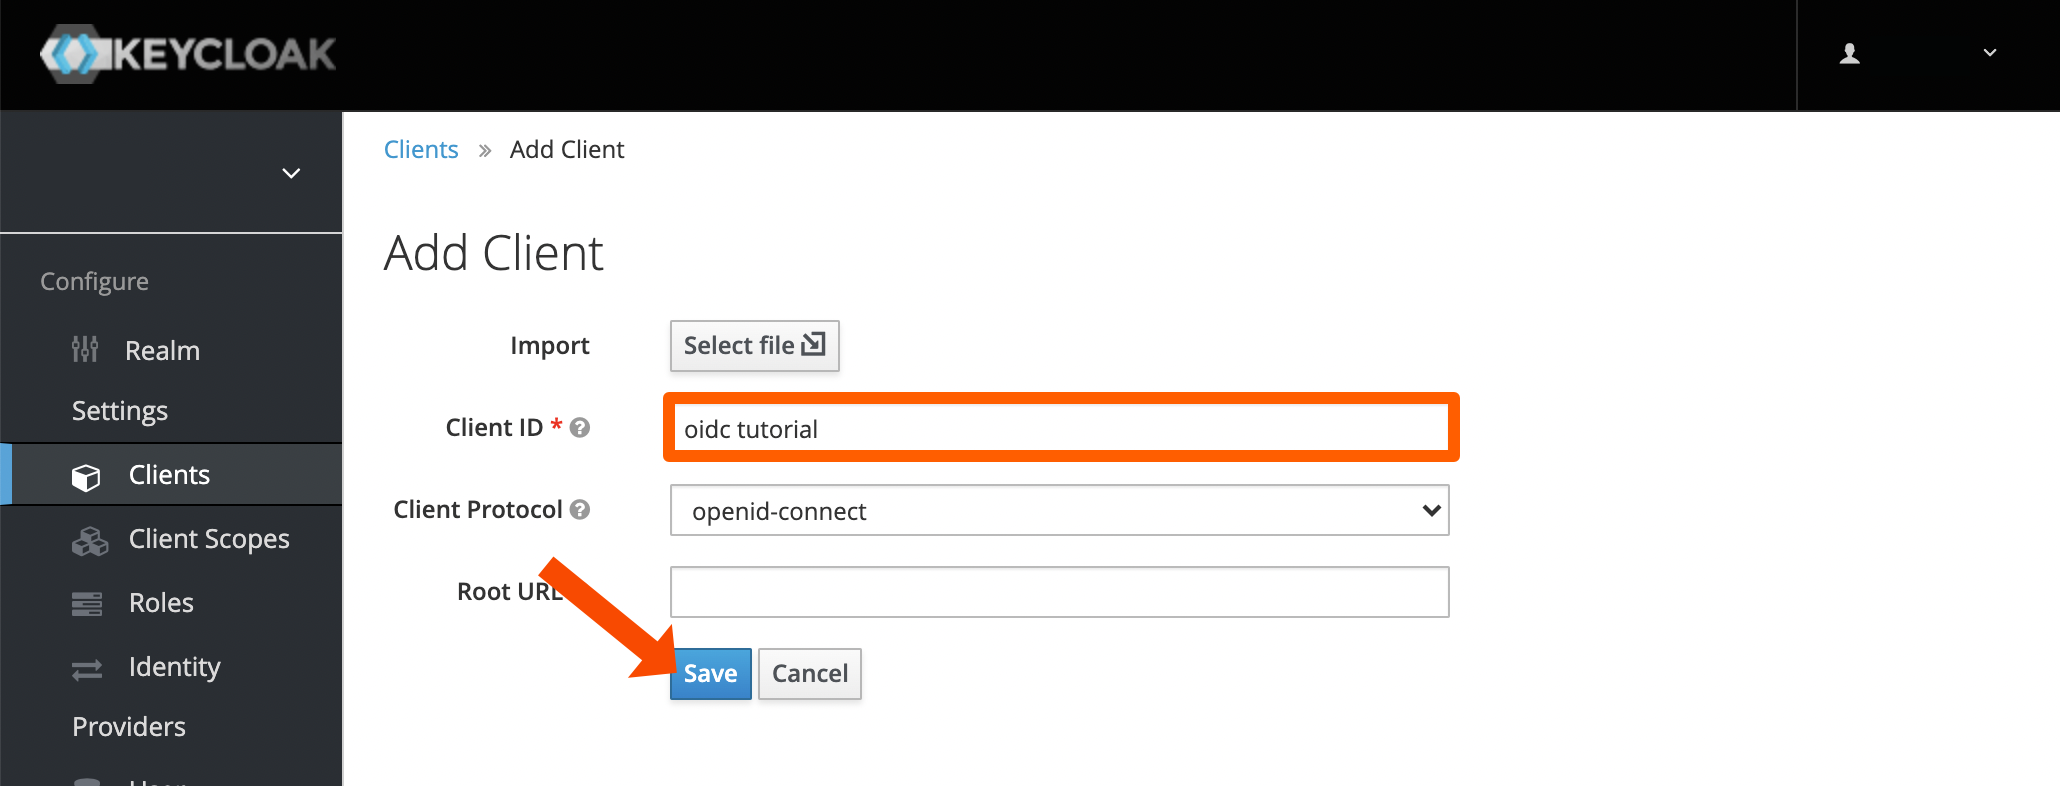
Enter a Client ID. That must be unique. Click Save to continue.
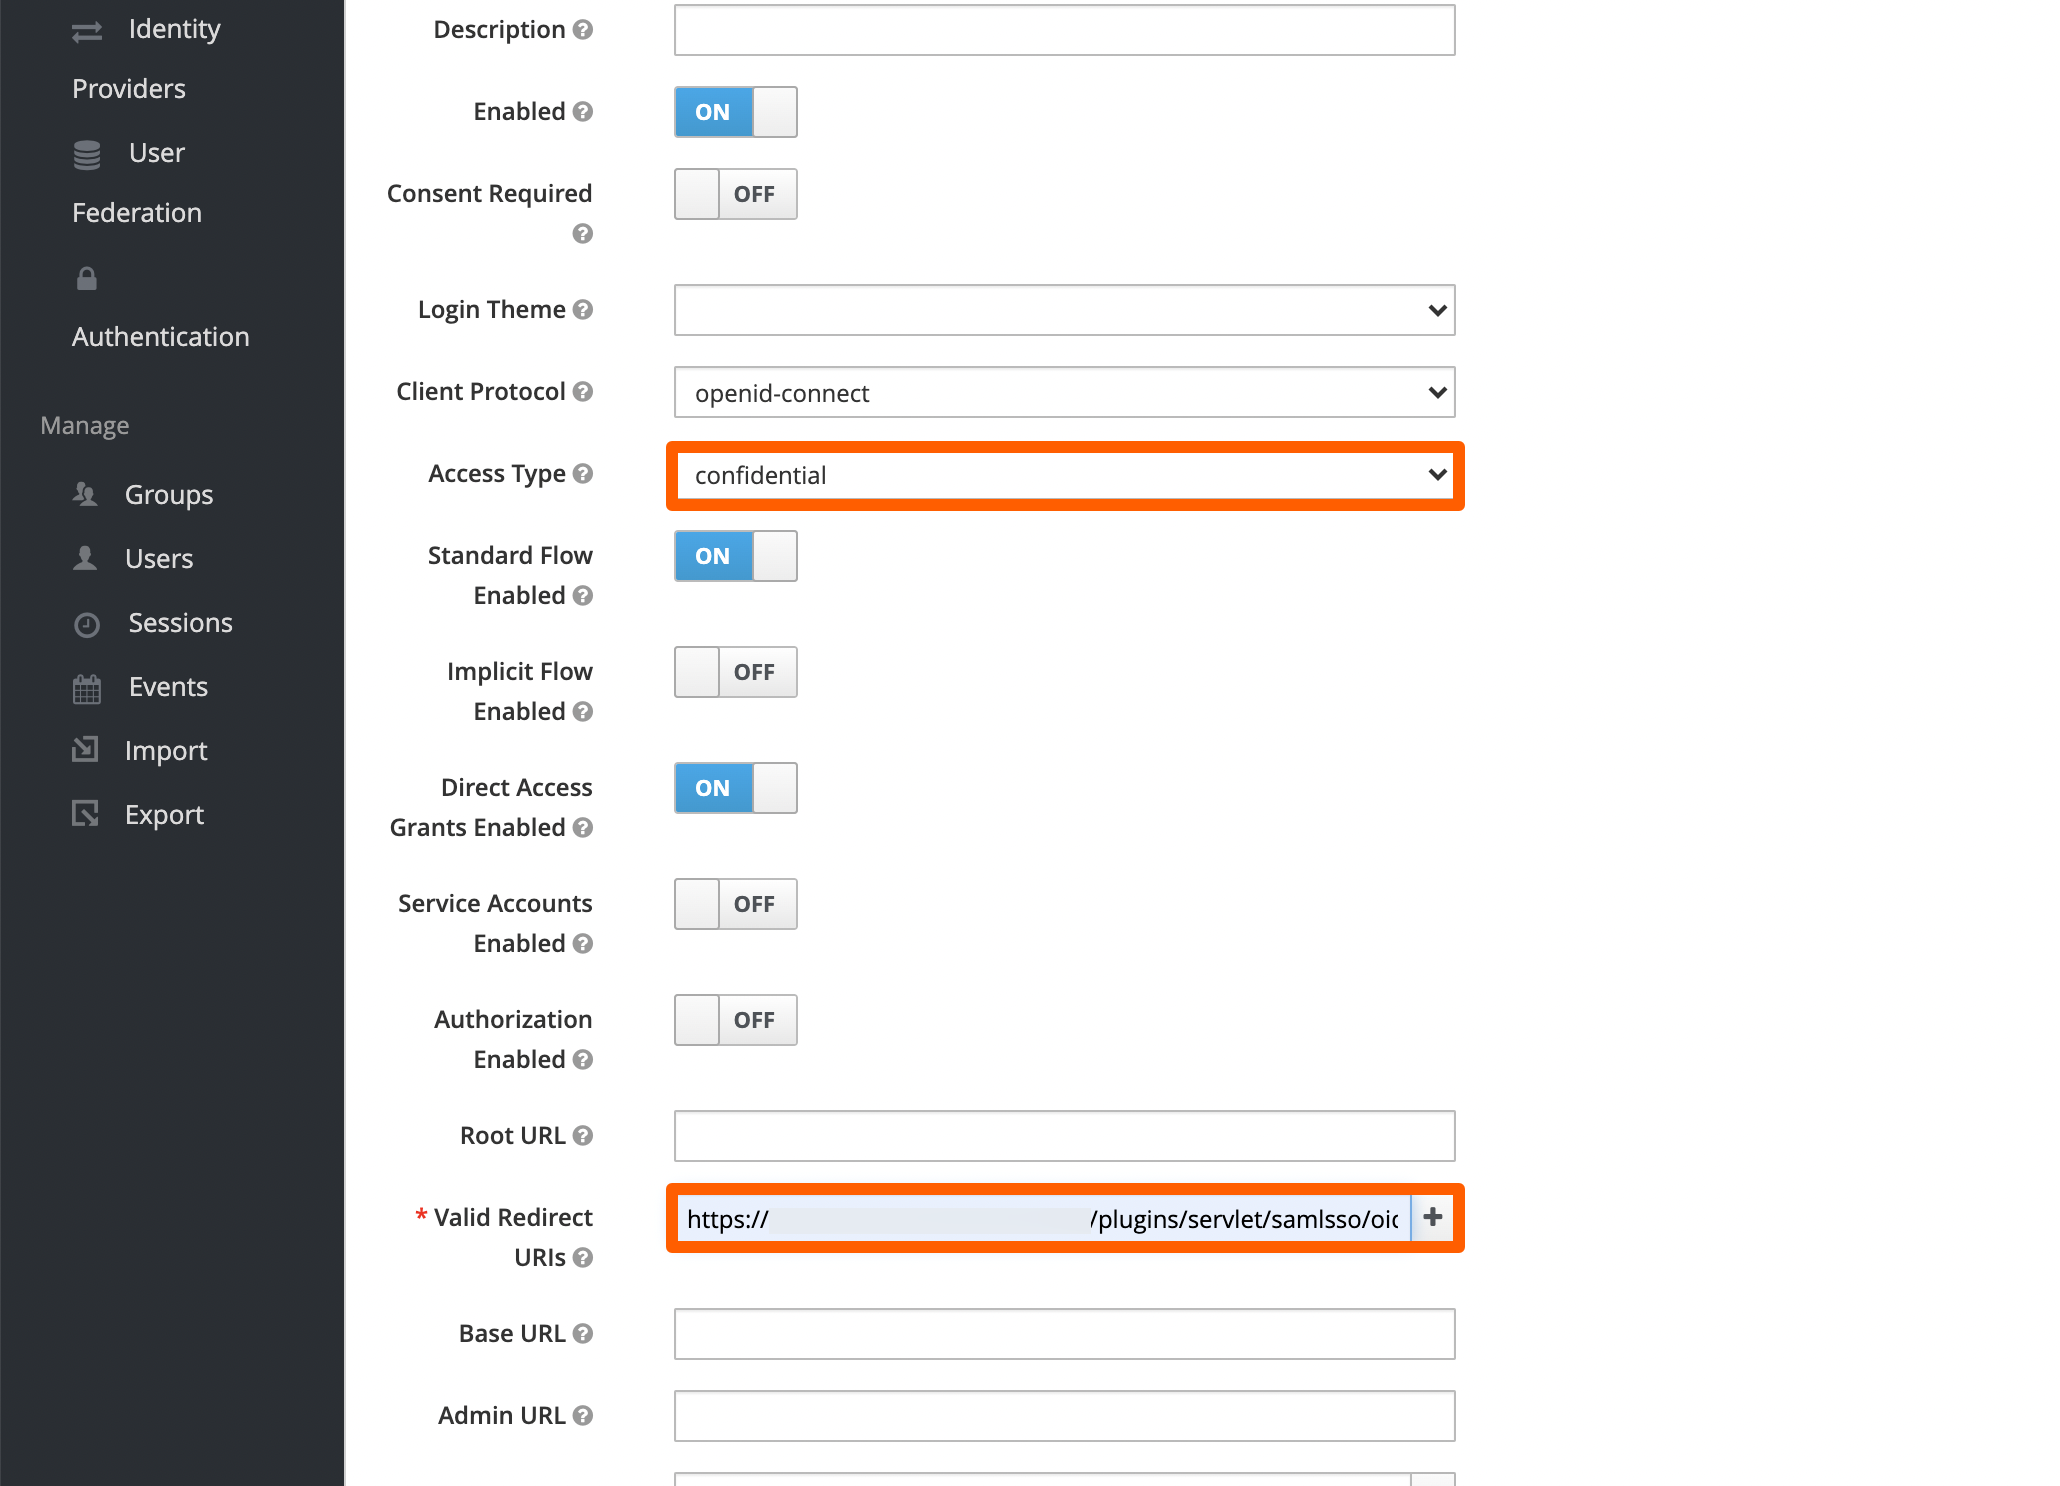
Next, scroll down and choose confidential for the Access Type. For the Valid Redirect URIs enter the callback URL from before.
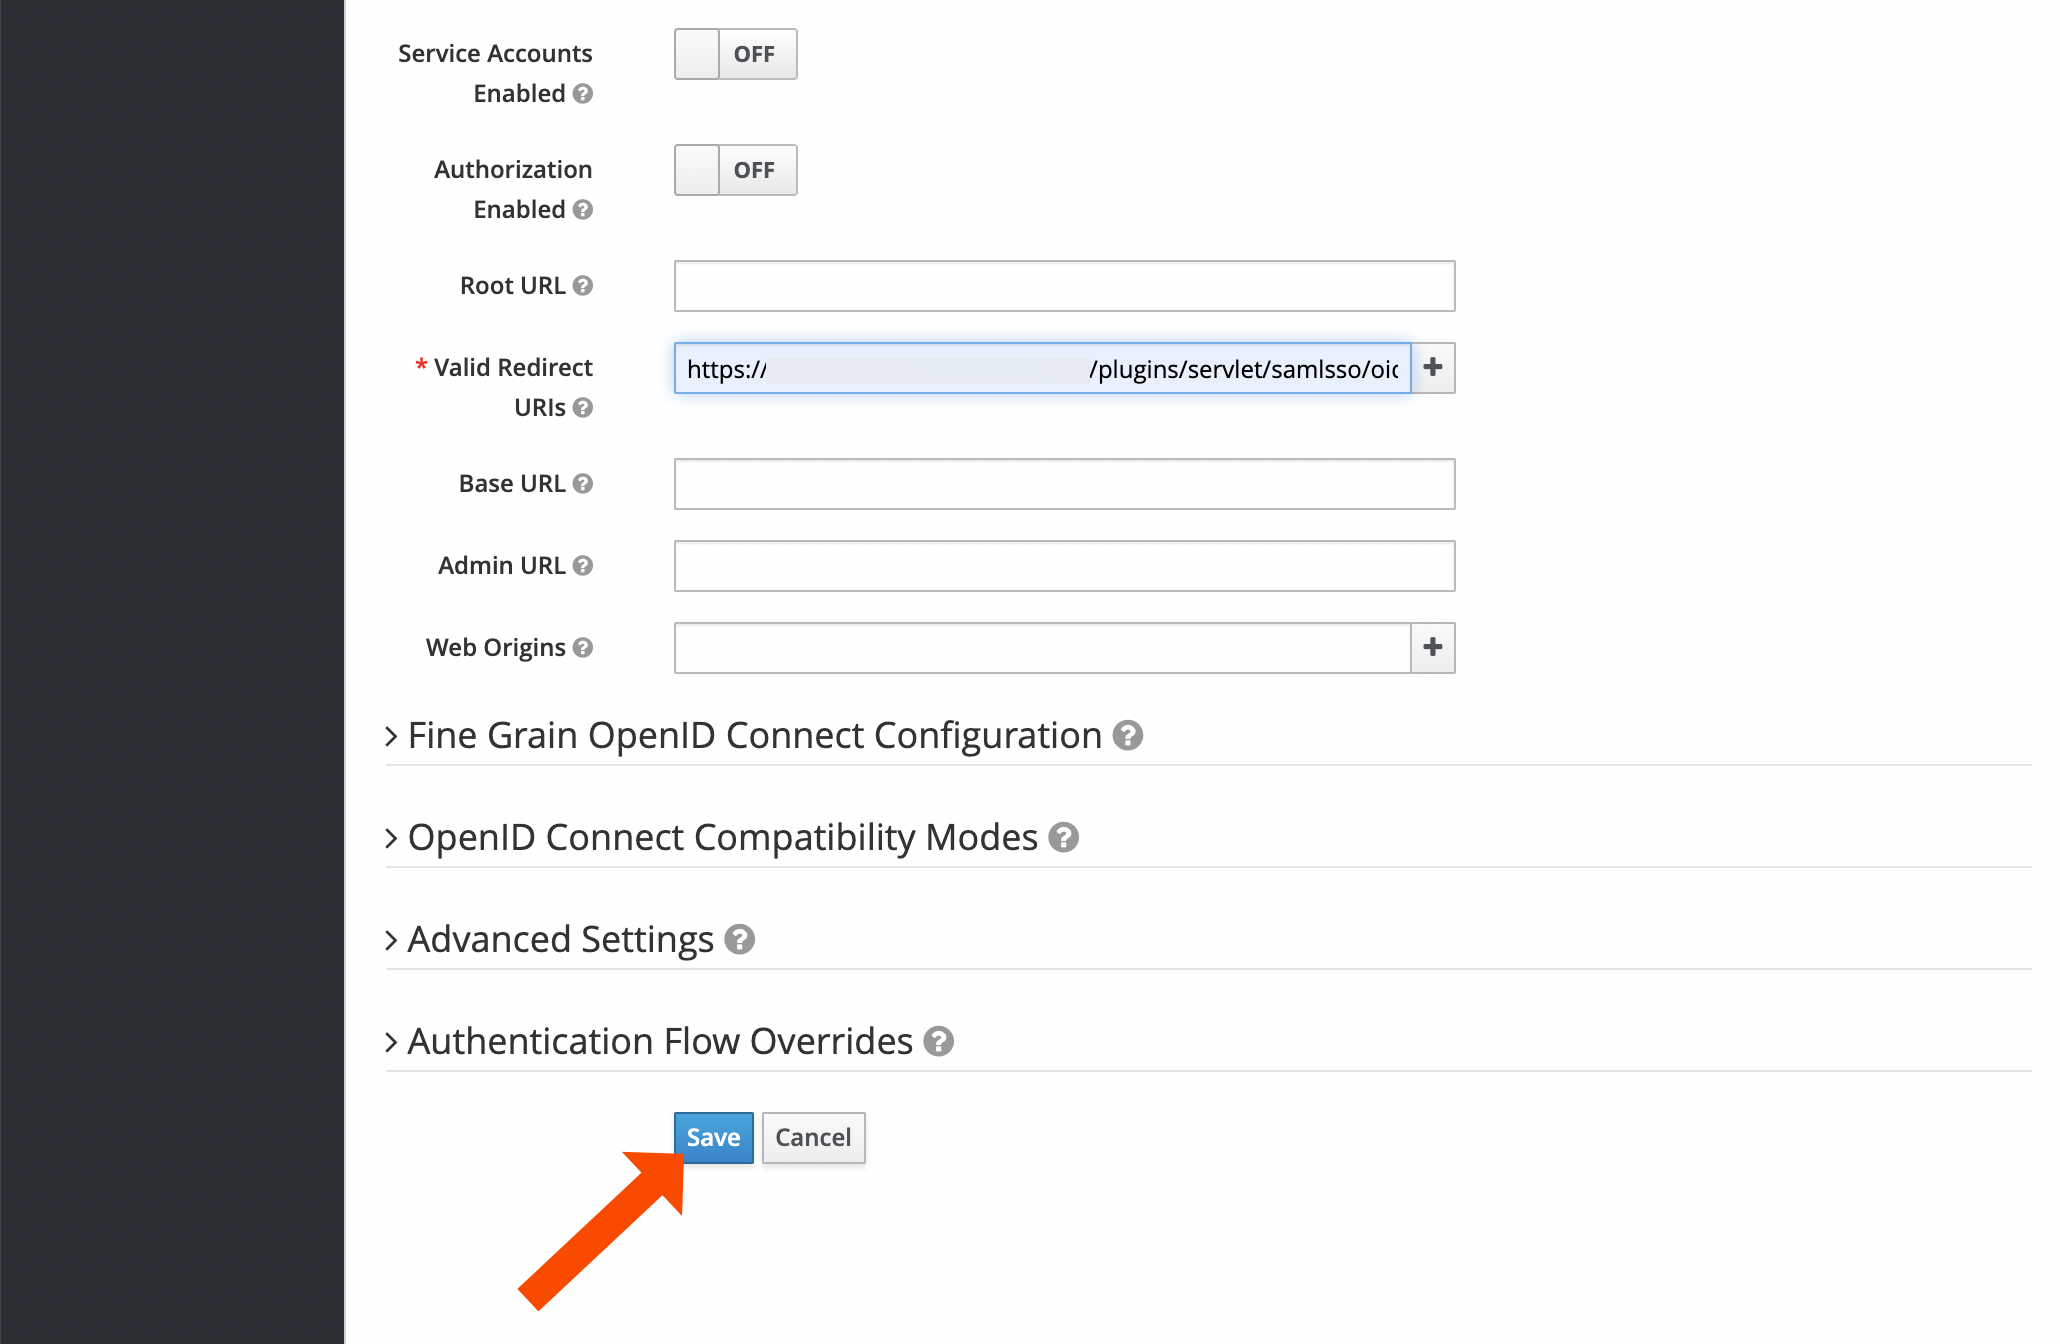
Next, click Save and reload the page. Without reloading, the options for the next step is not displayed!
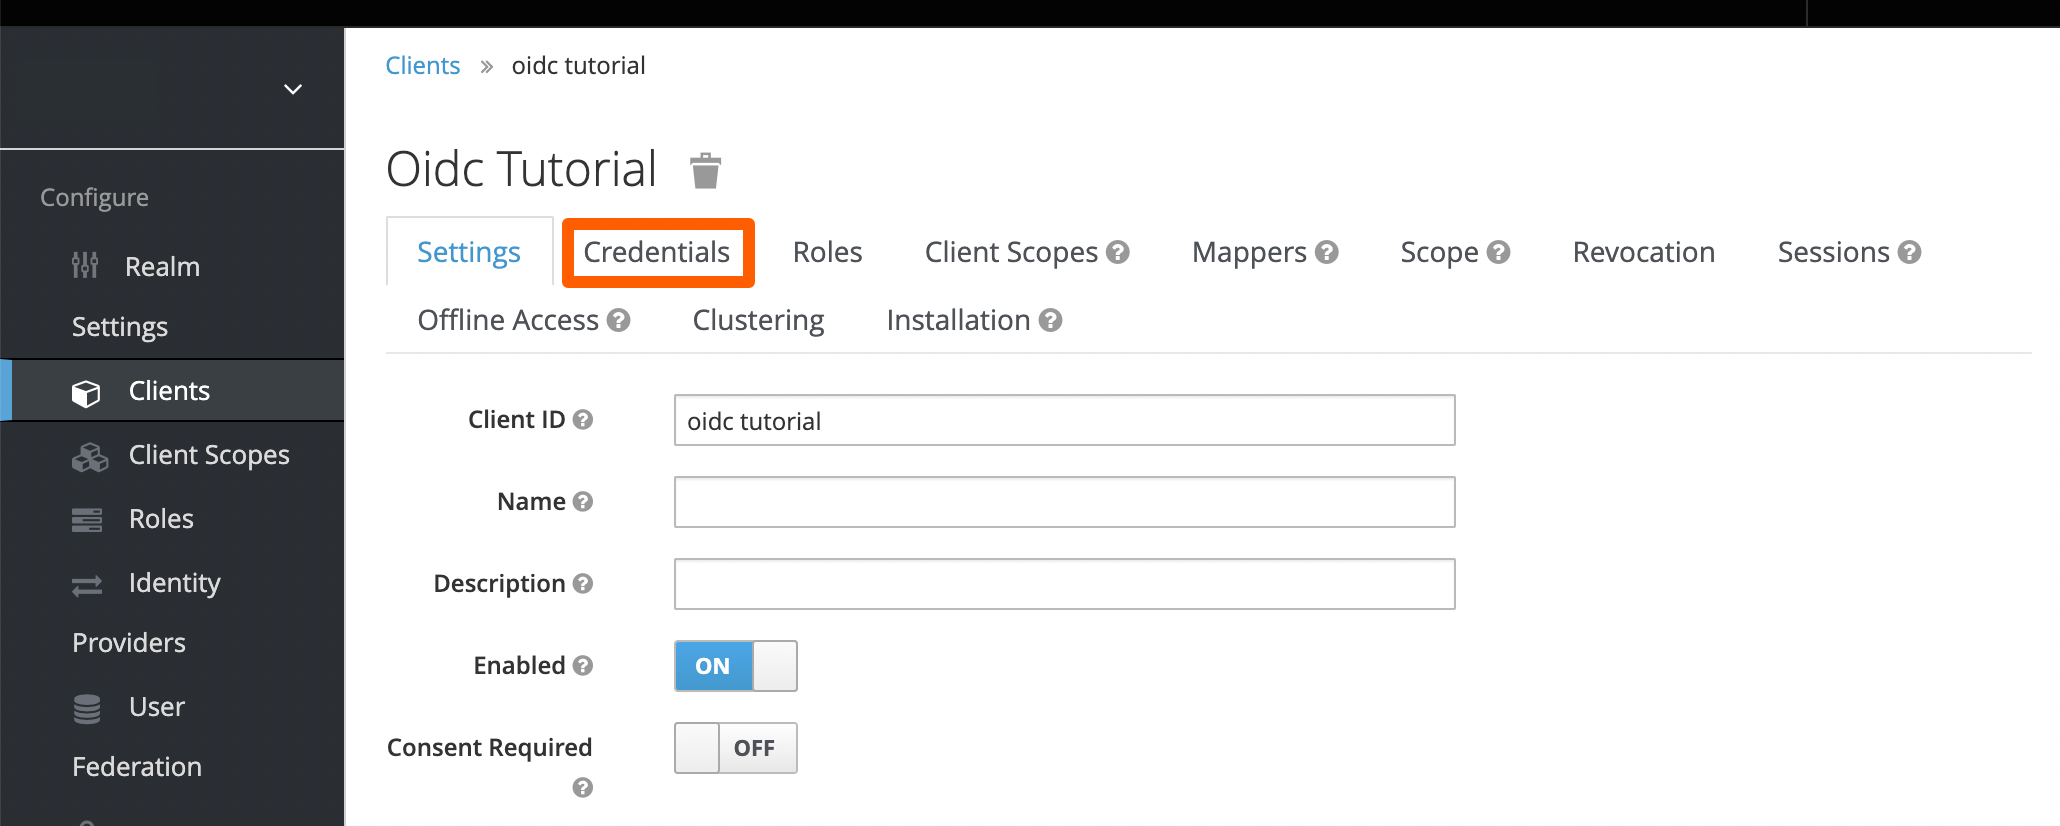
After reloading the page, go to the Credentials tab. Without reloading, the tab is not displayed!
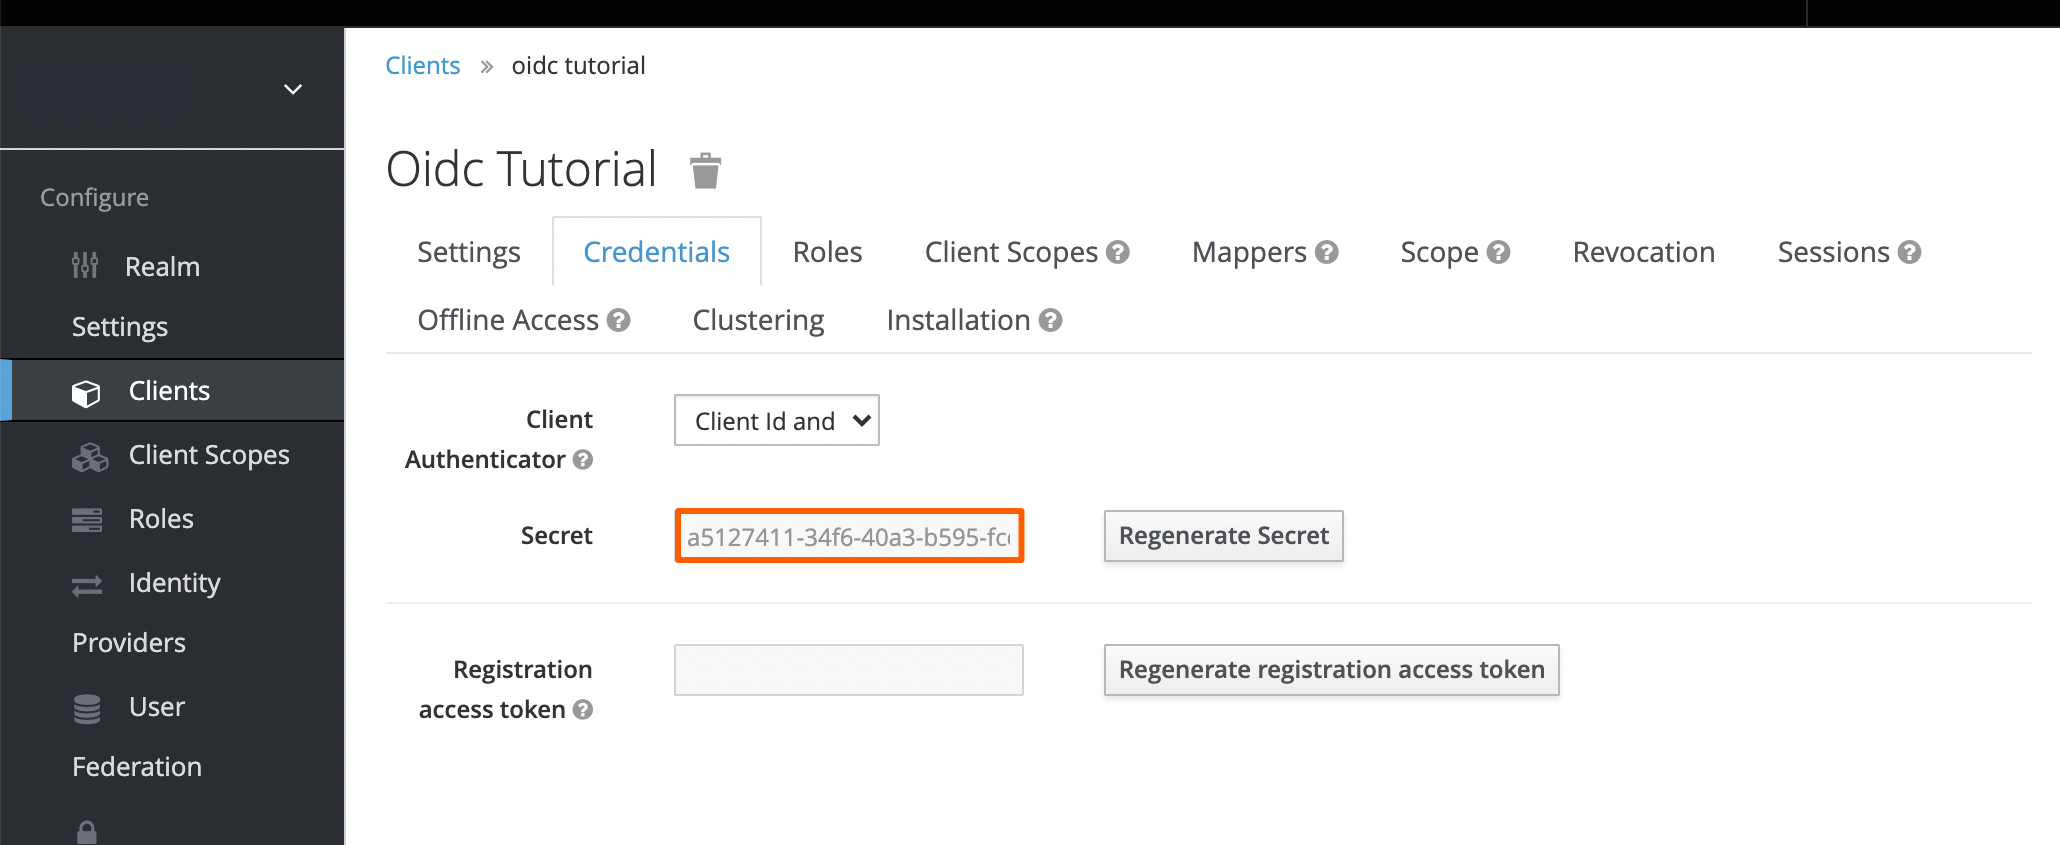
Copy the secret to your favorite text editor, we will need it soon.
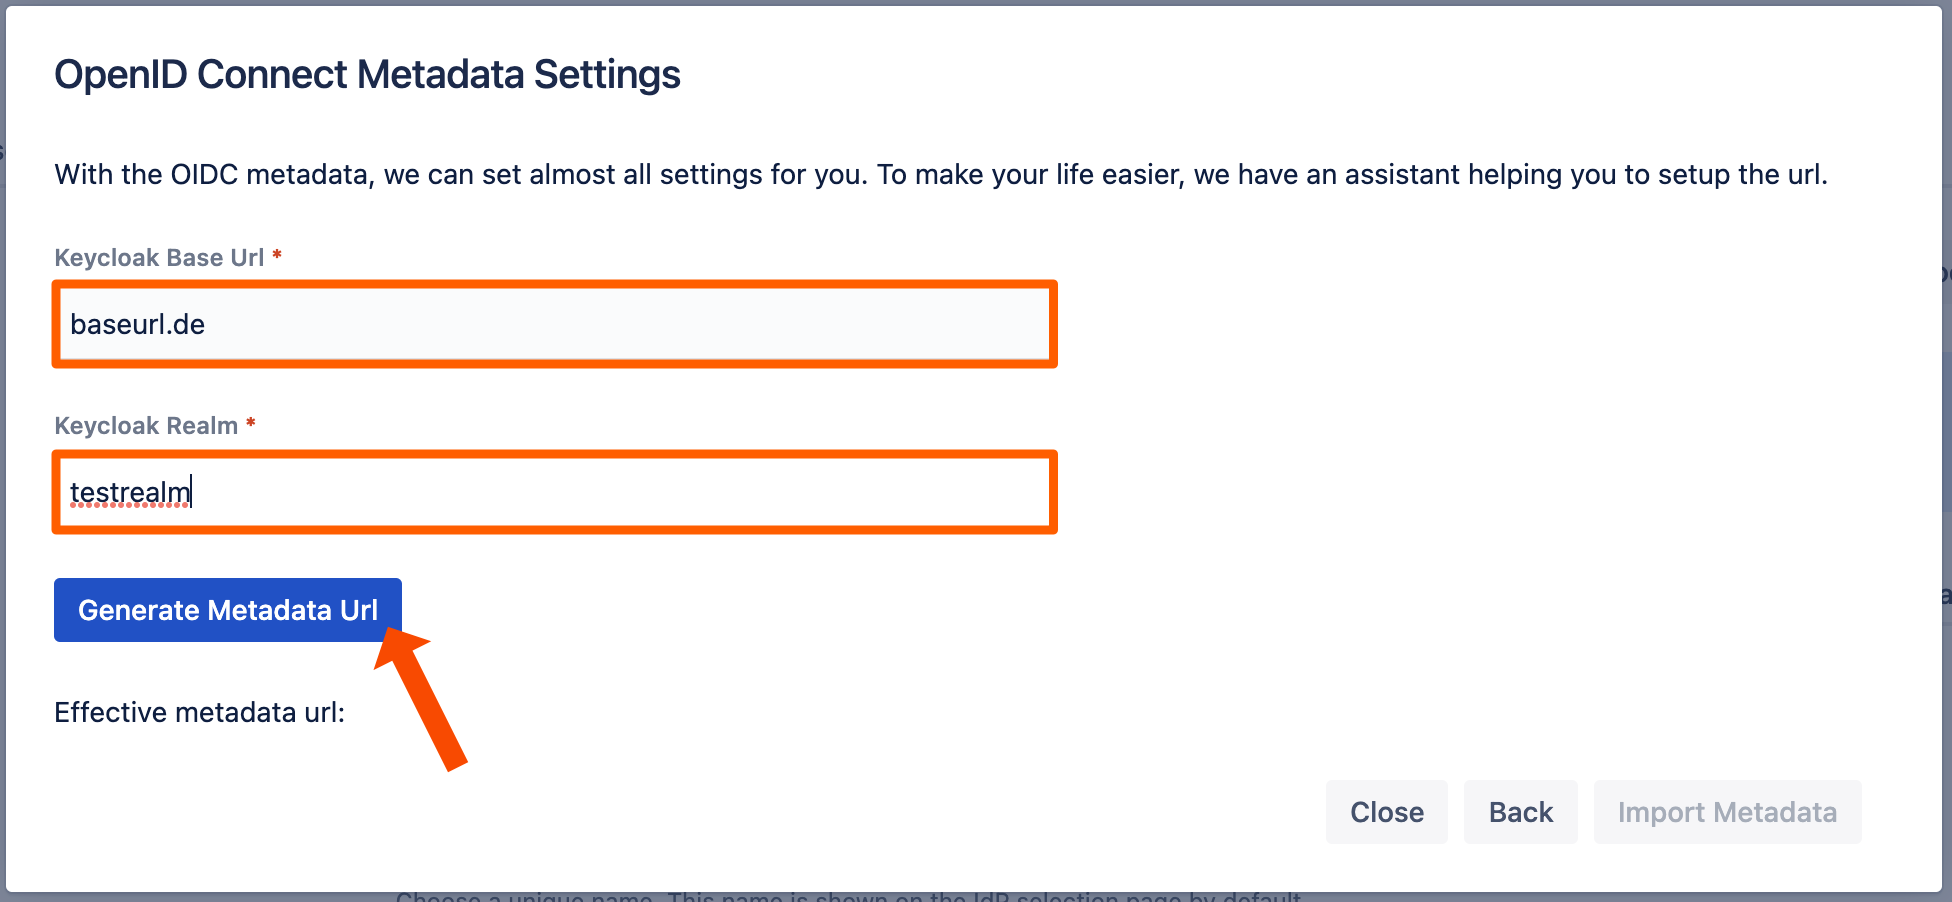
Enter your Keycloak Base Url and Keycloak Realm, next click Generate Metadata Url.
Click Import Metadata.
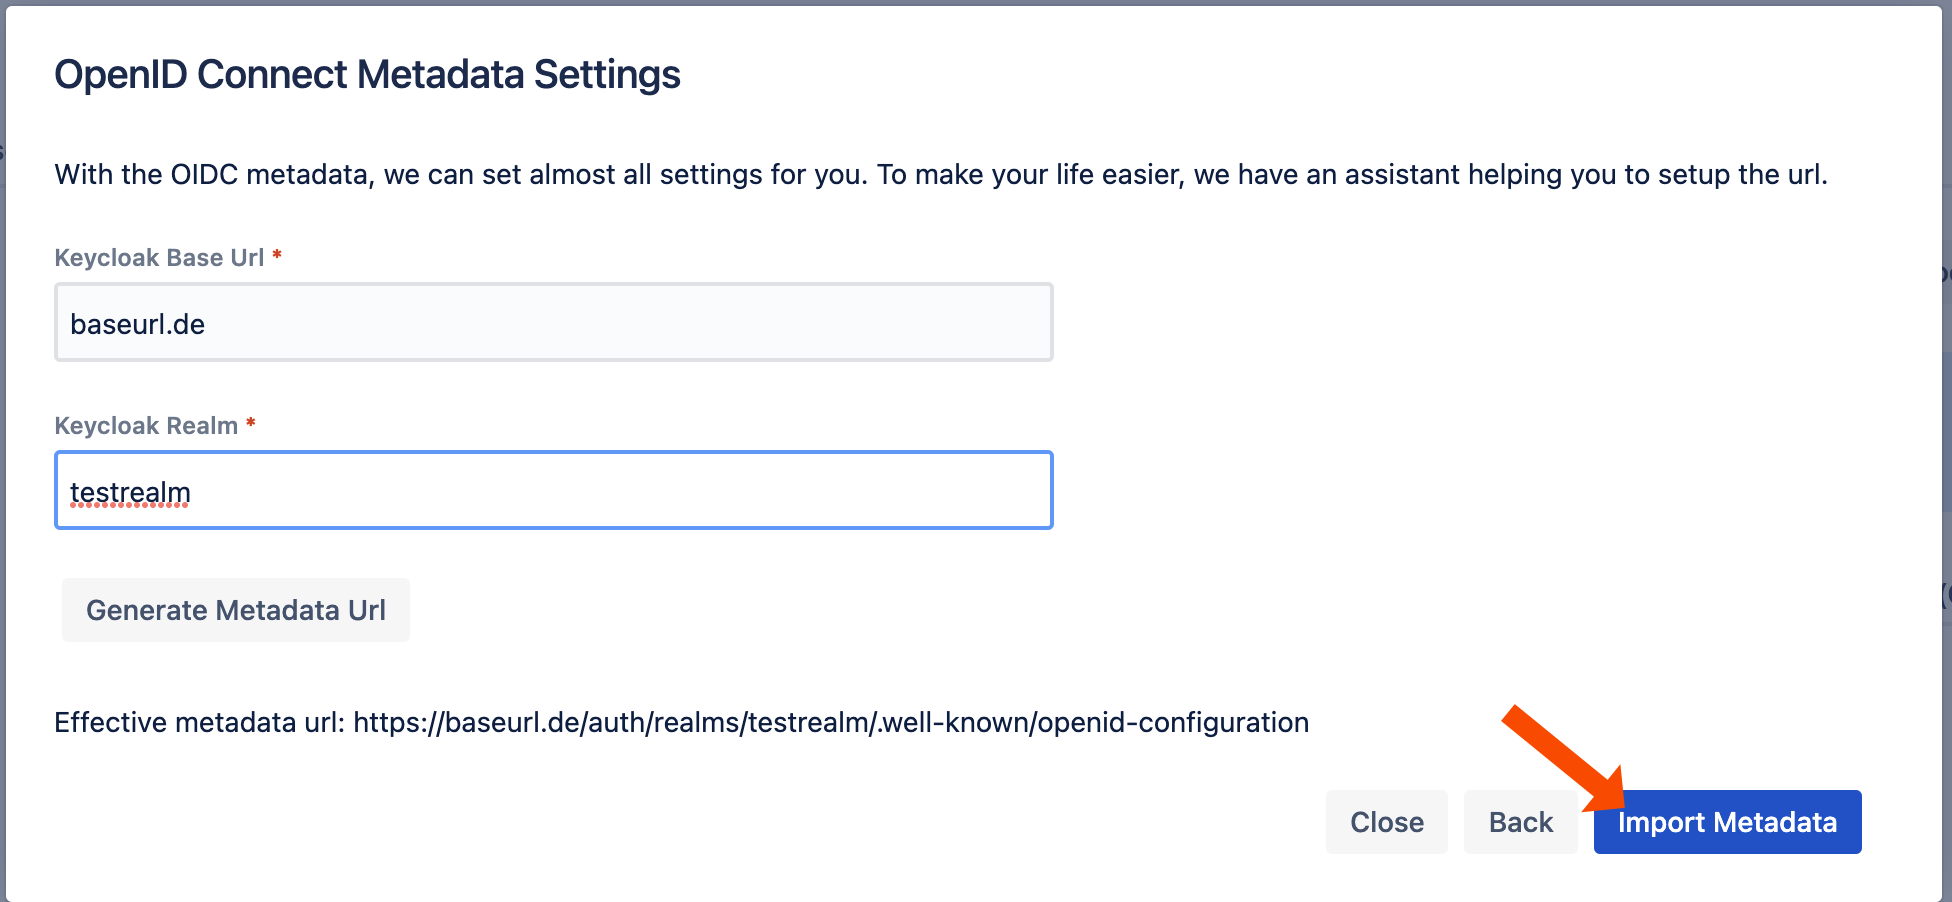
You will see this message if the import was successful.
To finish the wizard, click Save and Close.

Next, scroll down to the User Creation and Update section. Choose Update with UserSync for the User Update Method.
Choose the connector you have created before and click Save.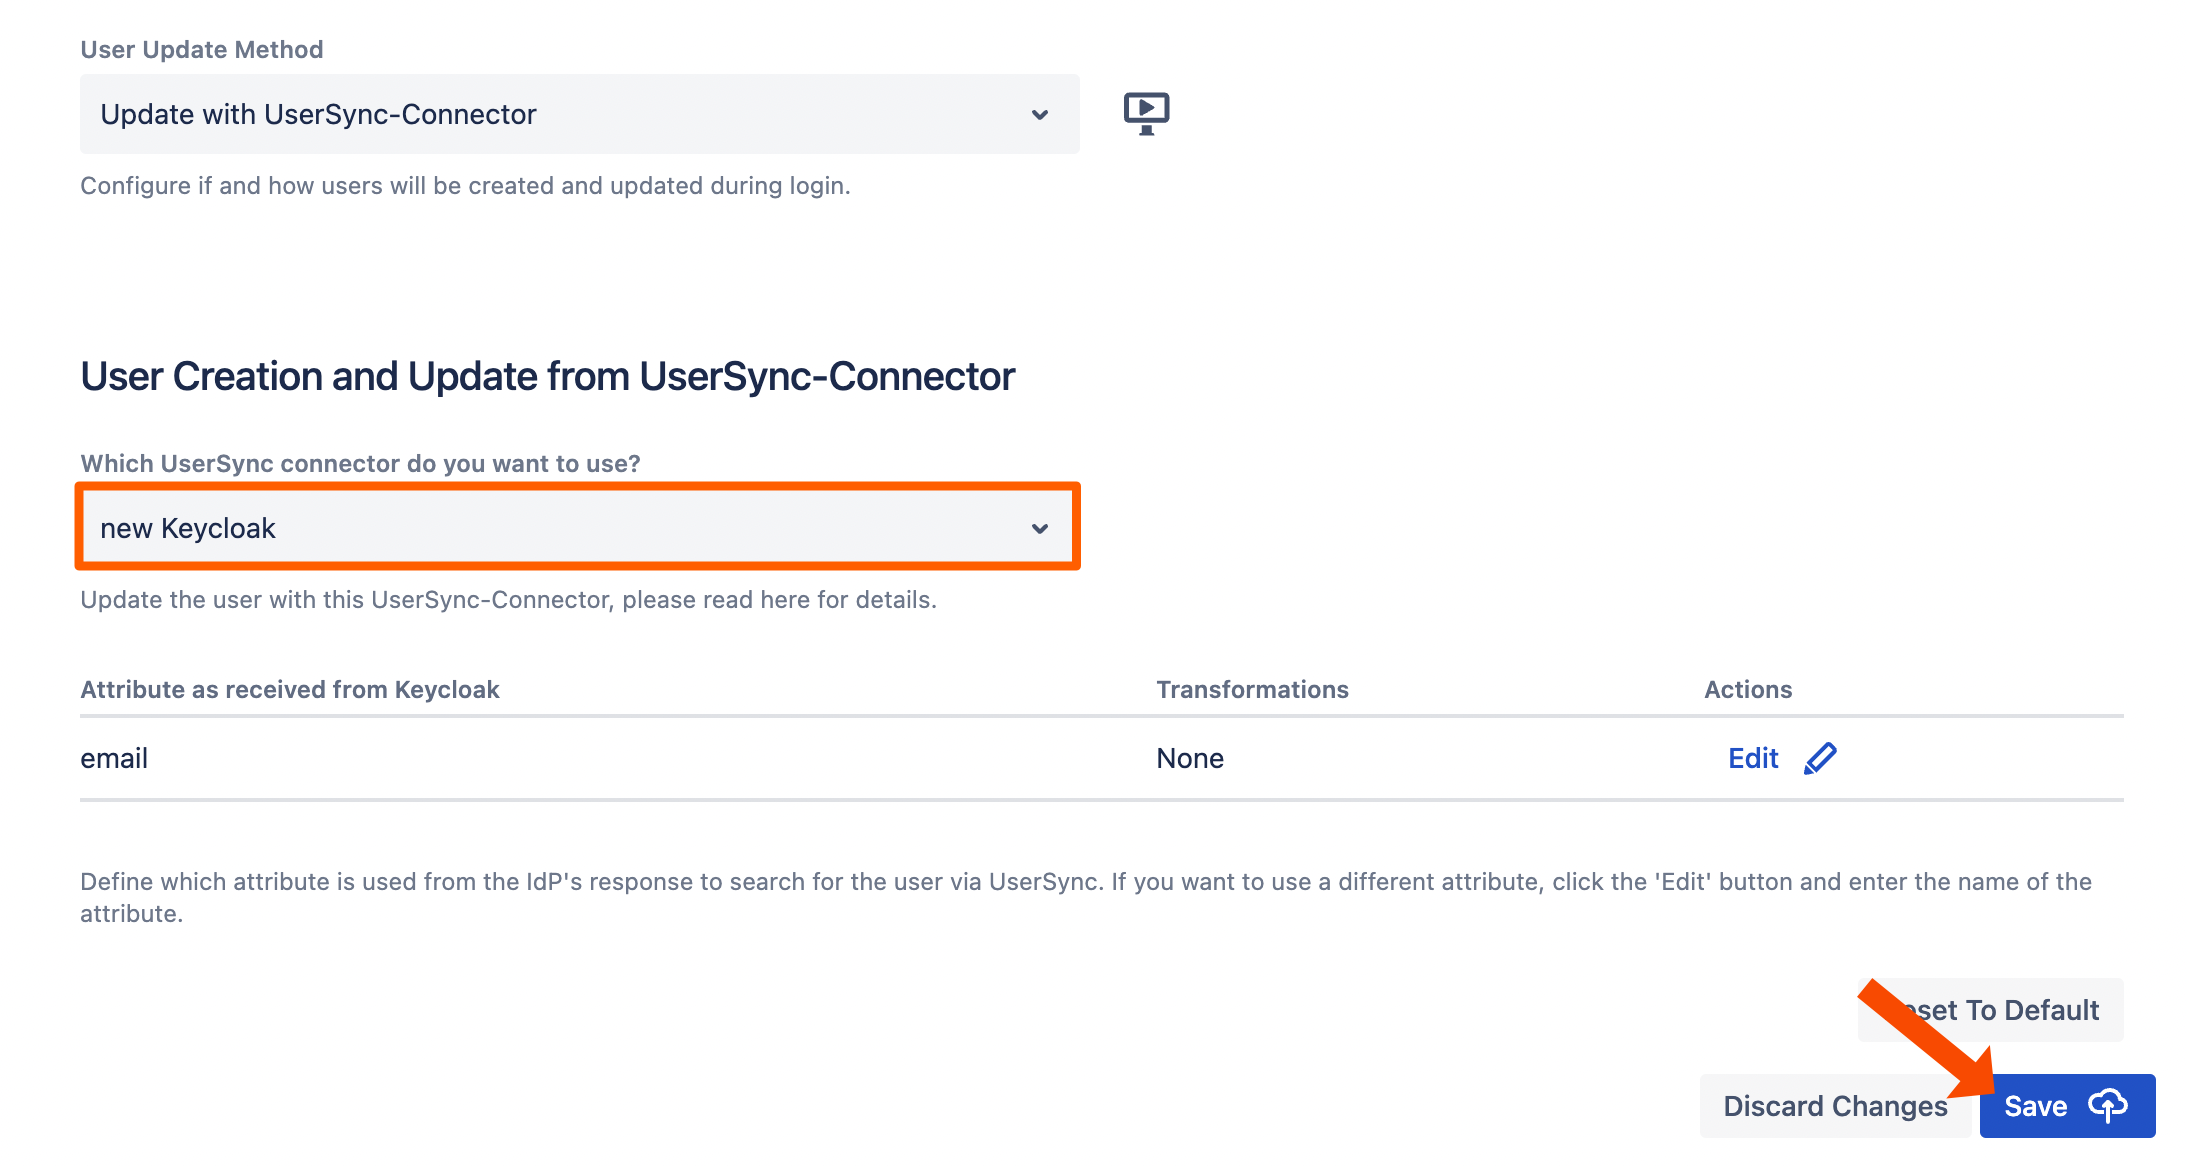
Testing SSO
To test you configuration, go to the System & Support section of the app and scroll down to the Tracker List.
Click New Tracker. If you have more than one identity provider configured, you must choose which configuration should be used for the log in test.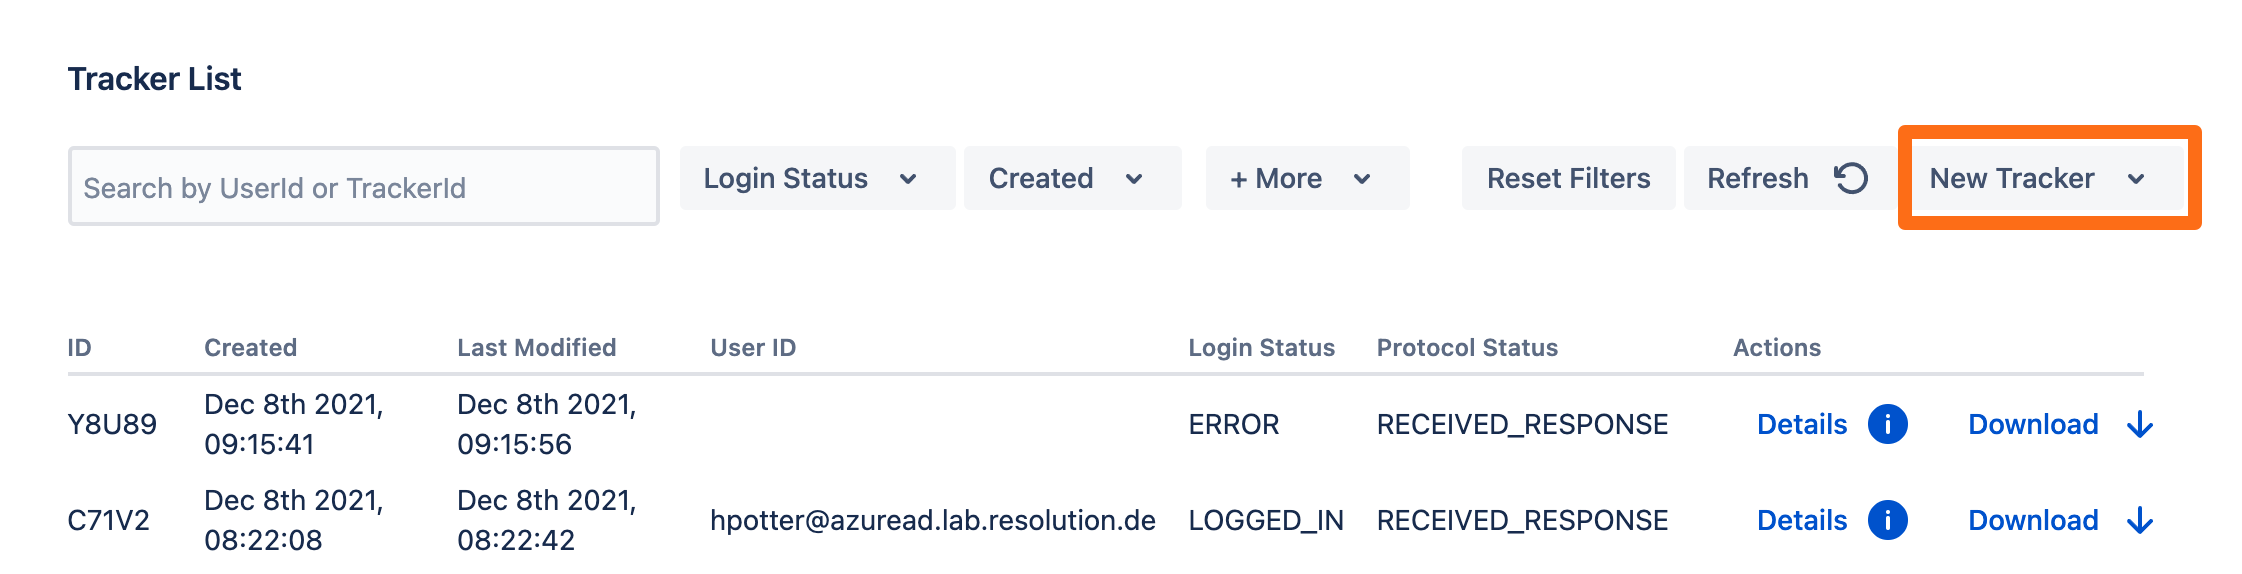
Copy the test url and open the link an incognito web browser. If something goes wrong during the test, you can easily create a support ticket that includes this tracker by click Contact Support. Additionally, you can contact us by going to https://www.resolution.de/go/support or booking a free meeting via https://www.resolution.de/go/calendly.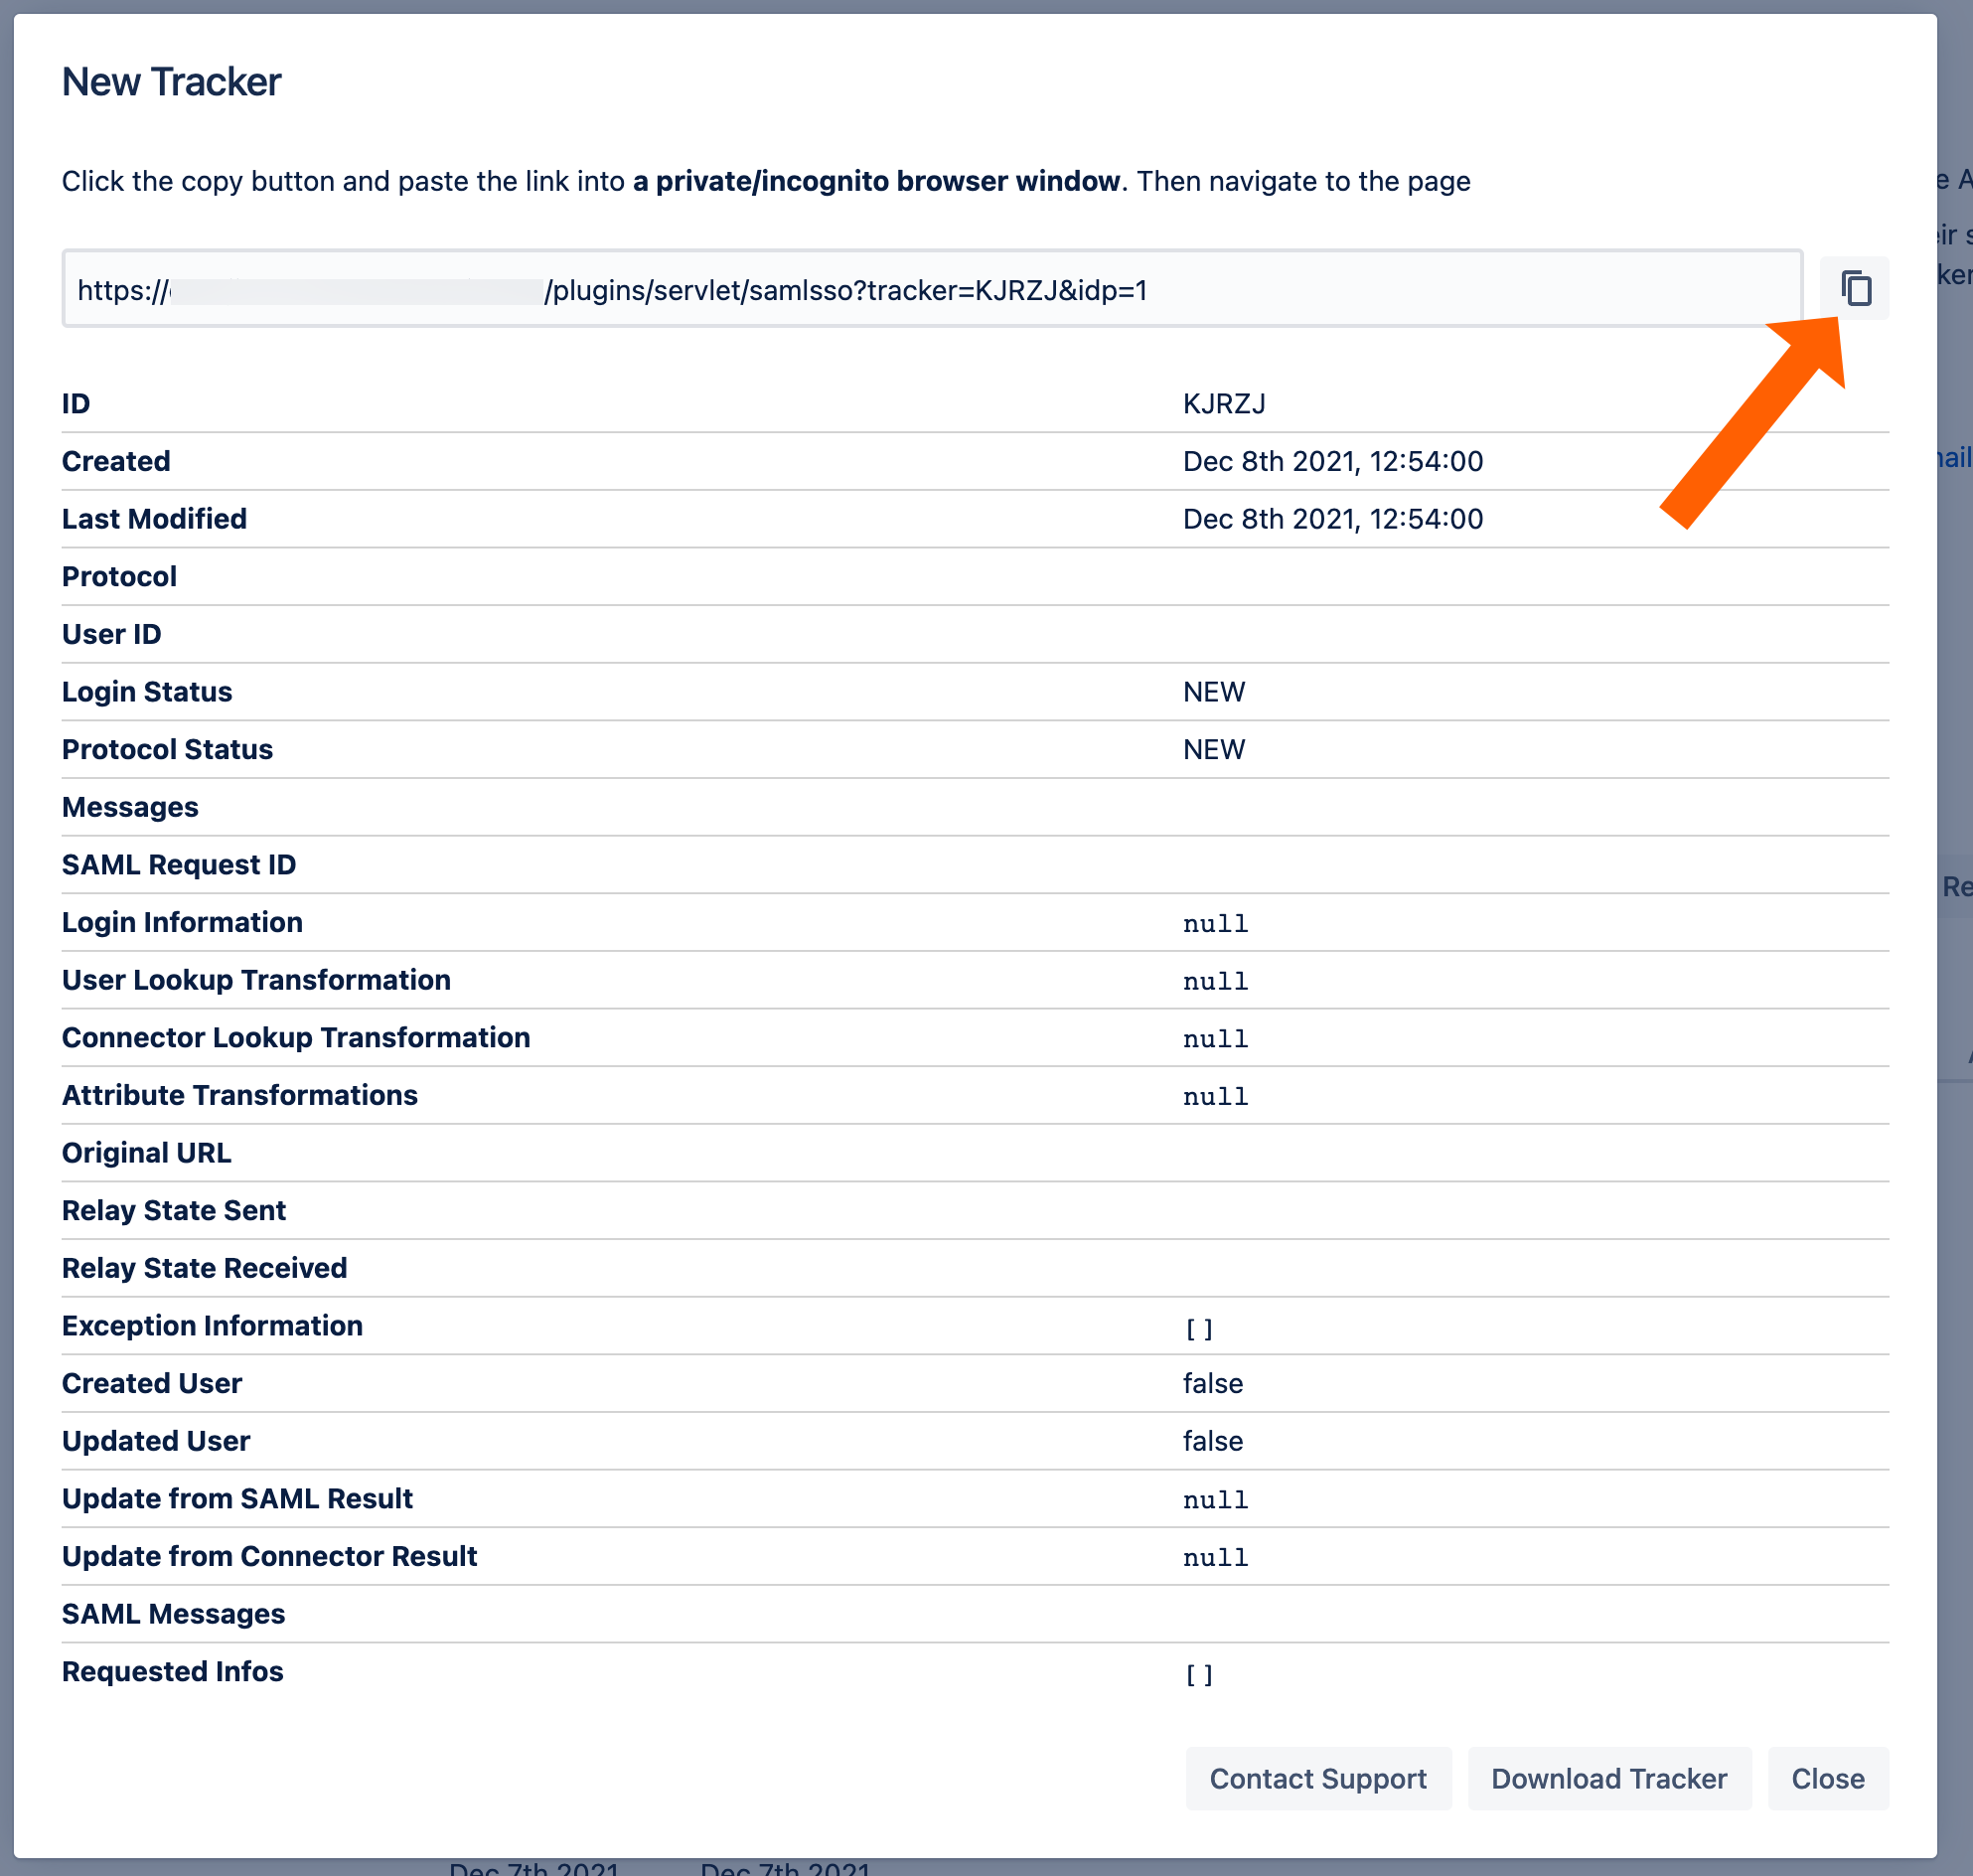
Redirect to SSO
After a successful test, the next step is to configure the redirection. With the redirection setting, the app can automatically redirect users to log in via OpenID Connect.
Go change this setting, go to Redirection from the middle panel.
By checking Enable SSO Redirect, users will get redirected to the configured SSO provider for login. If you are running JSM, you find a second option below.
Click Save to finish the configuration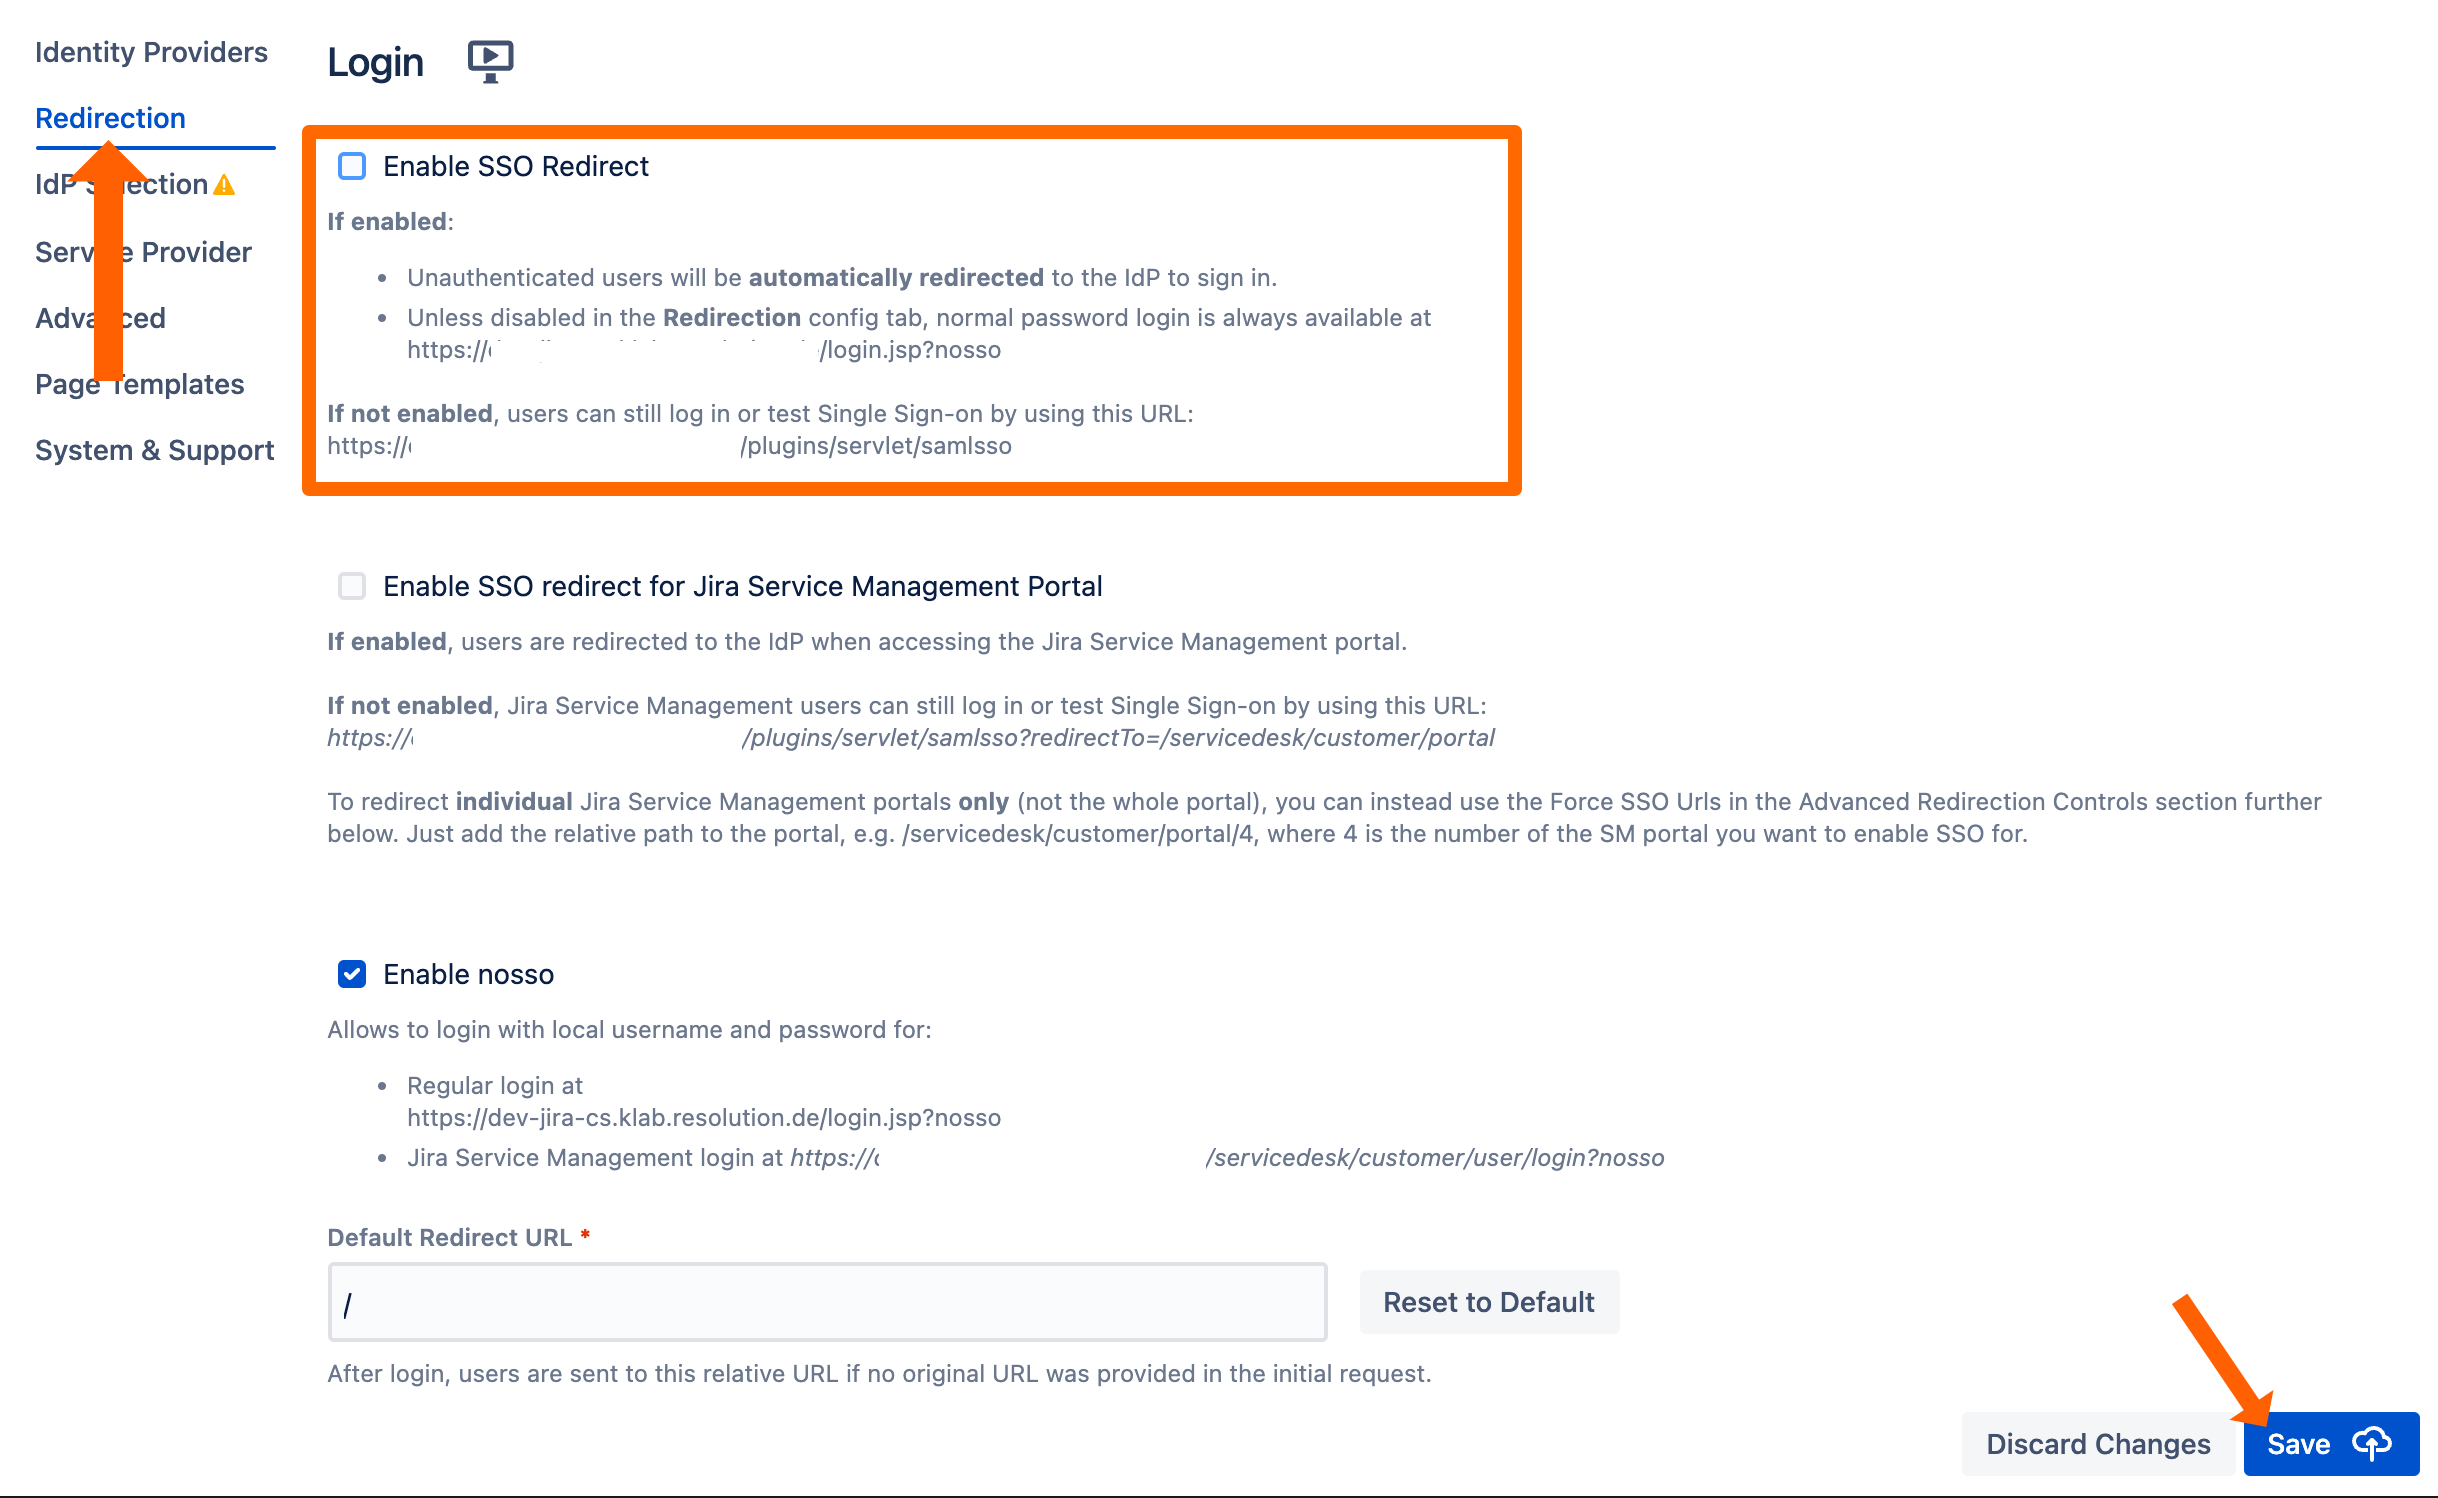
If Enable SSO Redirect is enabled, you can login to your Atlassian application manually by browsing to the URL that fits your Atlassian application as listed below.
Use this URL, if you need to login a local user unknown to the Keycloak or if there are any issues with Single Sign On.
Jira: https://<baseurl>/login.jsp?nosso
Confluence: https://<baseurl>/login.action?nosso
Bitbucket: https://<baseurl>/login?nosso