
License Optimizer Admin Guide
License Optimizer functionality is only available in the Jira and Confluence versions of the app.
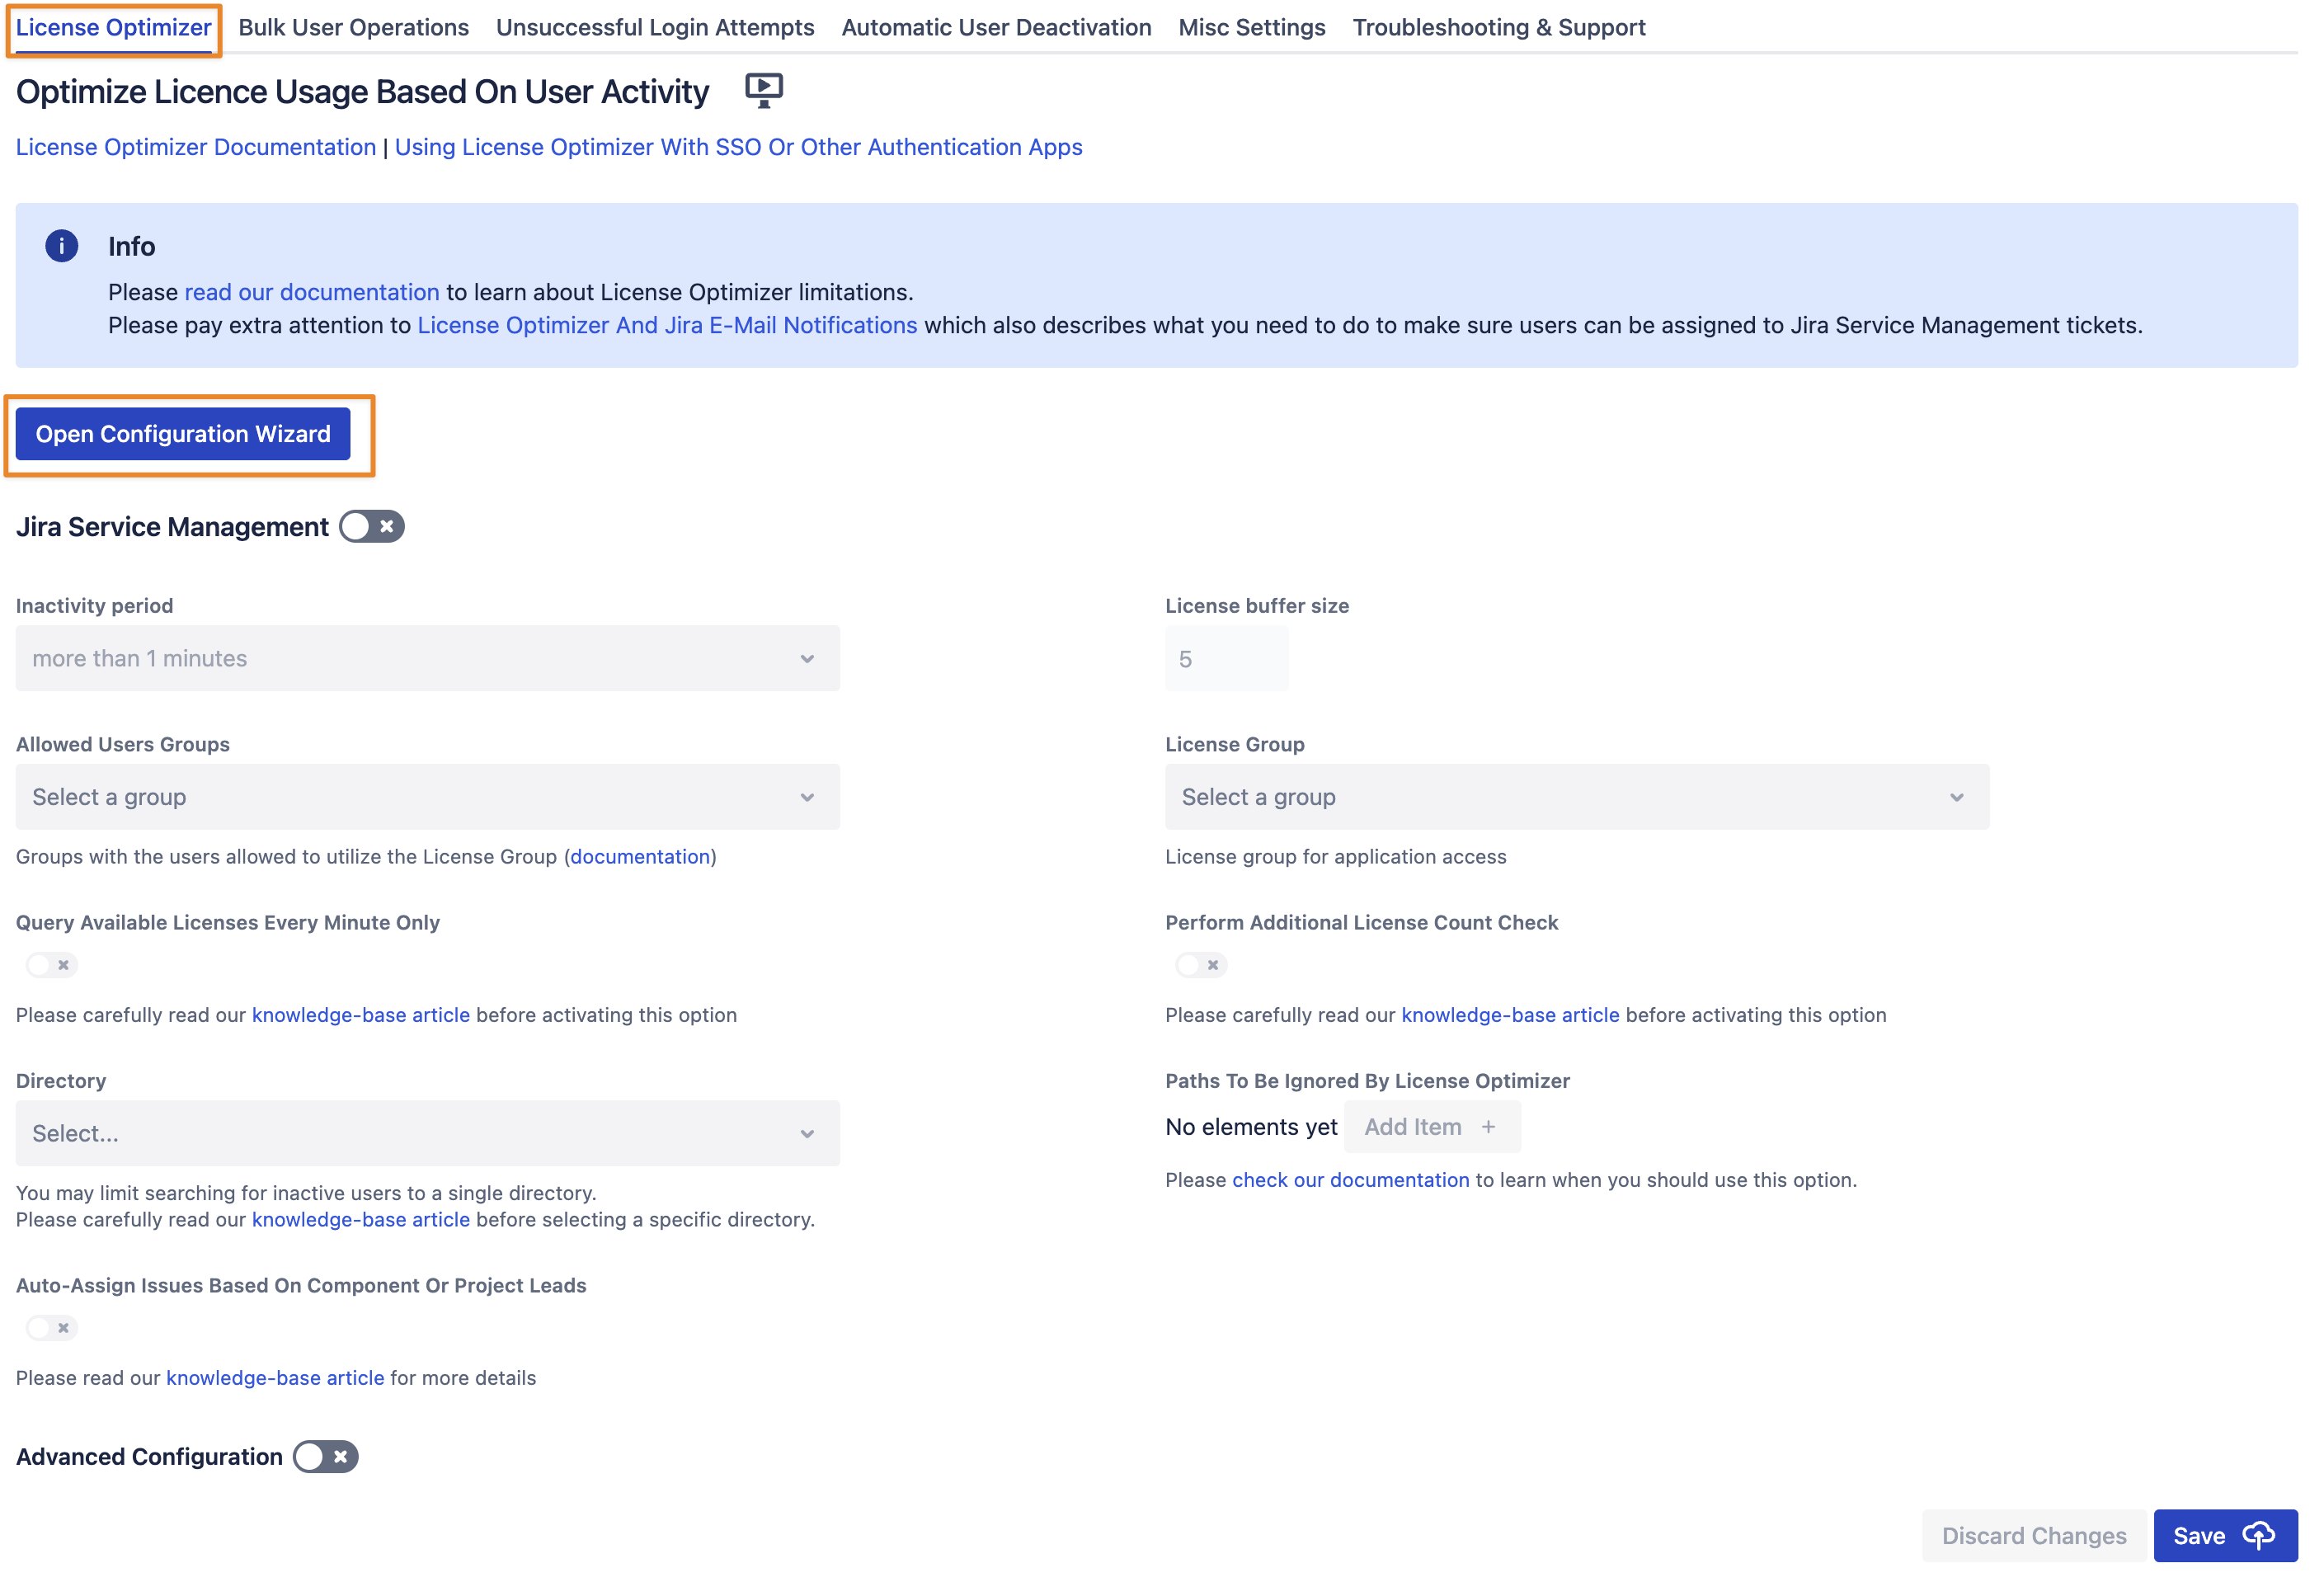
Open the User Deactivator admin UI as explained here and use its first tab and the wizard to complete the configuration. Depending on whether you are using Jira Software, Jira Service Management, Jira Core or Confluence, you’ll see configuration options for each of those.
Concept Of License Optimization
To get familiar with the concept of license optimization we suggest watching the video below.
License Optimizer basically adds and removes users from the group providing application access based on their activity in Jira or Confluence. If users are not actively using the user interface during the defined inactivity period, they are removed from the group. Once they become active again, they are added back to it. The same will happen during login or after logout.
If you are using Single Sign-On or another app to log in users to Jira or Confluence, please also read here.
It would be best if you made some adjustments to ensure that users are added to the right groups during login.
Please read below to determine which groups these are – this depends on your configuration.
Configuration
Select Application
For each Jira application (Jira Service Management, Jira Software and Jira Core), there is a dedicated configuration. For Confluence, there is just one. You can either use the wizard for each of these or configure it directly, once you are familiar with the settings. We recommend using the wizard. The following chapters provide a more detailed explanation of each option.
Allowed Users Groups
License Optimizer needs to know which group the users who are subject to optimisation are members of. This is usually the group providing application access by default:
jira-servicedesk-users for Jira Service Management
jira-software-users for Jira Software
jira-core-users for Jira Core
confluence-users for Confluence
If you are using a different group, you should use this one instead. You could also create a new one, but this would only really make sense if you don't want to optimize licenses for everybody. The optimizer doesn't make any changes to that group; it is only using it to determine if a user should have access or not. You can add more than one group, but this should only be required in more bespoke instances.
License Group
We recommend creating a new group for this. You can also choose an existing group, but remember that we will add and remove users to it as needed, so it should be dedicated to our use. The wizard offers to create this group for you, which will add the term licensed- to the Atlassian default name.
jira-servicedesk-licensed-users for Jira Service Management
jira-software-licensed-users for Jira Software
jira-core-licensed-users for Jira Core
confluence-licensed-users for Confluence
If you are not using the wizard, create the group yourself or select an existing one. Assign it to the License Group field in the configuration.
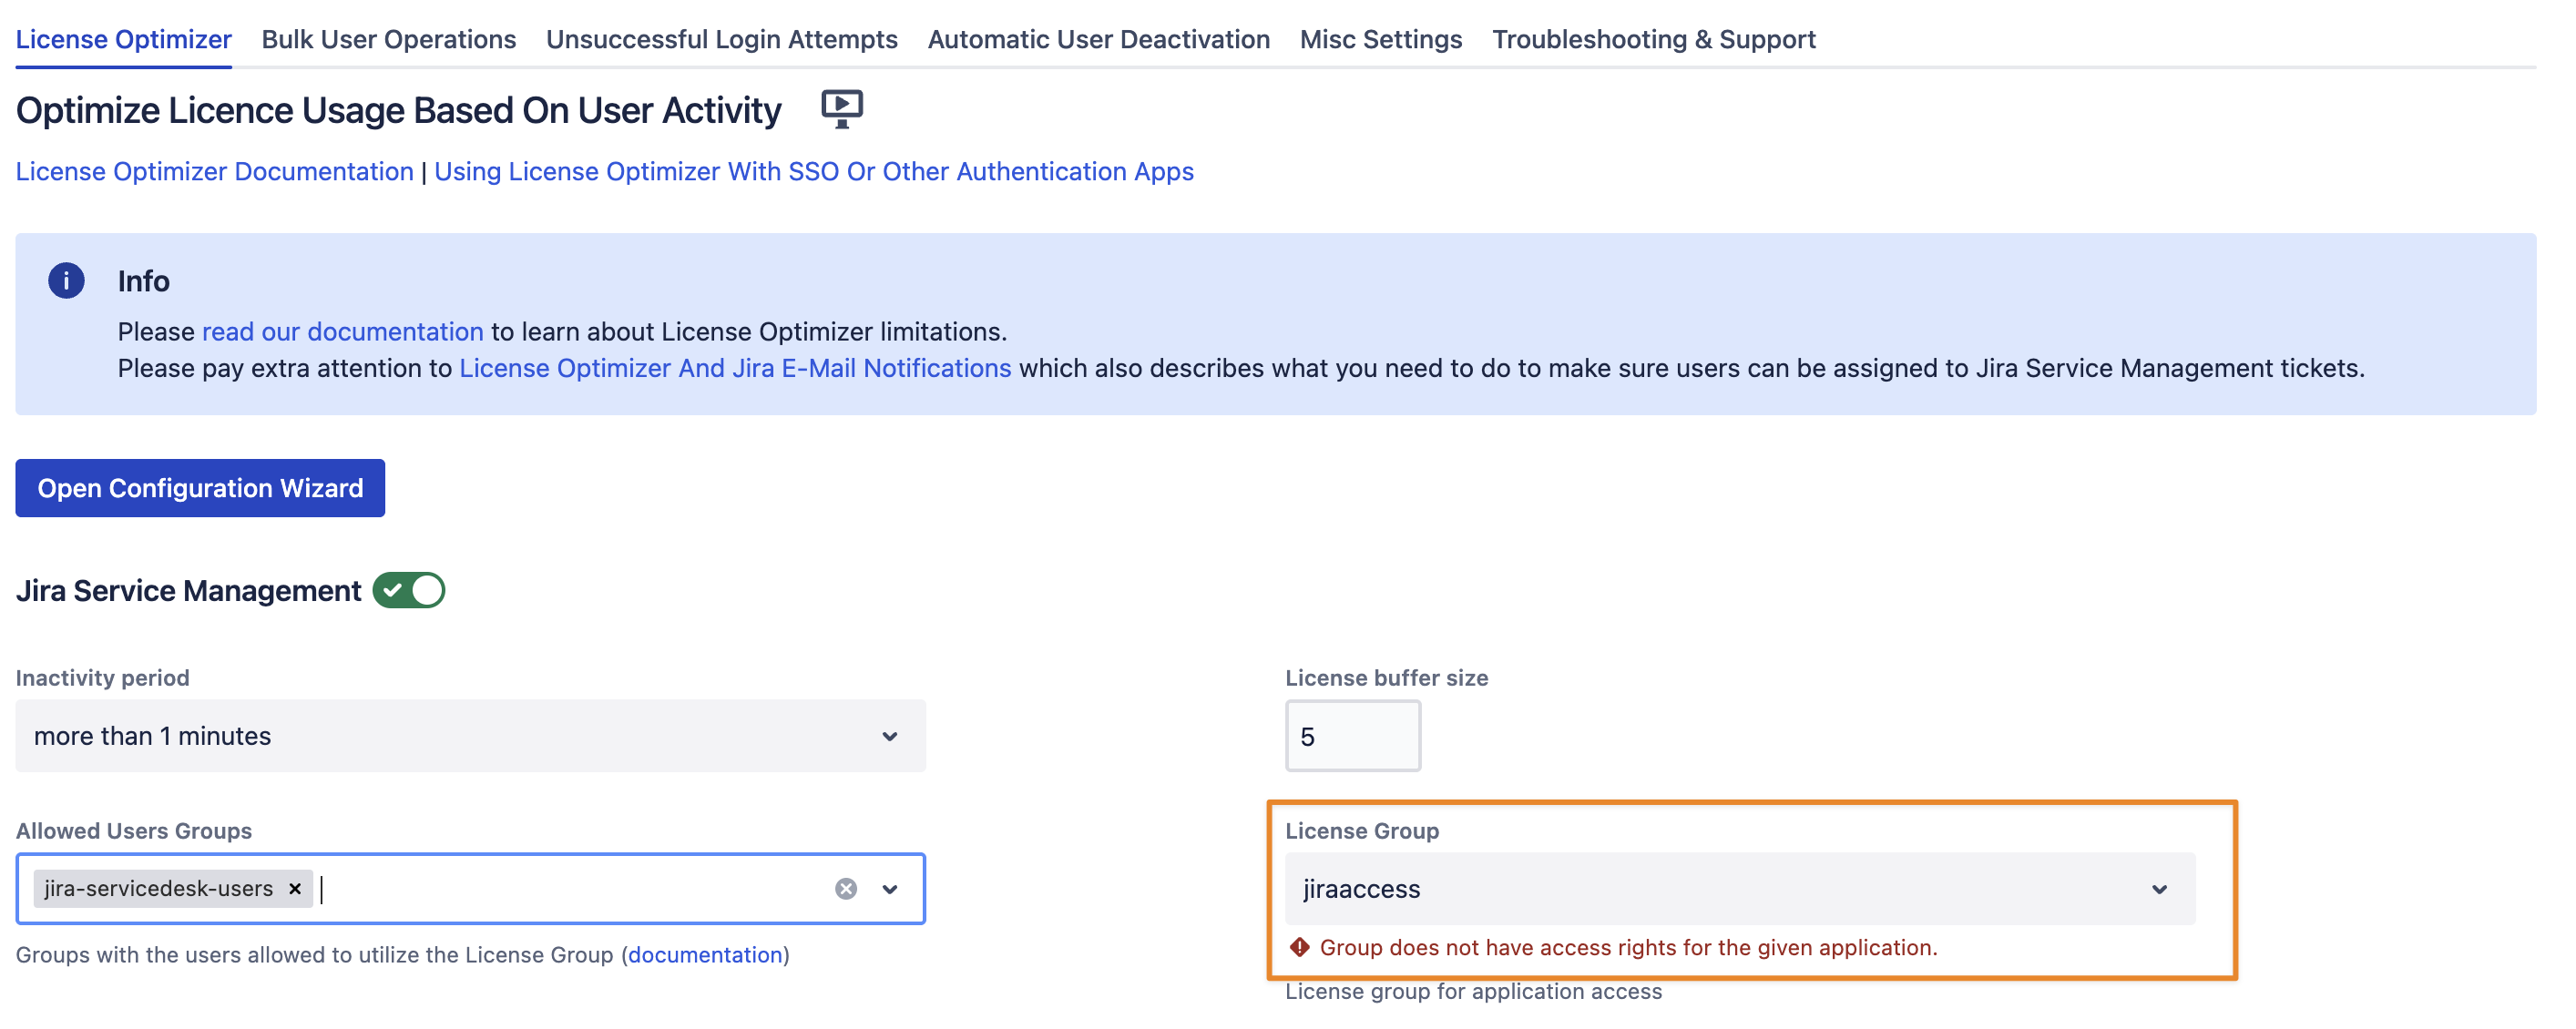
The warning about that group not having application access will be addressed in the following configuration step.
Adding Application Access To The New Group
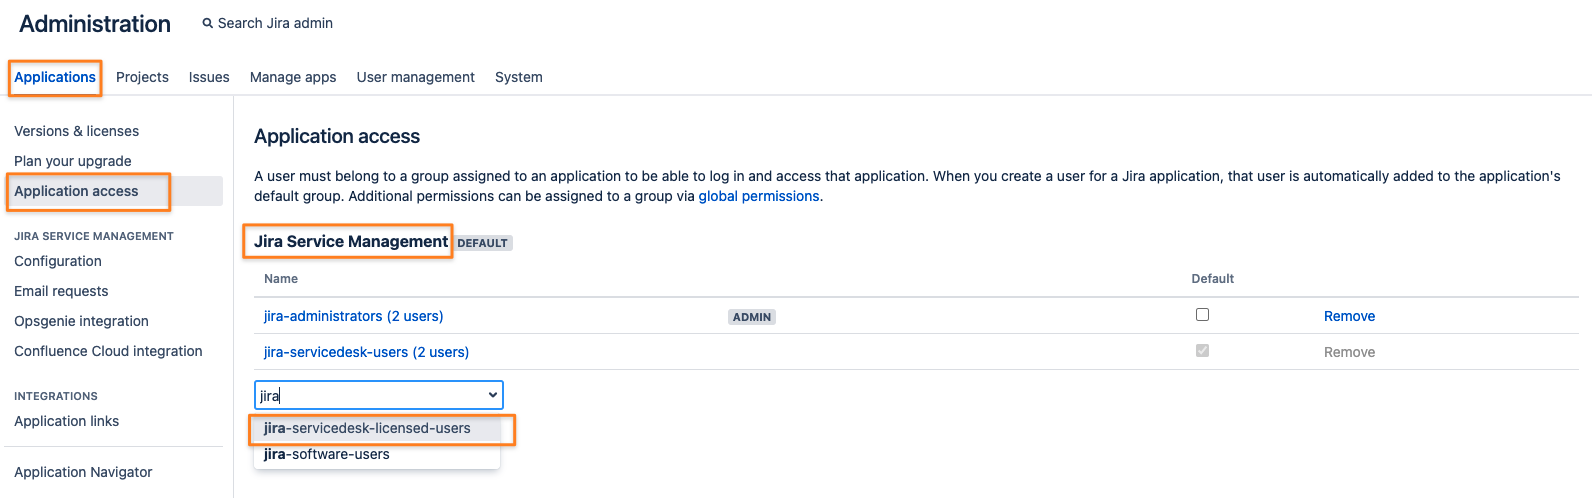
You need to grant application access to the new group.
Jira
Open the https://your-jira-base-url/secure/admin/ApplicationAccess.jspa Application Access page and add the group to the application you want to optimize licenses for.
Add the group to the application:
Also, check the default box (you can leave the other settings as is):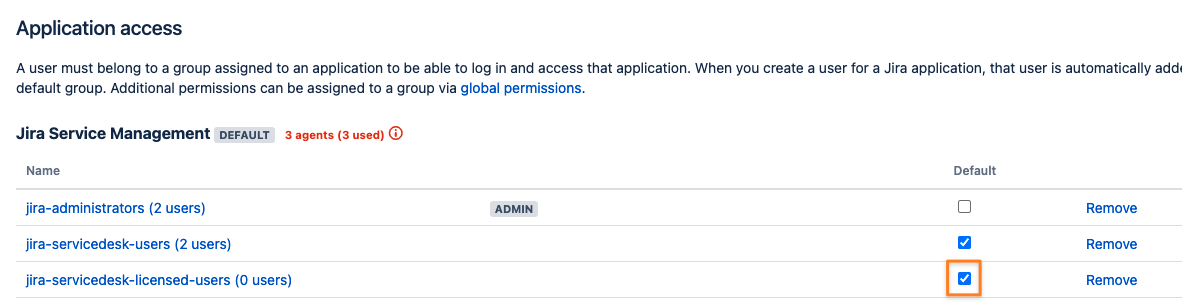
Confluence
Open the https://your-confluence-base-url/admin/permissions/globalpermissions.action Global Permissions page:
Click on Edit Permissions first: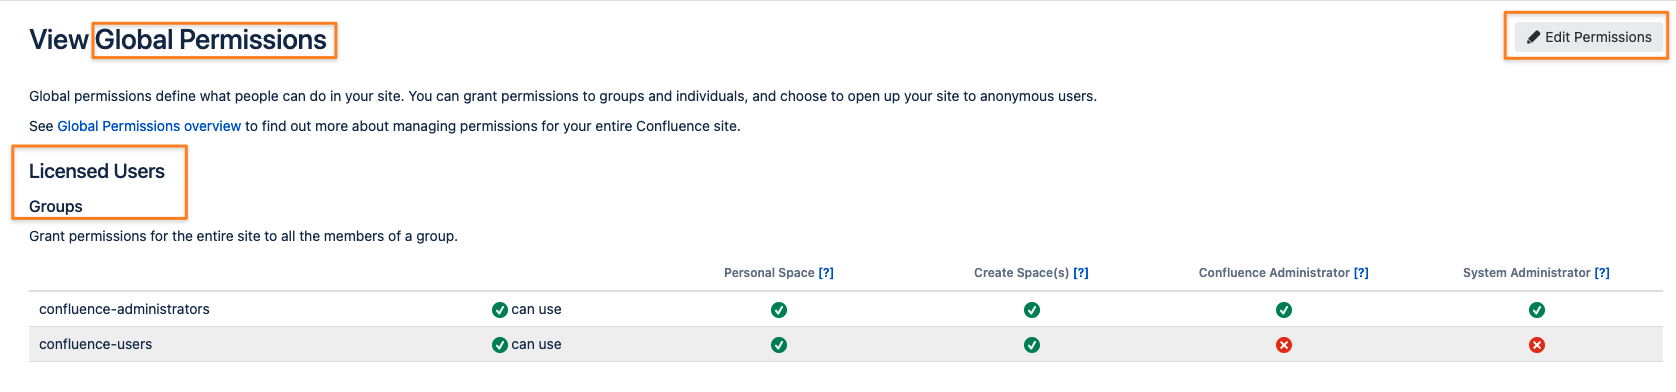
Add the group to Licensed Users/ Groups: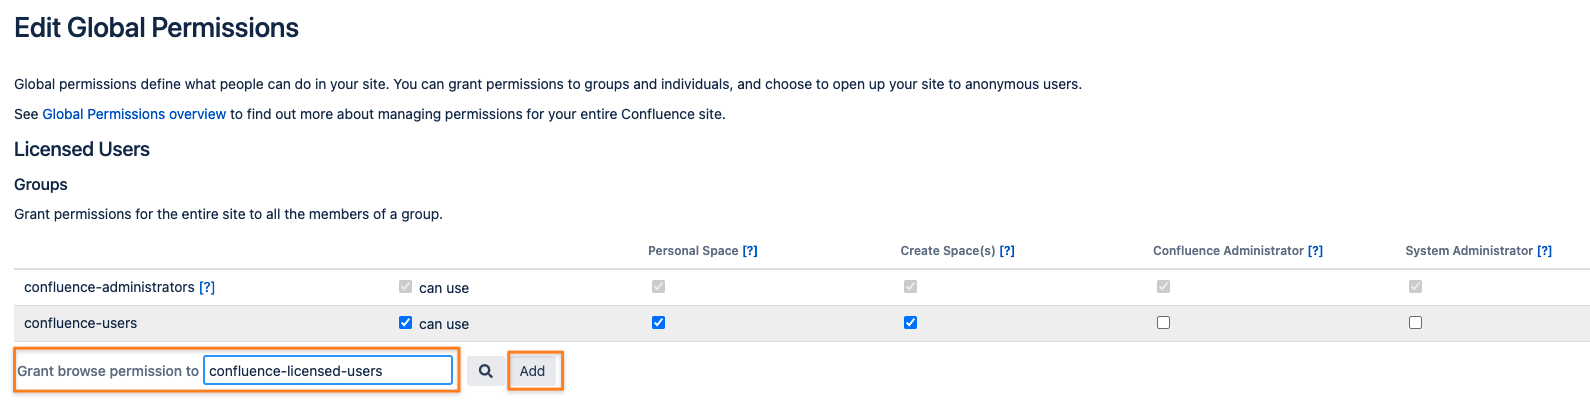
Check the same boxes as for the confluence-users group to provide the same permissions:

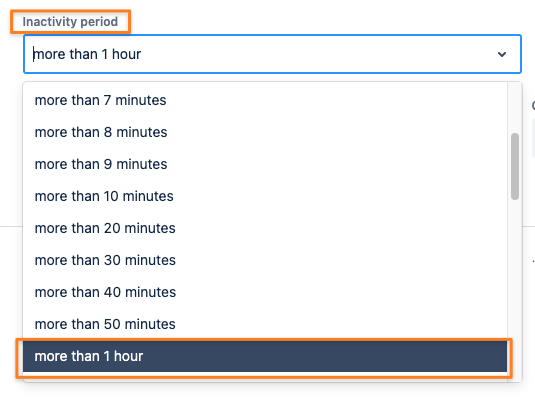
Inactivity Period
The default setting is more than 1 hour, but you could also select shorter periods. The shorter the period, the more aggressively you should save licenses. It is, however, a trade-off with some CPU & Database load that you are adding.
License Buffer
In the Datacenter version of the app, an additional license buffer size field is available, which defaults to 5.
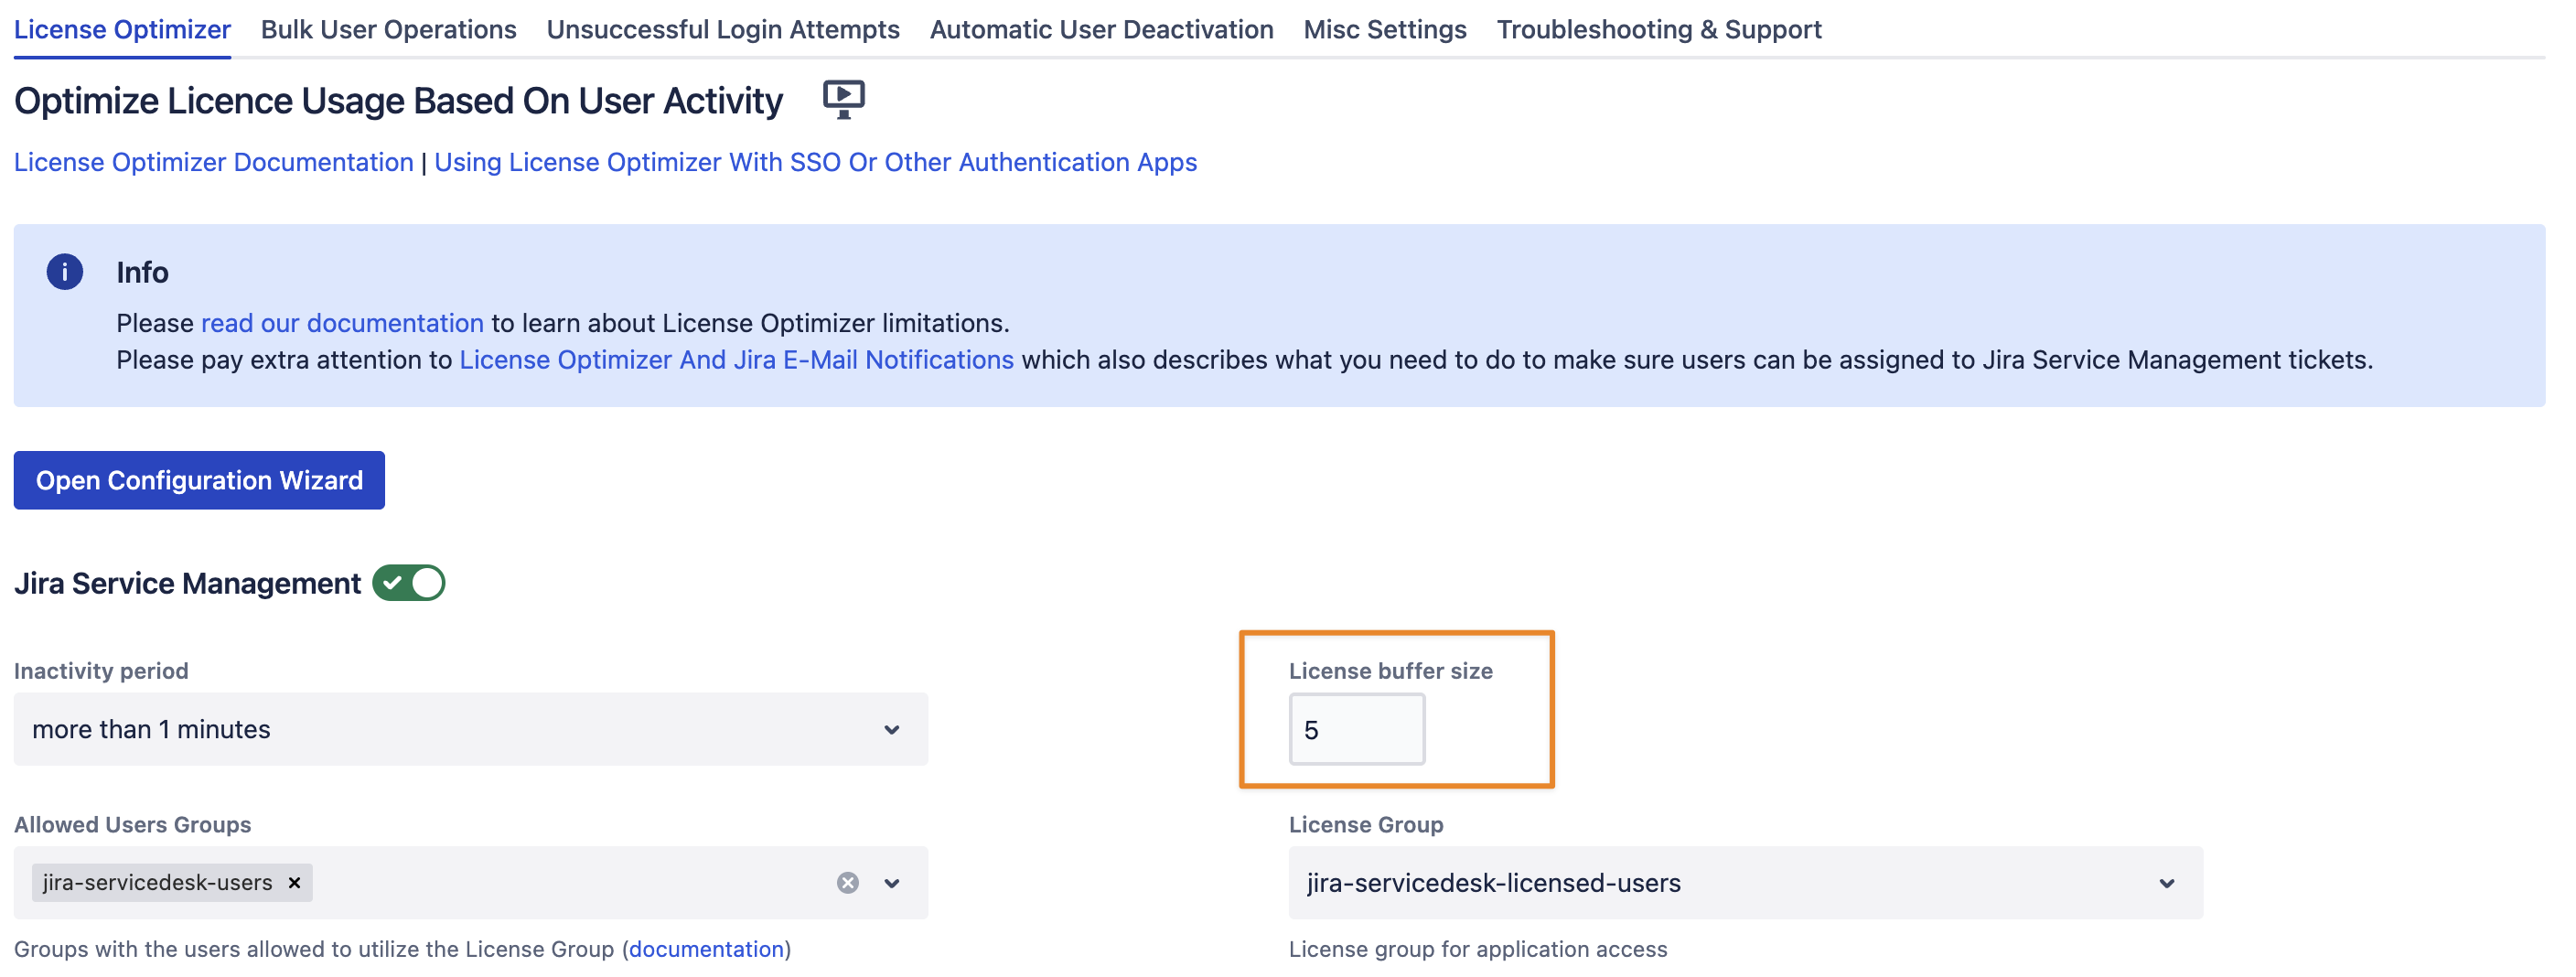
License Optimizer is running on each node of your Datacenter setup. When there is a lot of concurrent activity, it is a good idea to reserve a few licenses to prevent exceeding the maximum license count due to race conditions. This can happen if a large number of users become active simultaneously.
Activate Settings
If you did all of the above and see no warnings, you can already enable License Optimizer for the application by pressing Save.
Removing application access from the old group
The only thing left to do now is to remove application access from the old group
Jira
Open the https://your-jira-base-url/secure/admin/ApplicationAccess.jspa Application Access page again and remove the group from it:
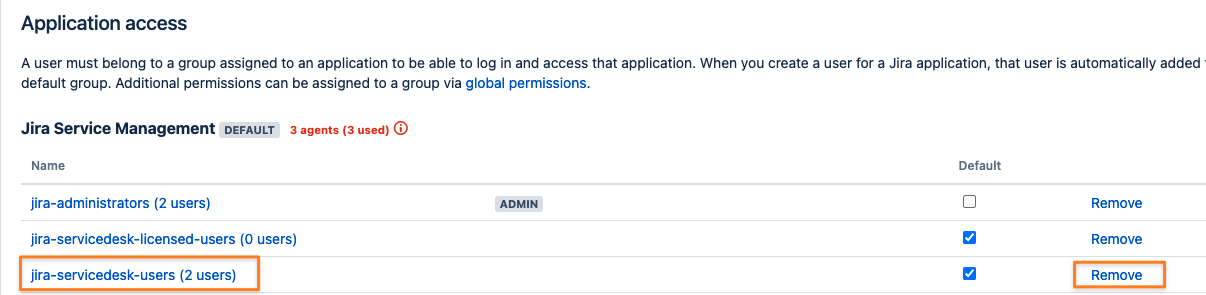
Confluence
Open the https://your-confluence-base-url/admin/permissions/globalpermissions.action Global Permissions page again.
Click on Edit Permissions first and uncheck all boxes for each permission of the old group:
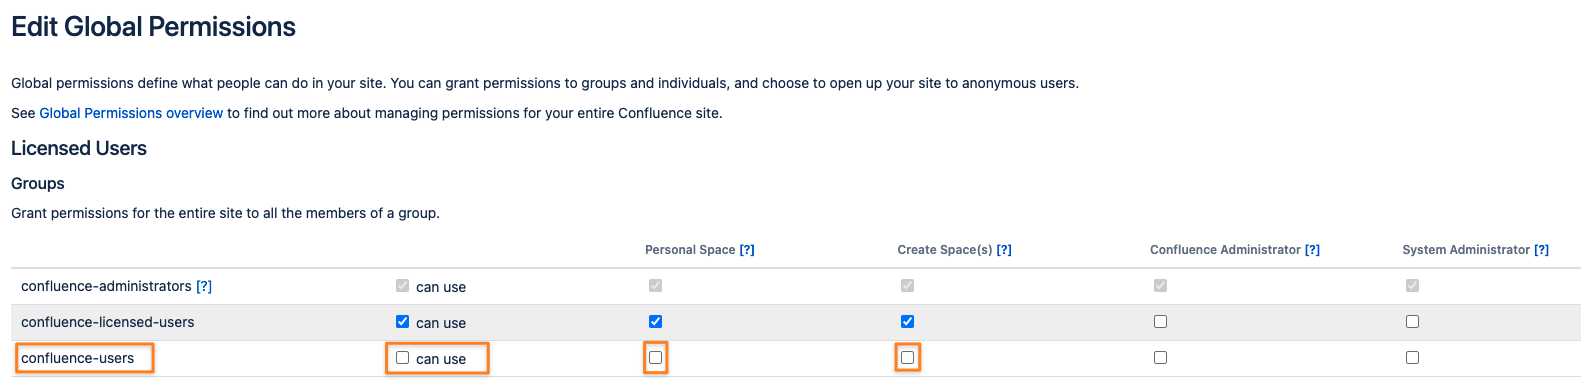
Click Save All at the bottom of the page. This will also remove the old group from the list of Licensed Users/ Groups.
Advanced Settings & Considerations
Scalability
The License Optimizer feature has been tested with the Atlassian Datacenter Testing Framework and 3000 to 4000 concurrent users in Jira and Confluence.
Advanced Options
We’ve added some advanced options over the years, not all of which are available in both versions of the app (Jira and Confluence). We suggested contacting our support if you need advice. Typically, you won’t need to activate any of these.
Jira & Confluence
“Query Available Licenses Every Minute Only” and “Perform Additional License Count Check” can be activated in both; please refer to the articles linked.

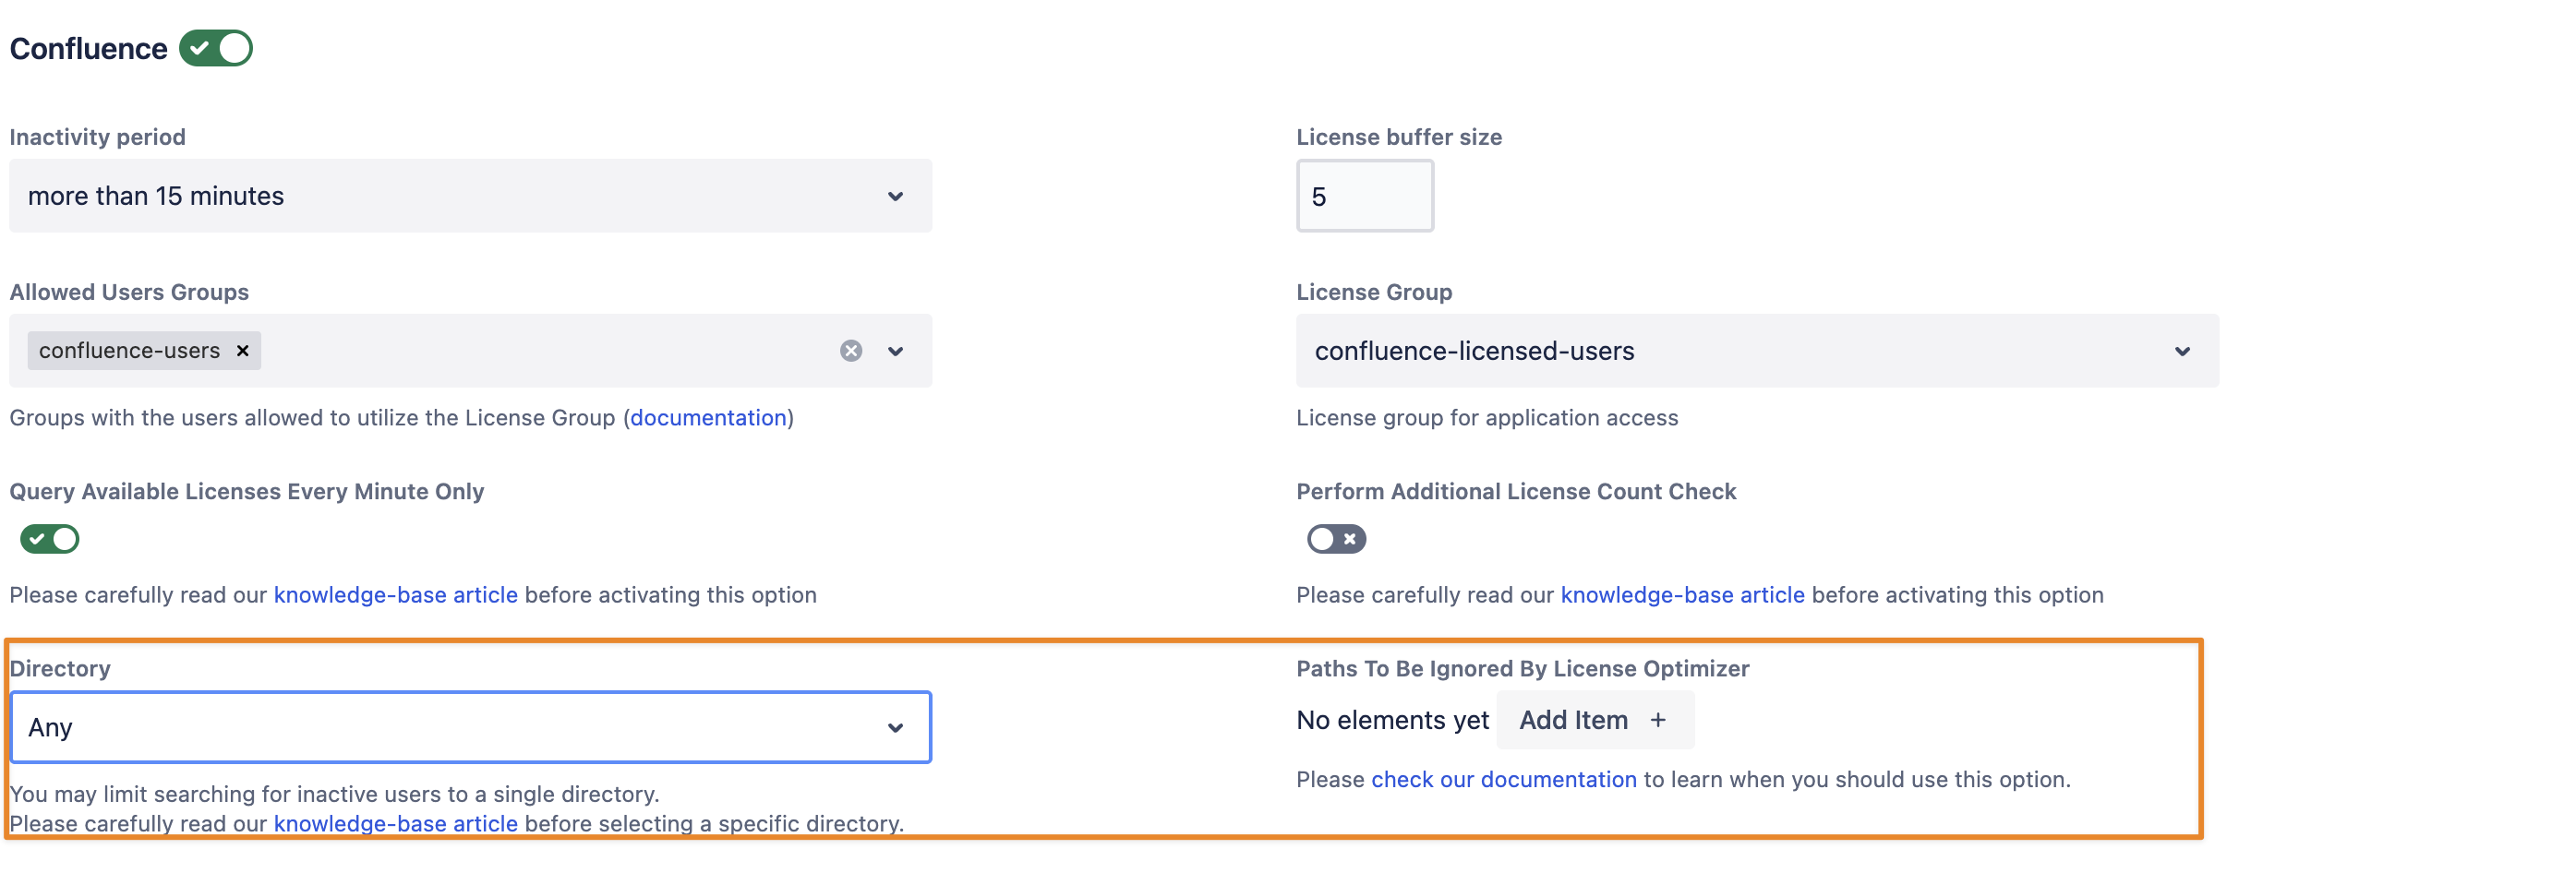
“Directory” and “Paths To Be Ignored by License Optimiser” can also be activated in both; please refer to the linked articles.
Jira
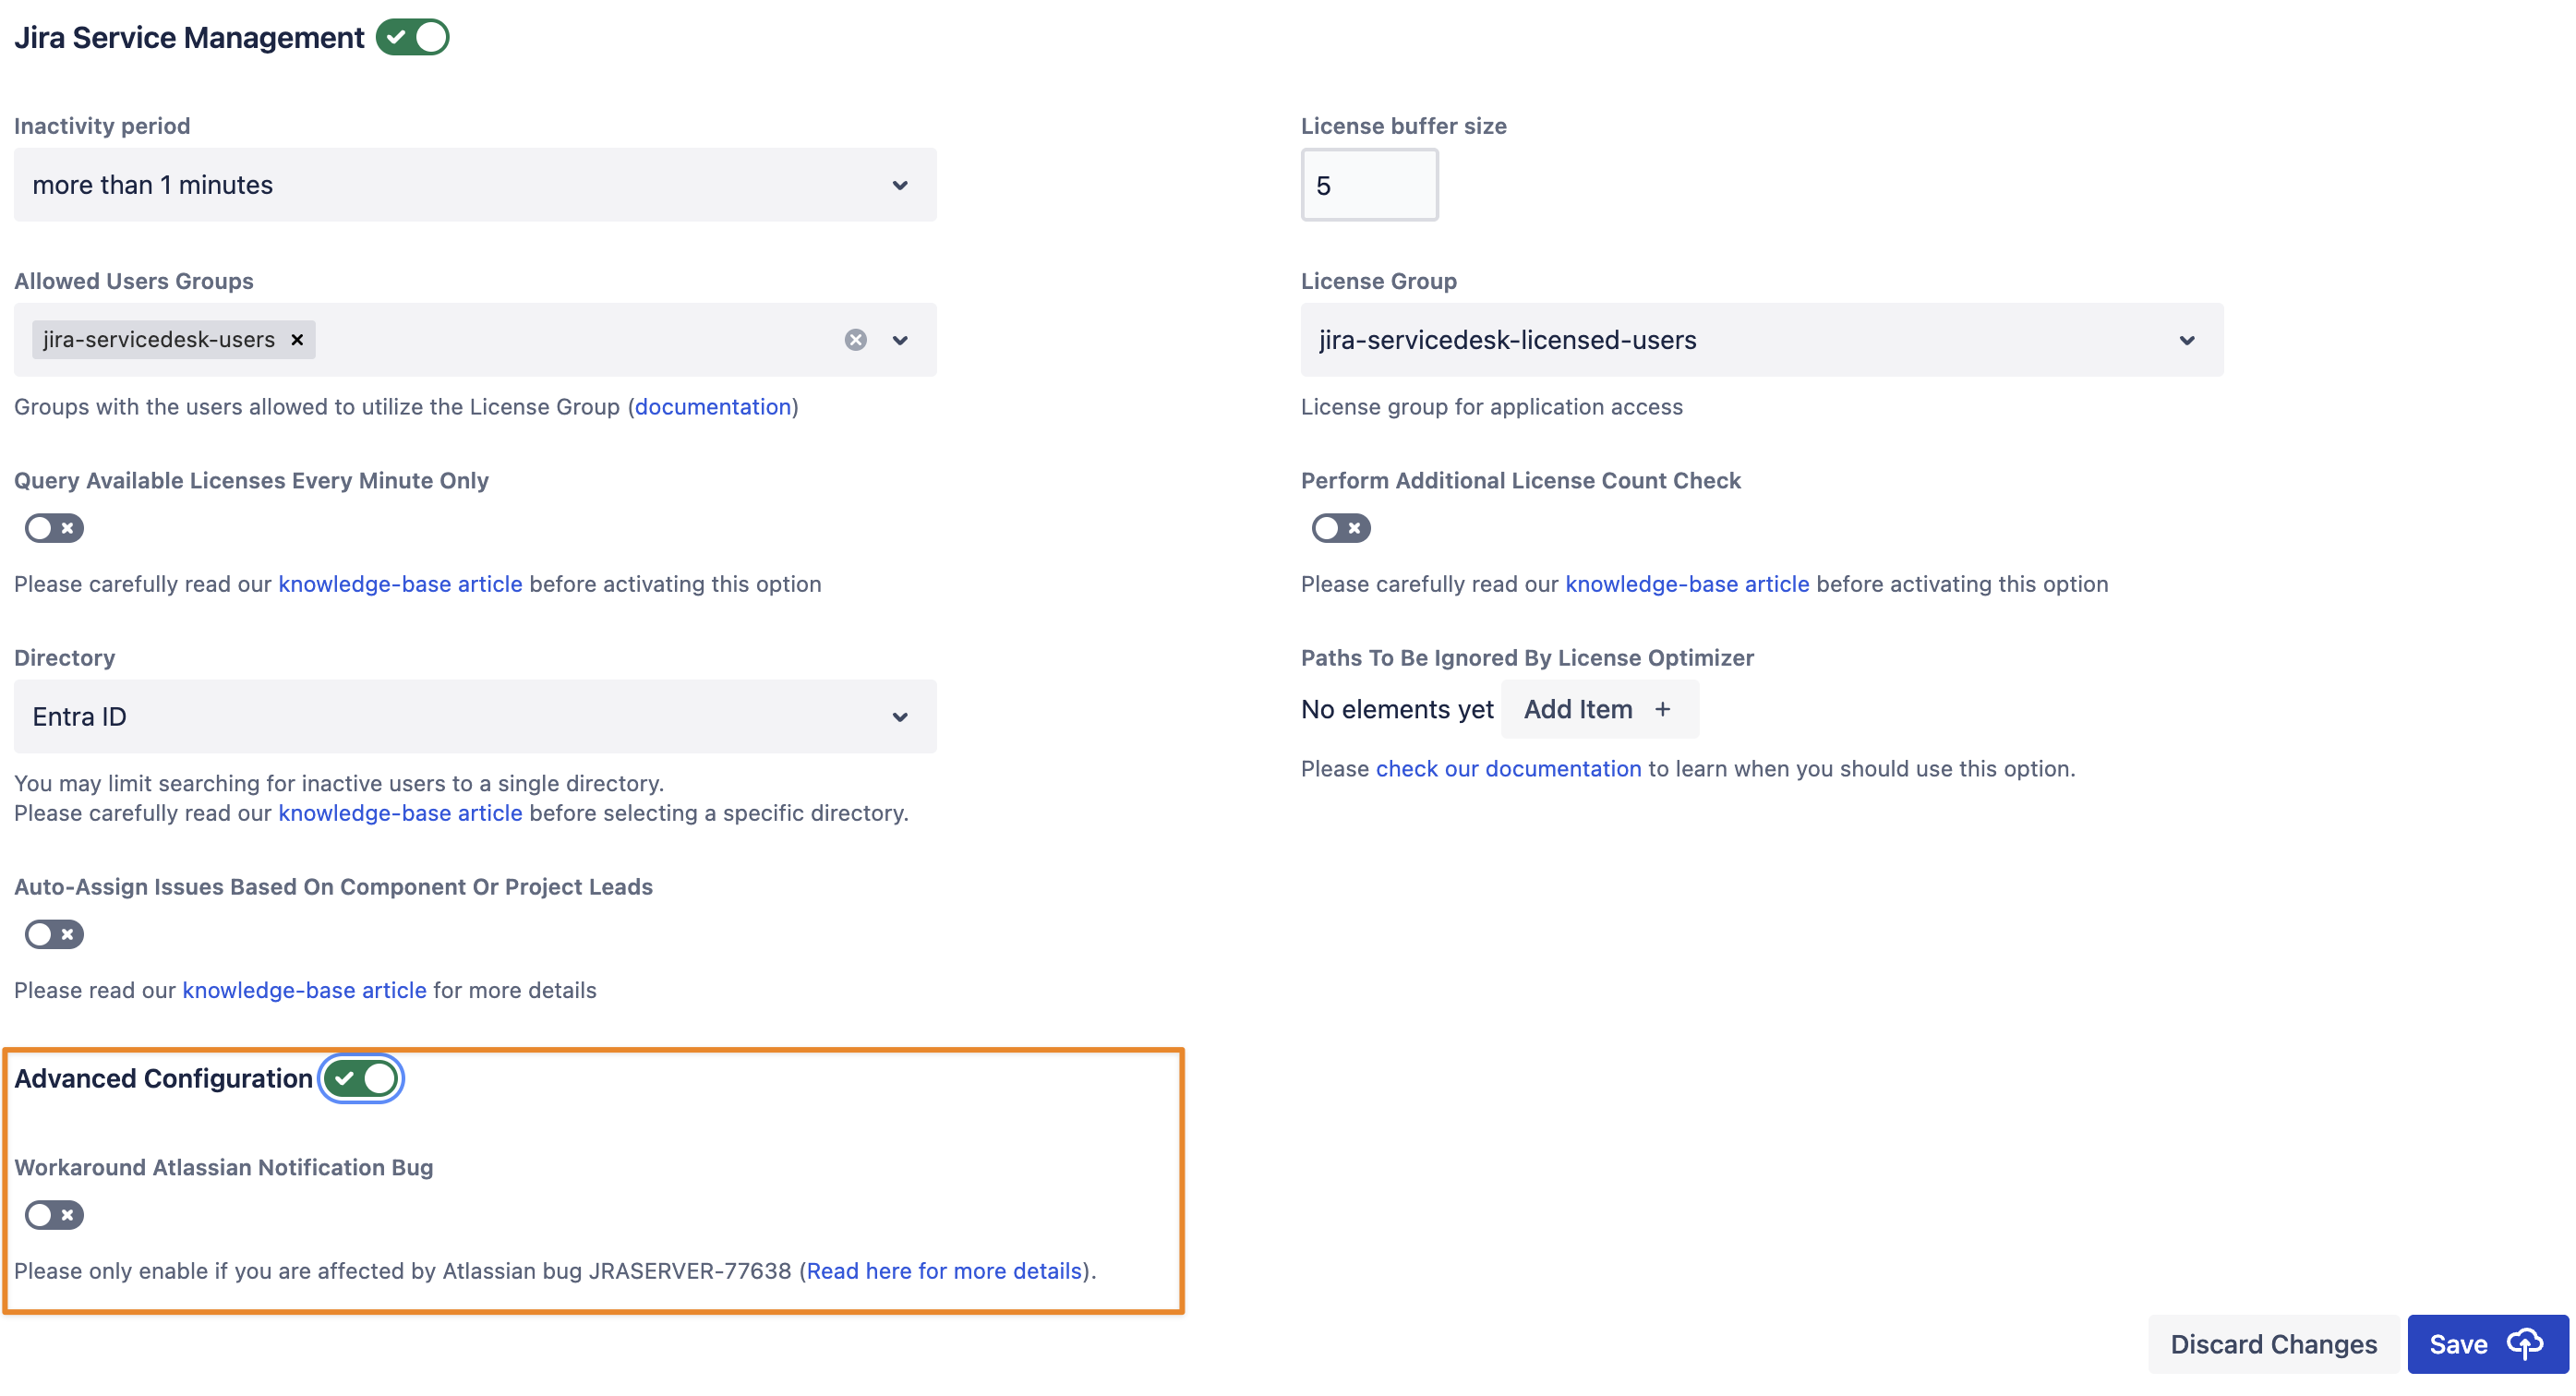
When using License Optimizer for Jira Service Management, you’ll notice an option “Auto-Assign Issues Based On Component Or Project Leads“, which is explained in this article.
There is also a toggle to show more advanced settings, currently available only with a workaround for an Atlassian bug; read here for more.
Confluence
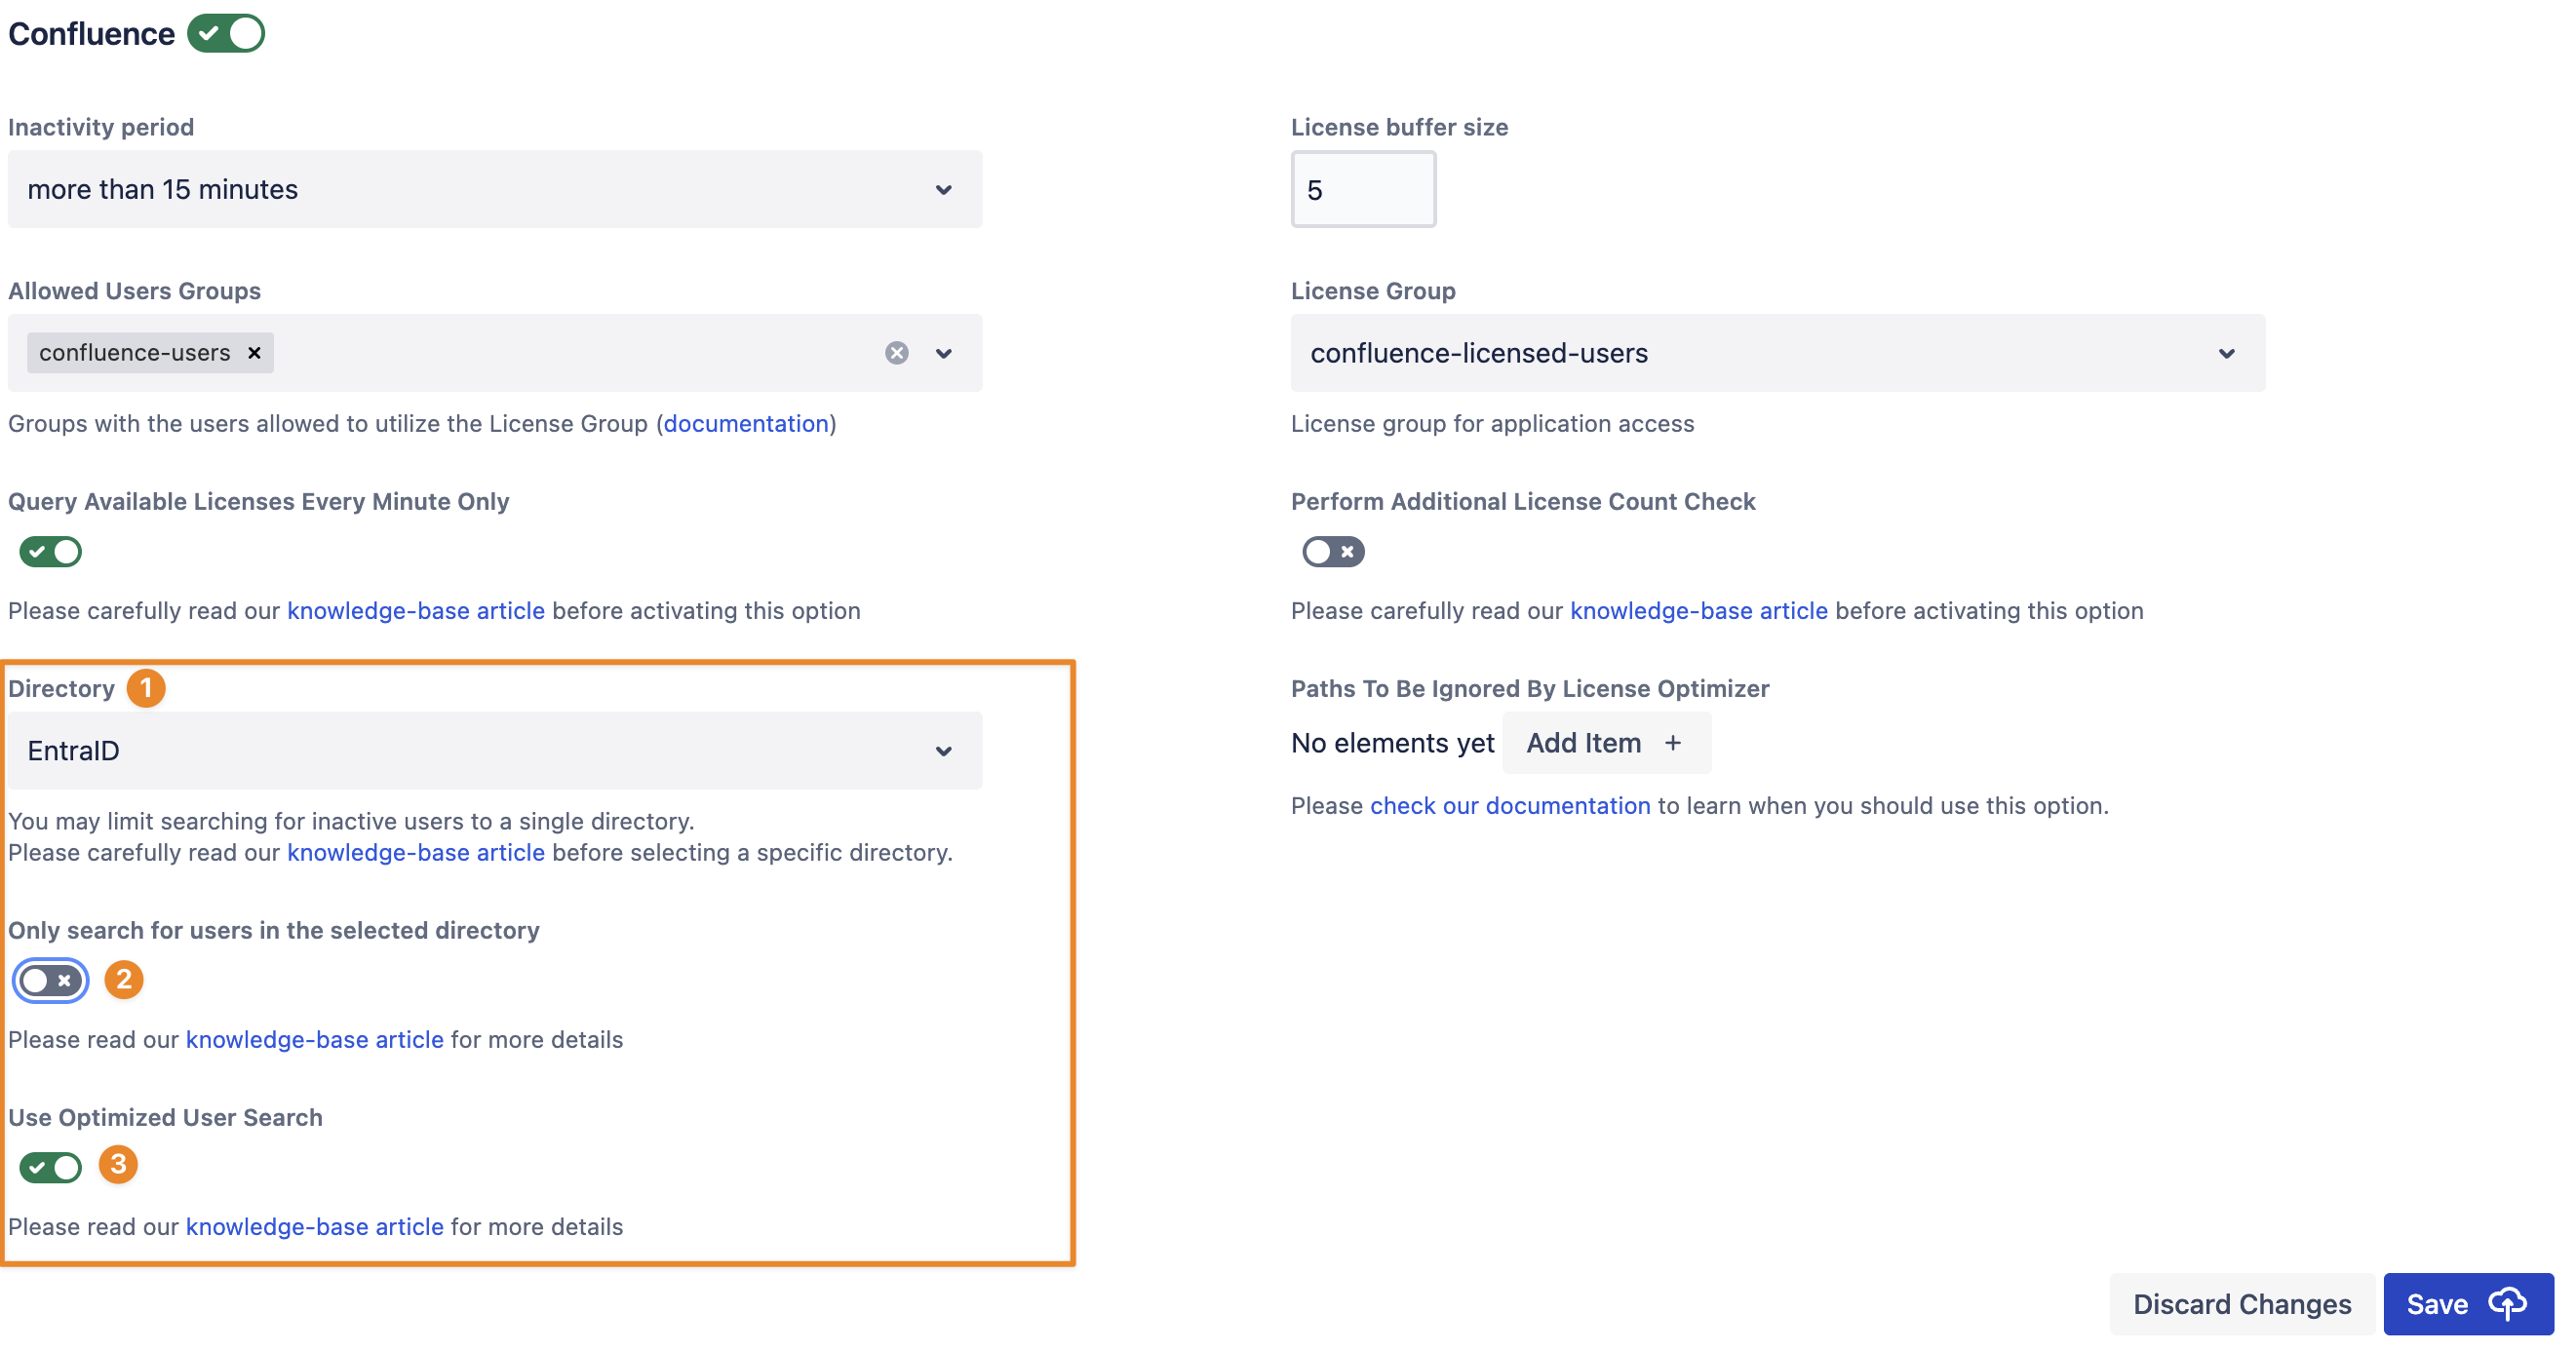
The Confluence version includes settings related to user search. You only need to consider making changes in case of search performance issues. For example, if you type the name of a user to be mentioned, or in the space or page restriction settings, and notice that the search times out. This can happen in instances with a large number of users and potentially across multiple directories. (2) is only available if you have selected a single directory (1). You should only do that if all of the users being optimised are sourced in the same directory, as explained in this article. (3) will disappear when (2) is selected, because it only makes sense if the users being optimised are sourced from multiple directories.
Service And Automation User Accounts
We usually recommend not including service accounts (used for automation and scripting with the REST API) in the "Allowed Users Group" and always assigning a license to these accounts instead.
It depends a bit on how much you can adjust the scripts used by these accounts. We've seen some REST request results where retrying the operation was required, something you can not always control yourself.