How to Migrate an Internal Directory to UserSync
Goal
Migrating an internal directory (or LDAP, etc) to a UserSync directory, such that the history, groups, tickets of the users in your Atlassian product will be retained.
If you have doubts about the process or questions, please do not hesitate to contact us via https://www.resolution.de/go/support.
Important
After this tutorial, all data from the internal users such as tickets (but not passwords) will be copied over from the internal user to the user in the UserSync directory.
In consequence, the login is only possible with Single Sign-On but not with a local password anymore.
The problem
When the usernames of the UserSync directory and internal directory do not match, then UserSync cannot find the internal users to copy over the data.
A common scenario is the following:
Before, users were provisioned with an LDAP connection. In such a scenario usernames often consist of the local part of an email address, while GSuite/Azure/Okta sends the full email address for the username.
Example: GSuite sends user1@domain.com for the username, while the user is present as user1 in an internal directory.
When performing the migration, UserSync will search for the usernames in the internal directory, but if they do not match, UserSync is not able to find the users for copying data.
The solution
Transforming incoming usernames from the cloud provider, such that they match the internal one.
In most cases, it is possible to transform usernames such that UserSync will be able to find them in the internal directory.
If you transform the usernames, you must also add this transformation to the SAML SSO configuration, such that the user will be found and logged in.Rename internal users, such that they match the usernames sent by the cloud provider.
For LDAP directories, it is usually also possible to change the username attribute. That makes migrating users easier, since then no transformation is necessary.
Requirements
An internal directory to migrate
A UserSync directory with the users of the internal directory, but NOT synced yet.
If the UserSync directory is already synced, then delete the UserSync directory and also the orphaned directory first.
Create a new UserSync connector, but DO NOT SYNC ANY USER.
Step-By-Step Guide
Two things need to be taken care of: existing local groups and usernames.
Before the Migration
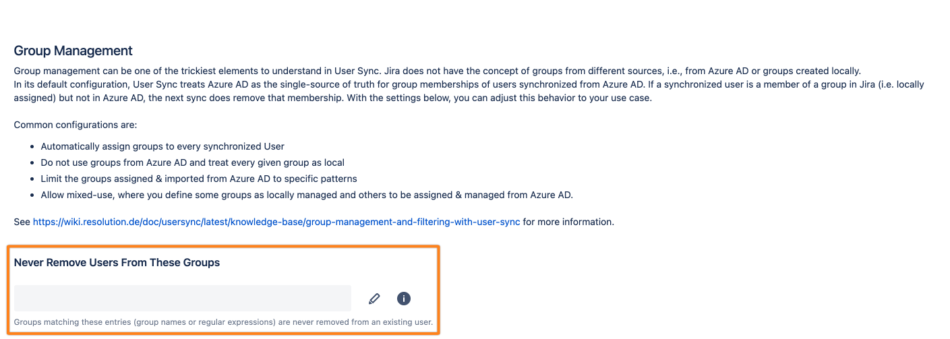
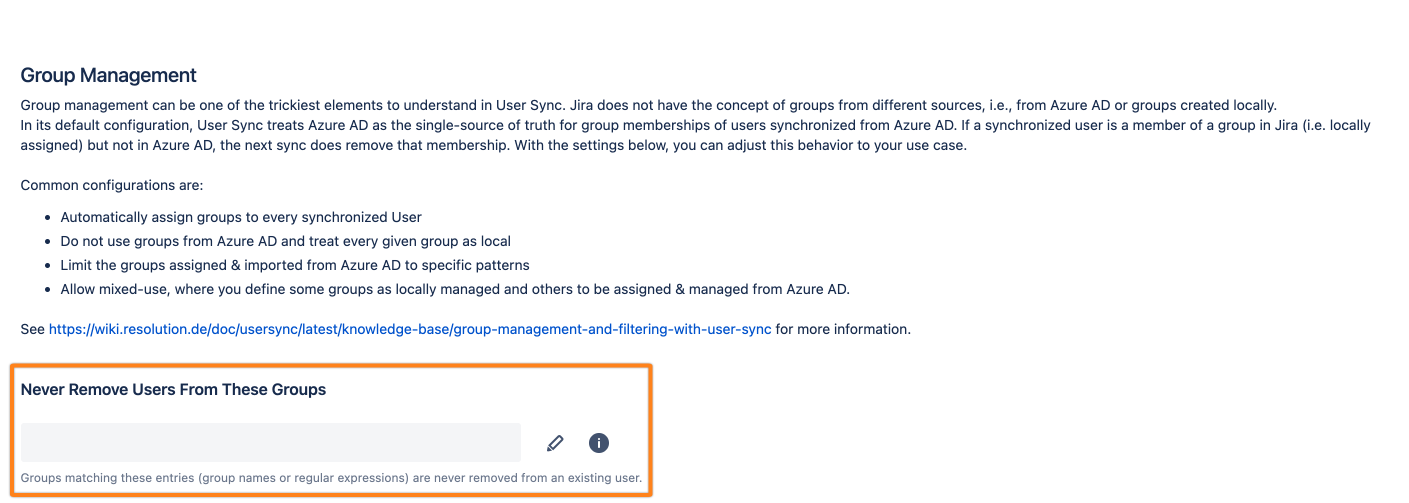
Local groups
If you only synchronize your groups via UserSync you can skip this section. If you manage your groups locally in your Atlassian product, please read the following carefully.
To retain local groups after a synchronization, please do as follows:
Go to the UserSync configuration page and click Edit for the UserSync connector.
Scroll down to the bottom of the page and click Show Advanced Settings.
Next, go to Local Group Management.
With Keep these groups you can specify groups that should be retained. Instead of specifying each group, regular expressions can also be used. Please see the following examples:
Groups to keep | Regular Expression |
|---|---|
all groups | .* |
jira-users, jira-software-users, jira- | jira-.* |
confluence-users, confluence-employees, confluence- | confluence-.* |
Usernames
For a successful migration, UserSync must be able to find the user by the username in an internal directory. Thus, the username must match in the UserSync directory and in the internal directory.
If that is not the case, you either have
to transform the usernames of the UserSync directory such that they match or
rename the internal users such that they match the usernames in the UserSync directory or
in case of an old LDAP directory, change the attribute for the username to email and sync again.
The option to choose depends on your user base. If you are not sure what you are doing, please contact our support at https://www.resolution.de/go/support.
Transformations
A transformation can be based on a regular expression. In the following, some of the common cases will be presented.
Internal directory username | UserSync directory username | Transformation for the UserSync username | |
|---|---|---|---|
Regular expression | Replacement | ||
a.example | ^(.*)@.*$ | $1 | |
^(.*)_(.*)#EXT#.*$ | $1@$2 | ||
a.example | ^(.*)_.*#EXT#.*$ | $1 | |
If you have any doubt about finding an appropriate transformation, please contact our support via https://www.resolution.de/go/support.
Doing the Migration
For UserSync
After the preparation, the following steps show how to do the actual migration:
Go to the UserSync configuration page and click Edit for the UserSync connector.
Scroll down to the bottom of the page and click Show Advanced Settings.
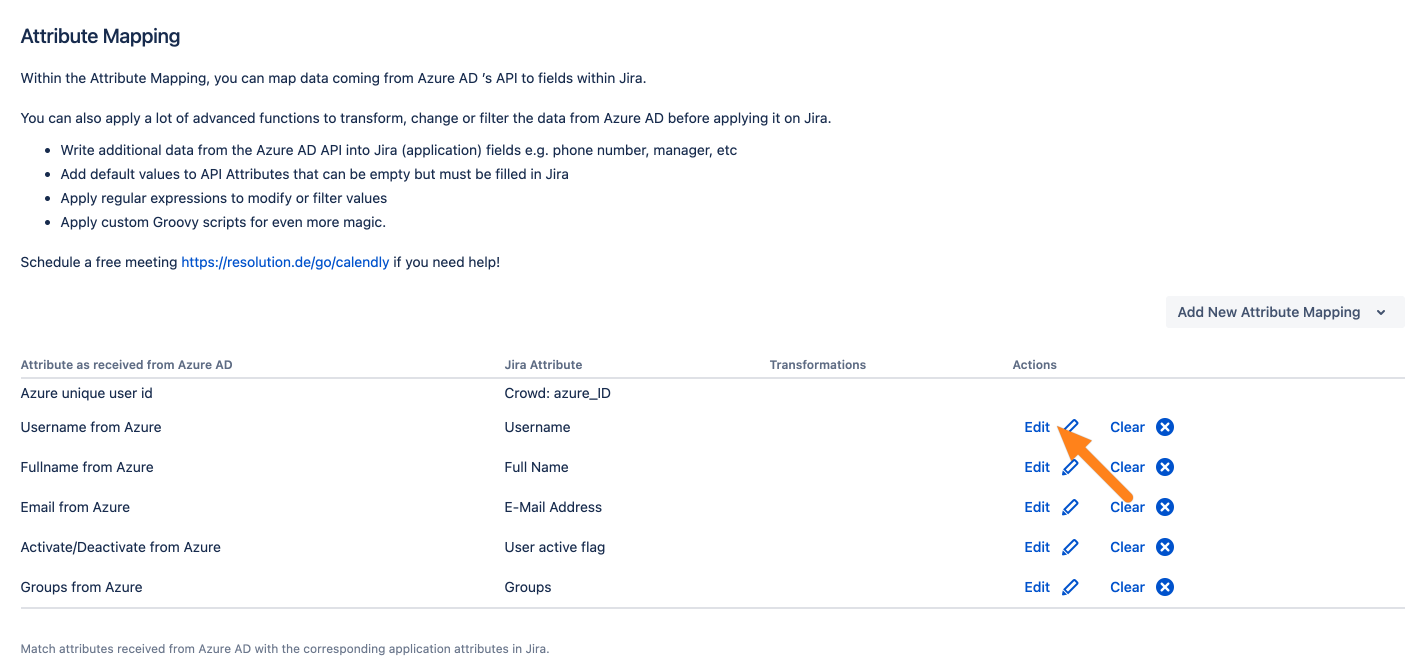
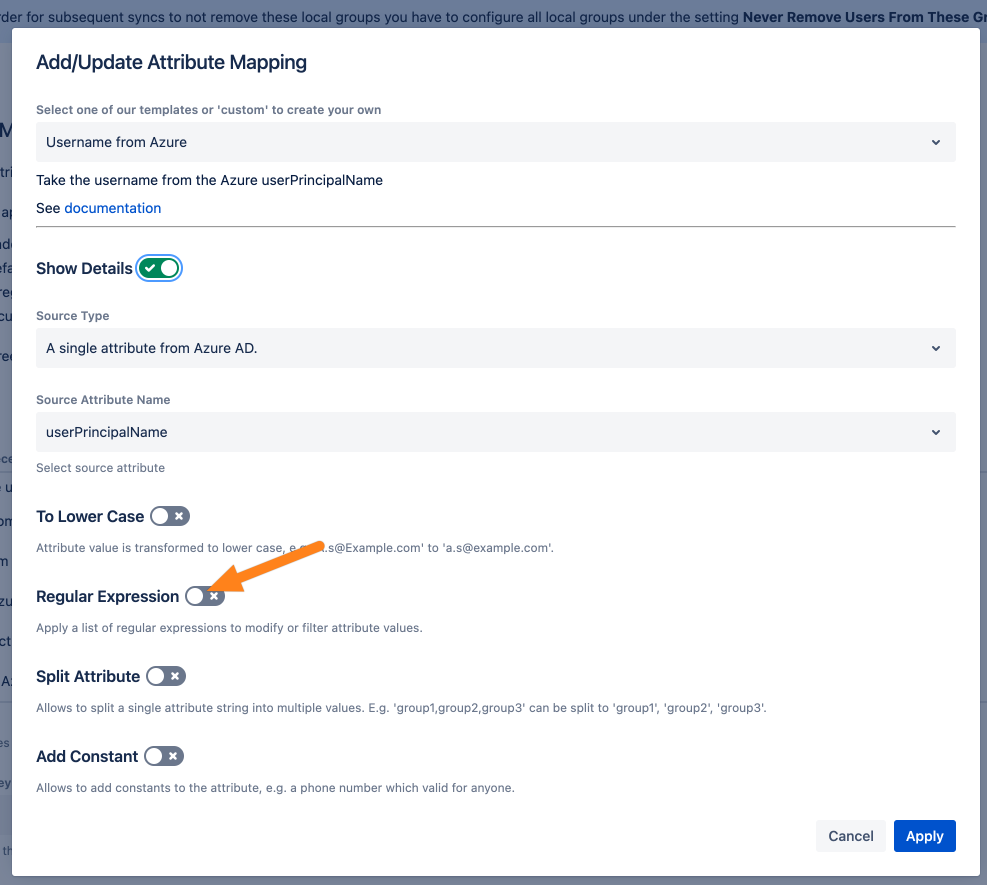
Go to Attribute Mappings, and click Edit for the Username column (Jira/Confluence/... Attribute)
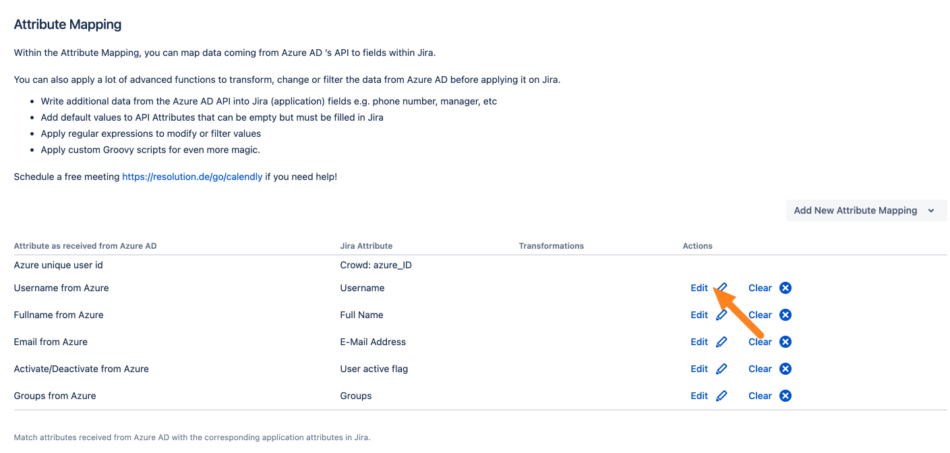
Click Show Details.
Click Regular Expressions.

Click Edit
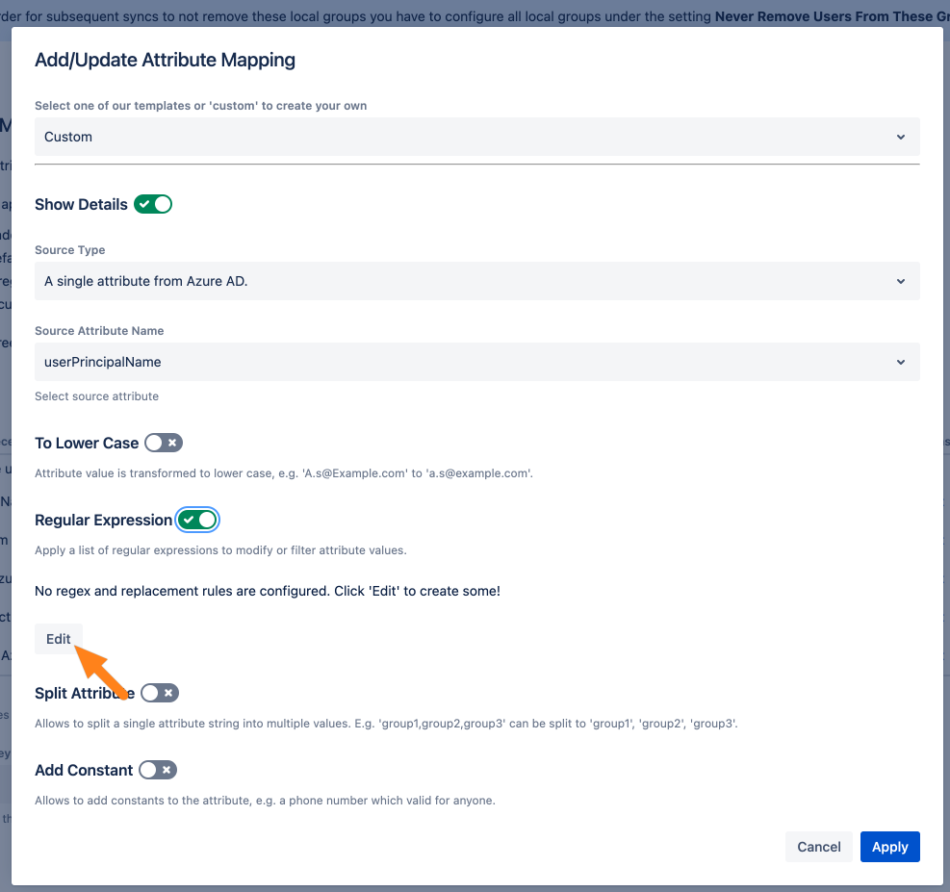
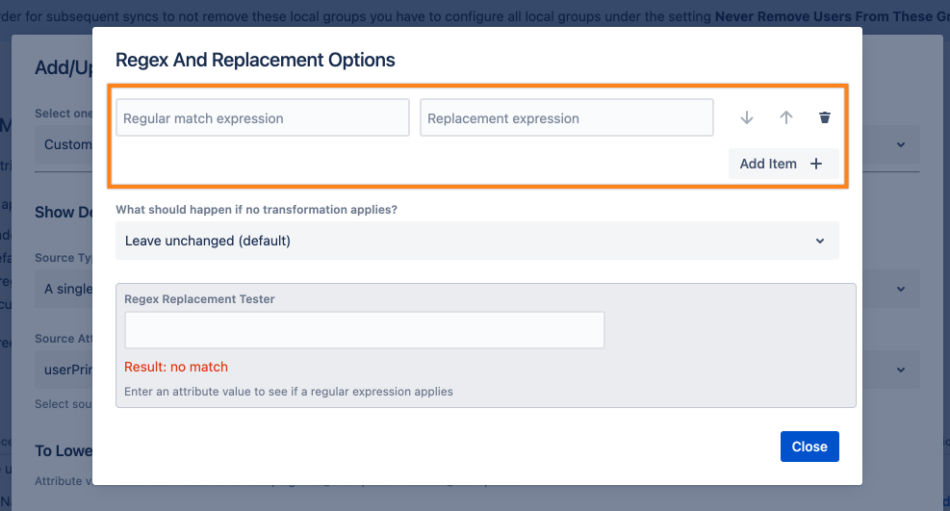
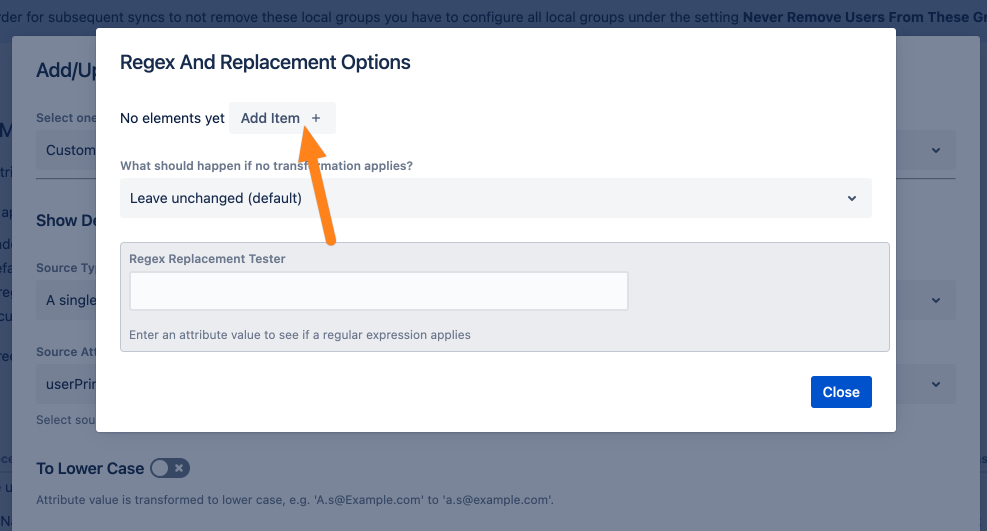
Click Add Entry

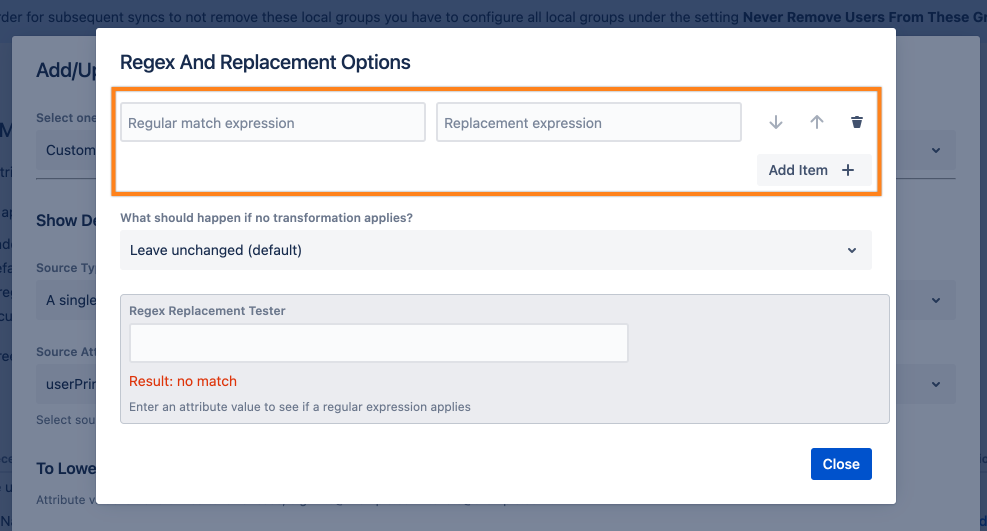
Add the desired transformation and close the popup.
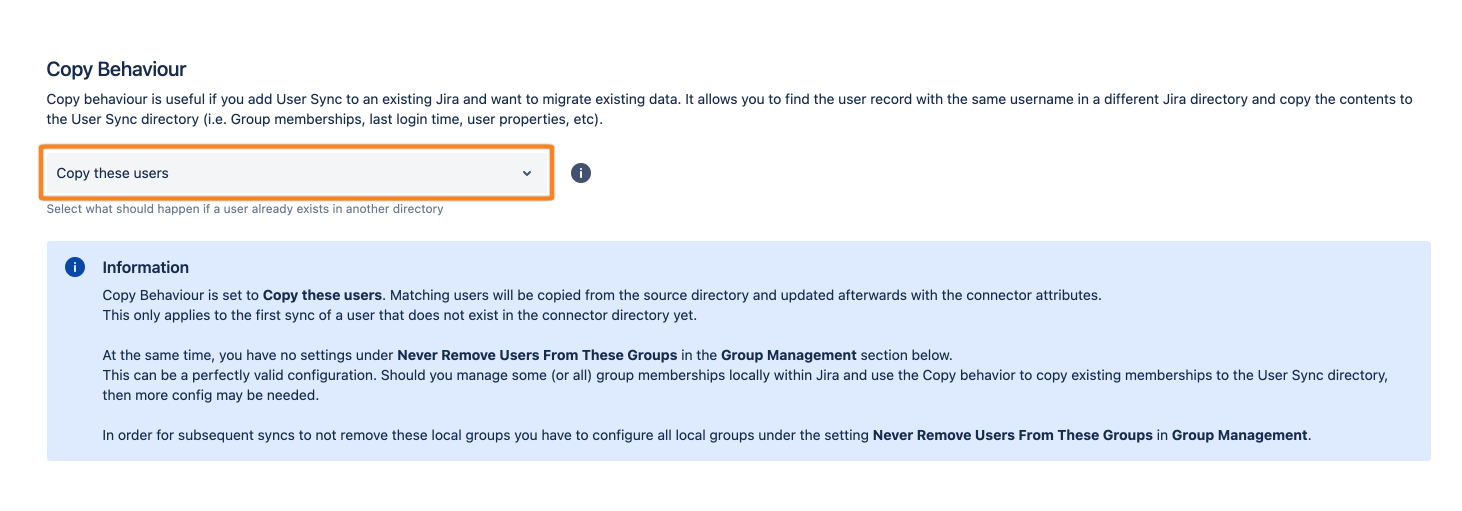
Make sure that Copy Behaviour is set to Copy These Users. This should be the case by default. It will trigger UserSync to lookup users and copy their data, but for the first sync only.

Scroll down and click Save and Return.
Now, click Full Sync. Wait for sync to finish and check your users for any duplicates. If you can't see a duplicate, everything went well.
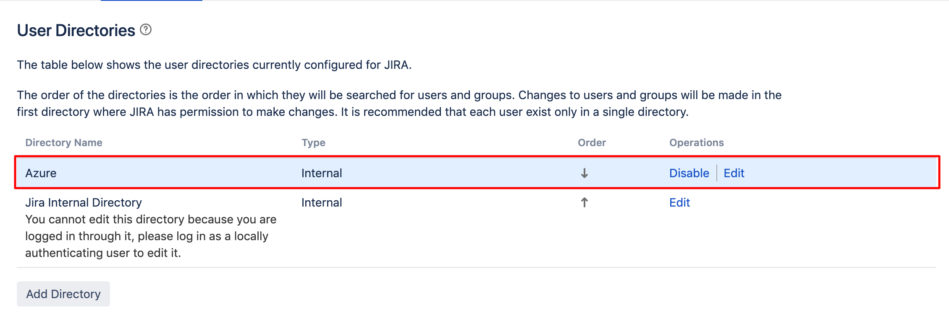
Afterwards, go to the User Directory options of you Atlassian product.
Put the UserSync directory in front of the internal directory.


For SAML SSO
If you use a transformation rule for the migration, you need to use the same one for SAML Single Sign-On:
Go to the SAML Single Sign-On configuration.
Choose the IdP you migrated your users for.
Scroll down to the Attribute Mapping and click Edit for the Username.

Do the same steps as before and add the same transformations.
Then Save your configuration.

Result
If everything went well, you migrated your users from your internal directory to the directory of your cloud provider. When your users log in, they can see all their old tickets, mentions, etc.
If something did not work as expected, please do not hesitate to contact our support for help. We can also have a free screenshare session to do the migration together. In that case, please go to https://www.resolution.de/go/support.