
JIT and Microsoft Entra ID (formerly Azure AD): Sending Groups via SAML Attributes
Overview
In this article, you learn how to transmit groups from Microsoft Entra ID (formerly Azure AD) during Just In Time Provisioning.
Since Microsoft Entra ID (formerly Azure AD) only supports sending group IDs instead of group names, you also have to create a group transformation for each group.
Please note that there is a limit in Microsoft Entra ID (formerly Azure AD) for only 150 groups to be sent as values in the attribute in the SAML response. If the number of groups the user is in goes over that limit (150 for SAML) then an overage claim will be added to the claim sources. The overage claim will be pointing at the Graph endpoint containing the list of groups for the user, which cannot be processed by the plugin in JIT.
Configure Microsoft Entra ID (formerly Azure AD) for Transmitting Groups via SAML Attributes
With its default settings, Microsoft Entra ID (formerly Azure AD) does not send group IDs for Just In Time Provisioning. To change this, navigate to the Enterprise Application you've created for your Atlassian instance in Azure AD:
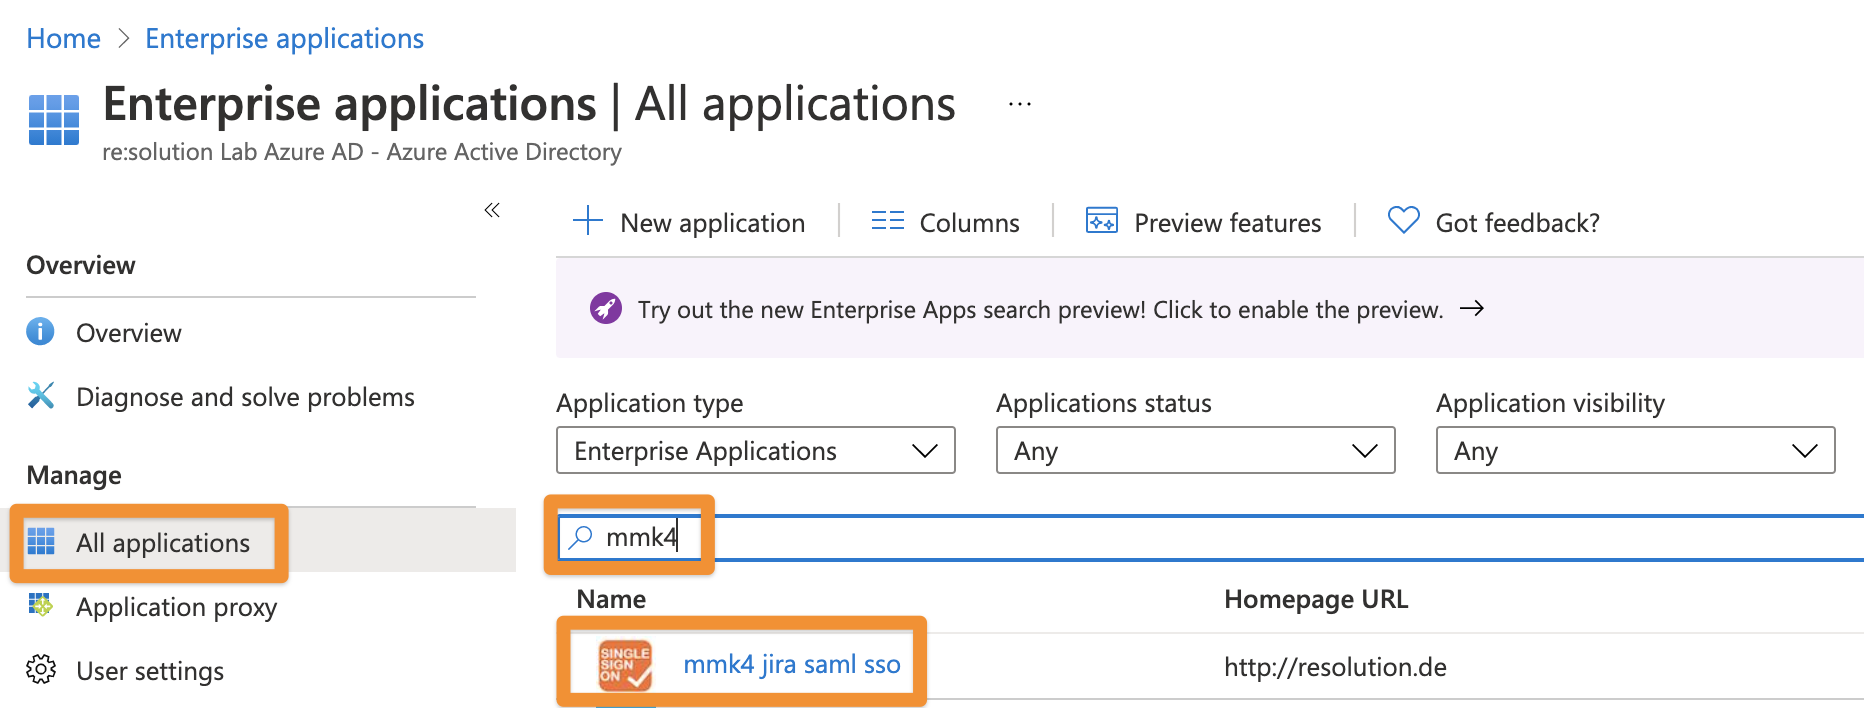
Next, click on All Applications and search for the Enterprise Application you have created for the SAML SSO Data Center app and click on its name:
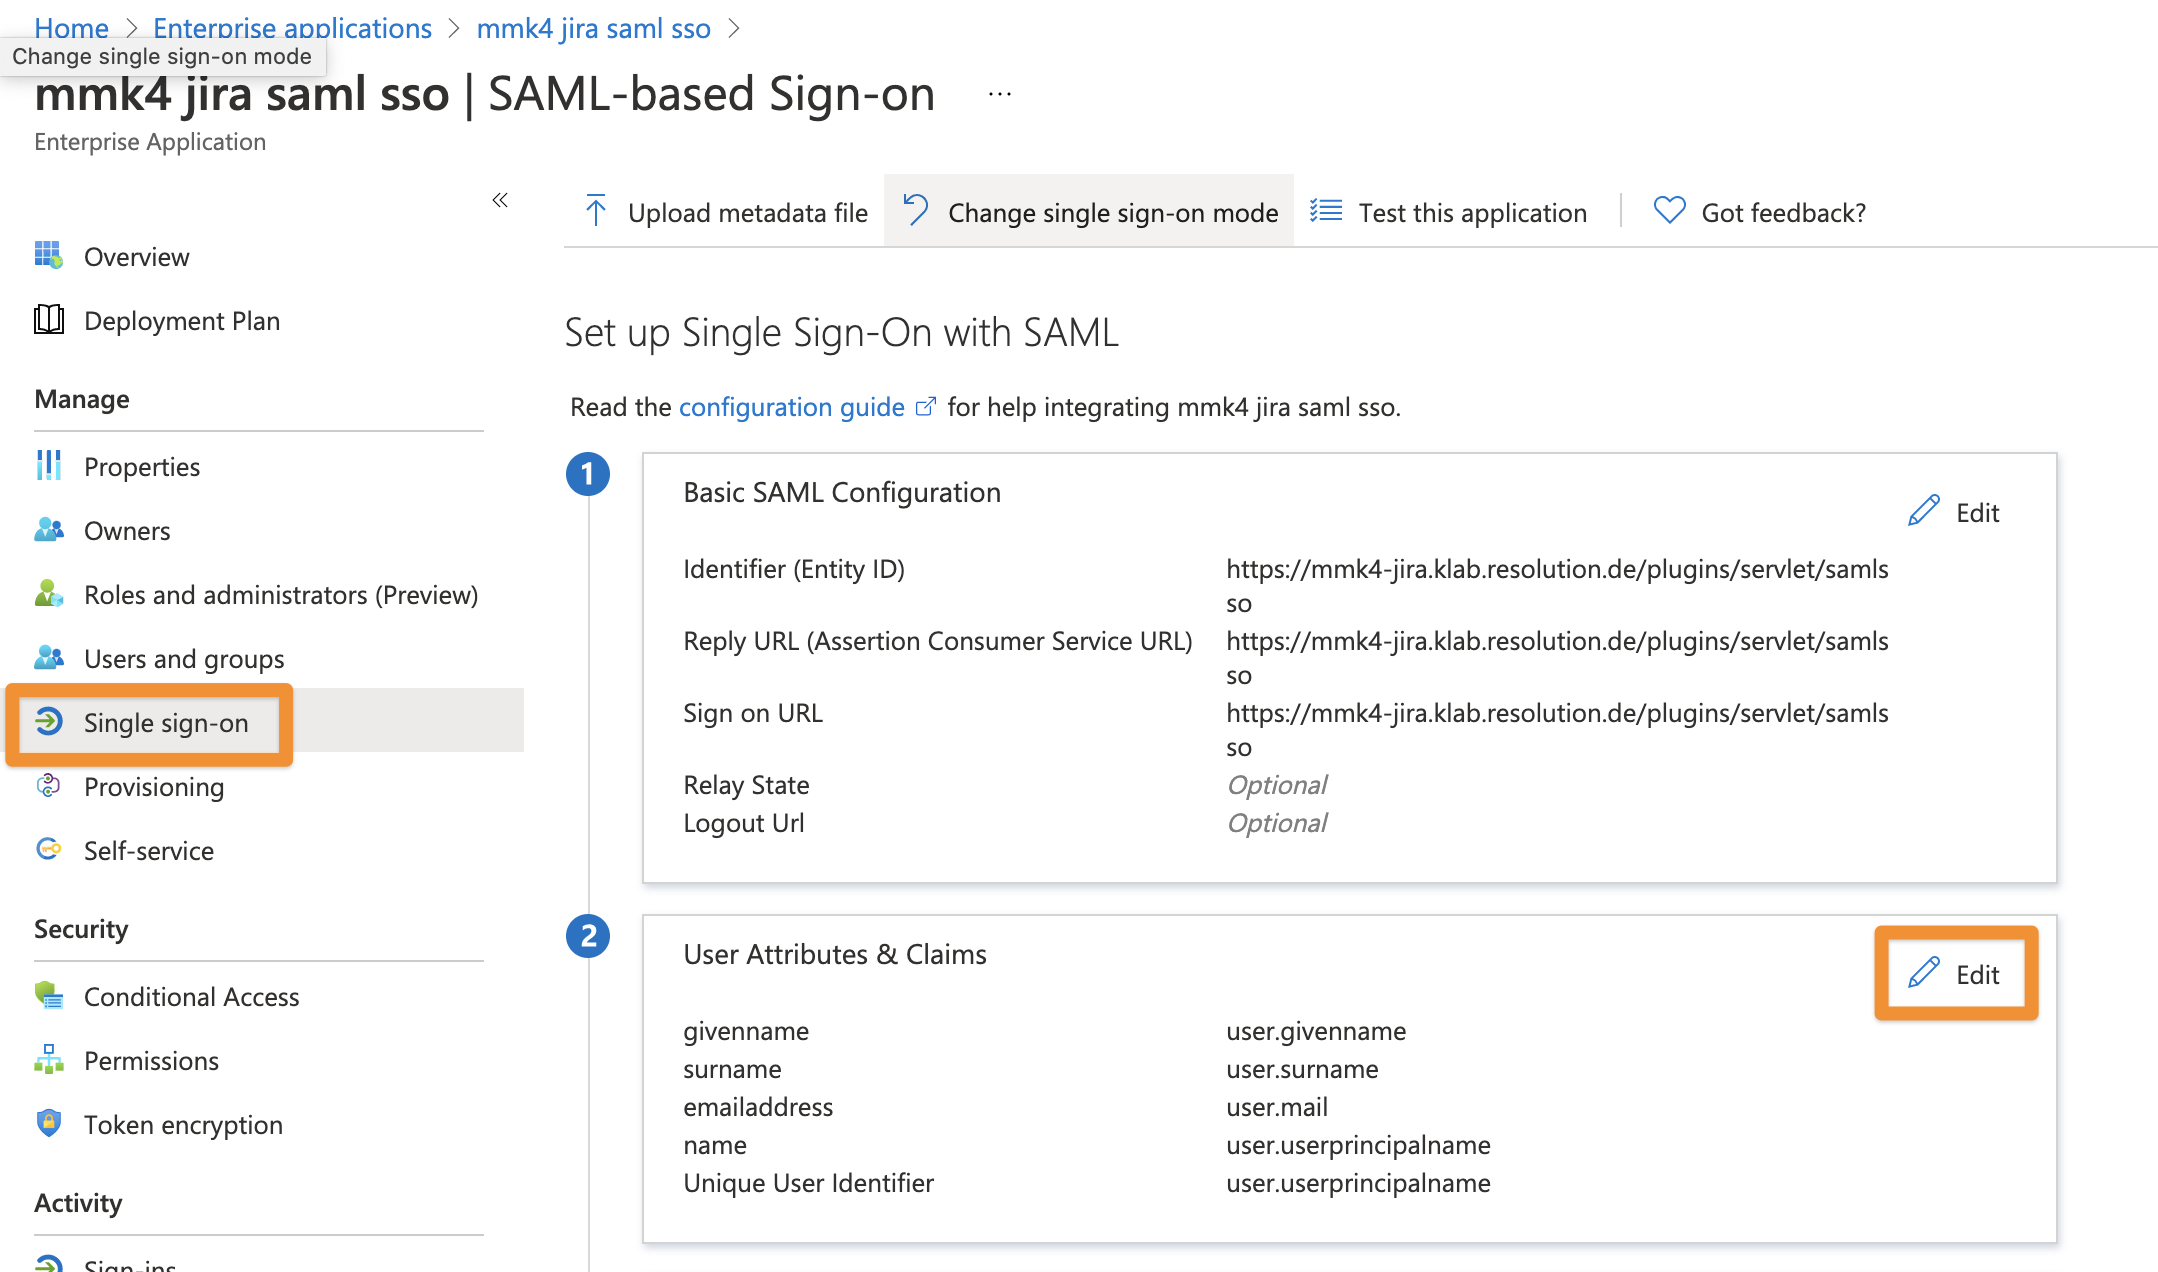
Once opened, click on Single sign-on and then the pencil 'Edit' icon beside User Attributes & Claims
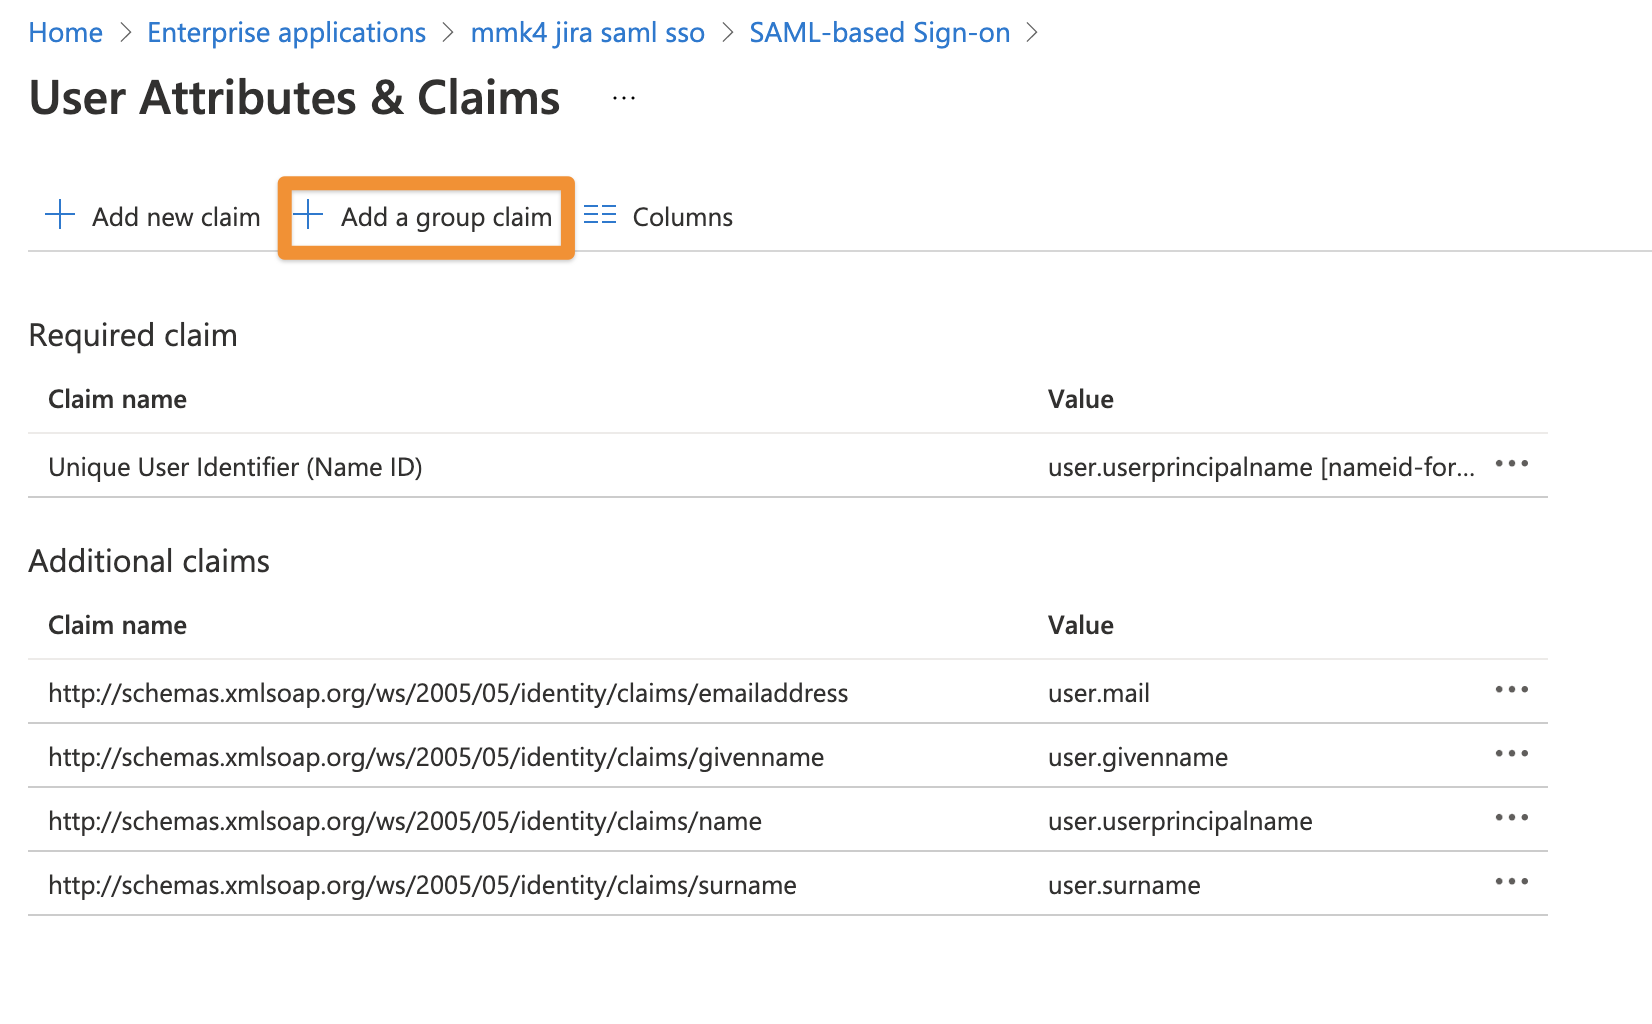
Click on the '+' icon beside Add a group claim
And change the settings to All groups and save your settings.
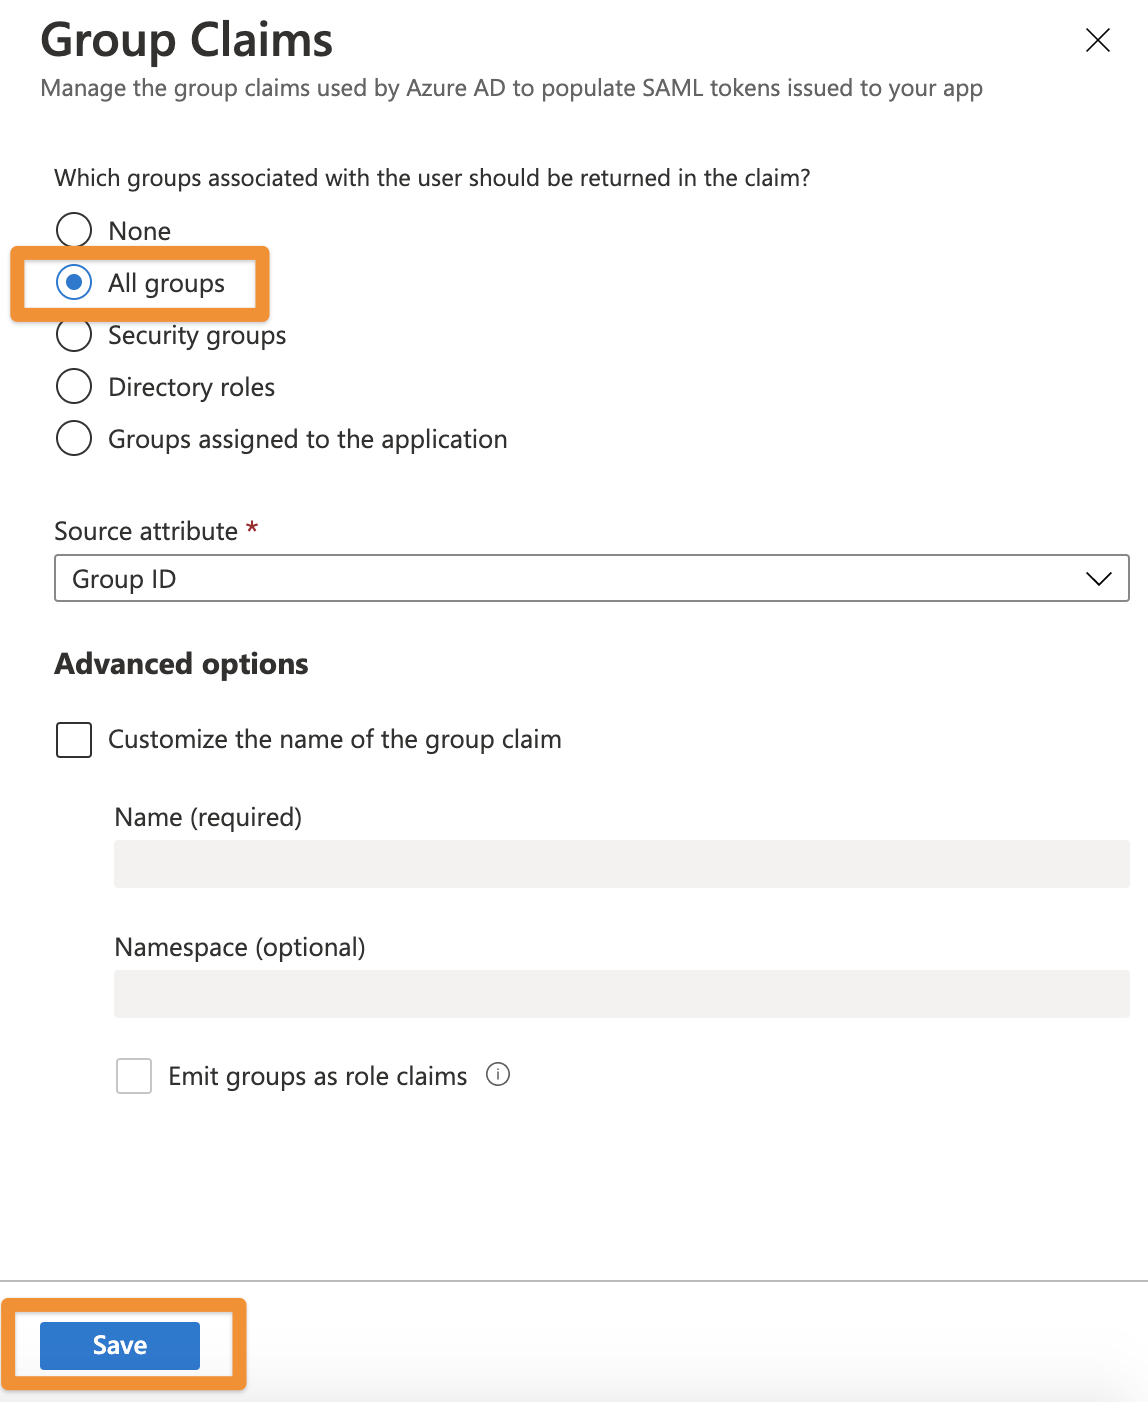
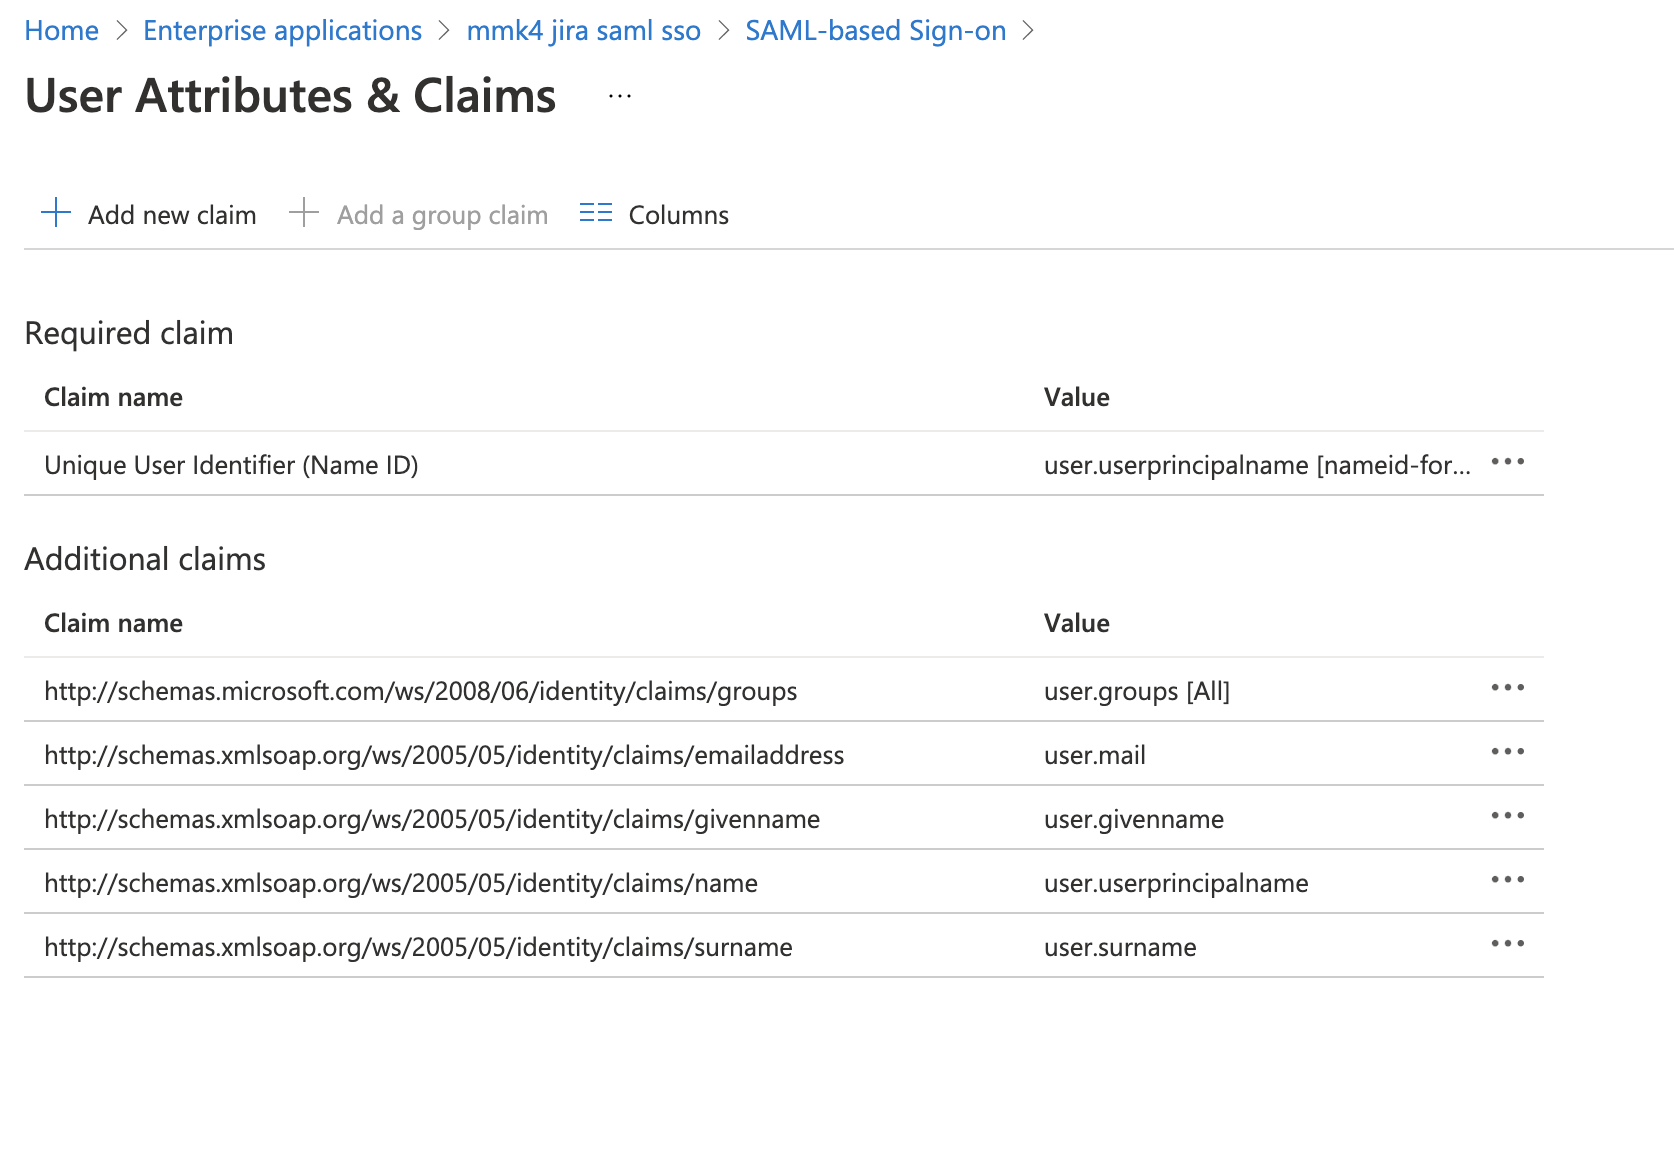
Now, Azure AD will send the group IDs of a user when logging in.
You need to convert it into a human-readable name by using group transformation rules for each. This is described in the next chapter as part of the SAML SSO plugin configuration.
Configure the SAML SSO Data Center app for JIT with Microsoft Entra ID (formerly Azure AD)
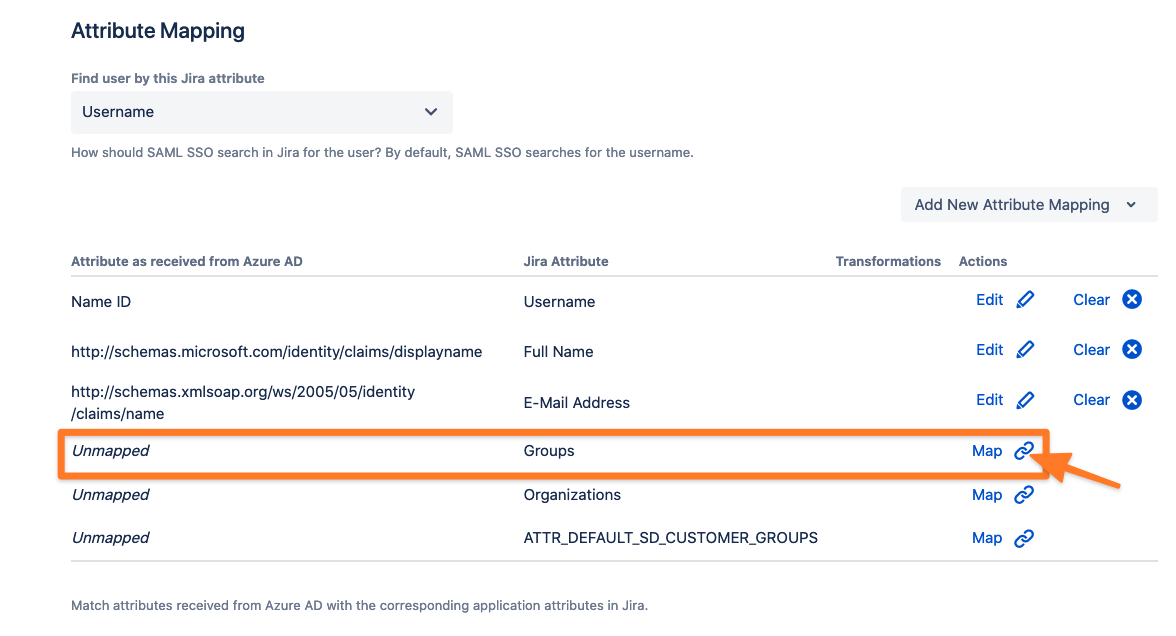
Scroll down in the SAML Single Sign On Configuration → Identity Providers to access the User Creation and Update → Attribute Mapping.
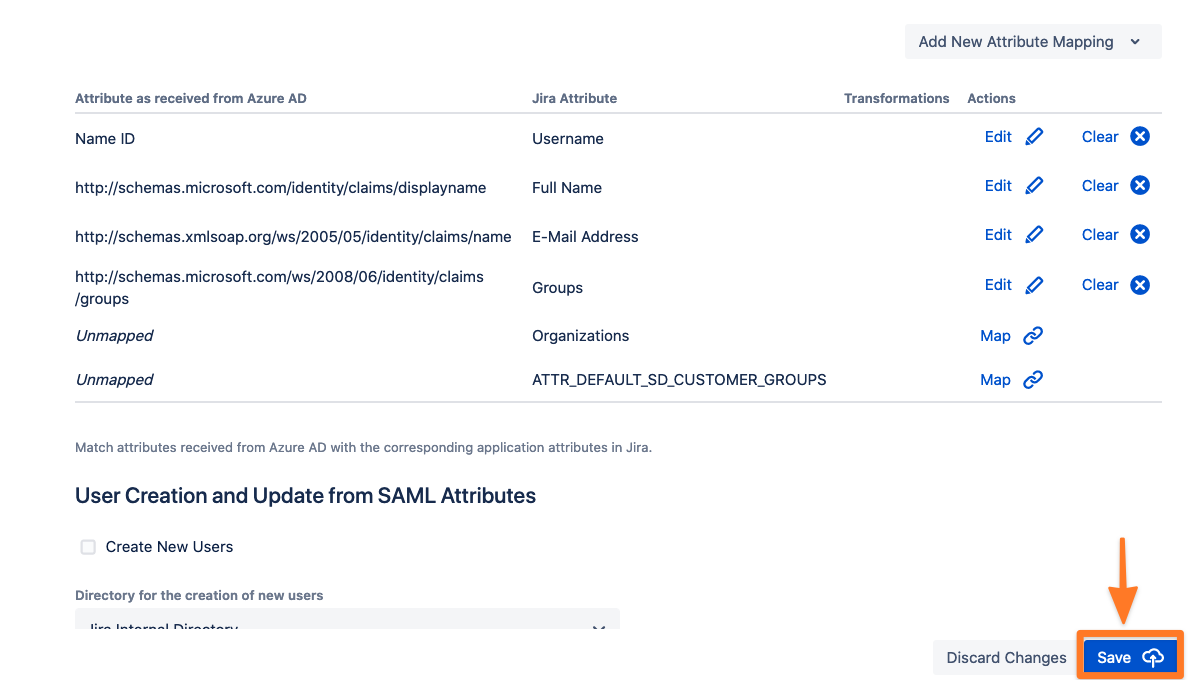
Click Map to map the corresponding attribute (Groups).
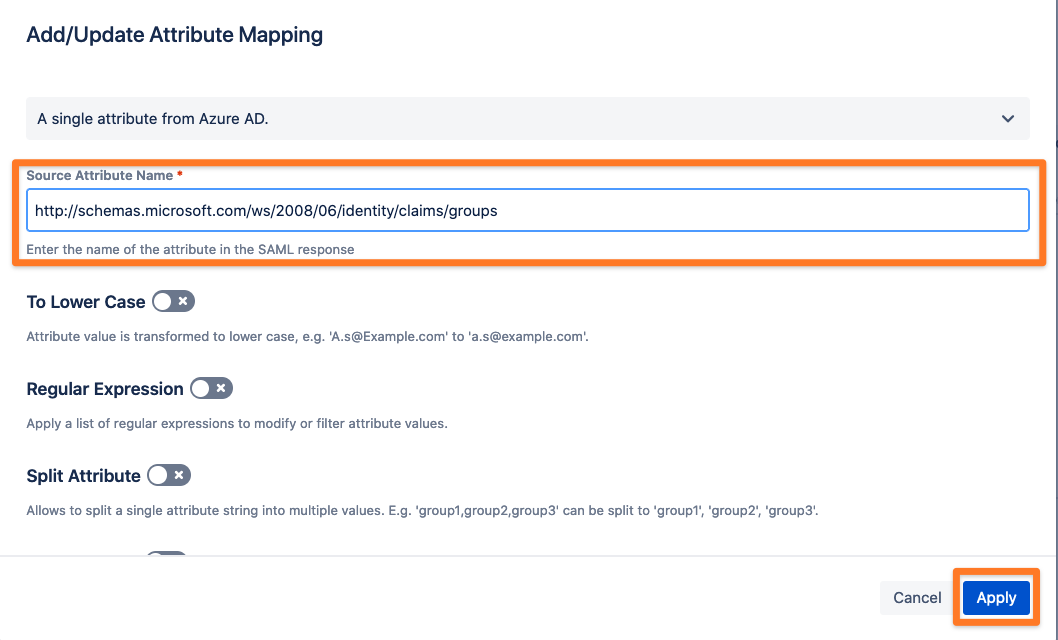
Use http://schemas.microsoft.com/ws/2008/06/identity/claims/groups as Source Attribute Name and click Apply to add the new attribute mapping.
Depending on your Atlassian Data Center or Server product, it is a good idea to set (default) user group(s) for new users, such as jira-users for Jira or confluence-users for Confluence. Without assigning new users to the product specific group, they are not able to use your Atlassian product.
Please go to SAML Single Sign On Configuration → Identity Providers to access the User Creation and Update → Group Setting.
Add (default) user group(s) for new users
Create groups automatically which do not exist in your Atlassian product by enabling 'Create groups if they do not exist'
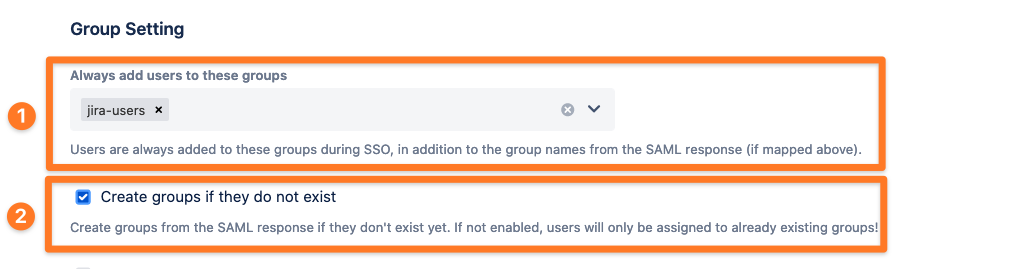
Also, feel free to activate any option which suits your needs.
Group Transformation
Since Azure AD only transfers group IDs and not group names, group transformations must be created for each group ID.
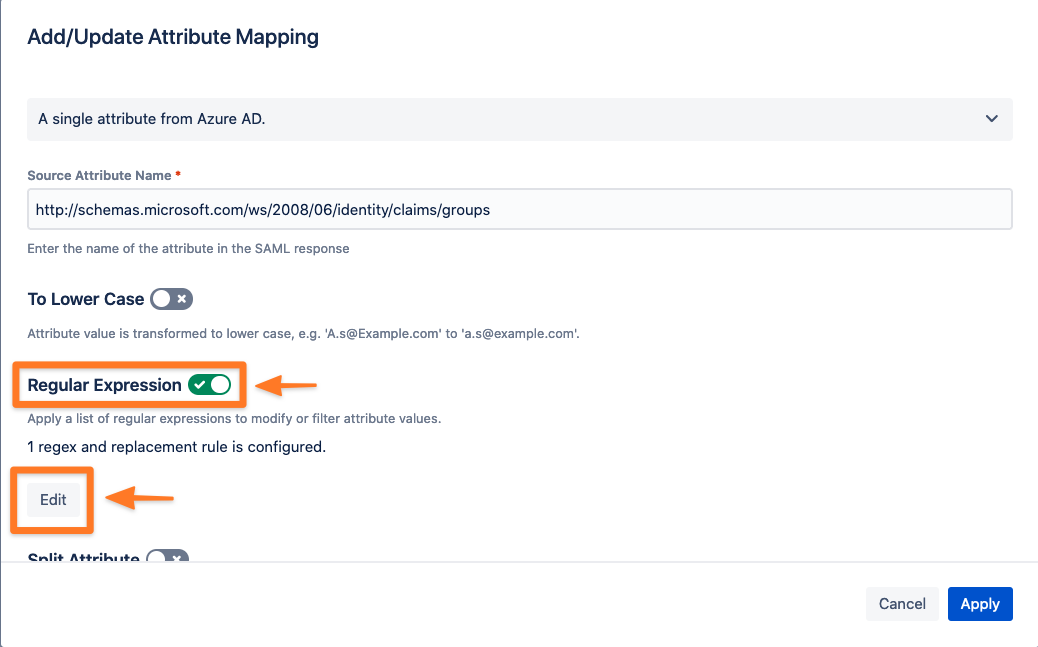
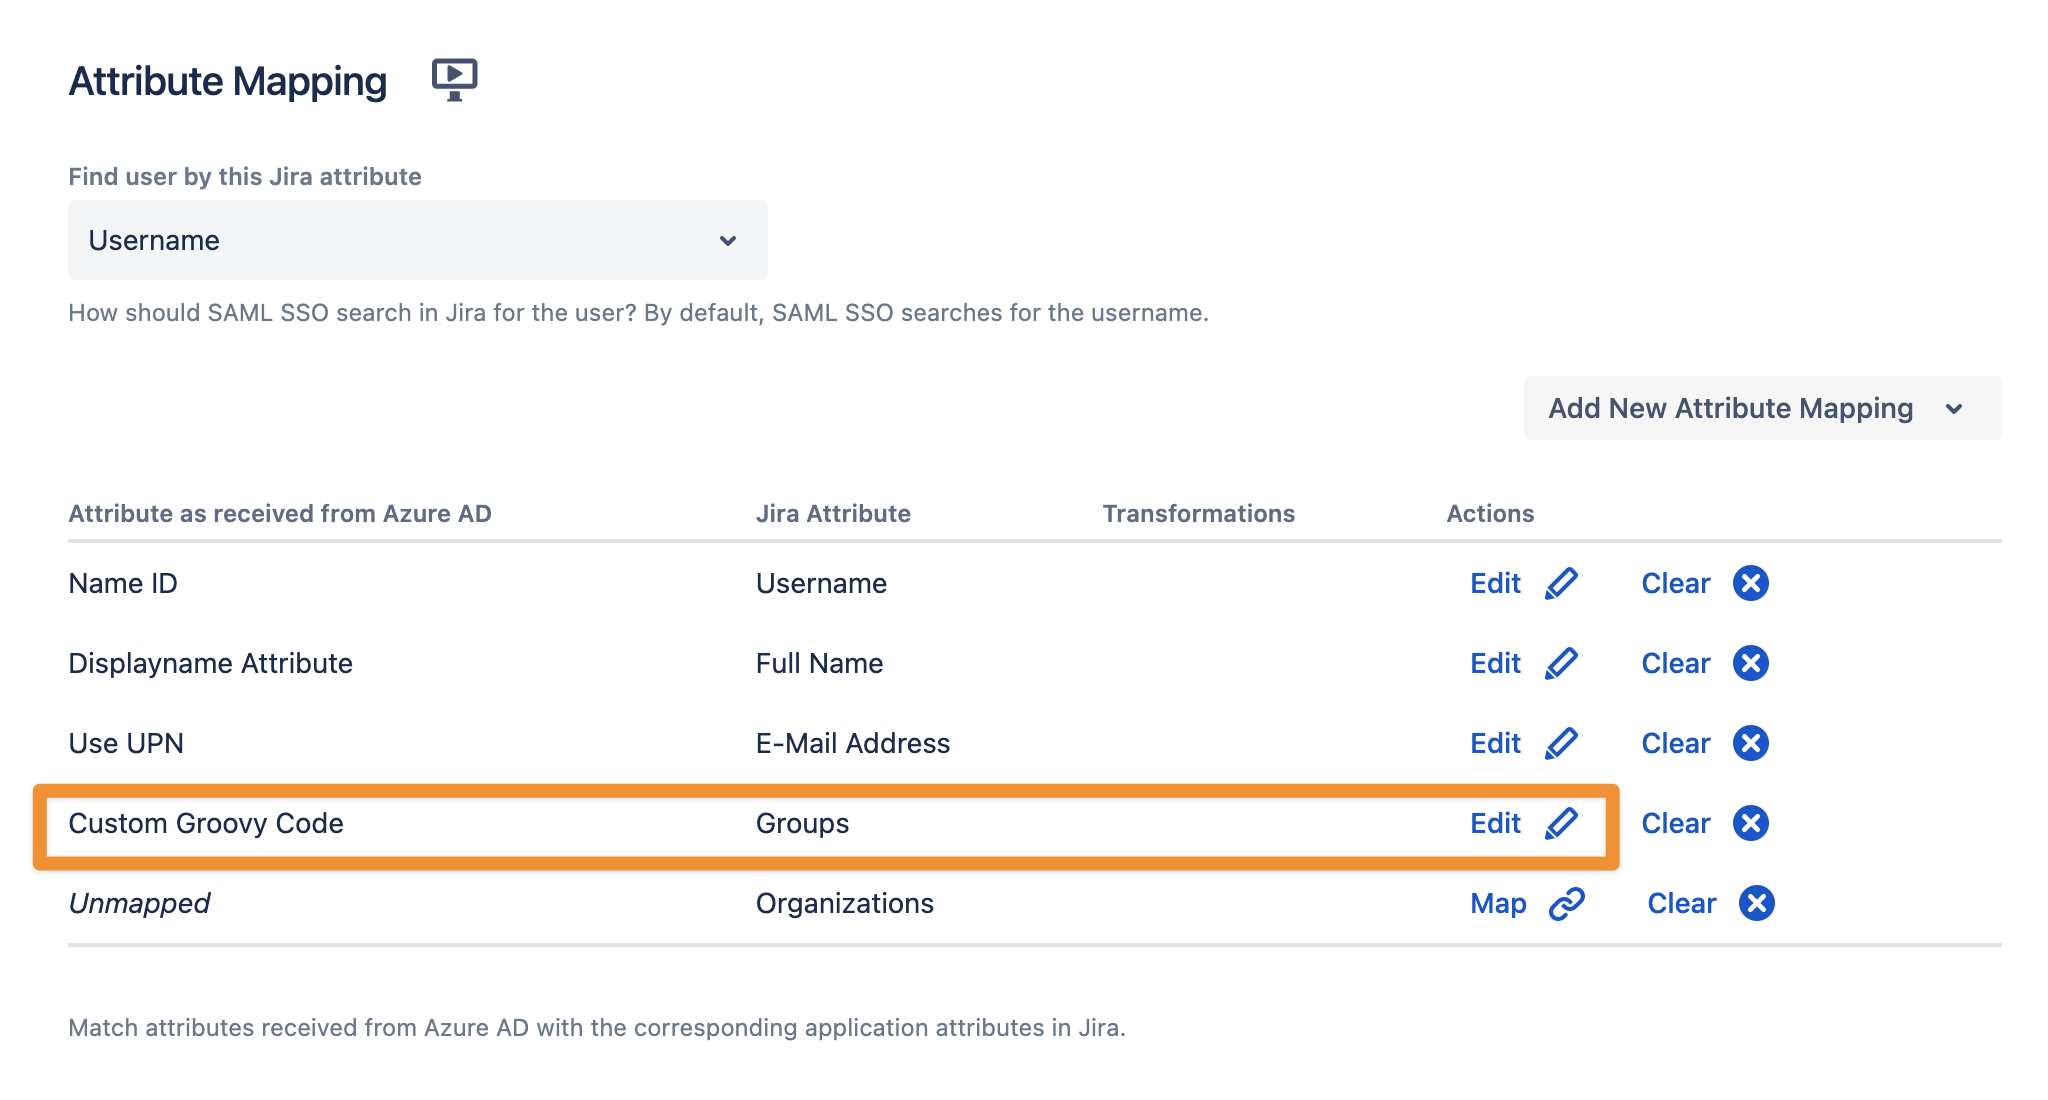
Scroll up in the configuration to Attribute Mapping and click Edit to create a transformation (Regular Expression) for groups.

Next, to enable ‘Regular Expression’ we need to add a 'Regex and Replacement Option'.
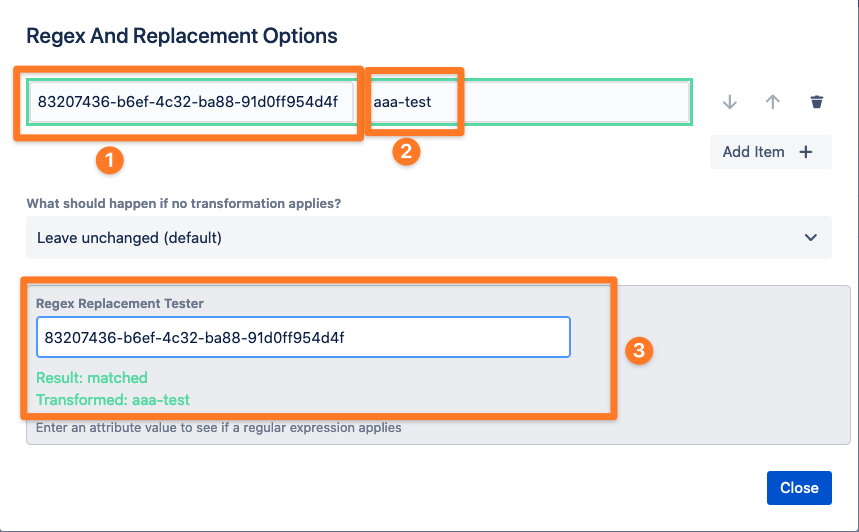
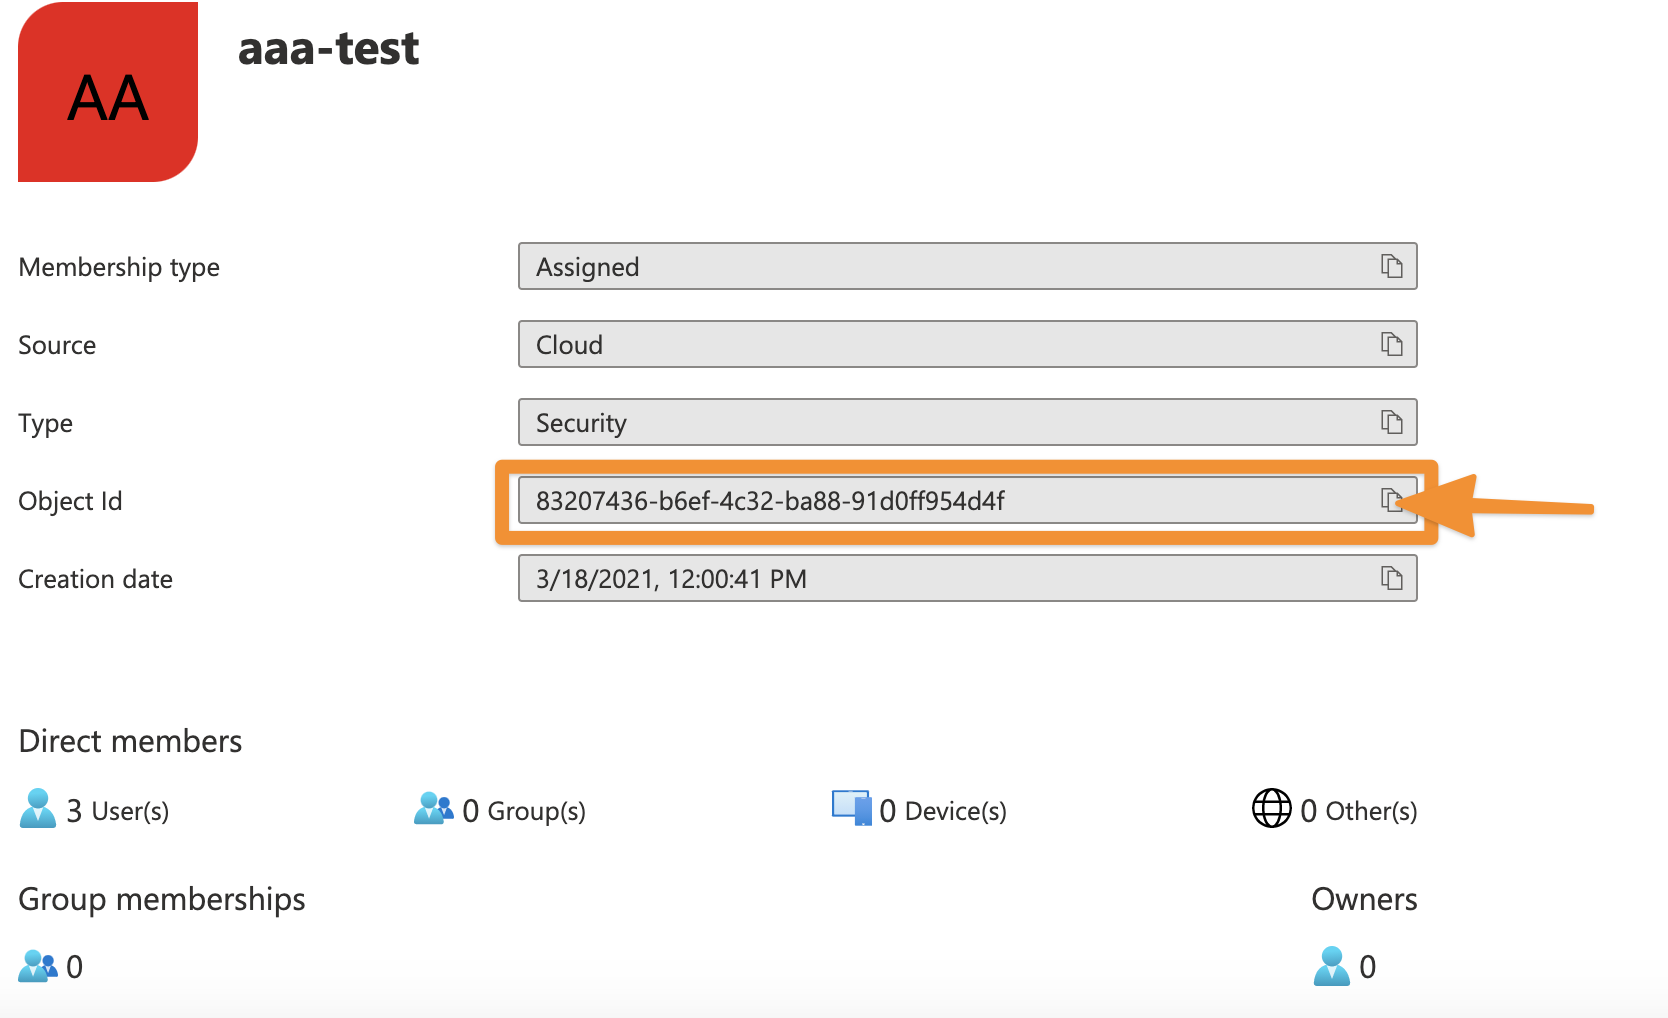
In our example, we will replace the Group object ID ‘83207436-b6ef-4c32-ba88-91d0ff954d4f’ with the group name ‘aaa-test’. If required, you can test your replacement via 'Regex Replacement Tester'.
After all the transformations have been added, close the window and apply your settings:
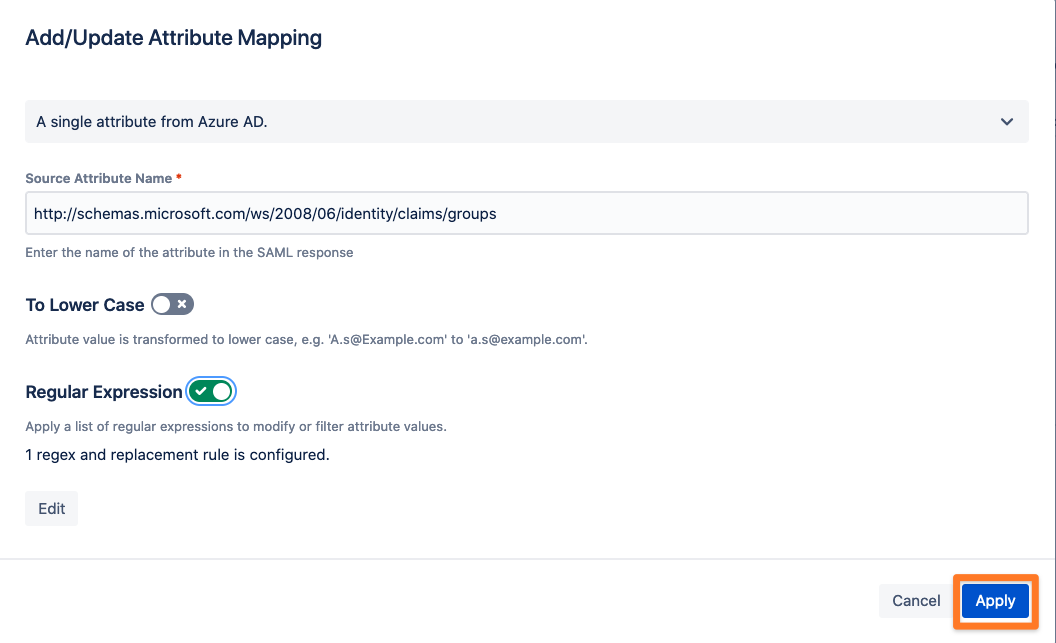
Now it is time to save the SAML configuration again:
Where can I find the group ID?
To create a transformation for a group ID to a name, you require the group ID. The ID of a group can be found in Azure AD on the page of the group. Just copy the Object ID.
Alternative – Groovy Script
If you don't want to add a transformation rule for each of the group IDs in Microsoft Entra ID (formerly Azure AD) you can also add a Groovy script to do that instead.
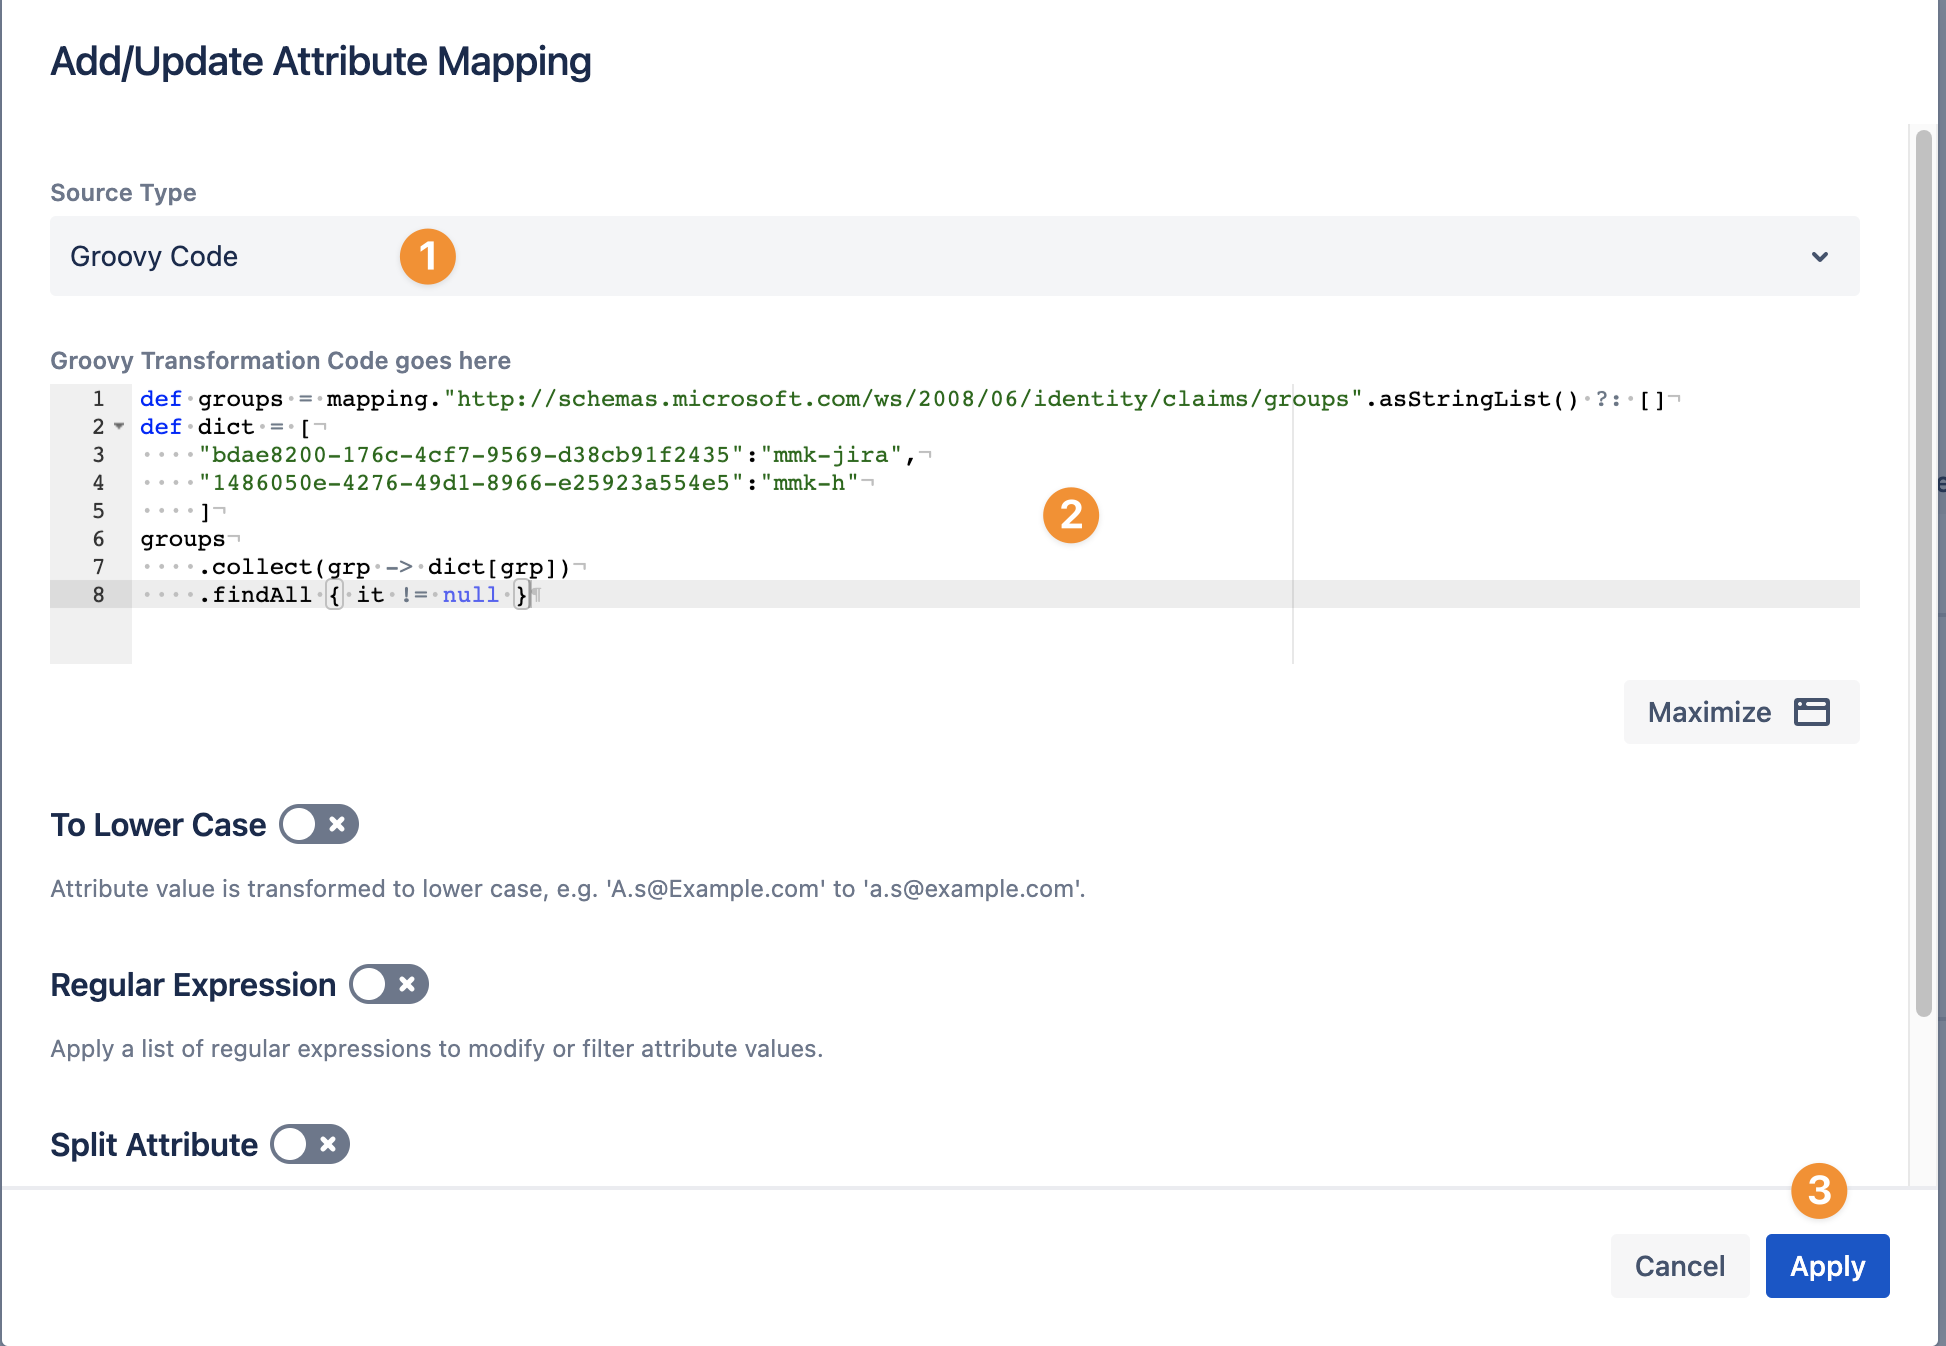
Edit the Groups attribute mapping and change it to Groovy Code (1). Paste the script from below into the field (2) and apply the settings (3).
Don't forget to provide your own values to the dict variable.
Groovy Script Example
Add as many transformations to the dict variable, separated by a comma and in the format
"<group-id>":"group-name"
For instance:
"83207436-b6ef-4c32-ba88-91d0ff954d4f":"aaa-test",
- def groups = mapping."http://schemas.microsoft.com/ws/2008/06/identity/claims/groups".asStringList() ?: []
- def dict = [
- "83207436-b6ef-4c32-ba88-91d0ff954d4f":"aaa-test",
- "<group-id>":"group-name"
- ]
- groups
- .collect(grp -> dict[grp])
- .findAll { it != null }