
Setting Up SAML SSO with Application Proxy in Azure AD
Prerequisites
An Azure AD subscription
A (trial) subscription for the SAML SSO app
Admin access to your Atlassian product
Setup Guide
Add an on-premises application for remote access through Application Proxy in Azure AD
To add the on-premises application in Azure AD, follow the steps from this Microsoft tutorial: Add an on-premises application for remote access through Application Proxy in Azure Active Directory.
An example of the Application Proxy settings would be something like this:

The Internal URL is the URL for accessing your Atlassian application from inside your private network - in the example above, it's the base URL of Confluence before applying any change.
The External URL is the address for users to access the app from outside your network.
Change your Atlassian application base URL
Navigate to the General Configuration in your Atlassian application, and change the base URL to match the External URL configured in the Application Proxy.
For instance: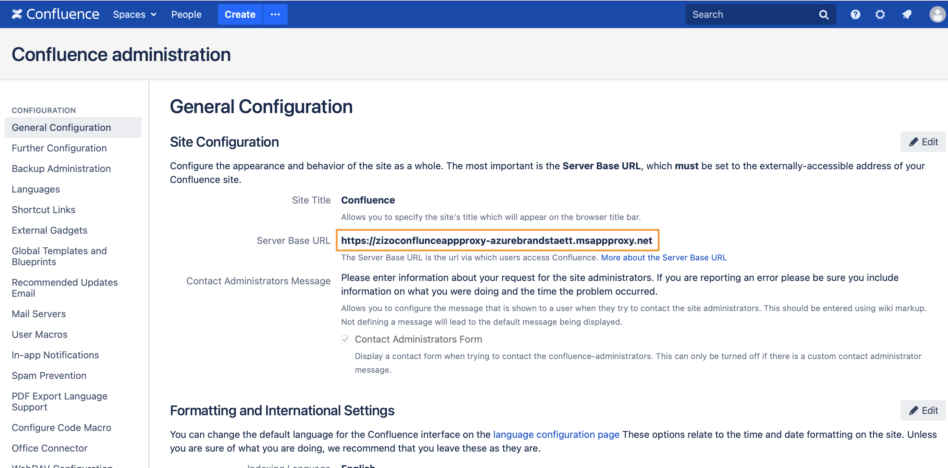
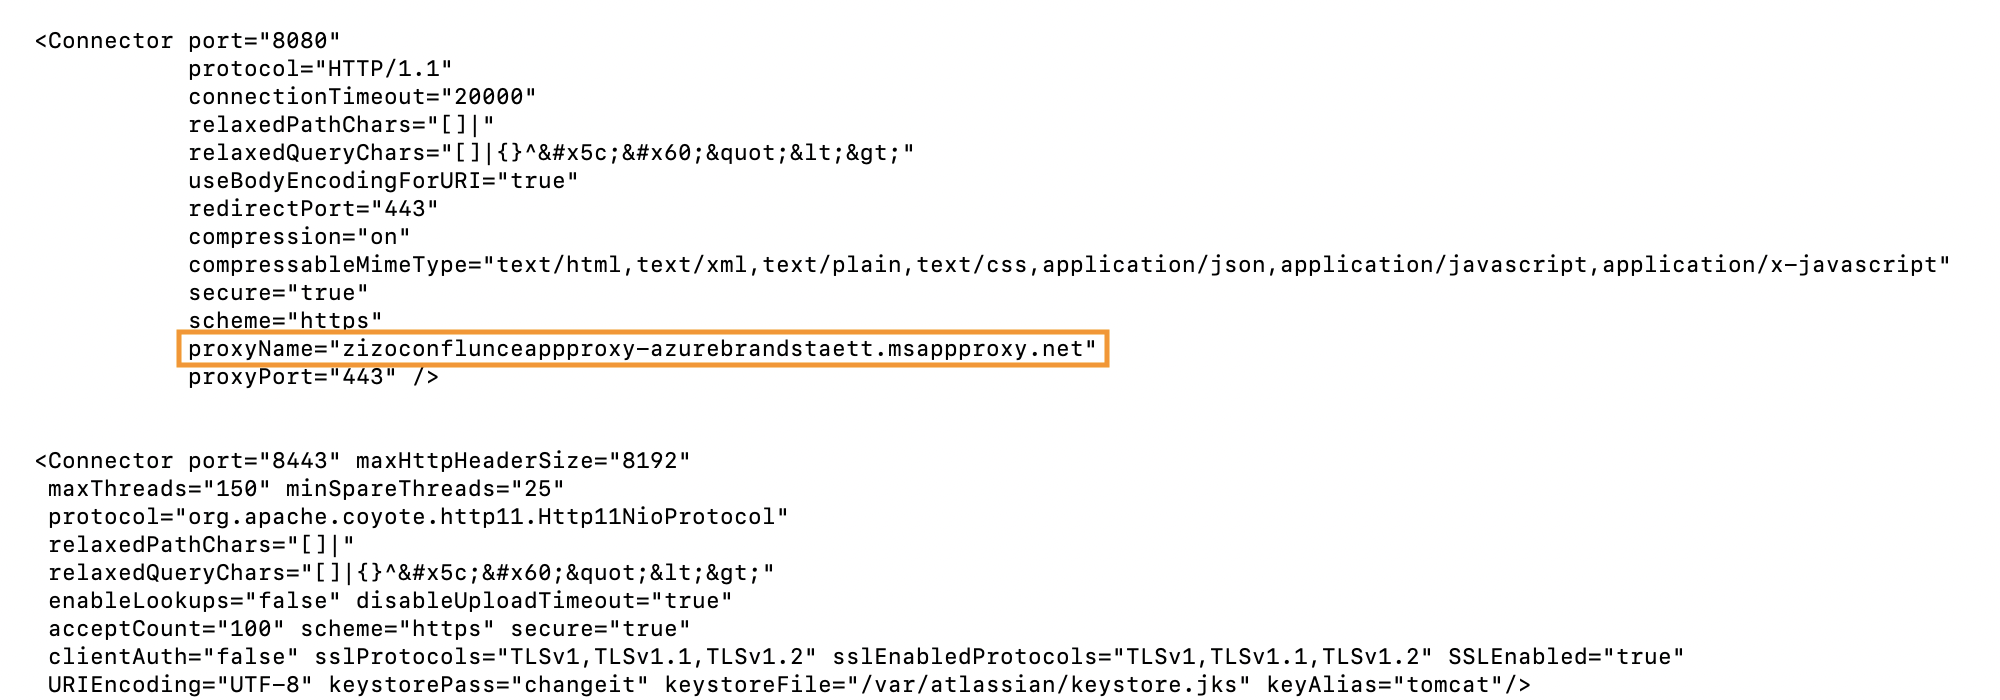
Modify the server.xml in your Tomcat config (usually under <Atlassian-installation-directory>/conf/server.xml in default installations).
Search for the proxyName in the Connector and change it to the External URL as well, as per the following example: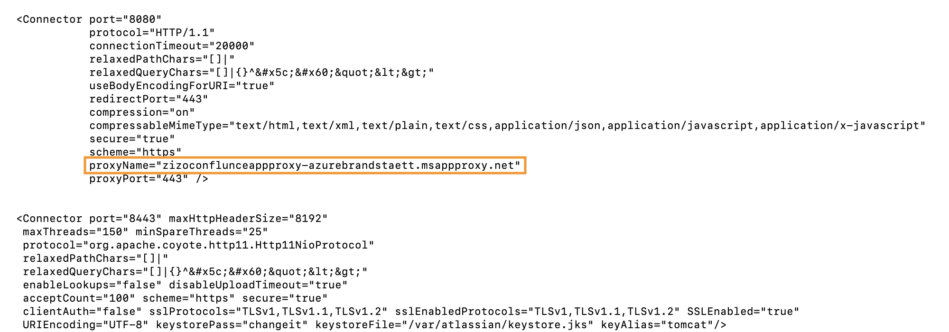
Then restart your Atlassian application for the changes to take effect.

Configure the SAML Single Sign On
Since the base URL has been changed, you also need to update the Entity ID in the SAML SSO configuration.
To do that:Navigate to the SAML Single Sign On configuration page
Go to the Server Provider tab
For the Entity Id, click on the "Reset to Default" button - that would change the Entity Id based on your current base URL
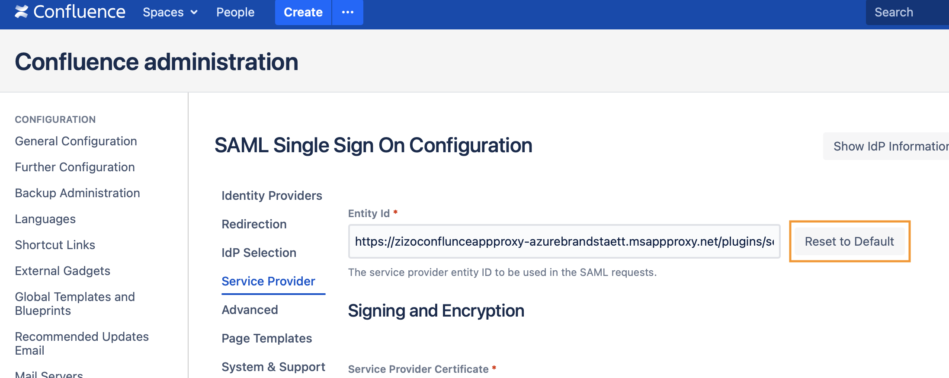
Save the configuration
After saving the above, you can proceed with the normal setup of SAML SSO with Azure AD, as per this guide: https://wiki.resolution.de/doc/saml-sso/latest/all/setup-guides-for-saml-sso/azure-ad.
All the URLs in the configuration now should be having the External URL as a prefix.
