
Out Of Office Assistant for Jira Cloud
Out-Of-Office Assistant allows to take time off from Jira without blocking progress on important work.
Keep Issues Flowing while your users are Out of the Office
Video Introduction And Tutorial
Features & Benefits
Out of Office rules that include an automated response message and a coverer (coverers are optional but we strongly recommend them).
Use JQL filters to define exactly which issues should be reassigned by each rule.
When a rule is created, already open issues can be delegated to coverers in bulk.
Add coverers as watchers.
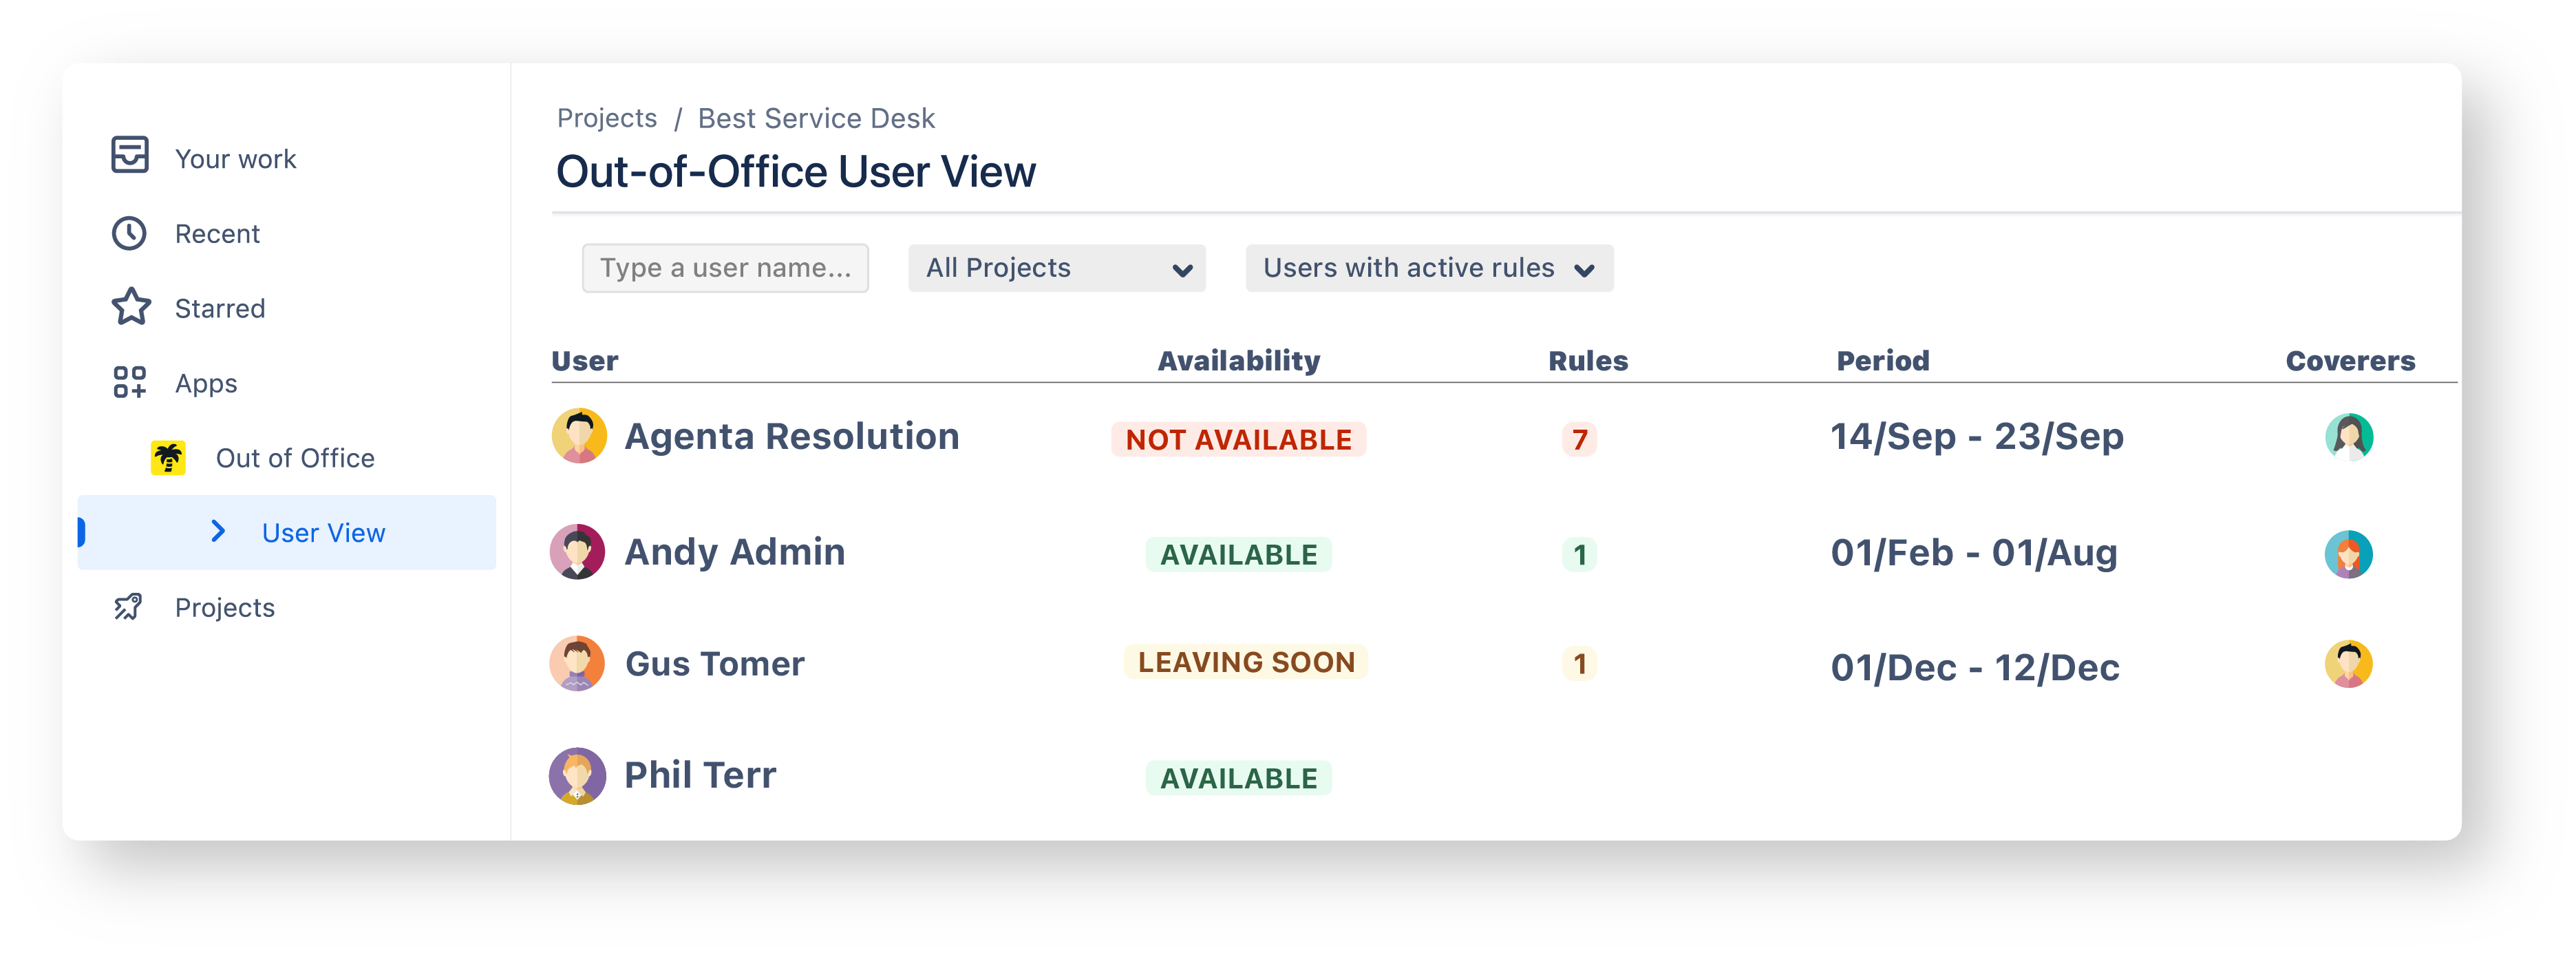
User View: Full view of scheduled leaves across your entire Jira instance.
Interact with round robin automations to skip users who are out of office.
Activate, modify or deactivate rules from Outlook, Google Workspace, Slack or even Tempo.
Use Cases
Define Out of the Office rules when traveling or during sabbaticals, child care, sick leaves, etc.
Create a permanent delegation structure for functional teams and organizations based on shifts.
Team members who have been temporarily shifted to a different initiative can announce that their assignations won't be prioritized.
Take sick days and spontaneously activate a rule from your phone using the Slack app.
Managers can use JQLs to retrieve a comprehensive list of all the Jira issues with assignees who are out of the office.